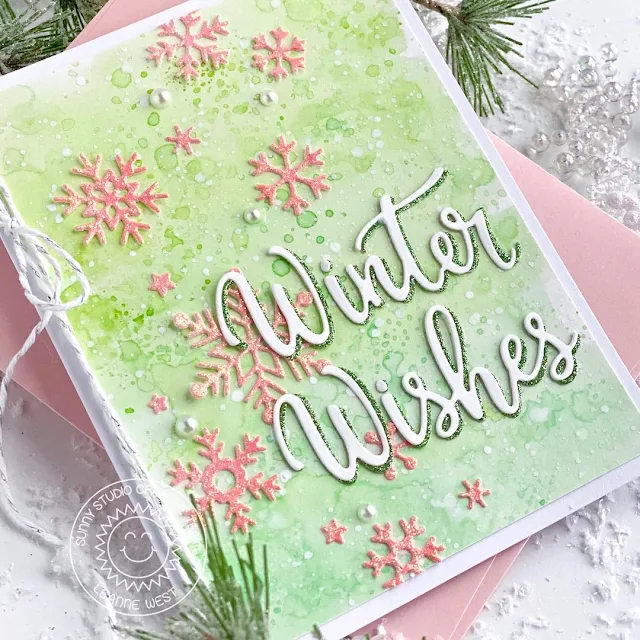
I made my own glitter card
stock to die cut the snowflakes out of. I blended Tattered Rose and
Candied Apple Distress Oxide Ink onto a panel of card stock. I then
applied a thin coat of Nuvo Moonstone Glitter Paste over the inked panel. Once dry, I die cut the snowflakes from the area of the panel with the shade
of pink I wanted.
I trimmed the background panel
slightly smaller than A2 size and adhered to a white card base. I added
the snowflakes cascading down towards the left side. I also added
some white pearls as a little extra embellishment. Next I
adhered the greeting towards the lower right corner. I die cut the Winter Wishes greeting from white and green glitter card
stock and then layered the two slightly offset. Lastly I tied white and
silver twine around the folded side of the card.
----------------------------------------------------
Hi friends, Eloise here and today I’m using the Layered Snowflake Frame Die to create a Christmas Card. I also pulled in Feeling Frosty for some images and Santa Claus Lane for a sentiment.
----------------------------------------------------
Hi friends, Eloise here and today I’m using the Layered Snowflake Frame Die to create a Christmas Card. I also pulled in Feeling Frosty for some images and Santa Claus Lane for a sentiment.
I
started off with stamping and colouring my images from Feeling
Frosty and cutting
them out. I then took two pieces of watercolour cardstock, cut them
down to 4 1/4” to 4 1/4” and ink blended some blue Distress Inks on the bottom
of each of them, fading to white. I then cut the Layered
Snowflake Frame Die from one of them.
(Copic Markers Used: BG70, BG72, BG75, BG78 / W00, W0 / W1, W5 / 0 / B000, B00 / YR00, YR02, YR12, YR18 / YG61, YG63, YG67, G28 / V91, V93, V95, V97 / E53, E55, E57 / R000, R00)
(Copic Markers Used: BG70, BG72, BG75, BG78 / W00, W0 / W1, W5 / 0 / B000, B00 / YR00, YR02, YR12, YR18 / YG61, YG63, YG67, G28 / V91, V93, V95, V97 / E53, E55, E57 / R000, R00)
I
then added foam tape to the back of the snowflake frame and also my images. I
adhered the snowflake frame on top of the other distress inked piece and then
adhered my images on top. For my sentiment I used the ‘Have A Magical
Christmas’ sentiment from Santa
Claus Lane onto a strip of black cardstock. Tied some twine to the
side of it and adhered it onto my card.
Thanks so much for stopping by today and I’ll see you all next week.
Thanks so much for stopping by today and I’ll see you all next week.
Sunny Studio Supplies Used:
 Santa Claus Lane Stamps Shop at: Sunny Studio |
 Feeling Frosty Stamps Shop at: Sunny Studio |
 Feeling Frosty Dies Shop at: Sunny Studio |
 Layered Snowflake Frame Shop at: Sunny Studio |
 Snowflake Circle Frame Shop at: Sunny Studio |


Great ideas! I really like the snowflake backgrounds. :-)
ReplyDelete