Showing posts with label Stitched Circle Dies. Show all posts

Tuesday, January 30, 2024

My Heart Card with Isha

Hello everyone! Isha here with a CAS card featuring the My Heart stamp and coordinating dies. I love the font of this stamp, so I decided to keep it as my focal image and create the background to enhance it.

Sunny Studio Stamps: My Heart Card by Isha Gupta (featuring Stitched Circle Dies, Stitched Rectangle Dies)

I started by sponging the kitsch flamingo and dried marigold distress inks onto a white panel. Stamp the hearts in two sizes from the My Heart stamp set. Die-cut this panel using the Stitched Rectangle die. Adhere to a white card. Flick some clear iridescent watercolor.

Sunny Studio Stamps: My Heart Card by Isha Gupta (featuring Stitched Circle Dies, Stitched Rectangle Dies)

Stamp the sentiment using black ink, die-cut using the coordinating dies. I die-cut the sentiment 3 more times using white card and stacked it behind the sentiment. Die-cut a vellum circle using the Stitched Circle Large die. Adhere the sentiment to the vellum and attach it to the card. 

Thank you for dropping by and have a nice day!

Sunny Studio Supplies Used:

Stitched Rectangle Dies
Shop at:
Sunny Studio
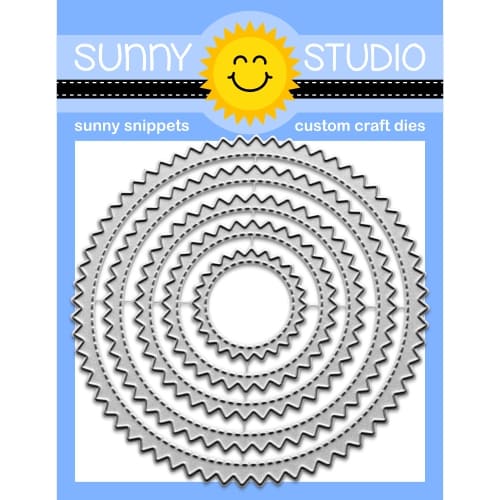
Stitched Circle Large Dies
Shop at:
Sunny Studio
My Heart Stamps
My Heart Stamps
Shop at:
Sunny Studio
My Heart Dies
My Heart Dies
Shop at:
Sunny Studio

Sunday, December 24, 2023

Dashing Dachshund Holiday Tags with Tammy

Hello friends, Tammy here! I'm on the blog today sharing my last holiday project of the year! I always enjoy making handmade gift tags for Christmas, and thought the Dashing Dachshund stamp set would make the cutest snow globe tags!

Sunny Studio Stamps: Dashing Dachshund Holiday Tags by Tammy Stark (featuring Stitched Circle Dies, Slimline Dies)

To begin, I stamped the images from Dashing Dachshund , colored with Copic markers, and die cut with the Dashing Dachshund Dies. 

Next, I cut 3 circles from Bristol smooth cardstock using the Stitched Circle Large Dies. I inked the circles with Speckled Egg Distress Oxide ink, then spattered them with white acrylic paint that was thinned with water, and set aside to dry. 

Sunny Studio Stamps: Dashing Dachshund Holiday Tags by Tammy Stark (featuring Stitched Circle Dies, Slimline Dies)

Next, I cut 3 snowy hills, using first the Stitched Circle Large Die, then running it through my die cut machine again with the Slimline Nature Borders DiesI attached the snowy borders to each tag, then attached the dachshunds with foam tape. I cut a strip of black cardstock to fit along the bottom of the tags to create a snow globe base, then white heat embossed the sentiment from the Dashing Dachshund stamp set.

Sunny Studio Stamps: Dashing Dachshund Holiday Tags by Tammy Stark (featuring Stitched Circle Dies, Slimline Dies)

I added some white snowflakes, die cut using the Basic Mini Shapes Dies 2Additionally, I added some white clay snowflakes. Lastly, I added a red bow, die cut from the Santa's Stocking Dies, to the top of each tag for a finishing touch. I tucked some red bakers twine underneath the bows to complete my tags.

Thanks so much for stopping by! Wishing everyone a wonderful holiday and Happy New Year! See you in 2024!

Sunny Studio Supplies Used:

Santa's Stocking Dies
Shop at:
Sunny Studio
Basic Mini Shape Dies 2
Shop at:
Sunny Studio
Slimline Nature Borders
Shop at:
Sunny Studio
Stitched Circle Large Dies
Shop at:
Sunny Studio
Dashing Dachshund Stamps
Shop at:
Sunny Studio
Dashing Dachshund Dies
Shop at:
Sunny Studio

Tuesday, December 12, 2023

Woolen Mitten Card with Isha

Hello everyone! Isha here with an adorable winter theme card featuring the Woolen Mitten Dies. This die is big and first I thought of creating a shaped card as it's perfect size but then I went for the layering style and loved the result. 

Sunny Studio Stamps: Woolen Mitten Die Focused Holiday Card by Isha Gupta (featuring Snowman Kisses, Winter Greenery Dies, Frilly Frame Dies, Fancy Frame Dies, Inside Greetings)

I started by sponging salvaged patina ink to a white card. Next I die-cut a white card using the Frilly Frames Herringbone die. Use this piece as stencil and sponged peacock feathers distress ink through it. Die-cut a white border from the Fancy Frames Rectangle die. Adhere to the card.

Next I started by die-cutting and stamping all the elements. Colored the snowmen using watercolors. Sponged various inks to the leaves and flowers.

Sunny Studio Stamps: Woolen Mitten Die Focused Holiday Card by Isha Gupta (featuring Snowman Kisses, Winter Greenery Dies, Frilly Frame Dies, Fancy Frame Dies, Inside Greetings)

Mitten, snowflakes, poinsettia, holly leaves - Woolen Mitten Dies
Circle - Stitched Circle Small dies
Leaves - Winter Greenery dies
Snowmen - Snowman Kisses stamps and dies
Sentiment - Inside Greetings Holidays

Emboss the snowflakes using WOW! gilded embossing powder. Assemble all the elements, flick white paint. To finish, add some clear drops.

Thank you for dropping by and have a nice day!

Sunny Studio Supplies Used:

Fancy Frames- Rectangles
Shop at:
Sunny Studio
Frilly Frames Herringbone
Shop at:
Sunny Studio
Inside Greetings-Holidays
Shop at:
Sunny Studio
Stitched Circle Small Dies
Shop at:
Sunny Studio
Winter Greenery DIes
Shop at:
Sunny Studio
Snowman Kisses Stamps
Shop at:
Sunny Studio
Snowman Kisses Dies
Snowman Kisses Dies
Shop at:
Sunny Studio
Woolen Mitten Dies
Woolen Mitten Dies
Shop at:
Sunny Studio

Saturday, November 25, 2023

Black Friday Exclusive: Merry Mocha Card Ideas with Mendi

Hello & welcome!  I'm excited to be joining in the Black Friday fun with several card ideas featuring our new little Merry Mocha Stamps and Dies which aren't available for purchase this year but can be received as a free gift with a $45+ purchase through Monday, November 27 (see below for full promotion details). 

Card No. 1: For my first Merry Mocha card I started by cutting out my red striped, scalloped mat by combining the inside portion of our Frilly Frames Stripes Dies with the outside portion of our Frilly Frames Hexagon Dies. I then backed it with white cardstock and mounted it onto an A2-sized kraft cardstock panel. I then cut a Large Stitched Circle and mini gift tag from our Sweet Treats Gift Bag Dies, inking them both along the edges using Tea Dye Distress ink.

To create my grouping of three unique hot drinks, I paired the Merry Mocha mug with the cups and sugar cookie from our Mug Hugs Stamps. I then heat embossed the "warm wishes" greeting from our Alpaca Holiday Stamps, tying the tag with red baker's twine to slip around one of my mug handles and securing it on the back before adhering the mug to my card with foam tape.

Sunny Studio Warm Wishes Coffee & Hot Cocoa Holiday Card (using Merry Mocha & Holiday Hugs Stamps, Large Stitched Circle, Frilly Frames Hexagon & Frilly Frames Stripes Dies)

Card No. 2: For my next card featuring the Merry Mocha Stamps, I used the cute script greeting from the set with the coordinating dies (that come with purchases of $75 or more). I paired the drink with an extra candy cane and gingerbread man from our Baking Spirits Bright Stamps and mounted them onto a scalloped mat cut using our Mini Mat & Tag 2 Dies. I layered a slightly smaller piece of green cardstock beneath to peek out behind the eyelet lace scallops and then mounted them onto a red and white snowflake print from our Joyful Holiday Paper pack.

Sunny Studio Eat, Drink & Be Merry Snowflake Mug Holiday Card (using Merry Mocha & Baking Spirits Bright Stamps, Mini Mat & Tag 2 Dies, & Joyful Holiday Paper)

Card No. 3 & 4: Up next is a card set featuring the same card design with the Merry Mocha Stamps in two different color palettes. For both cards, I started by adhering a small pale grey striped patterned paper to my background using a print from our Subtle Grey Tones Paper pack. 

I then cut an elongated Scalloped Tag from Joyful Holiday tone-on-tone snowflake patterned papers using our Scalloped Square Tag Dies. To achieve this I partially cut the top portion of the tag while hanging the bottom portion of the die off the cutting plate, I then flipped the die over and hung the top half off my cutting plate, matching up the scallops and securing the die with washi tape to help me keep them straight. Once you've done this trick a couple times, it becomes super easy to do, looks like the die came that way, and really makes you look at your die stash with a fresh eye.

Sunny Studio Warm Wishes Hot Cocoa Mug Holiday Cards (using Merry Mocha Stamps, Scalloped Square Tag, Wishes Word, Winter Greenery & Stitched Circle Dies, & Joyful Holiday Paper)

Blue Card: For my sentiments on each card, I heat embossed the word "warm" using our Heartfelt Wishes Stamps, pairing them with our Wishes Word Die cut from a pink Pastel Gingham Paper to match my pink mug.

Sunny Studio Warm Wishes Hot Cocoa Mug Holiday Card (using Merry Mocha Stamps, Scalloped Square Tag, Wishes Word, Winter Greenery & Stitched Circle Dies, & Joyful Holiday Paper)

Pink Card: To add a little interest behind each of my mugs, I framed them with our Small Stitched Circle Dies and added some twigs and leaves from our Winter Greenery Dies. For this particular card, I matched my aqua mug to the Wishes Word cut from an aqua grid print from our Classic Gingham Paper pack.

Sunny Studio Warm Wishes Hot Cocoa Mug Holiday Card (using Merry Mocha Stamps, Scalloped Square Tag, Wishes Word, Winter Greenery & Stitched Circle Dies, & Joyful Holiday Paper)

Which color combination is your favorite? Thanks so much for joining me today and I hope you have a wonderful holiday weekend.
_____________________________

The Merry Mocha Stamps used today are not available for purchase this holiday season but rather will be automatically included with all retail orders of $45 or more from our online store through November 27th at Midnight PDT. Here are all the details:

Receive free shipping on U.S. orders of $40+

+ Receive the exclusive mini "Merry Mocha" stamp set with a $45+ purchase.

+ Receive the coordinating "Merry Mocha" dies with a $75+ purchase.

+ 10% of retail sales will be donated to the Maui Strong Fund with the Hawaii Community Foundation.

*Please note: No discount codes are needed. All offers will be applied automatically and cannot be combined with additional discounts at checkout. Purchases are based on order subtotal, prior to shipping & tax.

Sunny Studio Black Friday 2023 Promotion with Exclusive Free Merry Mocha Stamps & Dies, Free Shipping + Maui Fundraiser

Other Supplies Used:

Heartfelt Wishes Stamps
Shop at:
Sunny Studio
Mug Hugs Dies
Mug Hugs Dies
Shop at:
Sunny Studio
Mug Hugs Stamps
Mug Hugs Stamps
Shop at:
Sunny Studio
Wishes Word Die
Wishes Word Die
Shop at:
Sunny Studio


Classic Gingham 6x6 Paper
Shop at:
Sunny Studio
Gingham Pastels 6x6 Paper
Shop at:
Sunny Studio
Frilly Frames Stripes Die
Shop at:
Sunny Studio
Frilly Frames Hexagon Dies
Shop at:
Sunny Studio
Subtle Grey Tones Paper
Shop at:
Sunny Studio
Scalloped Tags-Square
Shop at:
Sunny Studio
Sweet Treats Gift Bag
Shop at:
Sunny Studio
Stitched Circle Small Dies
Shop at:
Sunny Studio
Stitched Circle Large Dies
Shop at:
Sunny Studio
Winter Greenery DIes
Shop at:
Sunny Studio
Mini Mat & Tag 2 Dies
Shop at:
Sunny Studio
Joyful Holiday Paper
Shop at:
Sunny Studio
Baking Spirits Bright Stamps
Shop at:
Sunny Studio
Baking Spirits Bright Dies
Shop at:
Sunny Studio
Hero Arts White Detail
Shop at:
Sunny Studio
VersaMark Watermark Ink
Shop at:
Sunny Studio
Versafine Onyx Black Ink
Shop at:
Sunny Studio

Sunday, October 1, 2023

Too Cute To Spook Card with Tammy

Hi friends! Tammy here with a fun Halloween box card featuring the adorable set, Too Cute To Spook. 

Sunny Studio Stamps: Too Cute To Spook Halloween Card by Tammy Stark (featuring Picket Fence Border Dies, Stitched Circle Dies)

To begin, I stamped the images from Too Cute To Spook, colored with Copic markers, and die cut using the Too Cute To Spook Dies. Next, I created a basic rectangle base using purple cardstock. I then cut the back panel pieces from Purple, white, and Bristol smooth cardstock. I created a cloudy background on the Bristol cardstock with Hickory Smoke and Lost Shadow Distress Oxide inks, adding white and black paint splatters. Once dry, I layered the back pieces together and attached to the inside of the box. I die cut three grassy borders from black cardstock using the Picket Fence Border Die and attached them to the inside of the box.

Sunny Studio Stamps: Too Cute To Spook Halloween Card by Tammy Stark (featuring Picket Fence Border Dies, Stitched Circle Dies)

I die cut the moon from Bristol cardstock using the Stitched Circle Large Dies, lightly inking the edges with Scattered Straw Distress Oxide ink, before attaching to the back of the card.

Sunny Studio Stamps: Too Cute To Spook Halloween Card by Tammy Stark (featuring Picket Fence Border Dies, Stitched Circle Dies)

Next, I attached the die cut images to the box, using foam tape for dimension and stability. I cut a piece of white cardstock to fit the front of the box and stamped the 'Happy Halloween' sentiment in black ink. I then attached the cute ghost to the front with foam tape to complete my card!

Thanks so much for stopping by! Hugs!

Sunny Studio Supplies Used:

Picket Fence Border Dies
Shop at:
Sunny Studio
Stitched Circle Large Dies
Shop at:
Sunny Studio
Too Cute To Spook Stamps
Shop at:
Sunny Studio
Too Cute To Spook Dies
Shop at:
Sunny Studio

Monday, June 19, 2023

Summer Sweets Card with Bobbi

Bobbi here with you today! Summertime is the season for sweet and cool treats like popsicles, ice cream cones and sandwiches, iced-tea, a favorite-flavored soda and a sundae. Sunny Studio Stamps has thought of all the favorite treats in this “cool” set called, “Summer Sweets.” I’m using the Summer Sweets stamp set and dies for this 5″ X 7″ card.

Sunny Studio Stamps: Summer Sweets Card by Bobbi Lemanski (featuring Stitched Circle Dies)

For this card, I created a “pattern” background by stamping all the cute treats and a few of the sentiments from the set in black on white cardstock. I splattered bright ink colors over the black and white using my Kuretake Gansai Tambi watercolor paints and a small fan brush. I also added some more bolder tiny squares of color using my Copic Markers. I used a very random pattern when adding the squares.

Sunny Studio Stamps: Summer Sweets Card by Bobbi Lemanski (featuring Stitched Circle Dies)

For the focal point, I stamped individual sweets (some of my favorites) and three tiny cherries and cut them using the coordinating dies. I colored them using Copic markers.  I attached them to a circle of watercolor paper that was also splattered and color washed with color.  I used foam tabs behind the three center treats – iced tea, soda and popsicle – to make them stand out. I stamped the sentiment, “You’re the Coolest” right under the treats using black ink. I added an aqua outline by attaching a larger circle of color around the watercolor circle (both using the Stitched Circle Large Dies and attached it to the middle of the card front panel. The entire panel was adhered to a white card base to complete the card.

Thanks for stopping by today. If you want to see more ideas and inspiration from me, subscribe to my blog, BobbiHartDesign.com. I’ll send you updates on new posts! You can also find me on Instagram as @BobbiHartDesign and on Facebook as BobbiHartDesign.

Sunny Studio Supplies Used:

1
1
Shop at:
Sunny Studio
Summer Sweets Dies
Summer Sweets Dies
Shop at:
Sunny Studio
Stitched Circle Large Dies
Shop at:
Sunny Studio

Thursday, May 4, 2023

Scrumptious Cupcakes Card with Marine

Hi crafty friends, Marine here today to offer you a delicious cupcake from Scrumptious Cupcakes! I created this birthday shaker card using bits and pieces from different sets, and the first thing I did was to create the background. 

Sunny Studio Stamps: Scrumptious Cupcakes Birthday Card by Marine Simon (featuring Bursting Hearts Dies, Scalloped Circle Mat Dies, Stitched Circle Dies)

I cut a 5,5 x 4,25 inches Strathmore bristol smooth panel, and used distress oxide inks to color it. From the center: kitsch flamingo, squeezed lemonade and salvaged patina. As always I splattered the panel with water and white ink to make it less flat, and set it aside to dry.

Next I worked on the shaker panel. I cut a white Bursting Hearts panel, as well as a white frame using a die from my stash. I attached the frame on the front of the bursting hearts panel, and at the back I stuck an acetate panel. Still at the back of the bursting hearts panel, I attached foam strips all along the four edges, added golden heart sequins on the acetate, and then stuck my oxide ink panel on the foam strips to close my shaker panel. I attached it on a card base, and then moved on to the cupcake.

I created it using Lawn Fawn Inks. For the cupcake case I used butter + lemonade + sunflower inks, for the cupcake itself I used doe ink, and for the frosting I used ballet slippers + peachy keen + wild rose inks.

Sunny Studio Stamps: Scrumptious Cupcakes Birthday Card by Marine Simon (featuring Bursting Hearts Dies, Scalloped Circle Mat Dies, Stitched Circle Dies)

I cut each element using the coordinating dies, and set them aside for a minute because I wanted to add a small background behind my cupcake. As a base I cut a scalloped circle out of a Dots & Stripes Pastels pattern paper using a Scalloped Circle Mat 1 die, and then I cut a gold glitter frame using the same Scalloped Circle Mat 1 die as well a Stitched Circle Large die to create a frame that I attached on the scalloped circle.

I stuck my scalloped element in the middle of the Bursting Hearts panel, and then the cupcake on top using 1mm foam squares. Next I white heat embossed my greeting on a Notebook Photo Corners black banner combining words from Garden Fairy and Panda Party, and I attached the banner below the cupcake.

And that's it! Thank you so much for stopping by, and see you next week!

Sunny Studio Supplies Used:

Dots & Stripes Pastels 6x6 Paper
Shop at:
Sunny Studio
Garden Fairy Stamps
Garden Fairy Stamps
Shop at:
Sunny Studio
Scalloped Circle Mat 1 Dies
Shop at:
Sunny Studio
Stitched Circle Large Dies
Shop at:
Sunny Studio
Bursting Heart Die
Bursting Heart Die
Shop at:
Sunny Studio
Panda Party Stamps
Panda Party Stamps
Shop at:
Sunny Studio
Notebook Photo Corners Dies
Shop at:
Sunny Studio
Scrumptious Cupcakes Stamps
Shop at:
Sunny Studio
Scrumptious Cupcakes Dies
Shop at:
Sunny Studio