Showing posts with label Star Border Die. Show all posts

Friday, November 18, 2016

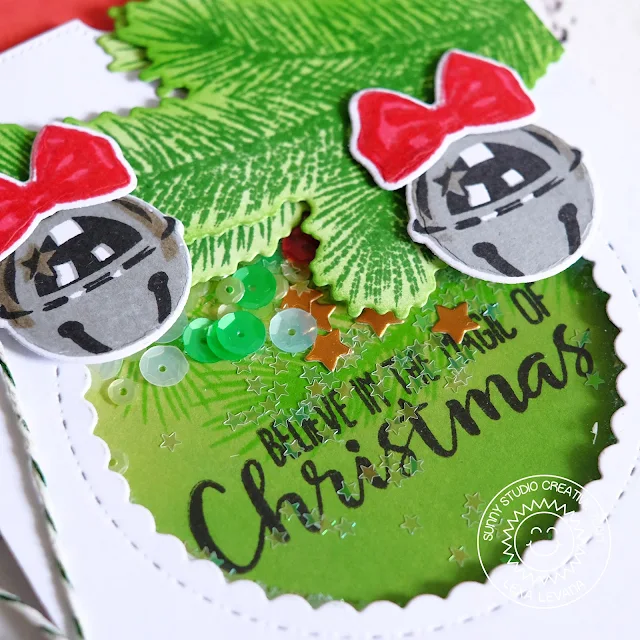
The Magic Of Christmas Card by Lexa

Hi Sunny Studio friends!  Lexa here with a classic colors choice card, adding more inspirations using your Holiday Style stamp and coordinating dies. I'm so ready for Christmas -it's getting closer.

Sunny Studio Stamps: Holiday Style Jingle Bell Magic of Christmas Card by Lexa Levana.

I think a shaker card is super fun, my daughter is always so excited every time I make one. She will shake it with all her might, making mommy worry it will tear. LOL. 

I started with two pieces of white cardstock, one for making a background and the other one for the front panel. I must say that Holiday Style stamp is super pretty, my favorite is the bell, I can't stop staring at it. I'll share a trick how to build this bell, I found it's easier to start with the darkest part to the base/lightest part. As for the bow, I didn't find any difficulties so you can do either way.

For the background of my shaker window, I blend Shabby Shutters and Mowed Lawn Distress Inks then stamped the pine leaves. Not forget the sentiment, the handwritting looks so pretty. What's a Christmas card without some blings? ;) I use pretty sequins from Pretty Pink Posh, Martha Stewarts (tiny clear stars) and die cut some stars from Star Border Dies on a piece of gold foil paper.

Sunny Studio Stamps: Holiday Style Jingle Bell Magic of Christmas Card by Lexa Levana.

I hope I've inspired you today.  Thanks so much for stopping by and have a great day!

Thursday, November 3, 2016

Mug Hugs Reindeer Hot Cocoa Card with Vanessa

Hi! Vanessa here with a fun shaker card using Mug Hugs with various other sets! I like to dress up those fun mug images of the set. Here I used Christmas Icons to create a Christmas mug.


Sunny Studio Stamps: Mug Hugs & Christmas Icons Reindeer Hot Cocoa Card by Vanessa Menhorn.

I can't help but use plaid patterned paper for Christmas cards!  Here I die-cut a circle window from the panel of patterned paper, adhered a piece of clear cardstock behind it and backed it with fun foam. Then I filled the window with sequins and die-cut stars (using the star border die) and adhered the shaker element to the white card base. 

I stamped the "Christmas" and adhered the "merry" that I had die-cut from pink cardstock. Now I stamped the mug and the reindeer head, colored it with Copics and die-cut it with the matching die. Finally, I adhered the mug to the top of my shaker window. 


Sunny Studio Stamps: Mug Hugs & Christmas Icons Reindeer Hot Cocoa Card by Vanessa Menhorn.

Thank you so much for stopping by today! Have a wonderful week!

Vanessa


Friday, May 20, 2016

Comfy Creatures Happy Graduation Card with Lexa

Hello everyone!  Lexa here again with another graduation card but this time I use a sweet koala from Comfy Creatures as the star of my card. The hat from Woo Hoo fits perfectly on her.  She looks sooo cute!

Sunny Studio Stamps: Comfy Creatures & Woo Hoo Koala Bear Graduation Card by Lexa Levana.

I made the background by cutting black cardstock into 1/2" stripes and arrange them on the white 4.25" x 5.5" card base. It might takes some time, but in the end it's all worth it. I stamped all the images on a piece of watercolor paper with my black Versafine ink and watercolored them with Distress Markers. I die-cut the tags on a pink and green paper to match the color of the koala, and I also die-cut the Star Border Die with a pink patterned paper for more fancy look.

Sunny Studio Stamps: Comfy Creatures & Woo Hoo Koala Bear Graduation Card by Lexa Levana.

Finally I arrange all the pieces together, stamped the sentiment in a piece of white cardstock and layered it with vellum underneath it. As you know that I love sequins, so I can't miss that for this one as well. :)

I hope you like it and thank you so much for reading.


Tuesday, May 17, 2016

Comfy Creatures: Celebrate Birthday Card with Anni

Hey stampers, Anni here!  Today I'd like to share a card I made using the set Comfy Creatures. For the stars in the background I used the Star Border Die and the sentiment is from the set Sunny Borders Die.

Sunny Studio Stamps: Comfy Creatures Monkey Birthday Card by Anni

I stamped and colored the little monkey. I chose colored pencils for the coloring. I really love to use colored pencils but it takes a little bit of time. Coloring with Copics is so much faster. But when I have the time I prefer to use colored pencils.

I paper-pieced the sweater of the monkey. Hey, a monkey in a polka dot sweater - it couldn't get cuter, could it?

For the panel I cut a tag from white paper and a bigger one from patterned paper with stars, added a hole and twine bow.

Sunny Studio Stamps: Comfy Creatures Monkey Birthday Card by Anni

For the sentiment I die-cut the word Celebrate once from yellow cardstock and a few times from black cardstock and stacked it up.  I finished the card with some die cut stars in the background to complete the theme.

Thanks for stopping by and have a sunny week!
Anni

Wednesday, May 11, 2016

Stars & Stripes Fourth of July Cards with Lindsey

Hi! Lindsey here again sharing several cards using the Stars and Stripes stamp set. This set is perfect for Fourth of July cards, but also has images and sentiments that would work great for birthday cards or even a card for your favorite hero! I also incorporated the new Star Border die, the Wavy Border dies and the cute koalas from the Comfy Creatures stamp set. Let's get started.

Sunny Studio Stamps: Fourth of July Flag Card by Lindsey Bailey (using Stars & Stripes, Comfy Creatures, Wavy Borders & Star Border die)

I started with an A2 size card base. I used the Wavy Border dies to create red and white strips of cardstock which became the stripes on my American flag. A simple rectangle out of blue cardstock created the background for the Star Border. I cut the Star Border from white cardstock and trimmed it down to six stars, so it would fit in my rectangle. Once I had the background done, it was time to stamp and color the adorable little boy and girl koala. I colored the koalas using Copic markers and fussy cut them out. I added a star and hat on top of their heads from the Stars and Stripes stamp set


Sunny Studio Stamps: Fourth of July Flag Card by Lindsey Bailey (using Stars & Stripes, Comfy Creatures, Wavy Borders & Star Border die)

Finally, I stamped my sentiment under the blue rectangle on one of the white stripes. Since my sentiment said "reach for the stars", I decided to add a few more larger stars above the little koalas. These stars also came from the Stars and Stripes stamp set. I added a little Wink of Stella to all the stars for a little extra sparkle and that completes my card.

For my second card, I used almost all the images in the Stars and Stripes stamp set to create another fun Fourth of July card. I just arranged the different stamps on my white rectangle, which was slightly smaller than an A2 size card, to see what layout I preferred. Once I had them where I wanted them, I stamped them down. I colored all the images with Copic markers. I also outlined each image with a light blue marker. Then I used my glitter pen to add a little sparkle to all the stars on my card.


Sunny Studio Stamps: Stars & Stripes Fourth of July Card by Lindsey Bailey

After everything was colored, I backed my white rectangle on a piece of red cardstock to really make the white panel pop. Finally, I attached the red panel to a gray polka dot piece of cardstock that was cut to four and a quarter by five and half.


Sunny Studio Stamps: Stars & Stripes Fourth of July Card by Lindsey Bailey

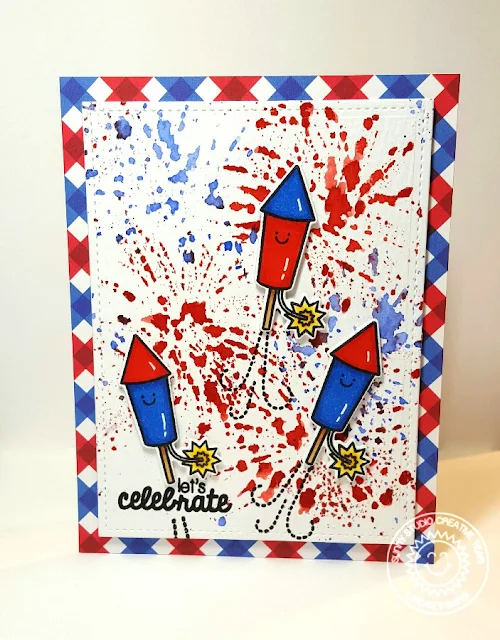
For my last card I decided to focus on the little firecracker image in the set. I wanted to create a background sky full of exploding fireworks with the little firecrackers in the foreground.

Sunny Studio Stamps: Stars & Stripes Red, White & Blue Fourth of July Rocket Card by Lindsey Bailey.

The first thing I did, was create the background using a piece of watercolor cardstock. I used some distress ink on an acrylic block to create the "fireworks." I simply put a dab of ink on the block and then used my water brush to spread the ink around in the shape of a firework. Then, I placed the paper on top of the ink. Ta-da.....watercolor fireworks! I think this technique worked well for the look I was going for. 

Next I stamped and colored three little fire crackers. I also stamped a little face from the set onto each firecracker to give them some personality. Once the watercolor panel was dry, I stamped the sentiment in the bottom left corner where I had a left a little white space. Then, I decided where to place the firecrackers and stamped the little firecracker trail in black. I used foam tape to pop up each of the firecrackers and added a little Wink of Stella to make them sparkle. Finally, I backed my watercolor panel on a gingham blue and red cardstock. 

Sunny Studio Stamps: Stars & Stripes Red, White & Blue Fourth of July Rocket Card by Lindsey Bailey.

I hope you'll check out this fun set, and stay tuned to the blog for more inspiration! I can't wait to see what everyone comes up with! Thanks for reading and have a great day!

Friday, April 1, 2016

Inspiration Week: Woo Hoo, Birthday Smiles & School Time Dies

Hello there!  Today's the big day!  You can now purchase all the new stamps and dies featured this week in our online store.  Yay!!!  

Before you head over I hope you will take a quick look at all the fun ways you can use our new Woo Hoo Stamps and dies.  ;)

Up first is a graduation card using the set in a straightforward way.  The set comes with both a large diploma and a little shrunken down version for the owl to carry.  For my blue background I stamped a tone-on-tone print using the "Happy Graduation" sentiment and some clear VersaMark ink.  For the yellow portion I used the star border from the Sunny Borders stamps to stamp a continuous pattern.

To round out my little scene I die-cut some clouds from white cardstock using the Rain or Shine dies and used the Fishtail Banner dies for my sentiment strip.
Sunny Studio: Happy Graduation Owl Card by Mendi Yoshikawa (using Woo Hoo stamps, Sunny Borders stamps, Rain or Shine dies and Fishtail Banner dies)

My next card uses the larger graduation cap and diploma in the set without the owl for a slightly more sophisticated design.  To create the red star print, I used the three smallest star stamps from Stars and Stripes to create a random pattern.

Sunny Studio: Red, White & Black Graduation Cap & Diploma Card by Mendi Yoshikawa (using Woo Hoo stamps and Stars & Stripes stamps)

Up next I thought it would be fun to show how you don't have to be limited to graduation cards with this set.  For this one I created a special thank you card for teachers. Using my MISTI I stamped a random alphabet letter border using our Sweet Script stamps stamped onto black cardstock and heat embossed in white to evoke the feeling of a chalkboard and to help reinforced my school theme.  I completed my card with the banner from Sunny Borders and the "Thank You" sentiment from Stars & Stripes.
Sunny Studio: Owl Teacher Thank you Card by Mendi Yoshikawa (using Woo Hoo, Stars & Stripes, Sweet Script & Sunny Borders stamps,


My last card goes patriotic with the cute owl from this set, adding the little hat & sentiment from Stars & Stripes. To create my background I cut 3 to 4 of the Star Borders from red, white and blue cardstock and layered them on a kraft panel.  Because I alternated their position on my panel and the border is only 5.5" long, I cut my finished panel apart and hid the gap under my blue panel (inked up in Stormy Sky distress ink).  I finished off my card using the Fishtail Banner dies to create my little pennant for my sentiment.

Sunny Studio: Patriotic Good Sam Red, White & Blue Owl Card by Mendi Yoshikawa (using Woo Hoo stamps, Stars & Stripes stamps, Star Border die and Fishtail Banner dies)

Here's a closer look at the 3x4 stamp set and dies featured on today's cards...


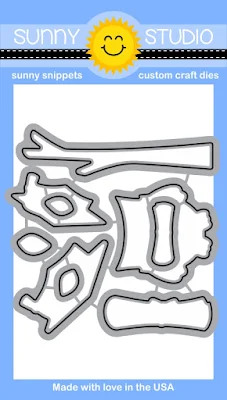
Sunny Studio Stamps: Woo Hoo Graduation owl stamp set Sunny Studio Stamps: Woo Hoo Dies

Unfortunately I didn't find the time to create some new projects with these, but I'm super excited to finally offer the Birthday Smiles and School Time dies that so many of you have been waiting for as well (the Happy Home dies are expected to follow in July).  ;) 

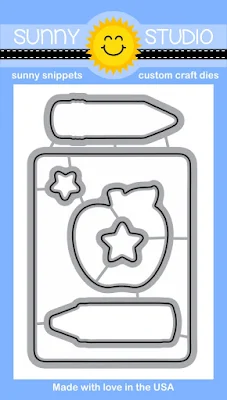
Sunny Studio Stamps: Birthday Smiles Dies Sunny Studio Stamps: School Time Dies

Would you like to win some of these fun products?  Today we are giving away the Woo Hoo Stamps and coordinating dies to one lucky winner using the Rafflecopter below.  You still have time to win the products featured earlier in the week as well.  ;)

Winners will be announced here on the blog on Sunday, April 3rd.  :)

a Rafflecopter giveaway
I hope you've enjoyed all the ideas this week and will stop by our shop to pick up some of our newest items.  For a limited time we are offering two different exclusive bundles to save you a little extra money and save you some time at checkout.  Don't forget you can also use the code "SAVE5" to save an extra $5 off all orders over $49.  ;)

Wednesday, March 30, 2016

Inspiration Week: Introducing Stars & Stripes Stamps & Star Border Die

Hello there!  How are you doing today?  I'm really excited to share ideas using our new Stars & Stripes stamps and the new standalone 5.5" star border die coming out on Friday!  While you're here be sure to sign up for our drawing of the day for your chance to win them!  ;)

My first card uses the featured Stars & Stripes Stamps, along with the panda and koala bear from the Comfy Creatures set being featured tomorrow, the shadow image from the Sunny Borders stamps and the new Star Border die.  I cut the star border from two different colors of blue cardstock and then added the stars back into the border using a Zig glue pen.

The little hat from the Stars & Stripes stamp set was designed to fit all our various creatures.  Using that as my jumping off point I went fully patriotic on this set.  I love how depending on the way you color the little clothes from Comfy Creatures and what you have them hold, you can create a completely different look!


Sunny Studio Stamps: Stars & Stripes Patriotic 4th of July Card by Mendi Yoshikawa

Up next is a card using the stars from the set, along with the star border stamp from our Sunny Borders stamp set which I used to create a tone-on-tone background with VersaMark ink.  After I arranged the stars, I adhered them with a glue pen and popped some up with foam tape for extra dimension.  I also added some clear Wink of Stella glitter to all the smaller stars and a little glossy accent to a few random ones.


Sunny Studio Stamps: Stars & Stripes Patriotic Reach For The Stars Card by Mendi Yoshikawa

For my next card I used that same star border stamp from the Sunny Borders stamp set, alternating between red and blue ink.  I then sponged on festive berries and mermaid lagoon distress ink over the top using mini sponge daubers.  I colored my rocket pops in coordinating colors with Copic Markers, stamped little faces on them using the faces from the set and then covered them in glossy accents to make them shiny.  I think you could get a little extra life from this image by coloring it in fun happy colors for summer too.
Sunny Studio Stamps: Stars & Stripes Red, White & Blue Rocket Popsicle Card by Mendi Yoshikawa

For my next card I wanted to create a special card perfect for giving to a loved on Veteran's day or for putting in the mail telling our military men and women how much they mean to us.  I used the bunting image to create a little banner and paired it with the flag from the set.


Sunny Studio Stamps: Stars & Stripes Patriotic "You're My Hero" Card by Mendi Yoshikawa

Before I go, I wanted to share a couple of everyday ideas using this set just to show how versatile it can be.  I love blue, black and yellow together and I couldn't wait to create a fun scene using this little rocket and matching sentiment.  The set comes with 4 different curly trails that are perfect for pairing with the rocket.  I think with a little creativity you might be able to use them to create your own firework image too.  ;)

To color my images I used Copic Markers in Y15, Y17, Y19, Y38 and YR04.  For my background I sponged on Mermaid Lagoon and Blueprint Sketch distress inks trying to create an ombre effect where my die-cut window was.  To add a little variation, I heat embossed three of my tiny stars in white, along with my sentiment and rocket trails.
Sunny Studio Stamps: Stars & Stripes "Hope You're Birthday Is A Blast" Rocket Card by Mendi Yoshikawa

For my last card I used the pinwheel image along with a pocket die-cut on my Silhouette.  The bunting image from the set can be colored in patriotic colors, but it also looks great colored in fun rainbow colors!  On a side note, I needed the lengthen the stick on my pink pinwheel so I stamped an extra stick and tried to hide the seam behind the yellow pinwheel.  ;)

To create the fun shape of my card I used our Fishtail Banner dies in front (leaving it flat in back to make it easier to stand.  I then filled the bottom inside of the card with some fun coordinating patterned paper (not shown).  


Sunny Studio Stamps: Stars & Stripes Rainbow Banner & Pinwheel Birthday Card by Mendi Yoshikawa

And here's another look at the new products featured on today's cards...


Sunny Studio Stamps: Stars & Stripes Patriotic 4th of July stamp set Sunny Studio Stamps: Stars & Stripes Patriotic 4th of July die set Sunny Studio Stamps: Stars & Stripes Patriotic 4th of July Star Border die

Would you like to win some of these fun products?  Today we are giving away the Stars & Stripes stamps & Star Border die to one lucky winner using the Rafflecopter below.  Come back everyday this week for another chance to win the products featured that day.  

Winners will be announced here on the blog on Sunday, April 3rd.  :)

a Rafflecopter giveaway
I hope I was able to inspire you today.  We're more than half way through our inspiration week.  Check back tomorrow for ideas using our Summer Picnic and Comfy Creatures sets. Until then...