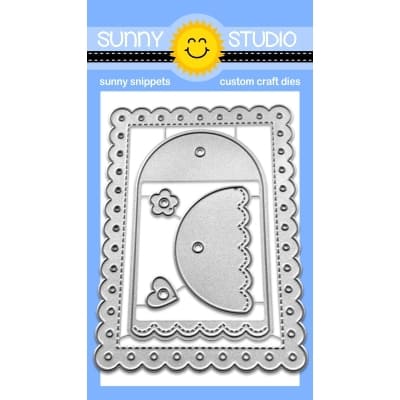
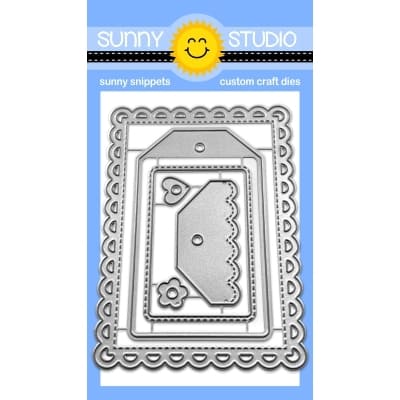
Showing posts with label Scalloped Fence Dies. Show all posts

Wednesday, March 22, 2023

Wonderful Windows Die Focused Cards with Marie and Catherine

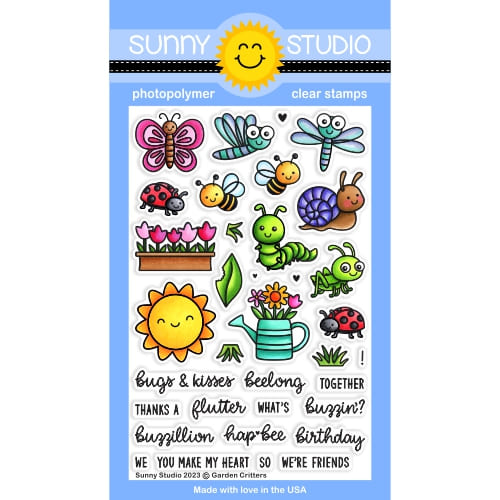
Hello Crafty Friends, Marie here! Thank Heavens, it's officially Spring! Out with the cold and in with the warmth! Spring brings about renewal, and rebirth within nature as well as within ourselves. Spring can also be a reminder to revive or nurture past friendships. In my case, Spring couldn't have come at a better time as I reconnect with a dear friend from my high school days! My card creation today is a friendship card I created for my friend to show her my gratitude for finally reconnecting after so many years. This card features the Wonderful Windows Dies from Sunny Studio Stamps' Spring 2023 collection. It sure is wonderful as it's one of my favorite dies from this release! I also paired this window scene with tiny, adorable bees from their Garden Critters Stamps.  

Sunny Studio Stamps: Wonderful Windows Die Focused Friendship Card by Marie Marco (featuring Garden Critters, Scalloped Fence Dies)

The first step to create this friendship card was to cut out two A2 sized card panels from Bristol Smooth Cardstock paper. This paper is super smooth and perfect for ink blending. Then taking the background panel, I used a brick stencil, and ink blended a light lavender color using Milled Lavender Distress Oxide Ink. To darken the edges, I went in with Shaded Lilac Distress Ink. For the bottom portion of the card, I inked it with some Mowed Lawn Distress ink and splattered some water droplets to create some texture.

For all my die cuts except the flowers, I used Bristol smooth cardstock because it takes Copic markers very well. Starting with my window frame, I colored it using copic markers in cool grey tones. I used the colors Cool Gray No.3 (C-3) , and Cool Gray No 1. (C-1). For the window curtains I used some beautiful yellow pattern paper from the Spring Fever Paper. For the inside window portion and the top triangle window pieces, I used Vintage Paper Distress Oxide to mimic the warmth of a softly lit room. I used some gold metallic paper for the curtain holders. And for the flower box, I used Copic Markers in the colors Chamois ( E35) and Sepia (E37) and to make it a terracotta color, I layered over top Rose Blush (PP4) from Spectrum Noir Illustrator Markers. All the dainty and adorable mini flower blooms were cut from various colors of red, and shades of pink cardstock. For all the tiny leaves, I used Yellow Green Copic marker in (YG03) and did some Mowed Lawn distress ink for shading on the base. For the cute fence, I used Sunny's Scalloped Fence Dies and colored it using Mauve Shadow (BV00) and Cool Grey No. (C-1) Copic Markers. I positioned all my die cut elements and adhered them to my card front panel with Bearly Art Precision Craft Glue. 

Sunny Studio Stamps: Wonderful Windows Die Focused Friendship Card by Marie Marco (featuring Garden Critters, Scalloped Fence Dies)

Next, I stamped out all the bee images onto watercolor paper.  I used Faber-Castell watercolor pencils to color all the images. I cut out the bees using their corresponding die from the Garden Critters Dies. I adhered the bees using repositionable double sided tape adhesive. For some detailing, I used a white Gelly Roll pen to create some flying bee trails. 

Moving on to the inside of my card, I did the same brick stenciling and ink blending as I did on the front to create continuity. I stamped out my Sentiment from the Garden Critters Stamp onto 110 lb. cardstock, and used some banner dies to cut them out. I also inked around the edges for some added interest with Vintage Photo Distress Oxide. Finally, I used some bee images on the inside, and voila all finished and ready to personalize!   

That's it for this week's spring time friendship card inspiration! Thank you so much for joining me today!  Until next time, Happy Cardmaking!  

------------------------------------------

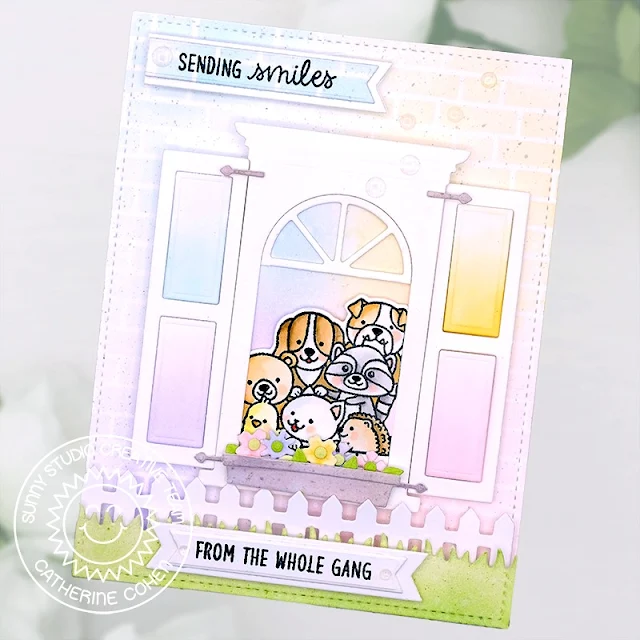
Hello Crafty Friends! Catherine here, and today I am sharing a card created with the Wonderful Windows Dies. This die set is so versatile, it comes with an arched radius frame, outer rectangular frame, curtains, flower box, and shutters which you can add to your design.  For my card, I used the arched radius frame, shutters, and flower box.

Sunny Studio Stamps: Wonderful Windows Die Focused Friendship Card by Catherine Cohen (featuring Cruising Critters, Picket Fence Border Dies)

For the background, I die cut A2 white cardstock with a stitched rectangle die.  I ink blended the background with Spun Sugar, Dried Marigold, Shaded Lilac, and Tumbled Glass Distress Oxides. I lightly splattered Hickory Smoke Distress Oxide mixed with water for added interest and set the background aside to dry.

Next, I die cut the outer rectangular frame, shutters, flower bed, flowers, hinges, and arched frame out of white cardstock. I ink blended the shutter panels and flowers with the same color combination as the background. I added a few leaves ink blended with Shabby Shutters Distress Oxide. I ink blended the flower bed and hinges with Hickory Smoke Distress Oxide.

Sunny Studio Stamps: Wonderful Windows Die Focused Friendship Card by Catherine Cohen (featuring Cruising Critters, Picket Fence Border Dies)

For the “gang,” I stamped the critters from Cruising Critters Stamps onto white cardstock. To fit as many of the critters into the frame as possible, I masked off the bunny with a post it note. I fussy cut the gang and colored the critters with Copic Markers listed in my blog link below. For the window background, I ink blended a piece of white cardstock trimmed to the same size as the arched frame and ink blended with the same color combination. I adhered the gang onto the window background and then onto the card background along with the remaining window pieces.

I added the flower bed along with some flowers. For the bottom of the card, I added a white fence and grass ink blended with Shabby Shutters and Twisted Citron Distress Oxide using the Picket Fence Border Die.

I finished off the card with sentiments from Holiday Express Stamps stamped onto white banners. I added some clear enamel dots for added details.

Thank you so much for stopping by today!  Please feel free to visit me at Crafti-Cat and have a wonderful week!

Sunny Studio Supplies Used:

Picket Fence Border Dies
Shop at:
Sunny Studio
Scalloped Fence Die
Scalloped Fence Die
Shop at:
Sunny Studio
Holiday Express Stamps
Shop at:
Sunny Studio
Cruising Critters Stamps
Shop at:
Sunny Studio
Cruising Critters Dies
Shop at:
Sunny Studio
Garden Critters Stamps
Shop at:
Sunny Studio
Garden Critters Dies
Shop at:
Sunny Studio
Wonderful Windows Dies
Shop at:
Sunny Studio
Spring Fever Paper
Spring Fever Paper
Shop at:
Sunny Studio

Wednesday, October 26, 2022

Mini Mat & Tag Die Focused Cards with Alma and Marie

Hello, my dears. It's Alma and today I'd like to present you my great passion: crafting with tags! I think you can use them in all situations! I was so excited that Sunny Studio Stamps released a Mini-Mat and Tag Dies series this year. So awesome and versatile! I chose the Mini Mat & Tag 1 Dies and used them for a Diagonal Double Pocket card. You can find instructions here

Sunny Studio Stamps: Mini Mat & Tag Die Focused Holiday Card and Tags by Alma Störk (featuring Alpaca Holiday, Fluffy Cloud Border Dies, Scalloped Fence Dies, Rustic Winter Dies)

First of all, I punched out the tags from light blue cardstock. Then I stamped the alpacas from the Alpaca Holiday Stamps set and coloured them with Copics. For the fluffy piles of snow I used the Fluffy Clouds Border Dies. I used design paper from the All is Bright 6x6 Paper pad to decorate the card. Just love the turquoise snowflake paper. 

Sunny Studio Stamps: Mini Mat & Tag Die Focused Holiday Card and Tags by Alma Störk (featuring Alpaca Holiday, Fluffy Cloud Border Dies, Scalloped Fence Dies, Rustic Winter Dies)

For the background design, I punched the birch tree trunks from the Rustic Winter Dies set and punched the Scalloped Fence Dies

Sunny Studio Stamps: Mini Mat & Tag Die Focused Holiday Card and Tags by Alma Störk (featuring Alpaca Holiday, Fluffy Cloud Border Dies, Scalloped Fence Dies, Rustic Winter Dies)

Now stamp all the texts, glue everything together, write nice winter and Christmas thoughts on the tags.... and the winter wish card is ready.

-------------------------------------------

Hello Crafty Friends, Marie here! I am super excited to be back on the blog to share my latest project with you! Tags are one of my favorite things about gift giving! It is a charming little detail that makes giving gifts to friends and loved ones even more personalized and special. Today I am sharing three Christmas Tags created using three of the newly released Mini Mat and Tag Die Sets. I also dressed up my tags using images from the beautiful Classy Christmas Stamp Set

Sunny Studio Stamps: Mini Mat & Tag Die Focused Holiday Card by Marie Marco (featuring Loopy Letters Dies, Classy Christmas)

I started off by die cutting three tags from solid 110lb Neenah Solar White Cardstock. I used the Tag dies from the Mini Mat & Tag 1 DiesMini Mat & Tag 2 Dies and Mini Mat and Tag 3 Dies. After cutting out the tags, I cut all the tag tops from  from Gold cardstock. I also die cut all the tags again using craft paper and Attached them to the backs of all the tags. For the front of my dies, I die cut the Mini Mat & Tag 2 again using craft cardstock and attached it to the front of my tag. For my other 2 tags I used the rectangle die from set 3 to create rounded rectangle centers for my other 2 tags. I splattered watered down acrylic paint to all the craft cardstock fronts. 

Sunny Studio Stamps: Mini Mat & Tag Die Focused Holiday Card by Marie Marco (featuring Loopy Letters Dies, Classy Christmas)

For my Christmas images, I used Distress Ink in the color Antique Linen to stamp them onto watercolor paper. I then used Derwent Inktense water soluble pencils to watercolor  my images in a traditional red and green palette. I then adhered all my gold tag tops to each corresponding tag using Bearly Art Precision Craft Glue. I added some gold trim to 2 of my tags and attached my images. I propped up some of the images using foam tape for some dimension. For my poinsettia tag, I used some Sunny Studio Gold Jewels embellishments, flipping them over to expose the shiny diamond side. 

Sunny Studio Stamps: Mini Mat & Tag Die Focused Holiday Card by Marie Marco (featuring Loopy Letters Dies, Classy Christmas)

On the back of my tags, I used the Loopy Letters Dies to create my "To". For the  finishing touch to my tags, I added some red and white Christmas Twine and Gold Twine to the tops of all my tags. 

There you have it friends! Super easy-to -create gift tags to decorate all your presents this Holiday season! I am super happy with the way my tags turned out! I can't wait to put them on gifts! Thanks so much for joining me today! Until next time, Happy Paper Crafting! 

Sunny Studio Supplies Used:
Scalloped Fence Die
Scalloped Fence Die
Shop at:
Sunny Studio
Alpaca Holiday Stamps
Shop at:
Sunny Studio
Alpaca Holiday Dies
Alpaca Holiday Dies
Shop at:
Sunny Studio
Loopy Letters Dies
Loopy Letters Dies
Shop at:
Sunny Studio
Rustic Winter Dies
Rustic Winter Dies
Shop at:
Sunny Studio
Fluffy Clouds Border Dies
Shop at:
Sunny Studio
Classy Christmas Stamps
Shop at:
Sunny Studio
Classy Christmas Dies
Shop at:
Sunny Studio
All Is Bright Paper
All Is Bright Paper
Shop at:
Sunny Studio
Mini Mat & Tag 1 Dies
Shop at:
Sunny Studio
Mini Mat & Tag 2 Dies
Shop at:
Sunny Studio
Mini Mat & Tag 3 Dies
Shop at:
Sunny Studio

Wednesday, September 28, 2022

Autumn Tree Die Focused Card with Marie

Hello Crafty Friends, Marie here! I know Fall has just begun but it's never too early to start crafting for the Holidays so for my card inspiration this week, I've created a Christmas Card which features the Autumn Tree Dies and Penguin Party Stamp - both products are part of their recent Fall/Winter 2022 release. 

Sunny Studio Stamps: Autumn Tree Die Focused Christmas Card by Marie Marco (featuring Penguin Party, Loopy Letter Dies, Fancy Frame Dies, Scalloped Fence Dies)

To create my card, I started by die cutting 2 Panels sized A2 from a Sturdy 110 lb Neenah Solar White Card Stock Paper. I also Die Cut a scalloped frame using Sunny's Fancy Frames Rectangle Dies and I cut out some adorable fences using the Scalloped Fence Die. I cut my fences from a gold metallic paper. 

Using the Autumn Tree Die I die cut a winter tree. The beauty of the Autumn Tree Dies is that it doesn't have to just be a fall tree. It can be anything you want it to be. So I turned this fall tree into a winter tree just by adding snow. 

I then ink blended my background onto an A2 sized mint green cardstock paper from the Cools paper pack collection from scrapbook.com. I used the Distress Inks in the colors : EverGreen Bough, Uncharted Mariner, And Chipped Sapphire. I adhered my colored background to one of my sturdy A2 Panel. 

Sunny Studio Stamps: Autumn Tree Die Focused Christmas Card by Marie Marco (featuring Penguin Party, Loopy Letter Dies, Fancy Frame Dies, Scalloped Fence Dies)

I used watered down acrylic paint to add white splatter all over my inked background to capture the essence of snowfall. I also did the same to my tree. I added the same white paint to my tree branches to mimic snow and I also painted some fallen snow onto my gold scalloped fence. 

I stamped out the super duper ADORABLE Penguins from the Penguin Party Stamp set using Distress ink in Antique Linen onto watercolor paper and did some no-line watercoloring using Derwent Inktense water soluble pencils. I cut them out using the Penguin Party Corresponding Dies.

Sunny Studio Stamps: Autumn Tree Die Focused Christmas Card by Marie Marco (featuring Penguin Party, Loopy Letter Dies, Fancy Frame Dies, Scalloped Fence Dies)

I attached my other A2 Panel to my card base from the top so my card opens upward. I assembled and glued down my tree and images using Bearly Arts Precision Craft Glue, and foam tape. I didn't have much room for a sentiment on the front of my card, so I decided to keep it very simple with a beautiful "Merry Christmas" greeting that I achieved using Sunny's Loopy Letters Dies.

That does it for my card inspiration this week! I hope I've inspired you to start your Holiday Crafting Early! Hopefully we can all get it done before the actual Holidays roll around and mail everything off on time! Until next week, Happy Card Making crafty friends! 

Sunny Studio Supplies Used:
Scalloped Fence Die
Scalloped Fence Die
Shop at:
Sunny Studio
Fancy Frames- Rectangles
Shop at:
Sunny Studio
Loopy Letters Dies
Loopy Letters Dies
Shop at:
Sunny Studio
Penguin Party Stamps
Shop at:
Sunny Studio
Penguin Party Dies
Penguin Party Dies
Shop at:
Sunny Studio
Autumn Tree Die
Autumn Tree Die
Shop at:
Sunny Studio

Friday, June 10, 2022

Wedded Bliss Cards with Vanessa and Audrey

Hello to you! Vanessa here with a pretty shadow box card using the cute Wedded Bliss set.

Sunny Studio Stamps: Wedded Bliss Wedding Themed Card by Vanessa Menhorn (featuring Passionate Penguins, Stitched Heart Dies, Scalloped Heart Dies, Scalloped Fence Dies)

I first constructed the shadow box card using the Stitched Rectangle Dies and the Stitched Heart 2 Dies. After I had inked the background with Broken Glass, Cracked Pistachio and Kitsch Flamingo Distress Oxide Inks, I stamped all the images, colored the elements with Copic markers, die-cut the pieces with the matching dies and adhered everything to the card. 

Sunny Studio Stamps: Wedded Bliss Wedding Themed Card by Vanessa Menhorn (featuring Passionate Penguins, Stitched Heart Dies, Scalloped Heart Dies, Scalloped Fence Dies)

These are the sets I used:
Wedded Bliss stamps + dies
Passionate Penguins stamps + dies
Penguin Pals stamps + dies
Little Birdie stamps + dies
Stitched Rectangle Dies
Stitched Heart 2 Dies
Scalloped Fence Dies
Scalloped Heart Dies
Red and Pink Heart Confetti

Sunny Studio Stamps: Wedded Bliss Wedding Themed Card by Vanessa Menhorn (featuring Passionate Penguins, Stitched Heart Dies, Scalloped Heart Dies, Scalloped Fence Dies)

To finish the card off, I added details with a white gel pen and adhered tiny clay hearts.

I am so glad Mendi added more adorable images to the penguin collection, can't get enough of these :) Thanks for stopping by and have a lovely weekend!

-------------------------------------------

Hello friends! Audrey here with a fun wedding card for you! 

Sunny Studio Stamps: Wedded Bliss Wedding Themed Card by Audrey Tokach (featuring Inside Greetings Congrats, Icing Border Dies)

To create this card, I started off with a piece of white cardstock cut slightly smaller than an A2 size. I ink blended some Saltwater Taffy Distress ink in the bottom right corner on an angle and faded it out as I move up the panel. Then, I splattered it with some gold watercolor. I stamped and colored the adorable penguin pair from Wedded Bliss and die cut them with the coordinating Wedded Bliss dies. To ground the bride and groom, I used a sentiment from the Inside Greetings Congrats sentiment set. I stamped that in black ink, and popped them up just above it.  

Sunny Studio Stamps: Wedded Bliss Wedding Themed Card by Audrey Tokach (featuring Inside Greetings Congrats, Icing Border Dies)

To add some more interest to the panel, I used the Icing Borders to add some scallops to both the left and right side of the panel, then added a tiny strip of gold glitter cardstock to each edge to finish it off nicely. For another touch of gold, I added a trio of tiny hearts using the Basic Mini Shapes Dies 2 die set. To finish off the card, I added some white gel pen accents and popped the panel up with foam tape on an A2 card base.

Sunny Studio Supplies Used:

Scalloped Fence Die
Scalloped Fence Die
Shop at:
Sunny Studio
Stitched Rectangle Dies
Shop at:
Sunny Studio
Icing Border DIes
Icing Border DIes
Shop at:
Sunny Studio
Mini Basic Shape Dies 2
Shop at:
Sunny Studio
Penguin Pals Stamps
Penguin Pals Stamps
Shop at:
Sunny Studio
Penguin Pals Dies
Penguin Pals Dies
Shop at:
Sunny Studio
Little Birdie Stamps
Shop at:
Sunny Studio
Little Birdie Dies
Little Birdie Dies
Shop at:
Sunny Studio
Passionate Penguins Stamps
Shop at:
Sunny Studio
Passionate Penguins Dies
Shop at:
Sunny Studio
Scalloped Heart Dies
Shop at:
Sunny Studio
Stitched Heart 2 Dies
Shop at:
Sunny Studio
Wedded Bliss Stamps
Wedded Bliss Stamps
Shop at:
Sunny Studio
Wedded Bliss Dies
Wedded Bliss Dies
Shop at:
Sunny Studio
Inside Greetings Congrats
Shop at:
Sunny Studio

Monday, April 4, 2022

Critters on the Go Cards with Mayra and Ashley

Happy Monday everyone, Mayra here with you! I am sharing this card with you today using the adorable Critters On the Go stamp set. 

Sunny Studio Stamps: Critters on the Go Cards by Mayra Duran-Hernandez (featuring Picket Fence Border Dies, Scalloped Fence Dies, Garden Fairy, Stitched Rectangle Dies)

I began by using the stitched rectangles from the Stitched Rectangle die set to die-cut the panels for the base of the card and to create the grass, bush, and ground layers. I then used the grass die from the Picket Fence Border die set to die cut the grass border. I used the cloud and hillside borders from the Slimline Nature Borders die set to create the layer of bushes, and the ground layers. The fence is from the Scalloped Fence die set. Next, I used Copic markers to color the images from the Critters On the Go stamp set, the mushrooms from the Home Sweet Gnome stamp set, and the flowers and butterflies from the Garden Fairy stamp set. 

Copics Used: Pinks: RV55, RV04, RV23, RV02, E93, R22; Browns: E41, E31, E55

Sunny Studio Stamps: Critters on the Go Cards by Mayra Duran-Hernandez (featuring Picket Fence Border Dies, Scalloped Fence Dies, Garden Fairy, Stitched Rectangle Dies)

I then stamped the sentiment from the Critters On the Go stamp set and the Charming City stamp set onto a banner. I hope you enjoy the card I created to share with you today. Thank you very much for taking the time to stop by today. I hope you each have a wonderful and blessed day. 

---------------------------------------------

Hello friends! It's Ashley with a cute card featuring the Critters on the Go set! My daughter and I had so much fun crafting together with this set!

Sunny Studio Stamps: Critters on the Go Cards by Ashley Ebben (featuring Scalloped Circle Mat Dies, Stitched Circle Dies, Hello Word Dies, Charming City)

I started by creating a background with repeating scooters using the Critters on the Go images. I knew I wanted the animals to pop, so I kept everything in the background a light grey. I added a scalloped circle to anchor my images with light grey cardstock and the Scalloped Circle Mat 1 dies. I stamped the line of buildings from Charming City in the same light grey ink I used for the scooters onto Bristol smooth cardstock. I used different colors of grey Zig Clean Color Real Brush markers to softly color the road and cut the whole piece with a Stitched Circle Small die. 

Sunny Studio Stamps: Critters on the Go Cards by Ashley Ebben (featuring Scalloped Circle Mat Dies, Stitched Circle Dies, Hello Word Dies, Charming City)

I stamped the images from Critters on the Go that I wanted to use on Bristol smooth cardstock and colored them with Zig Clean Color Real Brush markers. My daughter found some blue cardstock she wanted to use on her card, so I pulled from her color inspiration for my scooter. I cut everything out with the matching dies, then added the images to my card. For my sentiment, I stamped the first part in black ink directly onto my circle. I think it helps balance the big height difference between the giraffe and the puppy he's pulling on a skateboard. I then grabbed the same blue cardstock my daughter was using and used the Hello Word die three times to create a dimensional word.

Thank you so much for stopping by! Have a wonderful day!

Sunny Studio Supplies Used:
Picket Fence Border Dies
Shop at:
Sunny Studio
Scalloped Fence Die
Scalloped Fence Die
Shop at:
Sunny Studio
Stitched Rectangle Dies
Shop at:
Sunny Studio
Hello Word Die
Hello Word Die
Shop at:
Sunny Studio
Home Sweet Gnome Stamps
Shop at:
Sunny Studio
Home Sweet Gnome Dies
Shop at:
Sunny Studio
Slimline Nature Borders
Shop at:
Sunny Studio
Garden Fairy Stamps
Garden Fairy Stamps
Shop at:
Sunny Studio
Garden Fairy Dies
Garden Fairy Dies
Shop at:
Sunny Studio
Scalloped Circle Mat 1 Dies
Shop at:
Sunny Studio
Stitched Circle Small Dies
Shop at:
Sunny Studio
Charming City Stamps
Shop at:
Sunny Studio
Critters on the Go Stamps
Shop at:
Sunny Studio
Critters on the Go Dies
Shop at:
Sunny Studio