- Scenic Route stamp set & coordinating dies
- Super Duper stamp set & coordinating dies
- Santa Claus Lane stamp set (ho)
- Christmas Garland Frame die (christmas)
- Comic Strip Speech Bubbles die (frame)
- Woodland Borders dies
- Very Merry 6x6 paper pack
- Rainbow Pearls
I first die cut the frame, using the negative to
frame my scene. I filled the scene first with the night sky pattern paper and added the copic
colored and glittered hills under the
moon. Next, I colored the houses and used the coordinating dies to cut out and pop
dotted along the hillside.
I then die cut the stitched snowhills, layering along the
bottom of the card and pop dotted the frame on top of the scene. For the
sentiments, I first heat embossed the you're my favorite super hero on two separate navy
banners and then die cut multiples of the christmas, the top one out of red
glitter. I then die cut the comic bubble out of the same navy
and heat embossed the ho, ho, ho in white and pop
dotted it next to the Christmas superhero. I added a
few green pearls to tie in the green
around the sentiment.
I hope you are inspired to use some of your summer sets for Christmas in different ways!
I hope you are inspired to use some of your summer sets for Christmas in different ways!
---------------------------------------------------------
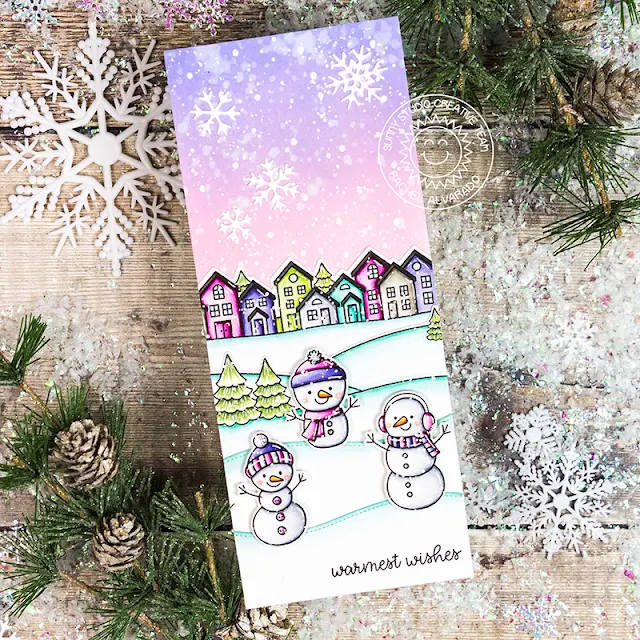
Hello everyone! It's Rachel here and I have a card to share with you today that focuses on the new Scenic Route Stamp Set. I combined this set with some cute snowmen from the Feeling Frosty Set to create a fun winter scene.
To start, I first trimmed
a piece of Neenah Solar White 110lb Card Stock to 8.5" x 3.5". I then
blended the top portion of it with Spun Sugar and Shaded Lilac Distress Oxide
Inks. I splattered this blend with both water and diluted Opaque White Paint to
resemble snow. I also added a few white die cut snowflakes using the snowflake
dies from the Snowflake Circle Frame Die Set.
I stamped my images with Memento Tuxedo Black Ink onto another sheet of Neenah Solar White 110lb Card Stock and colored them with Copics. I used the coordinating Scenic Route and Feeling Frosty die sets to cut them out once colored.
Copic Colors Used:
I stamped my images with Memento Tuxedo Black Ink onto another sheet of Neenah Solar White 110lb Card Stock and colored them with Copics. I used the coordinating Scenic Route and Feeling Frosty die sets to cut them out once colored.
Copic Colors Used:
- Pinks:
RV000, RV00, RV52, RV55, RV66, RV69
- Purples:
BV000, BV02, BV13, BV17, BV08
- Whites:
0, C00, C0, C2, C4
- Greens: G20, G24, YG25, YG63
- Dark
Gray: W5, W8
- Light
Gray: W1, W3, W5
- Snow
Drifts: BG0000, BG11, BG53
Once I had all of my scenery and images cut out, I adhered
them carefully onto the front of my card where I wanted them to be aligned. I
then used a paper trimmer to trim off any excess. I used the Woodland Border Dies to
add a few extra stitched snow drifts. I stamped my sentiment onto the lower
right corner of my lowest snow drift and lastly, adhered my snowmen with some
3D Foam Adhesive Squares for added dimension.
I hope you've enjoyed my card today! Thanks so much for dropping by! Wishing you all the most wonderful weekend!
I hope you've enjoyed my card today! Thanks so much for dropping by! Wishing you all the most wonderful weekend!
Sunny Studio Supplies Used:
 Woodland Borders Dies Shop at: Sunny Studio |
 Super Duper Stamps Shop at: Sunny Studio |
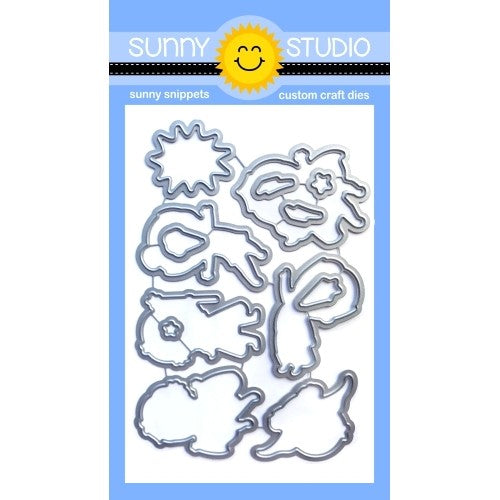
 Super Duper Dies Shop at: Sunny Studio |
 Comic Strip Speech Bubble Dies Shop at: Sunny Studio |
 Very Merry 6x6 Paper Shop at: Sunny Studio |
 Santa Claus Lane Stamps Shop at: Sunny Studio |
 Feeling Frosty Stamps Shop at: Sunny Studio |
 Feeling Frosty Dies Shop at: Sunny Studio |
 Scenic Route Stamps Shop at: Sunny Studio | |
 Scenic Route Dies Shop at: Sunny Studio |
 Snowflake Circle Frame Shop at: Sunny Studio |
 Christmas Garland Frame Shop at: Sunny Studio |


These are both amazing! Love them!
ReplyDeleteGreat cards!
ReplyDelete