Showing posts with label Make A Wish. Show all posts

Wednesday, April 10, 2024

Designer's Choice: Holiday Hugs Card with Tina

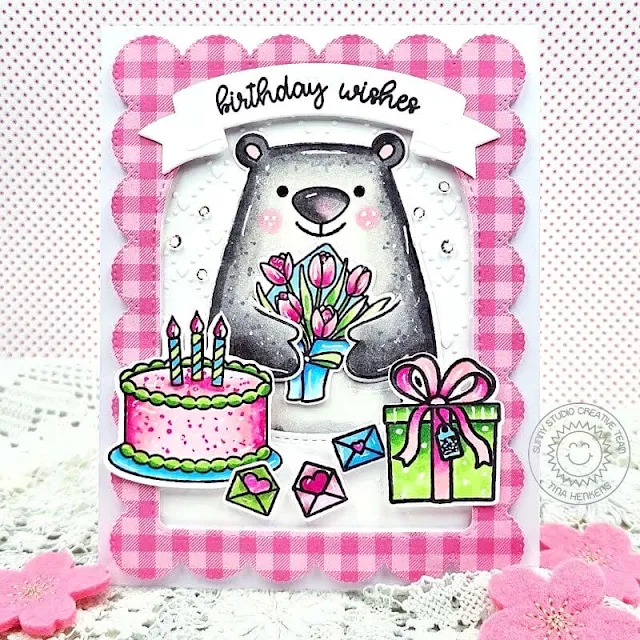
Hello crafters, it’s Tina and today I am mixing and matching several sets for this designer’s choice blog post. The darling bear from Holiday Hugs is perfect for all your winter cards but I wanted to see how I could make him the focal point of a Spring birthday card!

Sunny Studio Stamps: Holiday Hugs Birthday Card by Tina Henkens (featuring Make A Wish, Frilly Frame Dies, Quilted Hearts Dies, Stitched Arch Dies, Brilliant Banner Dies, Happy Thoughts)

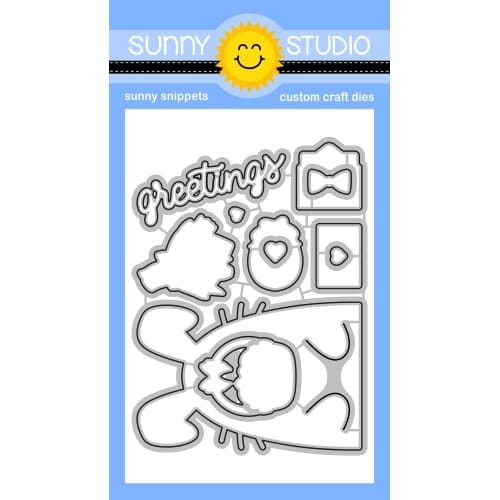
To achieve this look, I had to mask off his scarf with some Post-it tape while I was stamping. It went really well and next I used the matching dies to cut him out. I love the special die for the arms! To remove the scarf with more precision or make it easier to do for mass production, here are detailed steps to achieve this look:

  1. Stamp the bear onto masking material and cut out the scarf with scissors, leaving a thin shadow for a little wiggle room.
  2. Then, stamp a sheet of paper with the bear image using your Misti tool.
  3. Cut a sheet of cardstock the same size as the paper used in Step 2. Using a lightbox or a well-lit window, position the blank sheet of cardstock over that stamped image and position your hand-cut mask on the cardstock where that scarf will stamp. 
  4. Put the blank cardstock with the scarf mask in place back into your Misti, ink up your image, and stamp it onto the cardstock with the mask in place.
  5. Remove the mask and use a black fine-tip marker (one that will work with your desired coloring medium) to sketch the missing sides of the bear. A Memento marker or Copic Multiliner pen are both excellent choices.
  6. Use scissors to trim down the die-cut bear to account for the missing scarf.

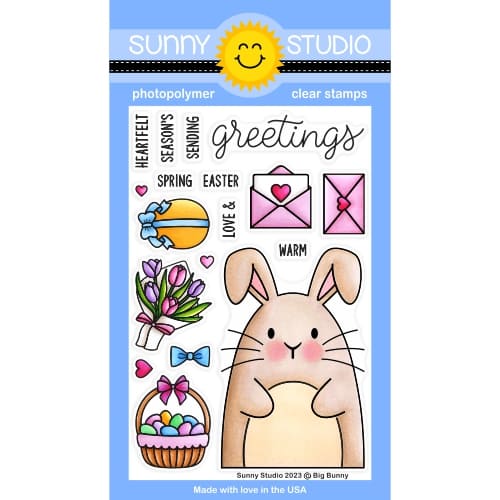
Whilst browsing through my stash I selected a few birthday related stamps like the big cake (Make A Wish), the gift (Holiday Hugs), the bouquet (Big Bunny) and the letters (Bighearted Bears).All these items were colored with alcohol markers in fun Spring colors.

My card base is an A2 size and made from white heavy weight card stock. For the pink gingham frame I used a Joyful Holiday paper, which was cut with the outer of the Frilly Frames Eyelet Lace dies and the largest of the Stitched Arched Dies.

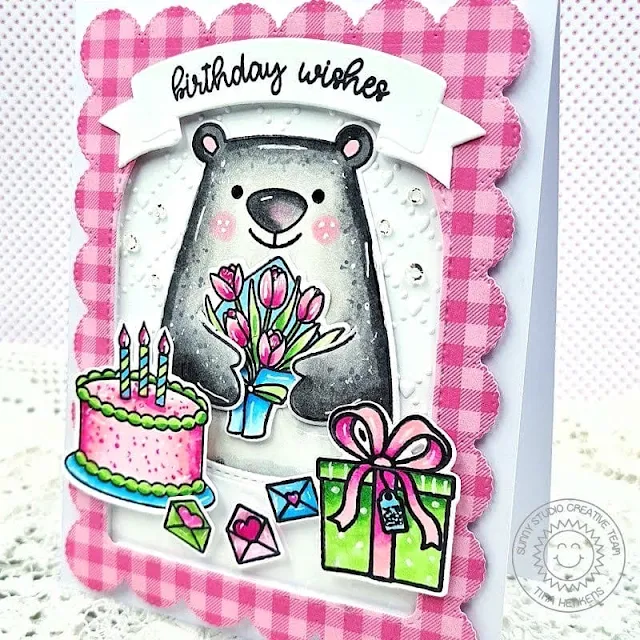
Sunny Studio Stamps: Holiday Hugs Birthday Card by Tina Henkens (featuring Make A Wish, Frilly Frame Dies, Quilted Hearts Dies, Stitched Arch Dies, Brilliant Banner Dies, Happy Thoughts)

Since the coloring was so bright, I opted for a white backdrop. The upper part is dry embossed with the Quilted Hearts folder, whilst the lower part was run through the Lots Of Dots folder (but that is difficult to see in the pictures). I added foam tape to the gingham frame and lower part of the background and adhered all the elements to my card base. Next, I added the cute bear and all his birthday accessories!

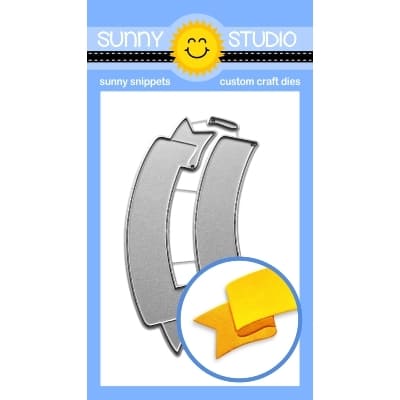
I love how the Brilliant Banner 2 Die perfectly fits on top of the arched frame. The combined sentiment was selected from the Happy Thoughts set and stamped in Versafine Onyx Black Ink. For some bling, I adhered a few Crystal Clear Jewels which are one of my favorites.

I hope you got inspired to experiment with stamp masking, it’s such a fun technique! Thank you for joining me and happy crafting!

Sunny Studio Supplies Used:

Happy Thoughts Stamps
Shop at:
Sunny Studio
Make A Wish Stamps
Make A Wish Stamps
Shop at:
Sunny Studio
Make A Wish Dies
Make A Wish Dies
Shop at:
Sunny Studio
Lots of Dots Embossing
Shop at:
Sunny Studio
Frilly Frames-Eyelet Lace
Shop at:
Sunny Studio
Stitched Arch Dies
Stitched Arch Dies
Shop at:
Sunny Studio
Quilted Hearts Portrait
Shop at:
Sunny Studio
Brilliant Banner 2 Dies
Shop at:
Sunny Studio
Holiday Hugs Stamps
Holiday Hugs Stamps
Shop at:
Sunny Studio
Holiday Hugs Dies
Holiday Hugs Dies
Shop at:
Sunny Studio
Big Bunny Stamps
Big Bunny Stamps
Shop at:
Sunny Studio
Big Bunny Dies
Big Bunny Dies
Shop at:
Sunny Studio

Wednesday, February 7, 2024

Treat Bag Topper Card with Tina

Hello crafters, it’s Tina and today I wanted to show you the versatility of the Treat Bag Topper die! Yes, it can be a topper, but this set has extra shapes that make it so great. I created a card and matching envelope to highlight these options. As I mentioned in previous posts, I am always looking for ways to increase my birthday card stash! A situation that many of us may be familiar with!

Sunny Studio Stamps: Treat Bag Topper Die Focused Birthday Cat Card by Tina Henkens (featuring Happy Thoughts, Frilly Frame Dies, Make A Wish)

For this design, I created a white panel with the outer border from the Frilly Frames Stripes die. I used the rectangle from the Treat Bag Topper die and tried to create three evenly spaced windows in this panel. At this point I was still going for a see through card, so I cut a piece of acetate and placed in on the back of the white piece.

In the pictures, this acetate is almost invisible, but it is the surface that I used to glue all my components in place! I changed my mind about the design because the white panel had become flimsy, after all the die cutting. I decided to glue a beautiful ocher yellow paper from Gingham Pastels to the back of the frame, making it much sturdier!

Sunny Studio Stamps: Treat Bag Topper Die Focused Birthday Cat Card by Tina Henkens (featuring Happy Thoughts, Frilly Frame Dies, Make A Wish)

If you are in for a party, make sure to invite the adorable Birthday Cats. I selected a few cuties and accessories and colored them in with my copics. The big birthday cake is from the Make A Wish stamps. The sentiment combines the ‘Happy’ word (Treat Bag Topper die) and  ‘Birthday’ (Happy Thoughts) which I stamped on the cake in Versafine Onyx Black ink.

I glued the Happy sentiment to the middle part of the card and created little ‘cats with cake’ clusters on the top and bottom of the design. A few Gold Jewels were the finishing touch!

Finally, I die cut three party hats and banners from the Treat Bag Topper die and Gingham Pastels to decorate a white envelope for this card.

Thank you for joining me and I hope you will have a fun time with these dies!

Sunny Studio Supplies Used:

Happy Thoughts Stamps
Shop at:
Sunny Studio
Gingham Pastels 6x6 Paper
Shop at:
Sunny Studio
Make A Wish Stamps
Make A Wish Stamps
Shop at:
Sunny Studio
Make A Wish Dies
Make A Wish Dies
Shop at:
Sunny Studio
Frilly Frames Stripes Die
Shop at:
Sunny Studio
Birthday Cat Stamps
Birthday Cat Stamps
Shop at:
Sunny Studio
Birthday Cat Dies
Birthday Cat Dies
Shop at:
Sunny Studio
Treat Bag Topper Die
Shop at:
Sunny Studio

Saturday, February 18, 2023

Guest Designer Spotlight: Cards with Gladys Marcelino

Hello friends!! Gladys here and I'm so excited to be back on the blog today to share some fun and fresh new projects using products from the latest release. Let's get started!

Sunny Studio Stamps: Panda Party Cards by Gladys Marcelino (Make A Wish)

For my first card I created a cute birthday card featuring the adorable pandas from the Panda Party stamp set. To start I used a watercolor stencil and ink blended a pastel rainbow with various distress oxide inks. I added interest by splattering diluted shaded lilac and white paint using a small paint brush. I stamped the pandas and birthday accessories from the stamp set with alcohol friendly ink. I colored the images with copic markers and used their coordinating dies to cut them out. Since this is a birthday card we can't have a birthday without cake so I stamped and colored the cake from a smaller stamp set called Make A Wish.

Sunny Studio Stamps: Panda Party Cards by Gladys Marcelino (Make A Wish)

Next I cut down the stenciled background panel using a stitched rectangle die slightly smaller than A2 size. Then it was time to assemble the scene. Once I was happy with the placement of the images I used double sided foam tape to attached them. I stamped the punny sentiment on the center of the card and finally I mounted the panel onto a rainbow pattern paper from the latest release called Spring Fever.  

Sunny Studio Stamps: Panda Party Cards by Gladys Marcelino (featuring Wonderful Windows)

For my second project I made a slimline card, again using the Panda Party stamp set with the Wonderful Windows dies.

I began by ink blending the background using a brick stencil and distress oxide inks. Then I started die cutting elements from the window dies. I used various colored card stock and pattern paper to complement the scene. The flowers did take the longest from cutting the different colors of paper and gluing them together. I wanted to create a cluster of flowers for the windowsills so it was a labor of love and I enjoyed the process. Also, I think it's because I'm longing for Spring to come. LOL!

Sunny Studio Stamps: Panda Party Cards by Gladys Marcelino (featuring Wonderful Windows)

I was able to fit almost 2 windows on top of each other and stuck the pandas in each of them. I cut a grass border and a couple of pandas holding flowers which I thought was so sweet. Next I heat embossed the sentiment in white on vellum. The sentiment "Have a pandastic day!" was my inspiration for this scene. I had imagined the pandas are greeting their neighbors, friends or family members to have a fantastic day. I  had so fun creating this scene and I love how it turned out.

That is all for me today. Thank you so much for stopping by and have a wonderful day!!

Sunny Studio Supplies Used:

Make A Wish Stamps
Make A Wish Stamps
Shop at:
Sunny Studio
Make A Wish Dies
Make A Wish Dies
Shop at:
Sunny Studio
Panda Party Stamps
Panda Party Stamps
Shop at:
Sunny Studio
Panda Party Dies
Panda Party Dies
Shop at:
Sunny Studio
Wonderful Windows Dies
Shop at:
Sunny Studio
Spring Fever Paper
Spring Fever Paper
Shop at:
Sunny Studio

Friday, February 10, 2023

Big Bold Greetings Cards with Vanessa and Tina

Hello to you! Vanessa here with a simple Thank You card using the Big Bold Greetings stamps.

Sunny Studio Stamps: Big Bold Greetings Baby Elephant Thank You Card by Vanessa Menhorn

I trimmed a panel of white cardstock slightly smaller than my card base and stamped the thanks with grey ink to create my patterned background. After I had adhered the panel to the card, I stamped the Baby Elephant and the Garden Fairy butterfly onto a piece of cardstock, colored everything with Copics, die-cut the elements with the matching dies and adhered them with foam tape.

Sunny Studio Stamps: Big Bold Greetings Baby Elephant Thank You Card by Vanessa Menhorn

Then I stamped the sentiment, die-cut it and added it to the card. Finally, I added white gems and used a white gel pen to add highlights.

I love big, bold greetings! Have a lovely weekend, see you next week!

--------------------------------------------

Hello crafty friends, it’s Tina with a sweet birthday card featuring the beautiful Big Bold Greetings stamp and die set. There are a lot of sentiments in this set which makes it a super versatile addition to your stash!

Sunny Studio Stamps: Big Bold Greetings Baby Elephant Happy Birthday Card by Tina (featuring Spring Greenery, Make A Wish, Frilly Frame Dies, Stitched Arch Dies)

Since you can never have enough birthday cards; I choose the ‘Happy Birthday’ and stamped it in a dark pink Memento ink. After die cutting the sentiment, I also cut two extra layers in white Neenah cardstock so I could stack them for dimension.

Next, I stamped and die cut all my images using the adorable elephants from Baby Elephants, the hats from Panda Party and the cake from Make A Wish. I used my Copics for the coloring, selecting bright Spring colors.

In my design I included a wreath arch made with large and small branches from the Spring Greenery dies. To decorate this arch I also cut a bunch of colorful little flowers from the Wonderful Windows die set. These flowers were the perfect size to scatter all over the greenery.

Sunny Studio Stamps: Big Bold Greetings Baby Elephant Happy Birthday Card by Tina (featuring Spring Greenery, Make A Wish, Frilly Frame Dies, Stitched Arch Dies)

My card panel was cut from a piece of Neenah Solar White paper using the Frilly Frame Eyelet Lace die. I really love this die as a panel because it has a lovely scalloped edge. I didn’t want my background to be too distracting, so I just added a hint of purple with a shiplap stencil from my stash and Distress Oxide Dusty Concord. 

Next I die cut an arch shape out of the panel using the largest of the Stitched Arched diesTo assemble the card, I first glued the remaining rectangle part of my panel directly to a white card base. Next, I mounted the stitched arch portion with foam tape to the base.

After building the greenery arch following the shape of the stitched arch, I added the little flowers and embellished them with a Pure White jewel to the centers. I completed the card by adhering the cake, elephants, and bold sentiment. 

Another birthday card ready to send!  Thank you for joining me and happy crafting!

Sunny Studio Supplies Used:

Make A Wish Stamps
Make A Wish Stamps
Shop at:
Sunny Studio
Make A Wish Dies
Make A Wish Dies
Shop at:
Sunny Studio
Frilly Frames-Eyelet Lace
Shop at:
Sunny Studio
Stitched Arch Dies
Stitched Arch Dies
Shop at:
Sunny Studio
Garden Fairy Stamps
Garden Fairy Stamps
Shop at:
Sunny Studio
Garden Fairy Dies
Garden Fairy Dies
Shop at:
Sunny Studio
Spring Greenery Dies
Shop at:
Sunny Studio
Baby Elephants Stamps
Shop at:
Sunny Studio
Baby Elephants Dies
Baby Elephants Dies
Shop at:
Sunny Studio
Big Bold Greetings Stamps
Shop at:
Sunny Studio
Big Bold Greetings Dies
Shop at:
Sunny Studio
Panda Party Stamps
Panda Party Stamps
Shop at:
Sunny Studio
Panda Party Dies
Panda Party Dies
Shop at:
Sunny Studio
Wonderful Windows Dies
Shop at:
Sunny Studio