Showing posts with label Stitched Scallop Dies. Show all posts

Wednesday, June 17, 2020

Summer Sweets Cards with Tammy and Ana

Hi there! Tammy here sharing this sweet card, featuring Summer Sweets from the newest releaseI am not a sweet eater (give me ALLL the savory), but I will be reaching for this set quite often, as I have a house full of people with a major sweet tooth!

Sunny Studio Stamps: Summer Sweets Stitched Scallop Dies Dessert Themed Birthday Card by Tammy Stark

To begin, I cut an A2 rectangle, using the Dots & Stripes Pastels Paper. Next, I cut a 2 1/2" strip of Bristol smooth cardstock and lightly ink blended the background with Peacock Feathers Distress Oxide ink. I added some water splatters and watered down Peacock Feathers ink with a fine paintbrush to add some interest. Using the Stitched Scallop DiesI cut 2 white borders, attached them behind my inked panel on the top and bottom, and attached it to the center of the polka dot paper.

Next, I stamped the images from Summer Sweets using Memento Tuxedo Black Inkcolored with Copic markers, and cut out with the coordinating Summer Sweets Dies.

Copic Colors used: Aqua: BG10, BG11, BG13; Pink: R81, R83, R85; Red: R22, R24, R29; Browns: E30, E31, E34, E59, E57, E55; Cream: YR30

Sunny Studio Stamps: Summer Sweets Stitched Scallop Dies Dessert Themed Birthday Card by Tammy Stark

I stamped the sentiment from Summer Sweets in black ink, then arranged the colored images onto my card, attaching with foam tape for dimension. To finish my card, I attached my card front to an A2 white card base.

Thanks so much for stopping by today! Have a wonderful day!!

-----------------------------------------------------

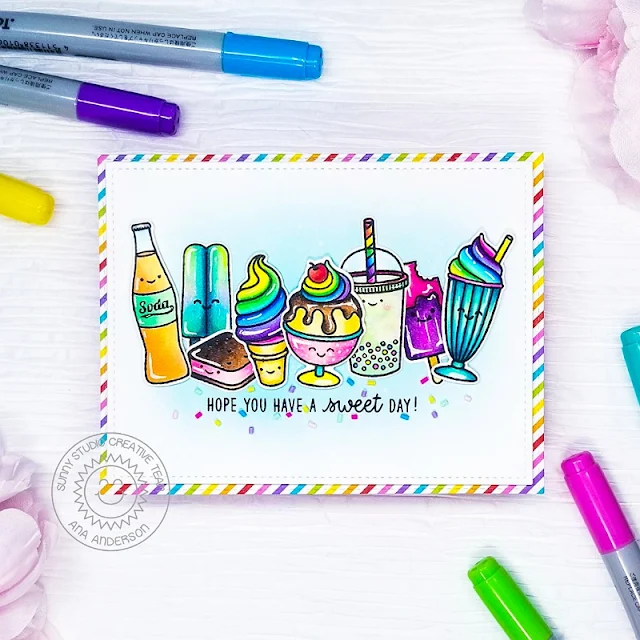
Hello crafty friends! It’s Ana here today sharing a delicious card featuring newly released Summer Sweets stamps and dies. For this yummy summer vibes card design, I decided to use all the images from the set! They were just too cute and I couldn’t bring myself to leave one behind!

Sunny Studio Stamps: Summer Sweets Frilly Frame Dies Dessert Themed Birthday Card by Ana Anderson

I stamped, colored the images with alcohol markers then stamped a little face on each one. I added some highlights with fine liners and white get pen, then cut them out with coordinating dies.

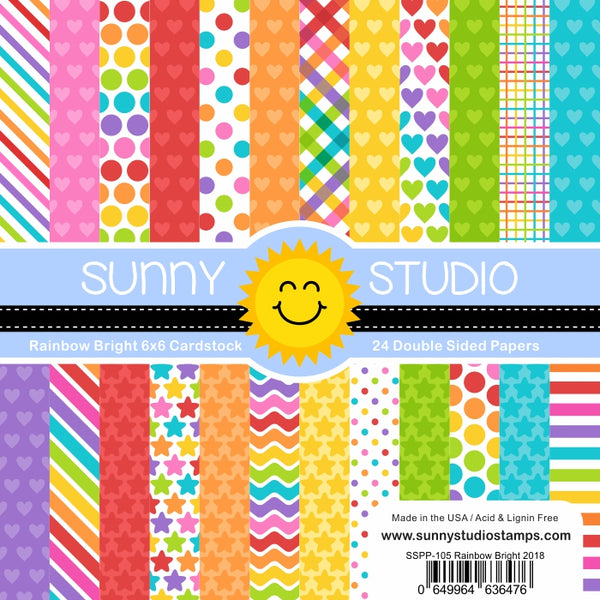
I used Frilly Frames Retro Petals outline die to die cut the background panel, then inked the center of the panel with Salty Ocean Distress ink. I backed the panel with rainbow striped patterned paper from Rainbow Bright paper pack. Next, I stamped the sentiment, from the Summer Sweets set, then adhered the images with liquid glue and foam tape.

Sunny Studio Stamps: Summer Sweets Frilly Frame Dies Dessert Themed Birthday Card by Ana Anderson

And just because this card is full of yummies, I added Ice Cream Chocolate Sprinkles around the sentiment! I thought it was the perfect touch to this array of Summer Sweets!

I hope you’ve enjoyed today’s post and got inspired. I will see you next week and until then I wish you happy crafting!

Sunny Studio Supplies Used:

Stitched Scallop Dies
Shop at:
Sunny Studio
Rainbow Bright 6x6 Paper
Shop at:
Sunny Studio
Dots & Stripes Pastels 6x6 Paper
Shop at:
Sunny Studio
Frilly Frames Retro Petals Dies
Shop at:
Sunny Studio
Summer Sweets Stamps
Shop at:
Sunny Studio
Summer Sweets Dies
Summer Sweets Dies
Shop at:
Sunny Studio

Monday, August 12, 2019

Elegant Leaves Cards by Leanne and Eloise

Hello everyone, Leanne here! Today we are showcasing a fall set that's packed with beautiful leaf images. I decided to try something other than my usual stamping in black ink and Copic coloring the images. I picked out few different colors of card stock from my stash and white heat embossed the leaf images instead. I kept the design simple to allow the leaves and fall colors to stand out.

Sunny Studio Stamps: Elegant Leaves Stitched Scallop Dies Autumn Themed Grateful Card by Leanne West

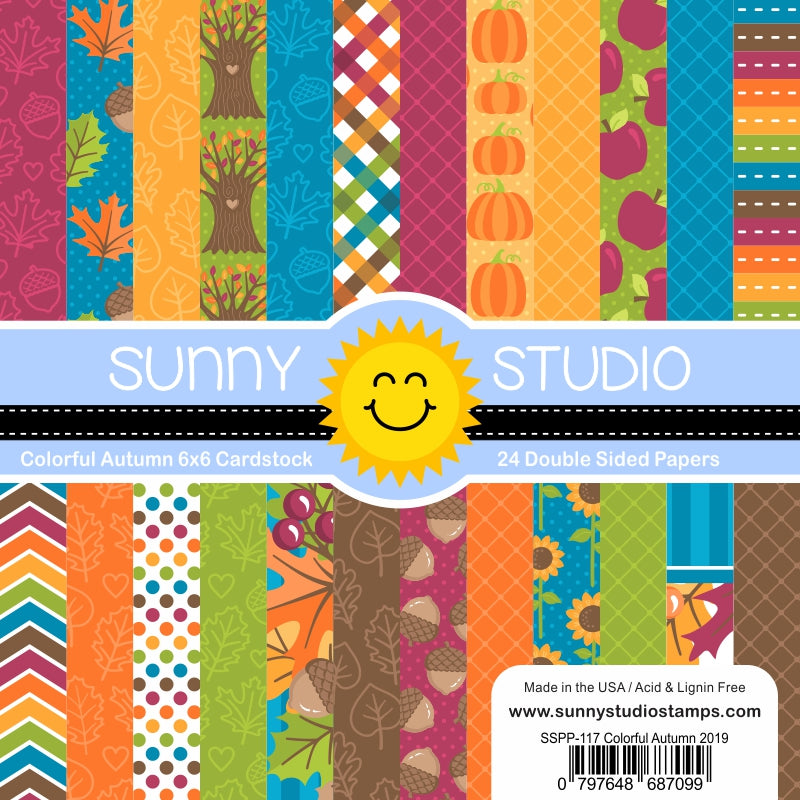
I chose card stock colors that coordinated with a rainbow stripe pattern from the Colorful Autumn Paper Pad. I stamped and white heat embossed several leaves from the Elegant Leaves set and then used the coordinating Elegant Leaves dies to cut them out. I took a white A2 size panel of card stock and die cut the bottom edge with a Stitched Scallop die. I arranged the leaves randomly across the panel. I stamped the greeting, also from the Elegant Leaves stamp set, right under the leaves with dark brown ink. Before adhering the panel to my card base, I tied some baker's twine around the bottom. 

Sunny Studio Stamps: Elegant Leaves Stitched Scallop Dies Autumn Themed Grateful Card by Leanne West

I adhered the strip of pattern paper to the bottom edge of the card front and layered the scalloped edge white panel overtop. I used foam tape to pop up the panel from the card base. Lastly I added some Nuvo Drops around the leaves. I used two different colors of Nuvo Crystal Drops - Copper Penny & Soft Mint.

--------------------------------------------------

Hello friends, Eloise here and today I have a card to share with you all using the Elegant Leaves Stamp Set.

Sunny Studio Stamps: Elegant Leaves Stitched Scallop Dies Autumn Themed Thankful Card by Eloise Blue

I started off with stamping out my leaf images from Elegant Leaves and coloured them in with Copic Markers. I then cut them out.

(Copic Markers Used: YR30, Y21, Y23, Y26 / YR21, YR23, YR24, YR27 / R14, R24, R27, R89 / YR00, YR02, YR12, YR18 / YG91, YG93, YG95, YG97 / YG61, YG63, YG67, G29 / 0)

Sunny Studio Stamps: Elegant Leaves Stitched Scallop Dies Autumn Themed Thankful Card by Eloise Blue

Next, I cut down a natural coloured card base and used the Colorful Autumn Patterned Paper and Stitched Scallop Dies to cut out a couple borders for the top and bottom of my card base. I adhered them down into place and then arranged my leaves onto the left side. That allowed me to stamp down my sentiment into place on the right. I then adhered down my cluster of leaves onto the left after my sentiment had been stamped.

Sunny Studio Stamps: Elegant Leaves Stitched Scallop Dies Autumn Themed Thankful Card by Eloise Blue

For an additional sentiment I white heat embossed ‘For All That You Do’ onto a strip of black cardstock and adhered it under the large ‘Thankful’ sentiment. I also adhered a few extra leaves underneath as well. Lastly, I tied a piece of hemp cord around my original leaves cluster and that finished off my card for today.

Thanks so much for stopping by today and I’ll see you next week. 

Sunny Studio Supplies Used:

Stitched Scallop Dies
Shop at:
Sunny Studio
Colorful Autumn 6x6 Paper
Shop at:
Sunny Studio
Elegant Leaves Stamps
Shop at:
Sunny Studio
Elegant Leaves Dies
Elegant Leaves Dies
Shop at:
Sunny Studio

Friday, July 19, 2019

Just Bee-Cause Cards with Rachel and Lexa

Hello everyone! It's Rachel here and I have a couple of cards to share with you today featuring the newly released Just Bee-cause Stamp Set.

Sunny Studio Stamps: Just Bee-cause Happy Harvest Window Trio Dies Frilly Frames Bee Themed Cards by Rachel Alvarado

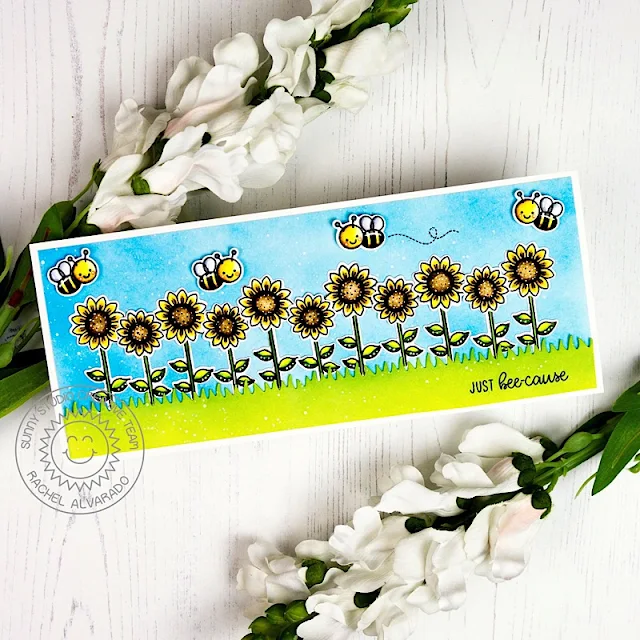
For my first card, I created a slimline card measuring at 8.5" x 3.5". I first blended the background with some Salty Ocean Distress Oxide Ink. I cut the long piece of grass from an 8.5" strip of smooth white card stock using the grass border die twice from the Sunny Sentiment Dies. I then blended this piece with both Twisted Citron and Mowed Lawn Distress Oxide Inks. 

The sweet little sunflowers came from the Happy Harvest Stamp Set. I stamped all of my images onto a sheet of Neenah Solar White 110lb Card Stock and colored them with Copics. I then used the coordinating Happy Harvest Die Set to cut them all out. Lastly, I added the bees from the Just Bee-cause Stamp Set with some 3D Foam Adhesive Squares.

Sunny Studio Stamps: Just Bee-cause Happy Harvest Window Trio Dies Frilly Frames Bee Themed Cards by Rachel Alvarado

For my second card, I created a fun shaker card combining the Just Bee-cause Stamp Set along with the newly released Frilly Frames Hexagon Die Set. I added some yellow polka dot patterned paper to the back of my card using the Polka Dot Parade 6x6 Paper Pack.

Sunny Studio Stamps: Just Bee-cause Happy Harvest Window Trio Dies Frilly Frames Bee Themed Cards by Rachel Alvarado

In order to create the shaker portion of my card and use each hexagon as an individual window, I die cut 5 of these frames and adhered them together with some liquid adhesive.

Sunny Studio Stamps: Just Bee-cause Happy Harvest Window Trio Dies Frilly Frames Bee Themed Cards by Rachel Alvarado

I then filled each window with both White and Gold Microbeads to try and resemble the color of honey. However, I think that mini sequins would add a nice, sparkly touch.

Sunny Studio Stamps: Just Bee-cause Happy Harvest Window Trio Dies Frilly Frames Bee Themed Cards by Rachel Alvarado

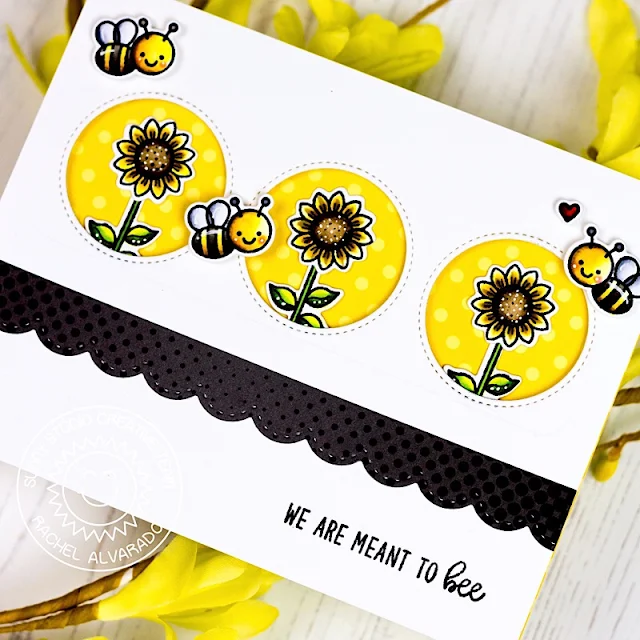
Lastly, I created a simple peek-a-boo window card using the Just Bee-cause Stamp Set along with the Window Trio Circle Dies. I added some more sunflowers from the Happy Harvest Stamp Set that I had laying around from my first card. For the black strip across the bottom portion of my card, I used the new Heroic Halftones Paper Pack and die cut a strip of it with the smaller of the Stitched Scallop Dies.

Thanks so much for taking the time to stop by! Have a lovely day!

------------------------------------------------------

Hi everyone! Lexa here today with a card that highlighting the brand new mini stamp set called Just Bee-Cause. It's an adorable 2x3 stamp set that will work out with other Sunny Studio older products, as I use on my project this time. I use Quilted Hexagon Stamps to create the background.

Sunny Studio Stamps: Just Bee-cause Quilted Hexagons Bee Themed Birthday Card by Lexa Levana

I stamped the images and color them with markers. Then use the coordinating dies to cut all of the cute little bees and beehive. I stamped the hexagons in yellow and orange with mixed patterns which I think look pretty together. The lines are stamped with dark brown dye ink.

Sunny Studio Stamps: Just Bee-cause Quilted Hexagons Bee Themed Birthday Card by Lexa Levana

After finished with the hexagons, I cut it to create the border then adhere it on a piece of burlap patterned paper. Instead of stamp the bee's trails, I use black twines to create them. It adds more texture and dimensions to the card. The sentiment is stamped with the same dark brown dye ink and I fussy cut it then adhere it with foam tapes. I finished my card with some beautiful yellow jewels from Pretty Pink Posh. 

Thank you so much for stopping by today. I hope you have an amazing day!

Sunny Studio Supplies Used:

Stitched Scallop Dies
Shop at:
Sunny Studio
Sunny Sentiments Dies
Shop at:
Sunny Studio
Quilted Hexagon Stamps
Shop at:
Sunny Studio
Window Trio- Circles Die
Shop at:
Sunny Studio
Polka-dot Parade 6x6 Paper
Shop at:
Sunny Studio
Happy Harvest Stamps
Shop at:
Sunny Studio
Happy Harvest Dies
Happy Harvest Dies
Shop at:
Sunny Studio
Heroic Halftones 6x6 Paper
Shop at:
Sunny Studio
Just Bee-cause Stamps
Shop at:
Sunny Studio
Just Bee-cause Dies
Just Bee-cause Dies
Shop at:
Sunny Studio
Frilly Frames Hexagon Dies
Shop at:
Sunny Studio

Saturday, February 23, 2019

Guest Designer Spotlight: Chubby Bunny Cards with Karin Akesdotter

Hi Everyone! Today it’s me, Karin Ã…kesdotter from Peppermint Patty’s Papercraft and I'm back to share some cards I've made with Sunny’s wonderful Spring Release. Focus today is on the adorable I'm back to share some more cards I've made with Sunny Studio's Spring Release. These Chubby Bunny are just the cutest for all your spring projects!


Sunny Studio Stamps: Chubby Bunny Frilly Frames Stitched Scallop Dies Easter And Spring Cards by Karin Akesdotter

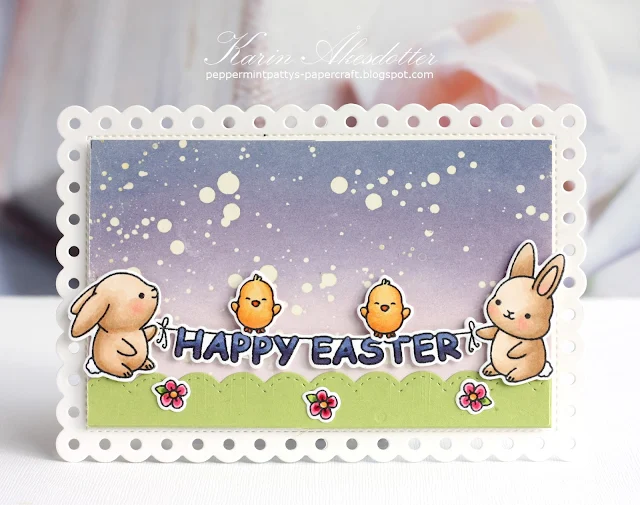
For my first card I started by spattering masking fluid to some off white cardstock before inking it to create a violet sky background. I then die cut grass using the lovely Stitched Scallop dies. I stamped by bunnies and colored them using Copic markers and then die cut them with the coordinating dies. I then cut the Frilly Frames Polka Dots dies from two ways to create a customized frame for the rectangle. The images are adhered with foam adhesive.

Sunny Studio Stamps: Chubby Bunny Frilly Frames Stitched Scallop Dies Easter And Spring Cards by Karin Akesdotter

This lovely CAS Springcard is fast and easy to make. I created the card panel background by embossing it with the fabulous Sunburst embossing folder. I die cut a stitched circle and inked it to create grass and sky. I adhered it to my panel  with foam adhesive before I I stamped Chubby Bunny and colored them using Copic markers and then die cut them with the coordinating diesLastly, I added a banner with a Hello Spring sentiment.  

Sunny Studio Stamps: Chubby Bunny Frilly Frames Stitched Scallop Dies Easter And Spring Cards by Karin Akesdotter

My last card is made by combining 3 favorites from this release: Chubby Bunny, Quilted Hearts embossing folder, and Frilly Frames Lattice dies. I just know that I will be using the Quilted Hearts embossing folder for many many projects in the future - it gives the best background texture!

Sunny Studio Supplies Used:

Stitched Scallop Dies
Shop at:
Sunny Studio
Quilted Hearts Embossing
Shop at:
Sunny Studio
Sunburst Embossing
Sunburst Embossing
Shop at:
Sunny Studio
Chubby Bunny Stamps
Chubby Bunny Stamps
Shop at:
Sunny Studio
Chubby Bunny Dies
Chubby Bunny Dies
Shop at:
Sunny Studio
Frilly Frames Lattice Dies
Shop at:
Sunny Studio
Frilly Frames Polka-Dot
Shop at:
Sunny Studio

Monday, February 11, 2019

Make A Wish Cards with Leanne and Eloise

Hi friends, Leanne here! I’m sharing a birthday card today featuring some fun patterned paper layers and the sweet cake image from Make a Wish

Sunny Studio Stamps: Make A Wish Stiched Oval Die Stitched Scallop Dies Happy Birthday Card by Leanne West

I wanted this card to be very feminine so I started by picking out a four different pink and purple colors of the stripe pattern from Dots & Stripes Pastels paper pack. I used one of the Stitched Scallop dies to create the decorative edge. I added a piece of ribbon and secured the ends to the back of the layered panel.

I then added the completed layered panel to an A2 card base. I cut out an oval with a die from the Stitched Oval dies to be the base for a birthday vignette in the center of my card. I stamped and Copic colored the cake and tiny stars from Make a Wish. I used the Make a Wish dies to cut them out. 

Sunny Studio Stamps: Make A Wish Stiched Oval Die Stitched Scallop Dies Happy Birthday Card by Leanne West

I used the Birthday Balloons to stamp three balloons. I stamped the balloon strings directly onto the oval and then added the images with adhesive foam squares. I left a space above the cake to stamp a sentiment which is also from Make a Wish. This very feminine birthday card would not be complete without a little bling and sparkle so I added some iridescent gems and glitter accents to the balloons and cake.  

---------------------------------------------------------

Hello friends, Eloise here and today I’ll be sharing a card using the Make A Wish stamp set. This set is super amazing, as it’s a small stamp set, the price point is great and it includes just enough images to make a card on its own, or it can easily pair with any stamp set it make a birthday themed card, it’s a great stamp to keep on hand at all times.

Sunny Studio Stamps: Make A Wish Sunburst Embossing Folder Happy Birthday Card by Eloise Blue

To start my card today I stamped out my images from Make A Wish and then also pulled in some balloons from Oceans of Joy. I coloured them in with Copic Markers and cut them out using the coordinating dies. For the strings of the balloons, I cut them out with my scissors since they don’t have a die. 

(Copic Markers Used: BV02, BV04, BV08 / RV13, RV25, RV19 / YR20, YR21, YR23 / Y11, Y18, YR15 / YG01, YG03, YG17 / C0, 0 / BG11, BG13, BG49 / Y11, Y13, Y17 / Y38, YR15, YR04)

Sunny Studio Stamps: Make A Wish Sunburst Embossing Folder Happy Birthday Card by Eloise Blue

While I had my die cutting machine out, I ran through the Sunburst Embossing Folder with some white cardstock. I then laid out all my images and stamped the sentiment ‘Make A Wish’ into the middle piece with black ink and stamped some stars around as well.

Sunny Studio Stamps: Make A Wish Sunburst Embossing Folder Happy Birthday Card by Eloise Blue

I then added foam tape onto all the backs of the images and adhered them into place where I had temporarily placed them before. I adhered the entire panel onto a card base and the card was complete.

Thanks so much for stopping by today and I’ll see you next time. 

Sunny Studio Supplies Used:

Oceans of Joy Dies
Oceans of Joy Dies
Shop at:
Sunny Studio
Oceans of Joy Stamps
Shop at:
Sunny Studio
Stitched Scallop Dies
Shop at:
Sunny Studio
Birthday Balloon Stamps
Shop at:
Sunny Studio
Birthday Balloon Die
Shop at:
Sunny Studio
Stitched Oval Dies
Stitched Oval Dies
Shop at:
Sunny Studio
Dots & Stripes Pastels 6x6 Paper
Shop at:
Sunny Studio
Sunburst Embossing
Sunburst Embossing
Shop at:
Sunny Studio
Make A Wish Stamps
Make A Wish Stamps
Shop at:
Sunny Studio
Make A Wish Dies
Make A Wish Dies
Shop at:
Sunny Studio