Showing posts with label Woolen Mitten Die. Show all posts

Sunday, December 22, 2024

Designer's Choice: Roly Poly Penguins Card with Hanh

Hello Crafty Friends! This is Hanh on the Sunny Studio Stamps blog today with another inspiration to share with you for the most adorable Roly Poly Penguin set. I just can't get enough of these cuties! 

Sunny Studio Stamps: Roly Poly Penguins Cards by Hanh Nguyen (featuring Woolen Mitten Dies, Dotted Diamond Dies, Stitched Rectangle Dies, Basic Mini Shape Dies)

I have a question ... how do you feel about that white border between the stamped image and where the dies cut? Some people prefer fussy cutting right up to the stamped line. Others prefer having that white border. Today, I decided to do something a little different and to use that white border to my advantage. I colored in that white border to represent the cookie part of my penguin-shaped frosted cookies!

Sunny Studio Stamps: Roly Poly Penguins Cards by Hanh Nguyen (featuring Woolen Mitten Dies, Dotted Diamond Dies, Stitched Rectangle Dies, Basic Mini Shape Dies)

I stamped the images from the Roly Poly Penguin stamp set onto a piece of Neenah Solar White 110 lb cardstock with Memento Tuxedo Black ink and used the coordinating Roly Poly Penguins Dies to die cut them out. I also created some snowflake cookies by using the Nested Circle Infinity Dies to die cut three 1.5" circles. I colored them with Copic markers and accented with a white gel pen. 

COPIC COLORS:
Penguins: T3/5/7, T0/1, Y38 YR04, R20
Red: R24/27
White: C0/1
Cookie: E53/55

Sunny Studio Stamps: Roly Poly Penguins Cards by Hanh Nguyen (featuring Woolen Mitten Dies, Dotted Diamond Dies, Stitched Rectangle Dies, Basic Mini Shape Dies)

For the snowflake cookies, I added some snowflakes die cut from white cardstock using the Woolen Mitten Dies set with liquid adhesive. I finished the cookie by adding silver gems onto the snowflakes for a bit of shine.

For the cookie box, I took a piece of pink cardstock and ran it through the die cut machine with the Dotted Diamond Portrait Die for some texture. I cut out a window in the center with the second largest die from the Stitched Rectangle Dies. I adhered a piece of clear acetate to the backside. I took a piece of white cardstock (4.25" x 5.5") and used the pink window panel as a guide to adhere the cookies to it. I adhered the penguins with some foam tape for a bit of dimension and interest. Once the cookies were where I wanted, I adhered the pink window panel with foam tape.

Sunny Studio Stamps: Roly Poly Penguins Cards by Hanh Nguyen (featuring Woolen Mitten Dies, Dotted Diamond Dies, Stitched Rectangle Dies, Basic Mini Shape Dies)

For the cookie box decorations, I created two small tags using one of the dies from the Sweet Treat Bag Dies. One die cut out of white cardstock and the other using a patterned paper from the Joyful Holiday Paper Pack. I stamped a sentiment using parts from the Penguin Party Stamps and Holiday Hugs Stamps with Versafine Satin Red ink. I tied a red ribbon onto the box and adhered the tags and some snowflakes die cut from white cardstock using the Basic Mini Shape Dies 2 and Woolen Mitten Dies sets with liquid adhesive. Finally, I adhered the cookie box to a white card base (4.25" x 5.5").

Sunny Studio Stamps: Roly Poly Penguins Cards by Hanh Nguyen (featuring Woolen Mitten Dies, Dotted Diamond Dies, Stitched Rectangle Dies, Basic Mini Shape Dies)

I appreciate you taking the time to stop by and visit today. I hope you liked my card. Be sure to check out the Sunny Studio Stamps Shop for more info and ideas. Please also visit my INSTAGRAM feed for more inspirations.

Have a wonderful and crafty day! Wishing you a very Merry Christmas!

Sunny Studio Supplies Used:

Stitched Rectangle Dies
Shop at:
Sunny Studio
Basic Mini Shape Dies 2
Shop at:
Sunny Studio
Sweet Treats Gift Bag
Shop at:
Sunny Studio
Penguin Party Stamps
Shop at:
Sunny Studio
Joyful Holiday Paper
Shop at:
Sunny Studio
Dotted Diamond Portrait
Shop at:
Sunny Studio
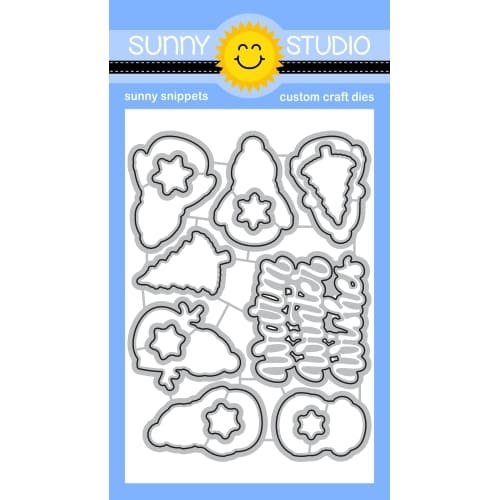
Woolen Mitten Dies
Woolen Mitten Dies
Shop at:
Sunny Studio
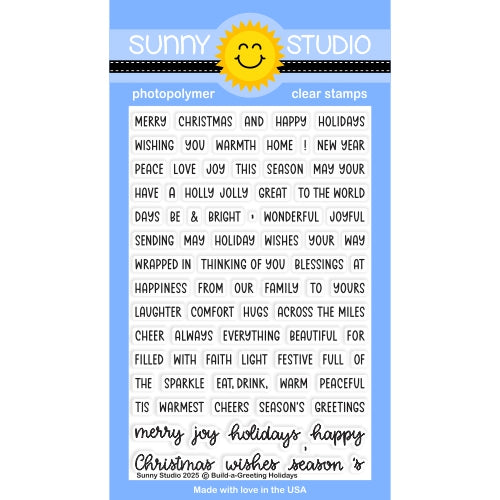
Holiday Hugs Stamps
Holiday Hugs Stamps
Shop at:
Sunny Studio
Roly Poly Penguin Stamps
Shop at:
Sunny Studio
Roly Poly Penguin Dies
Shop at:
Sunny Studio

Monday, December 16, 2024

Season's Greetings Holiday Gift Tags with Leanne

Hello friends! Leanne here and I'm sharing some Christmas tags today. I've combined some pretty holiday paper with a big Merry Christmas greeting for these festive tags. 

Sunny Studio Stamps: Seaon's Greetings Holiday Gift Tags by Leanne West (featuring Stitched Arch Dies, Woolen Mitten Dies, Brilliant Banner Dies, Inside Greetings Seasons)

Below are all the Sunny Studio supplies needed to recreate these tags.

Joyful Holiday paper pad - Patterned paper used for tag base.

Stitched Arch dies - I used the largest die in the set to cut out the tag base. I then punched a whole at the top with 1/4" paper punch. 

Season's Greetings stamp set companion dies - For the large Merry Christmas. The pink ones have been stamped with Catherine Pooler Party Dress ink. The red is CP Rouge ink. 

Woolen Mitten dies - For the holly leaves. 

Brilliant Banner 3 die - For the white banner I stamped to/from on.

Inside Greetings Seasons stamp set - For the to & from.

Sunny Studio Stamps: Seaon's Greetings Holiday Gift Tags by Leanne West (featuring Stitched Arch Dies, Woolen Mitten Dies, Brilliant Banner Dies, Inside Greetings Seasons)

To make the tags extra special, I added a little clay peppermint piece to the holly leaves and tied a jingle bell to the ribbon. The finished tag with ribbon measures 6 inches tall and 4 inches wide. 

One time saving tip I wanted to pass along...  when you need many of the stamped and die cut Merry Christmas words, die cut several blanks first with the companion die. Then use the negative die cut in a Misti to line up the stamp in that negative space. Close the Misti lid to pick up the stamp and place a blank die cut Merry Christmas piece into that opening. Stamp as you normally would, repeating the process with all the blanks. 

Sunny Studio Supplies Used:

Season's Greetings Stamps
Shop at:
Sunny Studio
Season's Greetings Dies
Shop at:
Sunny Studio
Stitched Arch Dies
Stitched Arch Dies
Shop at:
Sunny Studio
Joyful Holiday Paper
Shop at:
Sunny Studio
Woolen Mitten Dies
Woolen Mitten Dies
Shop at:
Sunny Studio
Inside Greetings Seasons
Shop at:
Sunny Studio
Brilliant Banner 3 Dies
Shop at:
Sunny Studio

Wednesday, December 4, 2024

Inside Greetings Seasons Card with Tina

Hi crafty friends, I am Tina and today I made another fun shaped card! Since the holiday season is approaching quickly, I opted for a festive sparkly mitten combined with a great sentiment set the Inside Greetings Seasons stamp.

Sunny Studio Stamps: Woolen Mitten Die & Inside Greetings: Seasons Holiday Card by Tina Henkens (featuring Circle Snowflake Frame Dies)

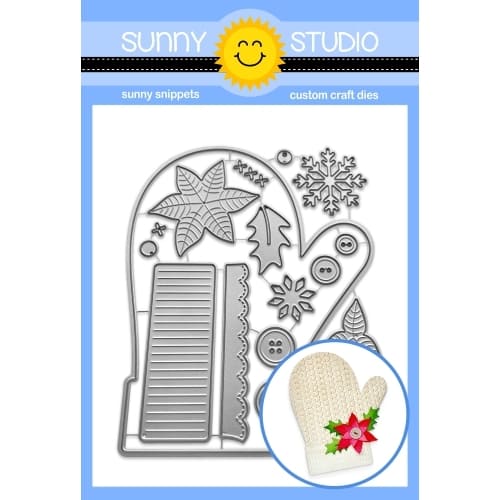
I started this project by creating a white card base using the large die from the Woolen Mitten set. After layering this base with the same shape cut from a red/pink knitted paper (Sweater Weather), I created the cuff from a matching striped paper (Joyful Holiday). These two patterns work so well together!

This card is a festive card, you must add some sparkle and shine! I browsed through my stash and found a pretty pink glitter paper for the trim (Woolen Mitten set).

The same paper was used to make three large snowflakes. From some scrap white paper I created extra trim, a button (Woolen Mitten set) and 3 smaller snowflakes (Snowflake Circle Frame die). That die is such a staple piece in my Christmas crafting supplies! I layered the small snowflakes on top of the large ones.

Sunny Studio Stamps: Woolen Mitten Die & Inside Greetings: Seasons Holiday Card by Tina Henkens (featuring Circle Snowflake Frame Dies)

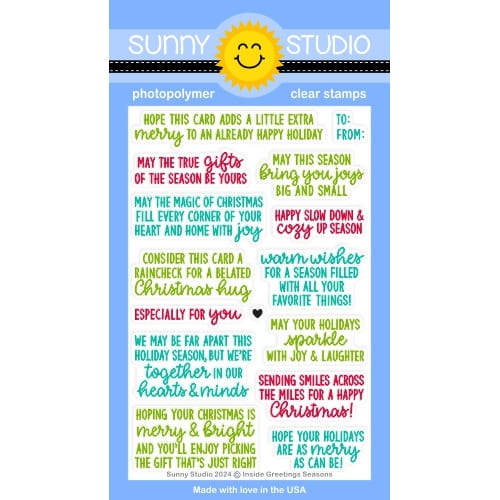
The sentiment was selected from the Inside Greetings Seasons stamp set and stamped with a pink ink from my stash. This phrase comes as one stamp, so I did a little ‘stamp surgery’ and carefully cut between to the two lines. That doesn’t hurt your stamp and you can always use it put together again on a block or in your stamping tool. I tried masking first but that didn’t work as I didn’t get a good impression.

Now it is time to assemble the mitten starting with the cuff and trim pieces. Next, I placed the large snowflakes in a triangle shape with the two sentiment strips in between. I threaded some pink twine through the buttonholes and glued the button to the trim border. A few Pure White Jewels were added to the middle of each snowflake.  

Thank you for visiting the blog and I can’t wait to see your festive cards! Happy crafting!

Sunny Studio Supplies Used:

Snowflake Circle Frame
Shop at:
Sunny Studio
Sweater Weather Paper
Shop at:
Sunny Studio
Joyful Holiday Paper
Shop at:
Sunny Studio
Woolen Mitten Dies
Woolen Mitten Dies
Shop at:
Sunny Studio
Inside Greetings Seasons
Shop at:
Sunny Studio

Friday, November 15, 2024

Inside Greetings Seasons Card with Nicky

Hello, this is Nicky back with you today on the Sunny Studio Stamps blog. I have a fun new card to share with you today that features the Inside Greetings Seasons stamp set. Please read on for the details.

Sunny Studio Stamps: Inside Greetings Seasons Holiday Card by Nicky Meeks (featuring Woolen Mitten Dies)

To create this card I first die cut the Woolen Mitten Die 3 times. Twice from a pale pink cardstock from my stash and once in white. I used the Cable Knit Embossing Folder on one pink panel to give it the dimensional knit pattern and then I came in with a little Blush Pink Ink from The Stamp Market around the edges. I backed this knitted panel with the other pink panel, glueing the two together just so that it would feel more robust because I like to build my cards sturdy.

I formed the rest of the card including the cuff and the decorative poinsettia with its holly leaves, bow and button. These elements are included with the Woolen Mitten Die. The poinsettia and leaves started as green and red cardstock of course but I came in with Lipstick Red and Forest inks by The Stamp Market to add interest.

Sunny Studio Stamps: Inside Greetings Seasons Holiday Card by Nicky Meeks (featuring Woolen Mitten Dies)

I used the snowflake included in the Woolen Mitten Die set and die cut several white snowflakes which I adhered to the mitten and then trimmed up the edges where there was overhang.

It was now time to form the card base. I determined how the card could stand up and then scored that line for the fold on the white woolen mitten panel I had die cut earlier. I used ScorPal tape above the 'hinge' for a nice strong connection between the card's front and back.

Sunny Studio Stamps: Inside Greetings Seasons Holiday Card by Nicky Meeks (featuring Woolen Mitten Dies)

I then opened up the card and used my chosen sentiment from Inside Greetings Seasons and stamped it using the same Lipstick Red ink described above and as you'll have noticed from the first two photos, this card happily stands up! Points were highlighted with a white gel pen and then this project was done.  

Thank you for stopping by, I'll be back next Friday with something new.

Sunny Studio Supplies Used:

Cable Knit Embossing
Shop at:
Sunny Studio
Woolen Mitten Dies
Woolen Mitten Dies
Shop at:
Sunny Studio
Inside Greetings Seasons
Shop at:
Sunny Studio

Sunday, November 3, 2024

Straight Stripes Stencil Focused Card with Hanh

Hello Crafty Friends! This is Hanh on the Sunny Studio Stamps blog today sharing a sweet Christmas card featuring the Diagonal & Straight Stripes Stencils. I used the stencil to create a bold holiday background for my penguin tag. 

Sunny Studio Stamps: Straight Stripes Stencil Focused Roly Poly Penguins Holiday Card by Hanh Nguyen (featuring Scalloped Tag Square Dies, Woolen Mitten Dies, Holiday Greetings)

For the background, I took a piece of Neenah Solar White 110 lb cardstock (4.25" x 5.5") and used the Diagonal & Straight Stripes Stencils with some Candied Apple Distress ink to create a striped pattern. Once the ink was dried, I shifted the stencil slightly a half of a stripe's width to the right. To create the peppermint pattern, I used the stencil as a guide to draw in thin stripes in between the red stripes with a green Ultra Fine Sharpie marker. I loved how I was able to create my own festive patterned paper. I trimmed the panel down to 4" x 5.25" to eliminate any messy edges.

I used the larger die from the Scallop Tag Square Dies to diecut the tag out of the Neenah Solar White cardstock. I masked off the scalloped edges of the tag die and lightly inked the edges with Mowed Lawn Distress Oxide ink. 

Sunny Studio Stamps: Straight Stripes Stencil Focused Roly Poly Penguins Holiday Card by Hanh Nguyen (featuring Scalloped Tag Square Dies, Woolen Mitten Dies, Holiday Greetings)

The Woolen Mitten Die Set was used to diecut some holly leaves and berries out of green and red cardstock.

I stamped the penguin from the Roly Poly Penguins Stamp set onto a piece of Neenah Solar White 110 lb cardstock with Memento Tuxedo Black ink and used the coordinating Roly Poly Penguins Dies to it out. I colored him with Copic markers and accented with a white gel pen.

COPIC COLORS:
Penguins: T3/5/7/9, W00/0, Y38 YR04, R00/20
Red: R22/24/27/29/39
White: C00/1/3

Sunny Studio Stamps: Straight Stripes Stencil Focused Roly Poly Penguins Holiday Card by Hanh Nguyen (featuring Scalloped Tag Square Dies, Woolen Mitten Dies, Holiday Greetings)

For the sentiment, I stamped the Merry Christmas sentiment from the Holiday Greetings Stamps set with Versamark Watermark ink onto a piece of black cardstock and heat embossed with Detail White Embossing Powder. I used the coordinating Holiday Greetings Dies to diecut it out.

I adhered all of the holly, sentiment and penguin to the tag with a combo of liquid adhesive and foam tape for a bit of dimension. I used a white gel pen to add highlights to the elements. The striped panel was adhered to a top folding white cardbase (4.25" x 5.5"). I adhered the tag  onto the card front with foam tape.

I appreciate you taking the time to stop by and visit today. I hope you liked my card. Be sure to check out the Sunny Studio Stamps Shop for more info and ideas. Please also visit my INSTAGRAM feed for more inspirations.

Have a wonderful and crafty day!

Sunny Studio Supplies Used:

Scalloped Tags-Square
Shop at:
Sunny Studio
Holiday Greetings Stamps
Shop at:
Sunny Studio
Holiday Greetings Dies
Shop at:
Sunny Studio
Woolen Mitten Dies
Woolen Mitten Dies
Shop at:
Sunny Studio
Roly Poly Penguin Stamps
Shop at:
Sunny Studio
Roly Poly Penguin Dies
Shop at:
Sunny Studio
Diagonal & Straight Stripes Stencils
Shop at:
Sunny Studio

Tuesday, October 29, 2024

Buffalo Plaid Die Focused Card with Leanne

Hi friends! Leanne here and I have a unique holiday card to share today. It's a mitten shaped card and it's so easy to make with the Woolen Mitten dies plus Buffalo Plaid Straight die

Sunny Studio Stamps: Buffalo Plaid Die Focused Winter Themed Card by Leanne West (featuring Woolen Mitten Dies, Inside Greetings, Diagonal Stencils)

To create the mitten shaped card base, I die cut two of the mitten - one for the front and one for the back. I then used the Buffalo Plaid Straight die to add the fun check texture to one of the mittens (this will be the card front). To add color to my plaid mitten, I used the Straight Stripes Stencil with Catherine Pooler It's a Girl ink. 

I then decorated the mitten front using all the dies included in the Woolen Mitten set (poinsettia, leaves, cuff, buttons). After I had the mitten front decorated, I splattered with thinned white paint.

Sunny Studio Stamps: Buffalo Plaid Die Focused Winter Themed Card by Leanne West (featuring Woolen Mitten Dies, Inside Greetings, Diagonal Stencils)

On the back mitten piece, I scored a line towards the top of the mitten. I adhered the back to the front by applying the glue only above the score line. This creates a hinged card as you can see in the photo below. I recommend stamping the inside sentiment before adhering the back to the front. It's much easier before it's attached to the front especially with the dimensional decoration on the front. 

Sunny Studio Stamps: Buffalo Plaid Die Focused Winter Themed Card by Leanne West (featuring Woolen Mitten Dies, Inside Greetings, Diagonal Stencils)

For the outside and inside sentiments, I used the Inside Greetings Seasons stamps.  

Sunny Studio Supplies Used:    

Woolen Mitten Dies
Woolen Mitten Dies
Shop at:
Sunny Studio
Inside Greetings Seasons
Shop at:
Sunny Studio
Buffalo Plaid Straight Die
Shop at:
Sunny Studio
Diagonal & Straight Stripes Stencils
Shop at:
Sunny Studio