Showing posts with label Penguin Pair. Show all posts

Tuesday, October 27, 2026

Happy Owlidays Card with Marieke

Hello all, Marieke here. I'm back again with my weekly post for Sunny Studio Stamps. Today I hope to inspire you with a card that I made using the Happy Owlidays.

Sunny Studio Stamps: Happy Owlidays Christmas Card by Marieke Slaats (featuring Penguin Pair)

Cut a top fold white base card, cut a slightly smaller blue rectangle and added some hearts using a stencil and some white paste, let it dry while I started coloring the images.

Sunny Studio Stamps: Happy Owlidays Christmas Card by Marieke Slaats (featuring Penguin Pair)

Stamped all the images out of the Happy Owlidays and Penguin Pair. Changed the hearts into Christmas ornaments. Colored them up using my Copic markers and cut them using my scissors.

Used Copic Colors:
Green - YG67, YG63, YG03
Red - R59, R29, R27, R24
Owl - E57, E55, E53, E51, E50, 0 / YR27, YR23
White - W3, W1, W00, 0
Antlers - E47, E44, E42

Sunny Studio Stamps: Happy Owlidays Christmas Card by Marieke Slaats (featuring Penguin Pair)

Added all the elements onto the card. Heat embossed the sentiment on some red cardstock and trimmed it down to a banner. Finished the card by adding some glitter and some glossy accents.

Have a wonderful day!

Sunny Studio Supplies Used:

Happy Owlidays Stamps
Shop at:
Sunny Studio
Happy Owlidays Dies
Happy Owlidays Dies
Shop at:
Sunny Studio
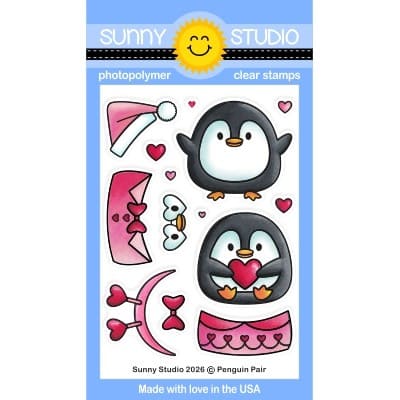
Penguin Pair Stamps
Penguin Pair Stamps
Shop at:
Sunny Studio
Penguin Pair Dies
Penguin Pair Dies
Shop at:
Sunny Studio

Sunday, October 25, 2026

Ribbon & Lace Border Die Focused Card with Hanh

Hello Crafty Friends! It's Hanh here with you today and I am sharing a fun slimline Christmas card featuring these adorable stack of penguins from the Roly Poly Penguins and Penguin Pair sets created using the Ribbons & Lace Borders Dies. I love that these border dies are super long and allowed me to custom create a slim and extra tall card. This wonky stack of penguins was super tall and needed the extra length. 

Sunny Studio Stamps: Ribbon & Lace Border Die Focused Christmas Card by Hanh Nguyen (featuring Roly Poly Penguins, Penguin Pair, Slimline Dies)

I stamped the images from the Roly Poly Penguins Stamp and Penguin Pair Stamp set onto a piece of Neenah Solar White 110 lb cardstock with Memento Tuxedo Black ink and used the coordinating Roly Poly Penguin Dies and Penguin Pair Dies to die cut them out. I colored them with Copic markers and highlighted with a white gel pen.

COPIC COLORS:
Penguins: T1/3/4/5/7, W00/0/1, Y38 YR04, R20
Pink: RV10/21/13/14
Red: R22/24
White: C00/1/3
Silver: C1/3

Sunny Studio Stamps: Ribbon & Lace Border Die Focused Christmas Card by Hanh Nguyen (featuring Roly Poly Penguins, Penguin Pair, Slimline Dies)

For the background, I ink blended a piece of Bristol Smooth cardstock with Spun Sugar and Kitsch Flamingo Distress Oxide inks. I used the Slimline Nature Borders Dies to trim a little snow bank out of Neenah Solar White cardstock.

Sunny Studio Stamps: Ribbon & Lace Border Die Focused Christmas Card by Hanh Nguyen (featuring Roly Poly Penguins, Penguin Pair, Slimline Dies)

For the sentiment, I stamped the “Hope your holiday is fun & festive” from the Penguin Party Stamp set with Memento Tuxedo Black ink and Picked Raspberry Distress Oxide ink directly onto the snow bank.

I adhered the snow bank to the inked panel. The Ribbon & Lace Borders Dies was used to create the faux stitched border on the long slimline panel for a nice finished look. The final panel measured 3” x 8.5”. 

Sunny Studio Stamps: Ribbon & Lace Border Die Focused Christmas Card by Hanh Nguyen (featuring Roly Poly Penguins, Penguin Pair, Slimline Dies)

I adhered all of the colored images to the panel with liquid glue. Finally, I adhered the panel to a white slimline card base (3.75” x 8.5”). I finished the card with a few white snowflakes die cut using the Basic Mini Shapes Dies 5.

I appreciate you taking the time to stop by and visit today. I hope you liked my card. Be sure to check out the Sunny Studio Stamps Shop for more info and ideas. Please also visit my INSTAGRAM feed for more inspirations.

Have a wonderful and crafty day!

Slimline Nature Borders
Shop at:
Sunny Studio
Penguin Party Stamps
Shop at:
Sunny Studio
Ribbon & Lace Dies
Ribbon & Lace Dies
Shop at:
Sunny Studio
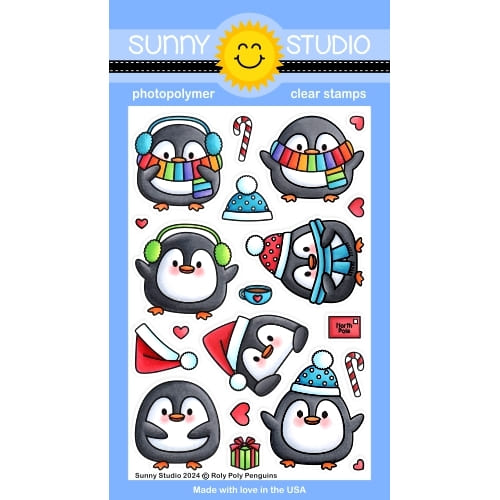
Roly Poly Penguin Stamps
Shop at:
Sunny Studio
Roly Poly Penguin Dies
Shop at:
Sunny Studio
Basic Mini Shape Dies 5
Shop at:
Sunny Studio
Penguin Pair Stamps
Penguin Pair Stamps
Shop at:
Sunny Studio
Penguin Pair Dies
Penguin Pair Dies
Shop at:
Sunny Studio

Thursday, October 15, 2026

Holiday Style Card with Yan

Hey crafty friends! It's Yan here, and today I'm sharing a super cheerful Christmas card that is packed with holiday magic! This project was so much fun to make, and I'd love to share my process with you. Let's craft together!  

Sunny Studio Stamps: Holiday Style & Penguin Pair Christmas Card by Yan X DIY (featuring Loopy Rectangle Frame Dies)

​To kick things off, I stamped the adorable penguin and Santa hat from the Penguin Pair Stamps onto Neenah Solar White cardstock using Memento Tuxedo Black Ink. Coloring is always my favorite part! I brought them to life using Copic markers before die-cutting them flawlessly with the matching dies.  

COPIC COLORS:
Penguin: E30, E31, E41, R30, W1, W5, W7, Y02, Y15
Santa Hat: R32, R43, R46, W1

​Next, I wanted a soft, dreamy look for the ornaments. On another piece of white cardstock, I stamped a cluster of Christmas balls from the Holiday Style Stamps set using soft pink, pale yellow, and light blue inks. Then, I die-cut every single ornament cleanly with the coordinating dies.  

For the cozy background, I trimmed a piece of classic red gingham paper from the Joyful Holiday 6x6 Paper Pad. I love how that pattern instantly adds a warm holiday feel!  

Sunny Studio Stamps: Holiday Style & Penguin Pair Christmas Card by Yan X DIY (featuring Loopy Rectangle Frame Dies)

​For the sentiment, I die-cut a label frame from white cardstock using the Loopy Rectangle Frame Dies. I stamped the "Believe in the magic of Christmas" text in black, adding pine branches and berries from the Holiday Greetings Stamps set around it for a sweet framed effect.  

​Finally, I assembled everything together! I popped the penguin and pastel ornaments onto the card using foam tape. I love using foam tape to build fun dimension—it makes the whole scene feel like the penguin is joyfully tossing ornaments into the air!  

And there you have it—a bright, whimsical card guaranteed to bring a big smile. Happy crafting, everyone! 

Sunny Studio Supplies Used:

Holiday Style Dies
Holiday Style Dies
Shop at:
Sunny Studio
Holiday Style Stamps
Shop at:
Sunny Studio
Holiday Greetings Stamps
Shop at:
Sunny Studio
Joyful Holiday Paper
Shop at:
Sunny Studio
Penguin Pair Stamps
Penguin Pair Stamps
Shop at:
Sunny Studio
Penguin Pair Dies
Penguin Pair Dies
Shop at:
Sunny Studio
Loopy Rectangle Frame Dies
Shop at:
Sunny Studio

Sunday, October 4, 2026

Mini Mat & Tag 2 Card with Hanh

Hello Crafty Friends! It's Hanh here with you today, and I am sharing a fun Christmas card featuring these adorable penguins from the Roly Poly Penguins and Penguin Pair set on a Mini Mat & Tag 2 die-cut.  

Sunny Studio Stamps: Mini Mat & Tag Die Focused Christmas Card by Hanh Nguyen (featuring Roly Poly Penguins, Penguin Pair, Build-A-Greeting Holidays, Basic Mini Shape Dies)

I stamped the images from the Roly Poly Penguins Stamp and Penguin Pair Stamp set onto Neenah Solar White 110 lb cardstock with Memento Tuxedo Black ink, then used the coordinating Roly Poly Penguin Dies and Penguin Pair Dies to die-cut them. I colored them with Copic markers and highlighted them with a white gel pen.

COPIC COLORS:
Penguins: T3/4/5/7, W00/0/1, Y38 YR04, R20
Red: R14/24/29/39
White: C00/1/3

Sunny Studio Stamps: Mini Mat & Tag Die Focused Christmas Card by Hanh Nguyen (featuring Roly Poly Penguins, Penguin Pair, Build-A-Greeting Holidays, Basic Mini Shape Dies)

For the layout, I used the Woolen Mitten Dies and Basic Mini Shapes Dies 5 to die-cut some white snowflakes. I adhered the snowflakes to pink cardstock. Next, I used the Mini Mat & Tag 2 Dies to die-cut a mat out of white cardstock. I masked off the scalloped edges and lightly ink-blended with Saltwater Taffy Distress Oxide ink. 

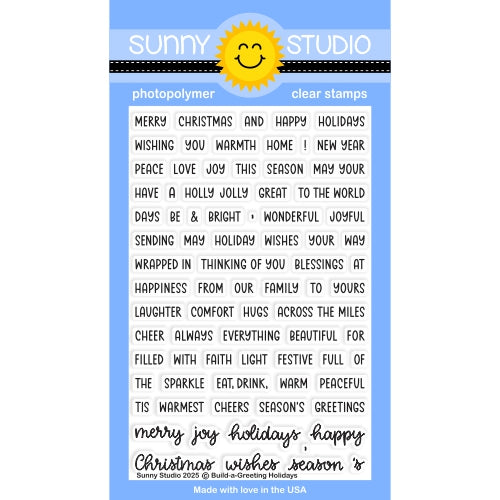
For the sentiment, I stamped the “Merry Christmas” from the Build-a-Greeting Holidays Stamp set with Versafine Satin Red ink directly onto the Mini Mat panel. 

Sunny Studio Stamps: Mini Mat & Tag Die Focused Christmas Card by Hanh Nguyen (featuring Roly Poly Penguins, Penguin Pair, Build-A-Greeting Holidays, Basic Mini Shape Dies)

I adhered a piece of craft foam to the back of the Mini Mat panel before adhering it to the pink panel with snowflakes. I trimmed off the bottom part of a couple of the penguins before adhering them to the Mini Mat panel. Finally, I adhered the pink panel to a white A2 card base (4.25” x 5.5”).

Thank you for taking the time to stop by and visit today. I hope you liked my card. Be sure to check out the Sunny Studio Stamps Shop for more info and ideas. Please also visit my INSTAGRAM feed for more inspiration. Have a wonderful and crafty day!

Also, in honor of National Cardmaking Day, you can save 20% with our affiliate partners at Glassboard Studio through October 7th using the discount code SUNNYSTUDIO at checkout (our discount code reduces back to 15% off after this week's promotion). They have so many fabulous products, including cool new magnetic ink trays for all the popular ink brands on the market. Their original magnetic glass mats remain one of my most beloved craft purchases, ever.

Sunny Studio Supplies Used:

Mini Mat & Tag 2 Dies
Shop at:
Sunny Studio
Woolen Mitten Dies
Woolen Mitten Dies
Shop at:
Sunny Studio
Roly Poly Penguin Stamps
Shop at:
Sunny Studio
Roly Poly Penguin Dies
Shop at:
Sunny Studio
Build-a-Greeting Holidays
Shop at:
Sunny Studio
Penguin Pair Stamps
Penguin Pair Stamps
Shop at:
Sunny Studio
Penguin Pair Dies
Penguin Pair Dies
Shop at:
Sunny Studio
Basic Mini Shape Dies 5
Shop at:
Sunny Studio

Monday, July 20, 2026

Scrumptious Cupcakes Card with Tina M

Hi there! Tina M here! Today I have another fun rainbow card for you using the Scrumptious Cupcakes Stamps set!

Sunny Studio Stamps: Scrumptious Cupcakes Birthday Card by Tina Magnusson (featuring Big Bold Greetings, Penquin Pair)

I started off by trimming a piece of the sprinkle patterned paper from the Surprise Party Paper pack to 4,25 x 5,5 inches to cover my A2 size card base. I then trimmed a piece of white card stock to 3,75 x 5 inches, and ink blended it in rainbow colors using pink, orange, yellow, green and turquoise ink. Next, I trimmed a slightly larger black panel to go behind my ink blended panel and adhered them to the card base, using double sided tape.

I then stamped the cupcakes and cherries from the Scrumptious Cupcakes Stamps using pink, yellow and turquoise/blue inks, and I stamped the penguins from the Penguin Pair Stamps on alcohol ink friendly card stock using Memento Tuxedo black ink and colored them with my Copic Markers, see list below.

Copic colors used:
Penguins: N3/4/5/6, W0/1/2, R30/32, YR21/24/27

Sunny Studio Stamps: Scrumptious Cupcakes Birthday Card by Tina Magnusson (featuring Big Bold Greetings, Penquin Pair)

I then die cut out the cupcakes and cherries using the coordinating Scrumptious Cupcakes Dies and the penguins using the coordinating Penguin Pair Dies. After assembling the cupcake parts and the cherries I added foam dots to the back of the cupcakes and penguins for dimension and adhered them to the card.

I stamped the Make A Wish from the Big Bold Greetings Stamps set with Memento Tuxedo black ink and die cut it out using the coordinate Big Bold Greetings Dies. I adhered the sentiment to the card using both foam dots and liquid glue. To finish the card off I added some rainbow-colored bling from my stash!

Thank you for stopping by! Wishing you a happy and colorful day!

Sunny Studio Supplies Used:

Surprise Party 6x6 Paper
Shop at:
Sunny Studio
Big Bold Greetings Stamps
Shop at:
Sunny Studio
Big Bold Greetings Dies
Shop at:
Sunny Studio
Scrumptious Cupcakes Stamps
Shop at:
Sunny Studio
Scrumptious Cupcakes Dies
Shop at:
Sunny Studio
Penguin Pair Stamps
Penguin Pair Stamps
Shop at:
Sunny Studio
Penguin Pair Dies
Penguin Pair Dies
Shop at:
Sunny Studio

Saturday, May 16, 2026

Guest Designer Spotlight: Cards with Sara Zoppi

Hi crafty friends, Sara here, guesting for the newest Sunny Studio Design collection! Today I have two inspiration cards to show you, and I really hope you will like them. So, let's dive into the first card!

Sunny Studio Stamps: Sweet As Can Bee & Holiday Hugs Card with Sara Zoppi

As soon as I saw the newest Sweet as Can Bee Stamp set, I knew I would have paired it with one of my favourite ever Sunny Stamp, the Holiday Hugs Stamp - the big bear is just the perfect match to these adorable small bees. The only "problem" is that it is a winter version of the bear, but let's see how we can easily solve it.

I firstly stamped all the images from the new set with Memento Black ink on some Neenah Classic Crest Solar White cardstock, then I took a stamping tool and I carefully inked the big bear, paying attention not to ink the scarf. Aster stamping his head, arms and body, I filled the empty spaces with some Copic friendly fine liner. Then I used the Copics listed below to color the images. I also added the red check details on the honey Jar using a red pencil  and then I die cut everything out. 

Sunny Studio Stamps: Sweet As Can Bee & Holiday Hugs Card with Sara Zoppi

- Bear: W10 – W9 – W8 – W7 – W6 – E55 – E53
- Bees: YR23 – YR35 – YR31 – Y11 – W9 – W7 – W6 – R20
- Honey Jar: E97 – YR23 – YR35 – YR31 – Y11 – E71 – E70 – E41 – R89 – R46 – R14 – R20


I then moved into the background. I used the hexagon stamp included in the newest set to create a pattern background, using three different yellow ink which perfectly match to my color palette. I didn't fill all the background, but I tried to leave empty spaces (especially where I planned to have the sentiment of the card). The background hexagon panel measures 3.75"x5".

Sunny Studio Stamps: Sweet As Can Bee & Holiday Hugs Card with Sara Zoppi

For the sentiment, I die cut the word BEE from the Chloe Alphabet Dies using a gold sparkly cardstock and a black one of the shaded effect behind, the HAPPY script from the Blooming Frame Die and I white heat embossed the small phrased on some yellow ochre cardstock.

I arranged all the images and words on the background panel and I glued them down (or attached using foam tape to get dimension. To complete the card, I matted the scene with a slightly larger brown sparkly cardstock and then with an A2 white panel. And here's the finished result!

Sunny Studio Stamps: The Graduate & Penguin Pair Card with Sara Zoppi

For my second inspiration, I went for a simple one-layer coloring on some colored cardstock. When I have simpler scenes in my mind, I usually love using colored cardstock as my panel, so that I have a colored cardstock. Here I went for a peachy/apricot color.

I love big sentiments and The Graduate Stamps has also a variety of hats and paper rolls to transform almost all the critters of the previous collections into some graduate critters!
 
So, I firstly chose to feature the adorable penguin from Penguin Pair Stamps and I carefully stamped him and his hat and laurea tube. I had to do a small masking with Judikins Masking paper. I then hand drew a pile of three books under him and just a few leaves and flowers.
I colored everything with the Copics listed below.

Sunny Studio Stamps: The Graduate & Penguin Pair Card with Sara Zoppi

- Penguin: W10 – W8 – W7 – W6 – E42 – E40 – E97 – YR23
- Hat: N10 – N8 – N7 – N5
- Red combo: R89 – R46 – RV25
- Flower centre: YR23 (for the white petals I used Copic Opaque white)
- Leaves: YG95 (for the stems I used a coordinate Polychromos pencil)
- Books: R22 – R21 – E97  (for the shades, I used coordinated Polychromos pencils)

I then added the sentiment, which comes from the newest The Graduate Stamp and I carefully masked the "grad" word since I wanted only a big Congrats. I added a few shadows with a darker pencil too.

Sunny Studio Stamps: The Graduate & Penguin Pair Card with Sara Zoppi
 
When I was happy with the result, I trimmed the panel colored to 5,5"x3,75", I matted it with a green sparkly cardstock and then with an A2 white panel too. To complete the card, I added some yellow sparkly gems on the flower centres and some glow shaded confetti here and there. And here's the finished result!
 
Thanks for stopping by! I really hope you will like my projects and you will be inspired to create something! See you next time!

Sunny Studio Supplies Used:

Chloe Alphabet Dies
Chloe Alphabet Dies
Shop at:
Sunny Studio
Blooming Frame Die
Blooming Frame Die
Shop at:
Sunny Studio
Holiday Hugs Stamps
Holiday Hugs Stamps
Shop at:
Sunny Studio
Holiday Hugs Dies
Holiday Hugs Dies
Shop at:
Sunny Studio
Penguin Pair Stamps
Penguin Pair Stamps
Shop at:
Sunny Studio
Penguin Pair Dies
Penguin Pair Dies
Shop at:
Sunny Studio
Sweet As Can Bee Stamps
Shop at:
Sunny Studio
Sweet As Can Bee Dies
Shop at:
Sunny Studio
The Graduate Stamps
The Graduate Stamps
Shop at:
Sunny Studio
The Graduate Dies
The Graduate Dies
Shop at:
Sunny Studio