Hello and welcome to day 2 of our Holiday Sneak Peek Week! Each morning in the coming week I will be showcasing projects using our newest fall & winter collections which will be available to purchase on August 25th.
Today I'm showcasing our new Truckloads of Love Stamps & Dies which includes an adorable vintage pick-up truck, truckloads for different holidays, occasions, and seasons, as well as a number of cute punny sentiments. The set also includes four new mini critter drivers. These are the same critters found in our Fall Friends Stamps, but shrunken down in size to mix and match with the critters from our Balloon Rides Stamps.
Card No. 1: My first card features a fall scene with a load of leaves in the back of an aqua colored pick-up truck using the Truckloads of Love Stamps. I started by blending my autumn sunset background using Wild Honey, Picked Raspberry, & Seedless Preserves Distress Inks. I then arranged three trees behind my truck using our Woodsy Autumn Stamps, layering a stitched hillside over the top cut from dark brown cardstock using our Slimline Nature Border Dies.
When I inked up my sky, I ended up trimming off some of the purple along the top of my cardstock panel so I could see more of the yellow peeking out near the horizon line of my scene so I was able to repurpose that portion by cutting out a stitched strip using the smallest pennant die from our Slimline Pennant Dies to help ground my sentiment. For my greeting, I inked up some white cardstock with Wild Honey ink, cut out a pennant strip using our Fancy Frames Rectangle Dies and heat embossed the phrase "Leaves are falling, Autumn is calling" from our Happy Harvest Stamps. Lastly, I layered the stitched strip with a pile of leaves and rake in the bottom right corner from our Fall Scenes Stamps. The leaves from this set are a larger scale so I thought they matched nicely with the other leaf piles and give the appearance they are in the foreground.

Card No. 2: Up next is another fall card, this time focusing on the load of pumpkins from our Truckloads of Love Stamps. For this card, I started by inking a white cardstock panel with Seedless Preserves and Wilted Violet Distress Inks which I then splattered with water to create a speckled look which I thought gave the appearance of a starry sky right before the sun has fully gone down for the evening. With this in mind, I colored my tree border from our Country Scenes Stamps with slightly darker moody fall tones using my Copic markers.
My dad had an old mint green pick-up truck like this when I was a kid so that was my inspiration when I colored this one, adding a little raccoon as my driver. For my sentiment, I paired the "greetings" word die from our Slimline Scalloped Frame Dies with the word "Autumn" which I spelled out using our Hayley Uppercase Alphabet and Hayley Lowercase Alphabet dies. I didn't realize how closely these matched until I created this card so that was an extra happy surprise!

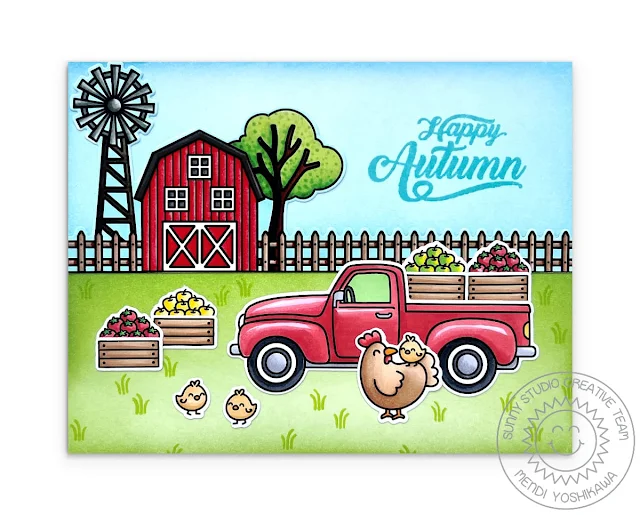
Card No. 3: I couldn't resist creating one last fall card with our new Truckloads of Love Stamps, focusing on a fall harvest scene using the wood crates, tomatoes and apples from the set. For the barn & windmill in my background, I stamped the border from our Farm Fresh Stamps, added a chicken and some chicks to the foreground using our Clucky Chickens Stamps, and small tufts of grass using our Harvest Mice Stamps. Lastly, I stamped the "happy autumn" greeting in the empty portion of my sky in the top right using our Crisp Autumn Stamps.
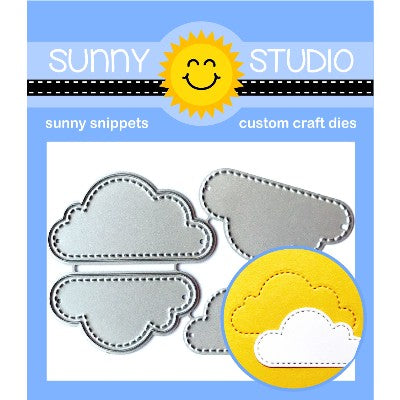
Card No. 4: I took inspiration from the Barbie movie for my next card, creating a bright and happy birthday card, coloring the truck from Truckloads of Love a hot pink color, filling it with a stack of colorful gifts from the set, and adding a bunny driver from our Balloon Rides Stamps. For the background, I inked my sky with Tumbled Glass Distress Ink and added the stitched clouds using our Fluffy Clouds Dies. I then layered it with a strip of neighborhood homes from our Scenic Route Stamps, keeping them a monochromatic grey to prevent them from competing with my focal point images. Lastly, I heat-embossed a birthday greeting from the set and added the white dotted line to my street with the border.
Card No. 5: Switching gears, I have a Christmas card using the Truckloads of Love Stamps with the tree & gifts and a husky dog as the driver. I paired them with the houses and trees border from our Winter Scenes Stamps, coloring the trees to match. I like to create a little story in my head when creating cards and I like the idea of them just coming back from cutting down one of these very trees. I inked up my sky to look like the glow of the sun setting with Tumbled Glass blending to Spun Sugar Distress inks and then added dots of Stickles Glitter to my sky to give the look of snow falling. I had been feeling like my card was missing something and I really love the touch of sparkle and extra texture it gives my card in person!
Card No. 6: Progressing through the holidays and seasons, next up I have a Truckloads of Love card perfect for Valentine's Day or pretty much any day you want to let someone know you love them. I started by adding a 5.5" wide x 1" high strip of striped aqua paper from our Sleek Stripes Paper pack to the bottom of my card base. I then cut the row of heart cutouts using our Heartstrings Border Dies, backed them with pink cardstock, and added the stitching and ric rac edge with our Slimline Basic Border dies. I added a little panda bear for my driver from our Balloon Rides Stamps and added a pink speech bubble for my heat-embossed sentiment from our Comic Strip Speech Bubbles Dies.
Card No. 7: It's a bit out of season at the moment, but I couldn't resist rounding out the holidays with a patriotic parade card adding the flag, bunting, and trailing stars to my red pick-up truck from Truckloads of Love with the dog from our Balloon Rides Stamps. To set the scene from my little hometown parade, I stamped a row of buildings from our City Streets Stamps, stamping them in tan ink onto kraft Paper for a subtle tone-on-tone look. For my greeting, I heat embossed my "Happy Fourth of July" from our Happy Thoughts Stamps onto a piece of blue grid paper from our Classic Gingham Paper pack and then die-cut it using the pennant from our Notebook Photo Corners Dies. Lastly, I added a strip of blue star print paper from our Surprise Party Paper pack.
That wraps up today's sneak peeks. I'm so happy you spent part of your day with me today. I read all your comments and they mean so much! I'd love to give a $25 gift code to one lucky winner using the Rafflecopter below.
a Rafflecopter giveaway
Our daily contests will run through Monday, August 28th at Midnight PST with winners announced here on Friday, September 1st. :)
Other Supplies Used:


