Showing posts with label Icing Rectangle Frame. Show all posts

Monday, July 27, 2026

Sunflower Fields Card with Tina M

Hi there! Tina M here! Today I have an elegant card for you using the Sunflower Fields setI usually go for bright pinks, orange, greens and turquoise on my cards, but today I chose a soft, muted pink to  mulled red color scheme!

Sunny Studio Stamps: Sunflower Fields Friendship Card by Tina Magnusson (featuring Inside Greetings Friends, Icing Rectangle Frame Dies)

For my card I used an A2 size card base. I started off by trimming a piece of grey polka dot patterned paper from the Subtle Grey Tones paper pack to 4,25 x 5,5 inches and adhered it to my card base using double sided tape.

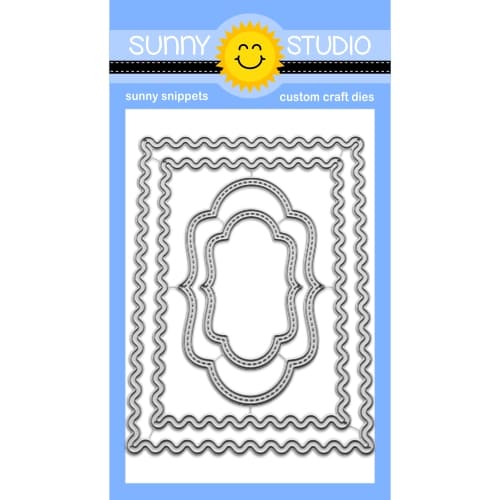
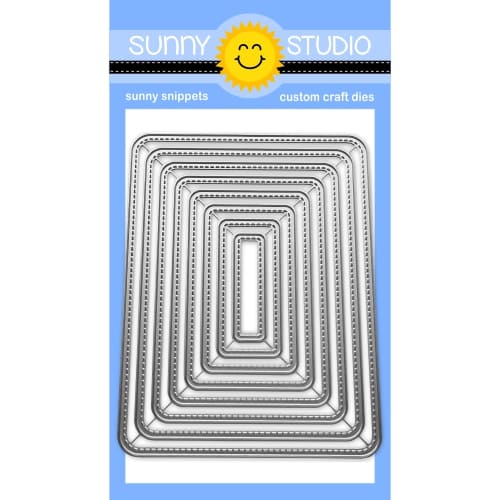
Next, I trimmed a piece of white card stock to 4,25 x 5,5 inches and ink blended the outer edges with pink ink and then die cut out the largest of the Icing Rectangle Frame Dies to create a frame and adhered it to the card base using liquid glue.

I stamped one of the sentiments from the Inside Greetings Friends Stamps set in the upper right corner. There are so many good sentiments to choose from with this stamp set!

Sunny Studio Stamps: Sunflower Fields Friendship Card by Tina Magnusson (featuring Inside Greetings Friends, Icing Rectangle Frame Dies)

I then stamped the sunflowers and leaves from the Sunflower Fields set, layer by layer, using light to dark inks. Next, I die cut the stamped images using the coordinating sunflower and leaves dies. As the stem stamp does not have a coordinating die I fussy cut them, super easy and quick! Next, I stamped one of the little bees and die cut it out using the coordinating die!

I assembled the sunflowers with the stems and leaves using liquid glue. Lastly, I added foam dots to the back of them and the little bee for dimension and arranged them to my taste and adhered them to the card.

Thanks for stopping by! Wishing you a happy and colorful day!

Sunny Studio Supplies Used:

Sunflower Fields Stamps
Shop at:
Sunny Studio
Sunflower Fields Dies
Shop at:
Sunny Studio
Subtle Grey Tones Paper
Shop at:
Sunny Studio
Inside Greetings Friends Stamps
Shop at:
Sunny Studio
Icing Rectangle Frame Dies
Shop at:
Sunny Studio

Friday, July 10, 2026

Sunflower Fields Card with Janneke

Hello crafty friends, Janneke here. Today I’m sharing a card featuring the Sunflower Fields stamp set.

Sunny Studio Stamps: Sunflower Fields and Garden Fairy Card by Janneke Peters (featuring Dotted Diamond Die, Icing Rectangle Frame Die)

I started by die cutting a beige frame and a light brown background panel for inside the frame using the Icing Rectangle Frame dies. To give the background some extra texture, I added a beautiful effect with the Dotted Diamond Portrait plate. I blended brown ink along the bottom of the panel to create more depth. To finish the background, I added some gold and white paint splatters, which gave it a subtle sparkle and a little bit of magic.

Sunny Studio Stamps: Sunflower Fields and Garden Fairy Card by Janneke Peters (featuring Dotted Diamond Die, Icing Rectangle Frame Die)

Next, I created the sunflowers and leaves using the Sunflower Field stamp set. This stamp set is a layering stamp set, so the sunflowers are created by adding different stamped layers. With every layer, more details and depth appear, giving the flowers a beautiful and realistic look. 

Sunny Studio Stamps: Sunflower Fields and Garden Fairy Card by Janneke Peters (featuring Dotted Diamond Die, Icing Rectangle Frame Die)

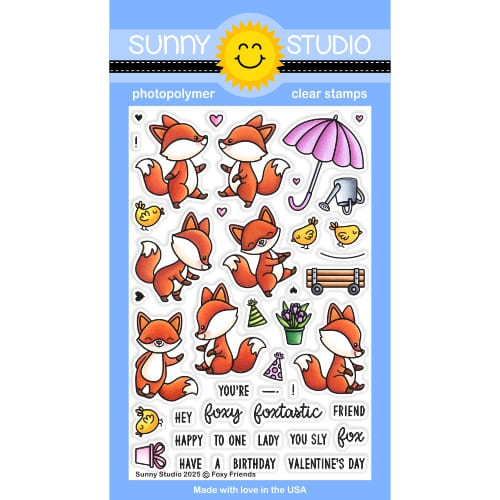
I stamped the fairies from the Garden Fairy stamp set. I colored them in warm bee-inspired colors with my Ohuhu markers. I also added tiny watering cans from the Foxy Friends stamp set into their hands, which made them look like they were taking care of the flowers. To complete the scene, I added an adorable little bee from the Sweet as Can Bee stamp set.

After arranging and gluing all the elements onto the light brown background, I attached the whole panel onto a yellow layer and finally placed it on a white cardstock base.

Card done, ready to send joy! Thanks for joining me, and see you next week.

Sunny Studio Supplies Used:

Sunflower Fields Stamps
Shop at:
Sunny Studio
Sunflower Fields Dies
Shop at:
Sunny Studio
Garden Fairy Stamps
Garden Fairy Stamps
Shop at:
Sunny Studio
Garden Fairy Dies
Garden Fairy Dies
Shop at:
Sunny Studio
Dotted Diamond Portrait
Shop at:
Sunny Studio
Foxy Friends Stamps
Foxy Friends Stamps
Shop at:
Sunny Studio
Foxy Friends Dies
Foxy Friends Dies
Shop at:
Sunny Studio
Icing Rectangle Frame Dies
Shop at:
Sunny Studio
Sweet As Can Bee Stamps
Shop at:
Sunny Studio
Sweet As Can Bee Dies
Shop at:
Sunny Studio

Friday, May 22, 2026

Bundle of Joy Card with Janneke

Hello crafty friends, Janneke here. Today I’m sharing a cute baby card featuring  Bundle of Joy stamp set. I originally had blue ink ready to go, but I decided to switch things up and use non-traditional colors instead.

Sunny Studio Stamps: Bundle Of Joy Baby Themed Card by Janneke Peters (featuring Icing Rectangle Frame Dies, Sydney Alphabet Dies, Dotted Diamond Dies)

I started by die-cutting the base from light beige cardstock using the Icing Rectangle Frame die. For the inside of the frame, I added texture by die-cutting a pattern with the Dotted Diamond Portrait die. I then softly ink blended the bottom part with a light brown ink to create a subtle grounded effect.

Sunny Studio Stamps: Bundle Of Joy Baby Themed Card by Janneke Peters (featuring Icing Rectangle Frame Dies, Sydney Alphabet Dies, Dotted Diamond Dies)

Next, I die-cut the frame again from light brown cardstock and layered everything onto a light beige card base for a soft tone-on-tone look.

For the baby’s name, I used the Sydney Alphabet dies and cut the letters twice: once from light brown cardstock and once from a darker brown. I adhered the darker layer slightly offset behind the lighter one to create a shadow effect.

Sunny Studio Stamps: Bundle Of Joy Baby Themed Card by Janneke Peters (featuring Icing Rectangle Frame Dies, Sydney Alphabet Dies, Dotted Diamond Dies)

Then it was time to use the Bundle of Joy stamp set. I stamped the images and colored them in monochrome shades of brown and beige using my Ohuhu markers. I also stamped the “welcome” sentiment on dark brown cardstock using white embossing powder. Finally, I adhered all the elements onto the card and added some highlights with a white gel pen.

Card done, ready to send joy! Thanks for joining me, and see you next week.

Sunny Studio Supplies Used:

Dotted Diamond Portrait
Shop at:
Sunny Studio
Icing Rectangle Frame Dies
Shop at:
Sunny Studio
Sydney Alphabet Dies
Shop at:
Sunny Studio
Bundle of Joy Stamps
Shop at:
Sunny Studio
Bundle of Joy Dies
Bundle of Joy Dies
Shop at:
Sunny Studio

Monday, May 18, 2026

Bundle Of Joy Card with Tina M

Hi there! Tina M here! Today I’m sharing a card featuring the new Bundle Of Joy Stamps set from the new Summer Release! There are so many cute images in this set! I just love the little clothes hanger, it´s such an adorable detail!

Sunny Studio Stamps: Bundle of Joy Baby Themed Card by Tina Magnusson (featuring Dotted Diamond Dies, Icing Rectangle Frame Dies)

I started by stamping all the images I wanted to feature on my card from the Bundle Of Joy Stamps set using Memento Tuxedo Black ink on alcohol ink friendly card stock and used the coordinating Bundle Of Joy Dies to die cut them out and colored them with my Copic Markers, see list below.

Copic colors used:
Baby: E000/00/11/21, R30/32, C0/1
Hangers: E21/23/25, C3
Green: G94, YG61/63
Turquoise: BG10/11/13
Pink: RV10/11/13

I then die cut out the smallest of the Icing Rectangle Frame Dies, from white card stock.
I ink blended the inside piece using turquoise ink and adhered it to the white frame. For the sentiment I stamped the “Welcome baby girl” from the 
Bundle Of Joy Stamps set in the center.

Sunny Studio Stamps: Bundle of Joy Baby Themed Card by Tina Magnusson (featuring Dotted Diamond Dies, Icing Rectangle Frame Dies)

For my card I used an A2 size card base, I used soft green ink and ink blended directly on the card base. I then trimmed a piece of white cardstock to 5 x 3,75 inches and ran it through my die cutting machine with the Dotted Diamond Portrait Die. Next, I ink blended the panel using pink and orange ink. I then trimmed a slightly larger white panel to go behind my ink blended panel and adhered them to the card base, using double sided tape.

I added foam dots to the back of the die cut images for dimension and adhered them to the card, the baby and items of clothing in a grid pattern at the top half and the rectangle frame with the stamped sentiment at the bottom.

Thank you for stopping by! Wishing you all a happy and colorful day!

Sunny Studio Supplies Used:

Dotted Diamond Portrait
Shop at:
Sunny Studio
Icing Rectangle Frame Dies
Shop at:
Sunny Studio
Bundle of Joy Stamps
Shop at:
Sunny Studio
Bundle of Joy Dies
Bundle of Joy Dies
Shop at:
Sunny Studio

Monday, May 4, 2026

Afternoon Tea Card with Tina M

Hi there! Tina M here! I love going to Afternoon Tea and I had so much fun creating this card with the beautiful Afternoon Tea Stamps!

Sunny Studio Stamps: Afternoon Tea Mother's Day Card by Tina Magnusson (featuring Icing Rectangle Frame Dies, Baked With Love)

For my card I used an A2 size card base. I started by trimming a piece of pink card stock from my stash to 5,5 x 4,25 inches and adhered it to my card base using double sided tape.

For the background, I used the largest of the Icing Rectangle Frame dies to create a frame using the turquoise paper from the Classic Sunburst Paper pack. Inside I used a piece of white cardstock that I ink blended using pink ink and then splattered with gold watercolor. For the bottom part of the inside, I used pink paper from the Classic Gingham Paper pack.

I then stamped all the images I wanted to feature from the Afternoon Tea Stamps set, the cookies from the Baked With Love Stamps set and the butterfly from the Spring Garland Stamps set using Memento Tuxedo Black Ink on alcohol ink friendly paper. To decorate the tea pot and the cups I stamped the tiny sprig from the stamp set creating a delicate pattern using turquoise ink.

Sunny Studio Stamps: Afternoon Tea Mother's Day Card by Tina Magnusson (featuring Icing Rectangle Frame Dies, Baked With Love)

I then colored the images with my Copic markers. The colors I used are listed below. Next, I die cut the colored images using the coordinating dies from the Afternoon Tea DiesBaked With Love Dies and the Spring Garland Dies.

Tea pot, cup and saucer: C0/1/2 (just to get a little shadow)
Cookies: E31/33/35/37, BG10/11/13
Butterfly: C3, BG10/11/13, RV10

I stamped the big Happy Mother´s Day from the Afternoon Tea Stamps set with turquoise inkdie cut it using the coordinating dieLastly, I added foam dots to the back of all die cut pieces for dimension and adhered them to the card.

Thanks for stopping by! Wishing you all a happy and colorful day!

Sunny Studio Supplies Used:

Classic Gingham 6x6 Paper
Shop at:
Sunny Studio
Classic Sunburst Paper
Shop at:
Sunny Studio
Baked With Love Stamps
Shop at:
Sunny Studio
Baked With Love Dies
Shop at:
Sunny Studio
Spring Garland Stamps
Shop at:
Sunny Studio
Spring Garland Dies
Spring Garland Dies
Shop at:
Sunny Studio
Icing Rectangle Frame Dies
Shop at:
Sunny Studio
Afternoon Tea Stamps
Shop at:
Sunny Studio
Afternoon Tea Dies
Afternoon Tea Dies
Shop at:
Sunny Studio

Thursday, April 30, 2026

Sweet As Can Bee Card with Yan

Hello friends! Yan here—I’m excited to share a bright and cheerful card featuring the new Summer release from Sunny Studio, using the adorable Sweet As Can Bee Stamps. This collection is full of playful and charming images, perfect for creating fun, lighthearted summer designs.

Sunny Studio Stamps: Sweet As Can Bee Friendship Card by Yan X DIY (featuring Icing Rectangle Frame Dies)

To begin, I stamped the lively images from the Sweet As Can Bee set onto Neenah Solar White cardstock using Memento Tuxedo Black Ink. I then colored them with Copic markers to bring out their cheerful personality. Once finished, I used the coordinating Sweet As Can Bee Dies to cut them out neatly. 

COPIC COLOR:
Bee : B000, B12, C1, C4, C7, E31, E41, R32, Y00, Y02, Y15, Y19
Honey Jar : BG93, E30, E31, E35, R46, Y00, Y02, Y15, YR61, YR65, YR68
Flower : G14, G40, R43, RV10, RV11, Y00, Y02, Y15, Y19, YG03
Honey Dipper : E30, E31, E35
Lemon : Y00, Y02, Y15, Y19

Sunny Studio Stamps: Sweet As Can Bee Friendship Card by Yan X DIY (featuring Icing Rectangle Frame Dies)

For the background, I blended Distress Oxides in Worn Lipstick, Twisted Citron, and Mowed Lawn onto another piece of white cardstock. These bright, fresh colors come together to create a vibrant summer feel.

Next, I used another piece of white cardstock and die cut a frame using the Stitched Label Frame from the Icing Rectangle Frame Dies. I then stamped a sentiment from the stamp set onto the frame to complete the design. Finally, I assembled all the elements using foam tape and glue to add dimension and bring the whole card together.

I hope this cheerful summer card inspires your next crafting project!

Sunny Studio Supplies Used:

Icing Rectangle Frame Dies
Shop at:
Sunny Studio
Sweet As Can Bee Stamps
Shop at:
Sunny Studio
Sweet As Can Bee Dies
Shop at:
Sunny Studio