Showing posts with label Snowmen in Sweaters. Show all posts

Friday, December 20, 2024

Snowmen in Sweaters Holiday Gift Bag with Nicky

Well hello everyone, this is Nicky with you today on the Sunny Studio Stamps blog where I'm sharing a fun Snowmen In Sweaters Holiday Gift Bag project. Read on for all the details:

Sunny Studio Stamps: Snowmen in Sweaters Holiday Gift Bag by Nicky Meeks (featuring Lacy Snowflakes Dies, Sweet Treat Gift Bag Dies, Eyelet Lace Border Dies, Happy Thoughts)

I started by taking two matching sheets of patterned paper from the All Is Bright 6 x 6 Cardstock and I assembled the Sweet Treats Bag Die which is a very simple process and can be found in a useful video created by Sunny owner Mendi in THIS VIDEO.

I then adorned the bag with two snow drifts at the bottom of both the front and the back, using the Slimline Nature Borders Die, and I added a double layer of lace around the top edge (also front and back) using the Eyelet Lace Borders Die.

Sunny Studio Stamps: Snowmen in Sweaters Holiday Gift Bag by Nicky Meeks (featuring Lacy Snowflakes Dies, Sweet Treat Gift Bag Dies, Eyelet Lace Border Dies, Happy Thoughts)

With the bag formed I used some cotton cord and knotted the handles in place and set it to one side.

I stamped the snowmen from Snowmen In Sweaters using Memento Ink in Black Tuxedo and I coloured the images with the following Copic marker combinations inspired by colours from the patterned paper:

Snowmen - C3, C1, C0, BG000
Teal - BG49, BG15, BG32
Red - R59, R39, R29, R27
Pink - RV63, RV52
Black - T9, T6, T4
White - C3, C1, C0
Blush - R22, R21, R20, R00
Noses - YR09, YR04

Sunny Studio Stamps: Snowmen in Sweaters Holiday Gift Bag by Nicky Meeks (featuring Lacy Snowflakes Dies, Sweet Treat Gift Bag Dies, Eyelet Lace Border Dies, Happy Thoughts)

I shaded their coloured clothing using T3 and T2. Images were die cut, with the coordinating Snowmen In Sweaters Die, then highlighted with a white gel pen and applied to the bag with foam tape.

To adorn the bag further I added the little gift tag with the sentiment stamped from Happy Thoughts, I also added some Lacy Snowflakes die-cuts and a few sparkling clear sequins.

Thanks for stopping by the blog today to read about this treat bag, I hope you feel inspired to tackle one for yourself. Happy crafting!

Sunny Studio Supplies Used:

Lacy Snowflakes Die
Lacy Snowflakes Die
Shop at:
Sunny Studio
Happy Thoughts Stamps
Shop at:
Sunny Studio
Sweet Treats Gift Bag
Shop at:
Sunny Studio
Eyelet Lace Borders
Eyelet Lace Borders
Shop at:
Sunny Studio
Slimline Nature Borders
Shop at:
Sunny Studio
All Is Bright Paper
All Is Bright Paper
Shop at:
Sunny Studio
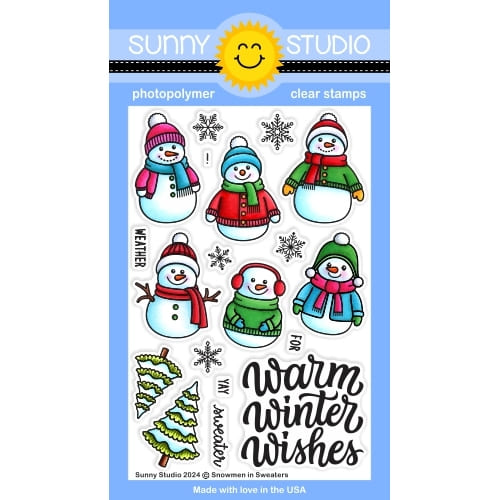
Snowmen in Sweaters Stamps
Shop at:
Sunny Studio
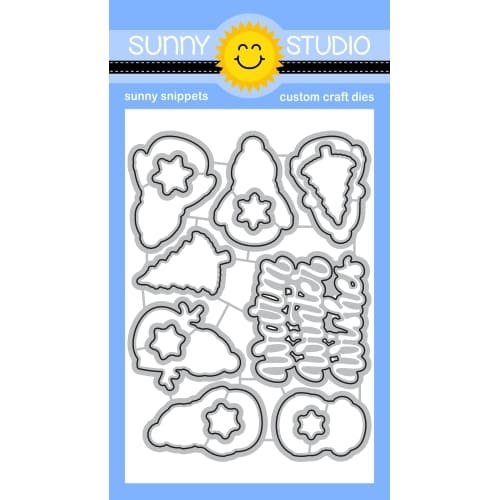
Snowmen in Sweaters Dies
Shop at:
Sunny Studio

Saturday, December 14, 2024

Guest Designer Spotlight: Holiday Cards with Amanda Fitterer

Hey there, crafty friends! It's Amanda here sharing TWO cards I created using a similar layout!

Sunny Studio Stamps: Snowmen In Sweaters Winter Themed Holiday Card by Amanda Fitterer (featuring Inside Greetings Seasons)

This first card was so much fun to color! I started by ink blending my background. I used Catherine Pooler Suede Shoes and Dress Blues. Next, I stamped some snowflakes from the Snowmen in Sweaters Stamps all around the background with WOW! Embossing Glue Ink. I applied WOW! Disco Ball embossing powder to the glue and then melted the powder with my heat tool.

Sunny Studio Stamps: Snowmen In Sweaters Winter Themed Holiday Card by Amanda Fitterer (featuring Inside Greetings Seasons)

Next, I stamped my snowmen from the Snowmen in Sweaters Stamps. I colored them with Copic markers and then cut them out with the coordinating diesOnce I had the adorable snowmen and snowflakes ready, I placed my card front in my MISTI to stamp my sentiment. This sentiment is from the Inside Greetings Seasons Stamps.

Sunny Studio Stamps: Snowmen In Sweaters Winter Themed Holiday Card by Amanda Fitterer (featuring Inside Greetings Seasons)

Once I stamped my sentiment, I was able to adhere my snowmen and snowflakes to the card using 3D foam squares. The last step was to attach my card front to my card base with double sided tape.

Sunny Studio Stamps: Toasty Hugs Winter Themed Holiday Card by Amanda Fitterer (featuring Inside Greetings Seasons)

My second card uses the same sentiment from the Inside Greetings Seasons Stamps! I also placed it in the same position on the card.

Sunny Studio Stamps: Toasty Hugs Winter Themed Holiday Card by Amanda Fitterer (featuring Inside Greetings Seasons)

For this card, I used a piece of paper from the Joyful Holiday Paper for my background. I glued that directly to my card front, which is cut down to 3.75"x5". My sweet little kiddos are from the Toasty Hugs Stamps. I used Copic markers to color them in as well! 

Which card is your favorite?!  I love them both for different reasons! I appreciate you coming by the Sunny Studio blog today and checking out my 2 holiday cards! I hope you have a great crafty day!

Sunny Studio Supplies Used:

Joyful Holiday Paper
Shop at:
Sunny Studio
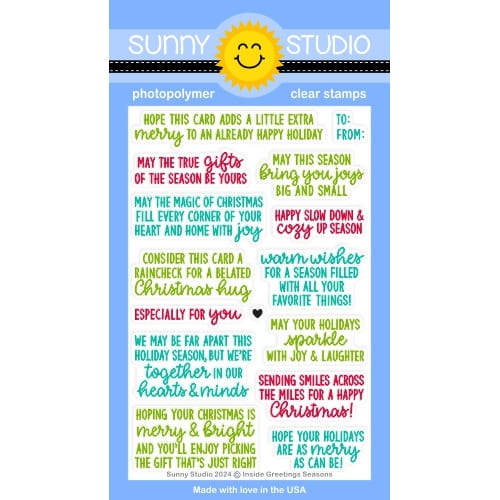
Inside Greetings Seasons
Shop at:
Sunny Studio
Snowmen in Sweaters Stamps
Shop at:
Sunny Studio
Snowmen in Sweaters Dies
Shop at:
Sunny Studio
Toasty Hugs Stamps
Toasty Hugs Stamps
Shop at:
Sunny Studio
Toasty Hugs Dies
Toasty Hugs Dies
Shop at:
Sunny Studio

Friday, December 13, 2024

Toasty Hugs Card with Nicky

Happy Friday everyone, this is Nicky with you today on the Sunny Studio Stamps blog where I'm sharing all the details for this card using the cute little Toasty Hugs stamp set. Read on for all the details.

Sunny Studio Stamps: Toasty Hugs Winter Themed Holiday Card by Nicky Meeks (featuring Cityscape Border Dies, Slimline Nature Border Dies, Snowmen in Sweaters)

Using Speckled Egg Distress Oxide Ink, I ink blended the winter sky on an A2 white panel of cardstock.

I die cut the Cityscape Border Die from white cardstock and glued this created panel to the sky.  Over this I layered two snow 'hills' made using the Slimline Nature Borders DieThis background panel was now ready to glue to my card base and set to one side.

Sunny Studio Stamps: Toasty Hugs Winter Themed Holiday Card by Nicky Meeks (featuring Cityscape Border Dies, Slimline Nature Border Dies, Snowmen in Sweaters)

I stamped the trees from Snowmen in Sweaters and the two kids from Toasty Hugs using black ink. I coloured with the following Copic markers:

Skin - E34, E11, E21
Hair Girl Left - E44, E43, E40
Hair Girl Right - E42, E40
Blush - R22, R21, R20, R00
Green - G19, YG45
Red - R29, R24
White - C3, C1
Brown - E44, E43

I die cut the images, using the Snowmen in Sweaters Die and Toasty Hugs Die, and backed them with foam tape and attached them to the background.

Sunny Studio Stamps: Toasty Hugs Winter Themed Holiday Card by Nicky Meeks (featuring Cityscape Border Dies, Slimline Nature Border Dies, Snowmen in Sweaters)

For the finishing touches I stamped and heat embossed the sentiment on a red strip and attached with foam tape and I glittered the snow on the trees and then using a stylus and white acrylic paint, I dotted in the snow throughout the scene. Your snow will look far more authentic if you make sure to 'nick' the lines of some of your images as I have done and of course by dotting rather than splattering you have full control and won't spoil the faces on the characters etc.

Thank you for coming by to read today, I will be back this time next week with something brand new.

Sunny Studio Supplies Used:

Cityscape Border Dies
Shop at:
Sunny Studio
Slimline Nature Borders
Shop at:
Sunny Studio
Snowmen in Sweaters Stamps
Shop at:
Sunny Studio
Snowmen in Sweaters Dies
Shop at:
Sunny Studio
Toasty Hugs Stamps
Toasty Hugs Stamps
Shop at:
Sunny Studio
Toasty Hugs Dies
Toasty Hugs Dies
Shop at:
Sunny Studio

Thursday, December 5, 2024

Brilliant Banner 3 Die Focused Card with Marine

Hello crafty friends, Marine here, I'm back with this cute holiday card featuring Santa, Rudolph and his reindeer friends. They're busy delivering presents to everyone who's been nice this year, and for the first time, Santa's sleigh stays in the garage, and the little gang is travelling the world in a Christmas van. How fun!

Sunny Studio Stamps: Brilliant Banner 3 Die Focused Christmas Card by Marine Simon (featuring Beach Bus, North Pole, Scenic Route, Winter Scenes)

I started off by stamping all the images on 110lb Neenah solar white cardstock using an alcohol marker friendly black ink. I cut them all using the coordinating dies, and colored everything using my Ohuhu markers and my Graph'it brush markers in my favorite holiday color palette, which is red, pink, aqua and green.

Here is a detailed list of the stamp sets I used: • Beach Bus - van • Lazy Christmas - presents • Snowmen In Sweaters - trees, snowflakes • Holiday Express - Rudolph • Fall Friends - reindeers • North Pole - Santa, nice list • Panda Party - banner • Scenic Route - houses • Winter Scenes - trees.

I set my images aside, and cut a 5,5 x 4,25 inches Strathmore bristol smooth panel that I divided in two sections using washi tape: the sky at the top, and snow at the bottom. I colored the sky using kitsch flamingo and picked raspberry oxide inks, and the snow using salvaged patina and peacock feathers oxide inks. As always I added lots of textures to my panel, starting with water droplets on the sky. I also mixed some picked raspberry oxide ink with water, and added more splatters to the sky. I mixed some peacock feathers oxide ink with water, and added splatters to the snow section. Next I mixed some copic opaque white ink with water and added splatters all over the panel, and then I did the same with liquid stardust.

Sunny Studio Stamps: Brilliant Banner 3 Die Focused Christmas Card by Marine Simon (featuring Beach Bus, North Pole, Scenic Route, Winter Scenes)

Once my panel was dry, I attached all the images on my panel using 1mm and 2mm foam squares, added highlights and details using a white gelly roll pen, and then moved on to my greeting that I created using Brilliant Banner 3 dies. I cut the two main pieces out of light pink cardstock, and white heat embossed "You're on my nice list" from North Pole on the front piece. I layered both pieces on top of each other using 1mm foam squares, and for an extra shiny detail, I cut another banner out of holographic cardstock, stuck it behind my pink banner using liquid glue, and finally attached the completed banner in the top part of my panel using foam squares again.

And that's it! Thanks so much for stopping by, and see you next week!

Sunny Studio Supplies Used:

Fall Friends Stamps
Fall Friends Stamps
Shop at:
Sunny Studio
Fall Friends Dies
Fall Friends Dies
Shop at:
Sunny Studio
Holiday Express Stamps
Shop at:
Sunny Studio
Holiday Express Dies
Shop at:
Sunny Studio
Lazy Christmas Stamps
Shop at:
Sunny Studio
Lazy Christmas Dies
Lazy Christmas Dies
Shop at:
Sunny Studio
Scenic Route Stamps
Scenic Route Stamps
Shop at:
Sunny Studio
Scenic Route Dies
Scenic Route Dies
Shop at:
Sunny Studio
North Pole Stamps
North Pole Stamps
Shop at:
Sunny Studio
North Pole Dies
North Pole Dies
Shop at:
Sunny Studio
Winter Scenes Stamps
Shop at:
Sunny Studio
Winter Scenes Dies
Winter Scenes Dies
Shop at:
Sunny Studio
Panda Party Stamps
Panda Party Stamps
Shop at:
Sunny Studio
Panda Party Dies
Panda Party Dies
Shop at:
Sunny Studio
Beach Bus Stamps
Beach Bus Stamps
Shop at:
Sunny Studio
Beach Bus Dies
Beach Bus Dies
Shop at:
Sunny Studio
Snowmen in Sweaters Stamps
Shop at:
Sunny Studio
Snowmen in Sweaters Dies
Shop at:
Sunny Studio
Brilliant Banner 3 Dies
Shop at:
Sunny Studio