Showing posts with label Fancy Frames. Show all posts

Sunday, February 25, 2024

Spring Garden Die Focused Card with Rachel

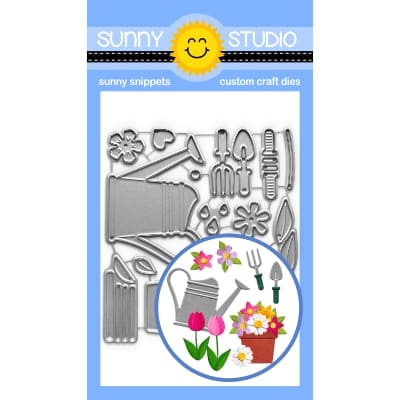
Hello crafty friends! It's Rachel here with a clean and simple card featuring the beautiful Spring Garden Dies. I kept my card super simple by using a single watering can with flowers as my focus. 

Sunny Studio Stamps: Spring Garden Die Focused Card by Rachel Alvarado (featuring Fancy Frame Dies)

To start my card, I first created my A2 sized card base from a piece of white card stock. I then layered it with a 4" x 5.25" piece of blue floral patterned paper from the Spring Fling Paper Pad. Next, I stamped my large sentiment from the Big Bunny Stamp Set with some Memento Tuxedo Black Ink.

To create my focal point, I then added a scalloped circle to the top center portion of my card that I had die cut from a piece of white card stock using the second largest of the Fancy Frames Circle Dies. Lastly, I die cut the pieces for my watering can and added some dimension to the blue base of the can with some Pinkfresh Storm Ink

Sunny Studio Stamps: Spring Garden Die Focused Card by Rachel Alvarado (featuring Fancy Frame Dies)

I then used a variety of colored card stock to die cut the rest of my pieces and adhered all of it to my card base with some 3D foam adhesive squares to give my die cuts a pop of dimension. Lastly, I added some white accents using a size 10 white Gelly Roll pen.

Thanks so much for taking the time to stop by! I hope you enjoyed my card today! If you want more card making inspiration, feel free to check out my Instagram feed.

Sunny Studio Supplies Used:

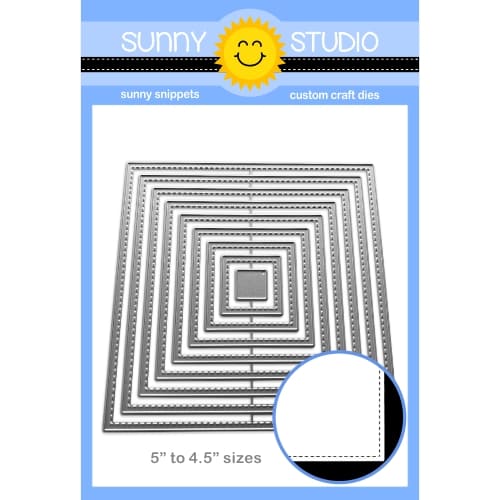
Fancy Frames-Circle Dies
Shop at:
Sunny Studio
Spring Fling Paper
Spring Fling Paper
Shop at:
Sunny Studio
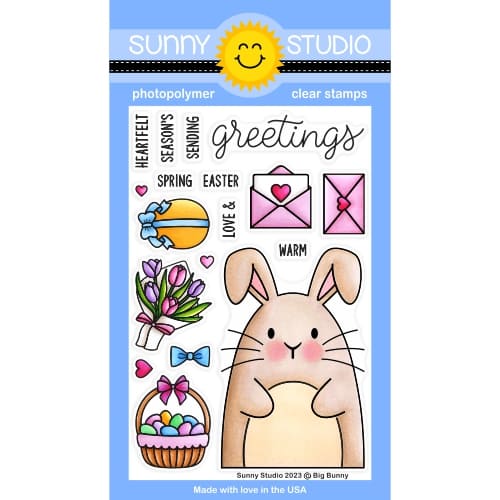
Big Bunny Stamps
Big Bunny Stamps
Shop at:
Sunny Studio
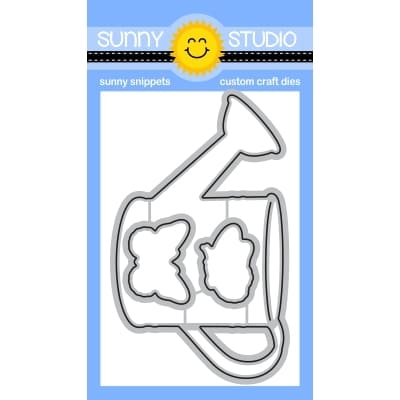
Spring Garden Dies
Spring Garden Dies
Shop at:
Sunny Studio

Sunday, September 17, 2023

Truckloads of Love Holiday Card with Tammy

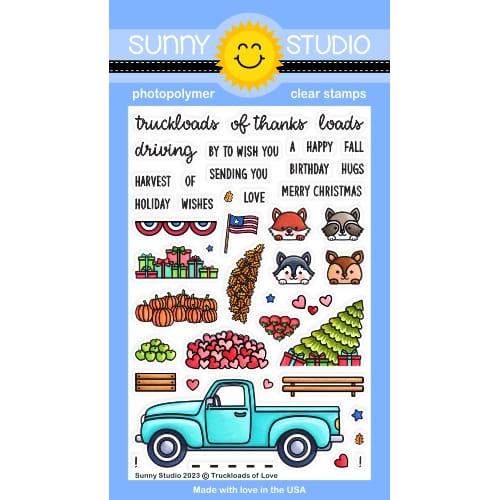
Hi there! Tammy here, sharing a card featuring the adorable set, Truckloads of LoveI love how versatile this set is, allowing you to create for all seasons! I chose to create a Christmas-themed card since they are my favorite to make!

Sunny Studio Christmas Holiday Pick-up Truck Winter Card (using Truckloads of Love & Festive Greetings Stamps, Rustic Winter, Lacy Snowflakes & Fancy Frames Rectangle Dies)

To begin, I stamped the images from Truckloads of Love, colored with Copic markers, and die cut with the Truckloads of Love Dies. Next, I cut a piece of Bristol smooth cardstock to an A2 size and ink-blended it with Broken China and Tumbled Glass Distress Oxide inks. I then splattered some white acrylic paint, thinned with water, onto the background to create a snowy feel. I then white heat embossed the "Season's Greetings" sentiment from the Festive Greetings Stamps.


Next, I die-cut some snowy hills using the Slimline Nature Borders Dies, cutting them to size, inking the tops with Tumbled Glass ink, and attaching them to the bottom of my card. I die-cut some trees from white cardstock using the Rustic Winter Dies, tucking them under the snowy borders. I added a white scalloped frame die cut using the Fancy Frames Rectangle Dies, attaching it with foam tape for dimension. I then white heat embossed the sentiment from Truckloads of Love onto a dark gray sentiment strip and added some white Lacy Snowflakes to complete my card.

Thanks so much for stopping by!

Hugs,
Tammy

Supplies Used:
Lacy Snowflakes Die
Lacy Snowflakes Die
Shop at:
Sunny Studio
Tsukineko Jumbo Dauber
Shop at:
Sunny Studio
Festive Greetings Stamps
Shop at:
Sunny Studio
Fancy Frames- Rectangles
Shop at:
Sunny Studio
Slimline Nature Borders
Shop at:
Sunny Studio
Truckloads of Love Stamps
Shop at:
Sunny Studio
Truckloads of Love Dies
Shop at:
Sunny Studio
Hero Arts White Detail
Shop at:
Sunny Studio
VersaMark Watermark Ink
Shop at:
Sunny Studio

Saturday, August 5, 2023

Guest Designer Spotlight: Cards with Marie Marco

Hello Crafty Friends!! It's Marie back on the blog with two birthday cards featuring the lovely Special Day Stamp. This stamp set features two super adorable layered cake images and number candles perfect for celebrating all the special occasions from birthdays to weddings and everything in between! 

Sunny Studio Stamps: Special Day Wedding Themed Card by Marie Marco

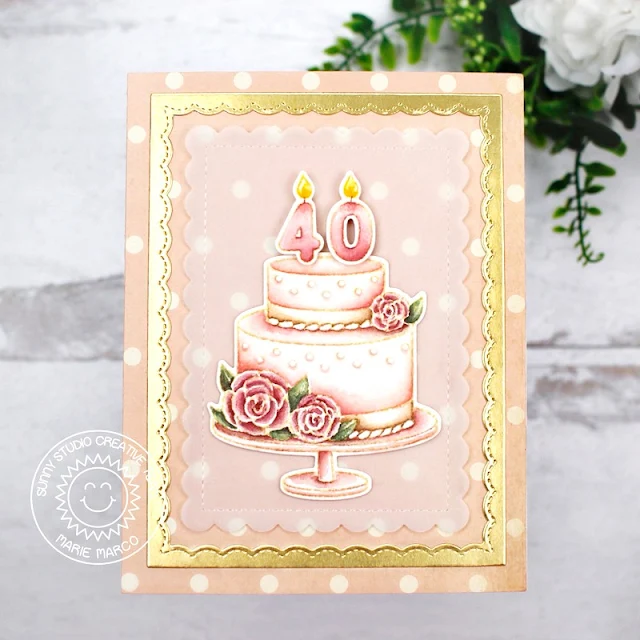
My first card features the gorgeous two tiered floral cake from the set. This design made me want to create a vintage inspired color palette for a friend's 40th birthday. To create this card, I first stamped my images onto watercolor paper using Antique Linen Distress Ink. All my images were colored using Faber- Castell Watercolor pencils. I cut out the images using the corresponding Special Day Dies. To construct my card front, I first die cut an A2 sized base panel from 110 lb Neenah Solar White cardstock paper. I also, cut an A2 sized polka dot pink pattern paper panel which I adhered to the base panel. For a simple elegant touch, I created a gold frame with the Fancy Frames Rectangle Die

I really wanted to keep my pattern paper visible while keeping the birthday cake the focal point so I cut out a scalloped panel from vellum paper using the Mini Mat & Tag 1 Dies. Taking my cake image, I used double sided tape to adhere it to the vellum paper. Before adhering the vellum to the pattern paper, I apply double sided tape adhesive to the back of the vellum hidden behind the cake so no tape adhesive is visible on the translucent vellum. To finish off this card, I applied foam strips to the back of the number candles to create some dimension and adhered it to the top of the cake. Finally, I used some Nuvo Crystal Drops on the decorative dots of the cake to create dimension. 

Sunny Studio Stamps: Special Day Birthday Card by Marie Marco (featuring Birthday Cat, Panda Party)

My second card features both the Special Day Stamp and the Birthday Cat Stamp. The Birthday Cat Stamp set is too cute for words! The adorable cats in this set inspired me to create a fun a playful pop up box card purrfect for my cat loving friend. To start off, I cut out all my box card elements from Bristol Smooth Cardstock and inked all the edges using Kitsch Flamingo Distress Ink. For all the decorative panels and inside panels, I used the double sided Sunny Studio Dots & Stripes Pastels Paper in the beautiful shade of pink. 

Sunny Studio Stamps: Special Day Birthday Card by Marie Marco (featuring Birthday Cat, Panda Party)

After assembling the box card, I stamped all my images onto watercolor paper and colored them with Faber-Castell Watercolor pencils. I also used party banner images from the Panda Party Stamp. I used the corresponding Birthday Cat DiesSpecial Day Dies, as well as the banner dies from Panda Party Dies to cut all my images. I adhered the birthday cake and cats using a strip of cardstock on the backs of all my images so they remain sturdy inside the box. Finally, I stamped my sentiment using VersaFine Onyx Black Ink to the pattern paper and adhered it to the front of the card. I absolutely love how cute this box card turned out that I'm tempted to keep it for myself! 

These two cards were super fun and simple to create! Thank you for stopping by and joining me today! Until next time, Happy Crafting friends!!!

Sunny Studio Supplies Used:

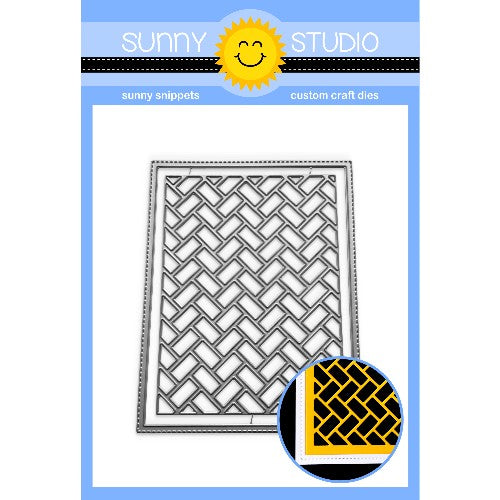
Fancy Frames- Rectangles
Shop at:
Sunny Studio
Dots & Stripes Pastels 6x6 Paper
Shop at:
Sunny Studio
Mini Mat & Tag 1 Dies
Shop at:
Sunny Studio
Panda Party Stamps
Panda Party Stamps
Shop at:
Sunny Studio
Panda Party Dies
Panda Party Dies
Shop at:
Sunny Studio
Birthday Cat Stamps
Birthday Cat Stamps
Shop at:
Sunny Studio
Birthday Cat Dies
Birthday Cat Dies
Shop at:
Sunny Studio
Special Day Stamps
Special Day Stamps
Shop at:
Sunny Studio
Special Day Dies
Special Day Dies
Shop at:
Sunny Studio

Saturday, May 27, 2023

Guest Designer Spotlight: Birthday Cards with Rachel Alvarado

Hello crafty friends! It's Rachel here from RachelAlvaradoDesigns.com. I am happy to be back on the Sunny Studio Blog with some projects featuring items from the newest release.

Sunny Studio Stamps: Birthday Cat Birthday Card by Rachel Alvarado (featuring Fancy Frame Circle Dies, Slimline Scalloped Frame Dies)

For my first project, I created a slimline birthday card featuring the adorable Birthday Cats Stamp Set. To start my card, I first stamped all of my images with Memento Tuxedo Black Ink onto a sheet of Neenah Solar White 110lb Card Stock. I then used the Birthday Cats Die Set to cut them out. I set my images aside and die cut some white and teal pieces of card stock with the Slimline Scalloped Frame Dies to create my slimline card base.

Sunny Studio Stamps: Birthday Cat Birthday Card by Rachel Alvarado (featuring Fancy Frame Circle Dies, Slimline Scalloped Frame Dies)

Next, I die cut three white scalloped circles using the Fancy Frame Circle Dies. Before adding them to my card base, I used a basic circle die to cut three more circles from a piece of smooth white card stock. I added some Salvaged Patina to each circular piece before then splattering it with some diluted Copic Opaque White Paint. Once dry, I then layered these ink-blended pieces with the scalloped circle sections and then adhered them to my card base with double-sided adhesive. Lastly, I heat embossed my sentiment pieces with Fine Detail White Embossing Powder and then added my images with some 3D Foam Adhesive Tape for extra dimension.

Sunny Studio Stamps: Birthday Mouse Birthday Card by Rachel Alvarado

For my second project, I created a sweet, single layered birthday card featuring the new Birthday Mouse Stamp Set. I first stamped my images to a 4"x 5.25" piece of Neenah Solar White 110lb Card Stock and then stamped them a second time onto a piece of Gina K. Designs Masking Magic Sheets. I fussy cut my images from the masking paper and used them to cover/mask the images that I had just stamped onto my card base. 

Sunny Studio Stamps: Birthday Mouse Birthday Card by Rachel Alvarado

Once covered, I then lightly blended the background with some Milled Lavender Distress Oxide Ink, removed the masking pieces, and then added some diluted white ink spatters to my ink-blended portion for some added interest. Once dry, I then colored all of my images with Copic Markers. I finished my card by stamping my sentiment and adding this piece to a standard, top-folding, A2 sized card base.

Copic Colors Used:

  • Mouse: W00, W1, W3, W5
  • Purples: V01, V04, V15, V09
  • Indigo: V20, V22, V25, V28
  • Butterfly: B60, B63

I hope you enjoyed my card today! Thanks so much for taking the time to stop by! If you liked this card and want some more crafty inspiration, please feel free to check out my INSTAGRAM feed! Wishing you all a lovely day!

Sunny Studio Supplies Used:
 

Fancy Frames-Circle Dies
Shop at:
Sunny Studio
Slimline Scalloped Frame
Shop at:
Sunny Studio
Birthday Cat Stamps
Birthday Cat Stamps
Shop at:
Sunny Studio
Birthday Cat Dies
Birthday Cat Dies
Shop at:
Sunny Studio
Birthday Mouse Stamps
Shop at:
Sunny Studio

Saturday, March 18, 2023

Guest Designer Spotlight: Cards with Rachel Alvarado

Hello crafty friends! It's Rachel from RachelAlvaradoDesigns.com, and I'm excited to share two projects with you today using products from the latest Sunny Studio Stamps release. For my first project, I created an A6 sized box card that showcases the super cute Clucky Chicken Stamp Set. I paired this set with some images from the Seasonal Trees Stamp Set to create a fun 3D scene. 

Sunny Studio Stamps: Clucky Chickens Birthday Card by Rachel Alvarado (featuring Seasonal Trees)

When folded, my card measures at 4.5" x 6.25" and fits easily into a standard A6 (or even a 5x7) envelope for mailing. All of my images were stamped onto a sheet of Neenah Solar White 110lb Card Stock, colored with Copic Markers, and cut out with both the Clucky Chicken and Seasonal Trees Die Sets.

Copic Colors Used:

  • Reds: R35, R59, R89
  • White: 0, C00, C1, C3
  • Chicks/Hay: Y19, Y21, E34
  • Tree: YG23, YG25, YG67
  • Birdhouse: B12, B16, B18
Sunny Studio Stamps: Clucky Chickens Birthday Card by Rachel Alvarado (featuring Seasonal Trees)

I also added a cute little white picket fence around the perimeter using the
 Picket Fence Border Die Set. For my grass, I used both the grass die from the Picket Fence Die Set as well as the grass die from the Slimline Nature Border Dies along with some green card stock. For my background sky, I trimmed a piece of the sky/cloud patterned paper that comes in the new Spring Fever Paper Pad.

Sunny Studio Stamps: Build-A-Birdhouse Birthday Card by Rachel Alvarado (featuring Fancy Frame Circle Dies)

For my second project, I made a simple card using the adorable new Build-A-Birdhouse Die Set. I layered my card with some pink patterned paper from the same paper pad that I had used above. After stamping my sentiment from the A Bird's Life Stamp Set, I then die cut a basic circle and blended it with some Picked Raspberry, Worn Lipstick, and Tattered Rose Distress Oxide Inks. I added another piece of a white picket fence to this circular piece with some liquid adhesive and then trimmed off the edges of the fence so that it was flush with the edge of the circle. I then added this piece to the front of my card and framed it with some gorgeous white scalloped circles that I had die cut using the Fancy Frames Circles Die Set.

Sunny Studio Stamps: Build-A-Birdhouse Birthday Card by Rachel Alvarado (featuring Fancy Frame Circle Dies)

Lastly, I added my birds and bird house with some 3D Foam adhesive tape for some extra dimension. I love how sweet these birds are and how simple this set is to use.

I hope you enjoyed my cards today! Thanks so much for taking the time to stop by! If you liked these cards and want some more crafty inspiration, please feel free to check out my INSTAGRAM feed! Wishing you all a lovely day! 

Sunny Studio Supplies Used:

A Bird's Life Stamps
Shop at:
Sunny Studio
Picket Fence Border Dies
Shop at:
Sunny Studio
Fancy Frames-Circle Dies
Shop at:
Sunny Studio
Seasonal Trees Stamps
Shop at:
Sunny Studio
Seaonal Trees Dies
Seaonal Trees Dies
Shop at:
Sunny Studio
Slimline Nature Borders
Shop at:
Sunny Studio
Clucky Chickens Stamps
Shop at:
Sunny Studio
Clucky Chickens Dies
Shop at:
Sunny Studio
Build-A-Birdhouse Dies
Shop at:
Sunny Studio
Spring Fever Paper
Spring Fever Paper
Shop at:
Sunny Studio

Thursday, January 26, 2023

Build-a-Birdhouse Die Focused Cards with Marine and Waleska

Hello crafty friends, Marine here with you today, I'm super happy to be back on the blog with a cute spring card showcasing the brand new and ever so cute Build-a-Birdhouse die set. It's not that usual for me to only use die cuts on my projects, I'm more of a busy-scene-with-critters kind of crafter, but I really enjoyed creating and assembling this lovely card!

Sunny Studio Stamps: Build-A-Birdhouse Missing You Card by Marine Simon (featuring Out On A Limb Dies)

I wanted the birdhouses to be super colorful, so I started off by cutting all the different elements and birds out of several plain colored cardstock. The Build-a-Birdhouse die set comes with a pole die to place the houses on, but I wanted them to be hanging from a tree, so I used the Out On a Limb die set to cut two branches out of some brown cardstock, and some leaves out of a green dotted pattern paper from the new Spring Fever paper pack.

Next I cut a 5,5" x 4,25" pink floral panel using another paper from the Spring Fever paper pack, as well as a slightly smaller vellum panel. I temporarily taped the vellum panel to the pink one using washi tape, I assembled the birdhouses, and glued them on the vellum along with the branches, leaves and birds using foam squares.

Sunny Studio Stamps: Build-A-Birdhouse Missing You Card by Marine Simon (featuring Out On A Limb Dies)

For my greeting, I first white heat embossed the words "Wishing you the" from Country Carnival, and I cut some gold glitter letters to form the word "Best" and finally read "Wishing you the best". Next I removed the washi tape that was keeping the pink panel and vellum panel together, I flipped the vellum panel over and applied liquid glue at the back of each die cut element, and then I attached that vellum panel to the pink floral one. And finally I added stitched lines above each birdhouse using a white gel pen to connect them to the branches.

And that's it! Feels like spring already, right? Thank you so much for stopping by, and see you next week!

------------------------------------------

Hey friends, Waleska here! I am excited to share today's card featuring the new Build-a-Birdhouse dies. They are perfect to create all kinds of scenes they can be spring, summer or even winter.  

Sunny Studio Stamps: Build-A-Birdhouse Birthday Card by Waleska Galindo (featuring Out On A Limb Dies)

I started my card die cutting and coloring the bird houses, I used oxide inks in colors Shaded Lilac, Kitsch Flamingo and Peacock Feathers, some details I leave them white and others I used copic markers to color them. I then started working on the background. I used a cloud stencil and the same colors I used for the bird houses. I mix the oxide inks with a little bit of water and splash the sky and the houses. I really wanted to incorporate the birds to this scene so I die cut two branches from the Out on a Limb dies with kraft cardstock as well as some leaves that I color with copic markers.

Sunny Studio Stamps: Build-A-Birdhouse Birthday Card by Waleska Galindo (featuring Out On A Limb Dies)

I started to assemble my card using all the elements, I also cut and color two birds and adhered them on the tree branches. I added a frame from the Fancy Frames Rectangle dies and cut a kraft base for my card and a white card as a base. The fun sentiment is from the A Bird's Life Stamp set. This is one of my favorite dies from the latest release. What dies were your favorite?

Thank you for stopping by! Enjoy the rest of your day!

Sunny Studio Supplies Used:

A Bird's Life Stamps
Shop at:
Sunny Studio
Fancy Frames- Rectangles
Shop at:
Sunny Studio
Out on A Limb Dies
Out on A Limb Dies
Shop at:
Sunny Studio
Country Carnival Stamps
Shop at:
Sunny Studio
Build-A-Birdhouse Dies
Shop at:
Sunny Studio
Spring Fever Paper
Spring Fever Paper
Shop at:
Sunny Studio

Monday, December 12, 2022

Reindeer Games Cards with Cathy and Bobbi

Hey friends! Cathy here today sharing some warm winter wishes featuring these sweeties from the Reindeer Games Stamps!

Sunny Studio Stamps: Reindeer Games Winter Themed Holiday Card by Cathy Chapdelaine (featuring Rustic Winter Dies, Fancy Frame Dies, Autumn Tree Dies)

To start this card, I die-cut a piece of white cardstock using the Fancy Frames Rectangle Dies. I used the center portion of this die-cut piece for my background and inked it with Speckled Egg Distress ink. I heat embossed a sentiment from the Alpaca Holiday Stamps with white embossing powder.

Next, I die-cut the Autumn Tree Dies from light gray cardstock and cut the branches off. I adhered them to the left and right sides of the background piece and trimmed them along the edges. I die-cut birch trees from white and dark gray cardstock using the Rustic Winter Dies, adhered them to the left side and trimmed the excess along the top edge. I also die-cut the cardinals using these dies for a little pop of red above the reindeer.

Sunny Studio Stamps: Reindeer Games Winter Themed Holiday Card by Cathy Chapdelaine (featuring Rustic Winter Dies, Fancy Frame Dies, Autumn Tree Dies)

For the snow along the bottom, I die-cut the Tropical Trees Backdrop Die from white cardstock and then die-cut the "sand" portion along the bottom edge using the Fancy Frames Rectangle Dies. I then adhered this to the bottom of the panel lining up the scalloped edges. I adhered the background panel to the center of a gray A2 card base.

To finish, I stamped the reindeer on Neenah Classic Crest 80lb solar white cardstock, colored them with Copics and die-cut them using the coordinating dies. I decided I wanted a white border, so I adhered the frame portion of the Fancy Frames Rectangle Dies to the card front.

I hope you enjoyed and thanks for stopping by today! For more inspiration, please visit my blog www.inkredibleadventures.com and you can also find me on Instagram as @cathy.chapdelaine.

-----------------------------------------------

Hello Sunny Studio friends! It’s Bobbi here with a card featuring the new Reindeer Games stamps and dies. Jolly Santa must feed the reindeer before their big night, flying in the sky. This herd loves all things sweet including candy canes, colorful gumdrops, and peppermints, too. This is food fit for Rudolph and all the reindeer!


Sunny Studio Stamps: Reindeer Games Winter Themed Holiday Card by Bobbi Lemanski (featuring Scenic Route, Gingerbread House Dies)

To make this 5″ X 7″ card, I created a simple background scene using the Scenic Route stamps. I blended on some blue ink at the top for the sky. I splattered on a little white paint for snow and added a few darker dots of blue in the sky. A little blue coloring was also added to the trees. I wanted to keep the background super simple so all the attention would be on the foreground scene. It’s Santa feeding the reindeer gang!


I stamped, colored and die cut the reindeer and Santa. For the candy, I used the candy cane, peppermint and gumdrop dies from the Gingerbread House dies. I put two candy canes in Santa’s hands. The reindeer on both sides of Santa are ready to take a few licks from these sweet treats! Gumdrops and peppermints, plus a broken candy cane cover the snowy hills.


Sunny Studio Stamps: Reindeer Games Winter Themed Holiday Card by Bobbi Lemanski (featuring Scenic Route, Gingerbread House Dies)

I stamped a few sentiments from the Reindeer Games stamps at the top and bottom and shaded around the elements to ground them and finish this card. I used the following Copic Marker colors to color in the elements:


Browns: E00, E04, E11, E42, E47, E44, E55, E57
Greens YG05, Yg07, YG02, Yg00
Reds: R89, R59, R29, R27, R14, R22, R20, R00
Cool Grays: 100, C7, C5, C3, C1, C00
Pinks: RV17, RV55, RV0
Blues: B000, B00, B02


I also used a Gelly Roll white ink pen for accents such as Santa’s beard and highlights on the candy pieces. Santa, the candy canes in his hands and the front-right side reindeer were attached using dimensional foam tabs.


You can shop all these wonderful products at Sunny Studio Stamps. Thanks for stopping by today. If you want to see more ideas and inspiration from me, subscribe to my blog, BobbiHartDesign.com. I’ll send you updates on new posts! You can also find me on Instagram as @BobbiHartDesign and on Facebook as BobbiHartDesign.


Sunny Studio Supplies Used:

Gingerbread House Dies
Shop at:
Sunny Studio
Fancy Frames- Rectangles
Shop at:
Sunny Studio
Alpaca Holiday Stamps
Shop at:
Sunny Studio
Rustic Winter Dies
Rustic Winter Dies
Shop at:
Sunny Studio
Scenic Route Stamps
Scenic Route Stamps
Shop at:
Sunny Studio
Scenic Route Dies
Scenic Route Dies
Shop at:
Sunny Studio
Tropical Trees Backdrop
Shop at:
Sunny Studio
Reindeer Games Stamps
Shop at:
Sunny Studio
Reindeer Games Dies
Reindeer Games Dies
Shop at:
Sunny Studio
Autumn Tree Die
Autumn Tree Die
Shop at:
Sunny Studio