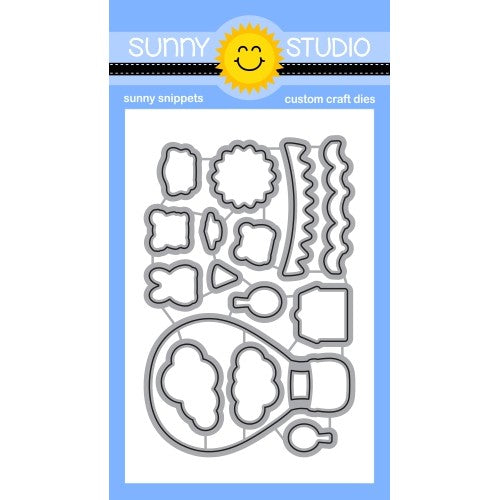
Showing posts with label Scalloped Tag Dies. Show all posts

Thursday, March 14, 2024

Spring Garden Die Focused Tags with Marine

Hello crafty friends, Marine here with you today, I'm back with a trio of tags featuring Spring Garden, which includes the perfect dies to create lovely scenes during springtime. Really love that set!

Sunny Studio Stamps: Spring Garden Die Focused Tag Set by Marine Simon (featuring Scalloped Tag Dies, Mini Grass Dies, Picket Fence Dies, Brilliant Banner Dies)

I started off by cutting different Scalloped Square Tags panels to build my tags:

• three blue tags using floral pattern papers from Spring Fever and from Spring Fling

• three green tags using a grass pattern paper from Spring Fever

• three white tags, to make the back of my tags nice

Sunny Studio Stamps: Spring Garden Die Focused Tag Set by Marine Simon (featuring Scalloped Tag Dies, Mini Grass Dies, Picket Fence Dies, Brilliant Banner Dies)

I cut a Mini Grass Border out of each grassy tag, and attached a grass border at the bottom of each blue floral tag using 1mm foam squares. And then I stuck each blue tag on a white one. I also cut three Picket Fences that I attached on each tag.

Sunny Studio Stamps: Spring Garden Die Focused Tag Set by Marine Simon (featuring Scalloped Tag Dies, Mini Grass Dies, Picket Fence Dies, Brilliant Banner Dies)

Next I cut all the bits and pieces out of colored cardstock using Spring Garden dies for most of them, but also used the bird from Build A Birdhouse, the boots from Rainy Days, and the low plant box from Wonderful Windows. I assembled all those cute pieces, and attached them on each tag using foam squares.

Sunny Studio Stamps: Spring Garden Die Focused Tag Set by Marine Simon (featuring Scalloped Tag Dies, Mini Grass Dies, Picket Fence Dies, Brilliant Banner Dies)

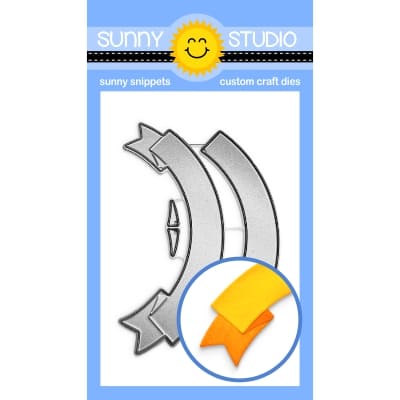
For my greetings, I started off by cutting three Brilliant Banners 1 bases out of different colored cardstock. I also cut the front pieces out of Dots & Stripes Pastels pattern papers, white heat embossed "Hello spring" from Chubby Bunny on each piece, and attached those banner front pieces on the banner bases using 1mm foam squares. I attached a banner on each tag, tied some ribbon and twine at the top of each tag, and added a small black pearl on each bird to make the eye. 

And that's it! Let me know what you think about those spring tags! Thanks so much for stopping by, and see you next week.

Sunny Studio Supplies Used:

Picket Fence Border Dies
Shop at:
Sunny Studio
Dots & Stripes Pastels 6x6 Paper
Shop at:
Sunny Studio
Chubby Bunny Stamps
Chubby Bunny Stamps
Shop at:
Sunny Studio
Scalloped Tags-Square
Shop at:
Sunny Studio
Spring Fling Paper
Spring Fling Paper
Shop at:
Sunny Studio
Build-A-Birdhouse Dies
Shop at:
Sunny Studio
Rainy Days Dies
Rainy Days Dies
Shop at:
Sunny Studio
Wonderful Windows Dies
Shop at:
Sunny Studio
Spring Fever Paper
Spring Fever Paper
Shop at:
Sunny Studio
Brilliant Banner 1 Dies
Shop at:
Sunny Studio
Spring Garden Dies
Spring Garden Dies
Shop at:
Sunny Studio
Mini Grass Border Dies
Shop at:
Sunny Studio

Thursday, February 8, 2024

My Heart Tags with Marine

Hello crafty friends, Marine here with you today, I'm so happy to be back on the blog with this set of five colorful tags showcasing, as very often, multiple things. My plan was originally to make one tag only, the one with the burger and fries, but I had so much fun making that tag that I decided to use the other signs from Cruisin' Cuisine to make more.

Sunny Studio Stamps: My Heart & Cruisin' Cuisine Tags by Marine Simon (featuring Big Bold Greetings, Scalloped Tag Dies, Words Of Gratitude, Stitched Rectangles Dies)

I started off by stamping all my images on 80lb Neenah solar white cardstock using an alcohol marker friendly black ink, I cut them all using the coordinating dies, and colored everything using my Spectrum Noir Illustrator markers and Graph'it brush markers.

Next I worked on my greetings, and started by stamping five big greetings using Lawn Fawn premium dye inks:

• "Happy Valentine's Day" from My Heart using Lemonade ink

• "You're My Favorite" from Lovey Dovey using Freshly cut grass ink

• "Thank You", "Happy Birthday", and "Make A Wish" from Big Bold Greetings using Guava, Bubblegum, and Merman inks

Sunny Studio Stamps: My Heart & Cruisin' Cuisine Tags by Marine Simon (featuring Big Bold Greetings, Scalloped Tag Dies, Words Of Gratitude, Stitched Rectangles Dies)

And then I white heat embossed five phrases from Cruisin' Cuisine and Words Of Gratitude on dark gray slim banners: "You're the burger to my fries", "Have a sweet day" (twice), "Franks a lot for always being there" and "Soy happy we're friends".

Sunny Studio Stamps: My Heart & Cruisin' Cuisine Tags by Marine Simon (featuring Big Bold Greetings, Scalloped Tag Dies, Words Of Gratitude, Stitched Rectangles Dies)

Next I used the Scalloped Square Tag largest die to cut five panels out of different Classic Sunburst pattern papers to match my food trucks. And to make my panels rectangle and not square, I started off by die cutting the top of the panel and not the bottom. I shifted the die down about an inch, and then cut the bottom of the panel and not the top. I did the same with white cardstock to create five white tags that I glued at the back of each colorful tag using liquid glue.

To mute the front of each tag down a little bit, I cut five vellum panels using the smallest die from Stitched Rectangles, attached images and greetings on each of those vellum panels using 1mm foam squares, and then stuck them on the tags using liquid glue.

Sunny Studio Stamps: My Heart & Cruisin' Cuisine Tags by Marine Simon (featuring Big Bold Greetings, Scalloped Tag Dies, Words Of Gratitude, Stitched Rectangles Dies)

I finished each tag by adding highlights and details to the images using a white gel pen, and added black & white gingham ribbon at the top of each tag. And that's it! 

Making those tags was so fun, it was my very first time using Cruisin' Cuisine and I really loved coloring those cute trucks and shop signs! Thanks so much for stopping by, and see you next time!

Sunny Studio Supplies Used:

Stitched Rectangle Dies
Shop at:
Sunny Studio
Words of Gratitude Stamps
Shop at:
Sunny Studio
Scalloped Tags-Square
Shop at:
Sunny Studio
Cruisin' Cuisine Stamps
Shop at:
Sunny Studio
Cruisin' Cuisine Dies
Shop at:
Sunny Studio
Classic Sunburst Paper
Shop at:
Sunny Studio
Lovey Dovey Stamps
Lovey Dovey Stamps
Shop at:
Sunny Studio
Lovey Dovey Dies
Lovey Dovey Dies
Shop at:
Sunny Studio
Big Bold Greetings Stamps
Shop at:
Sunny Studio
Big Bold Greetings Dies
Shop at:
Sunny Studio
My Heart Stamps
My Heart Stamps
Shop at:
Sunny Studio
My Heart Dies
My Heart Dies
Shop at:
Sunny Studio

Friday, February 2, 2024

Bighearted Bears Gift Tags with Nicky

Hello everyone, this is Nicky with you today on the Sunny blog and I'm sharing some very cute Valentine's themed gift tags with you. These tags feature the Bighearted Bears stamp set and would work well tied to a package of candy or a Valentine's gift. I have done two styles of gift tags so keep reading to see the second style.

Sunny Studio Stamps: Bighearted Bear Gift Tags by Nicky Meeks (featuring Scalloped Tag Circle Dies, Comic Strip Everyday Dies)

For this first trio of tags, I die cut both bright pink and white cardstock using the Scalloped Tags Circle Dies and the mini sentiment tags come from the Wrap Around Box Die.

I masked and ink blended each white die cut and splashed to distress the background. I stamped in some little hearts. I then die cut trees, hearts and clouds using the Comic Strip Everyday Die and adhered these in position. I assembled the mini tags and stamped the sentiment from the words included in Bighearted Bears at a fun angle. I assembled the tags, glueing the different parts together.

Sunny Studio Stamps: Bighearted Bear Gift Tags by Nicky Meeks (featuring Scalloped Tag Circle Dies, Comic Strip Everyday Dies)

I stamped the bears and accessory images from Bighearted Bears in black ink and coloured with the following Copic marker combinations:

Bears - T5, T4, T3, C3, C1, C00, RV10 (blush)
Pink - V06, RV17, RV06
Envelopes - C1, C0, B000
Clouds - C1, C0, B000

I highlighted with a white gel pen and die cut using the coordinating dies and applied everything either directly with glue or popped up on dimensional foam tape. To finish this group of tags I backed the white tags with dimensional foam tape and applied the bright pink die cuts to the back to make the tags heavier and more interesting, then I passed pink and white baker's twine through the tag and cinched the twine together with a cheerful pink ribbon bow.

Sunny Studio Stamps: Bighearted Bear Gift Tags by Nicky Meeks (featuring Scalloped Tag Circle Dies, Comic Strip Everyday Dies)

Not satisfied yet, I decided to make a shaker tag version. I cut three of the scalloped tags for this shaker version and I also cut a sheet of acetate so that I could create a shaker window which I filled with glitter and a variety of sequins and hearts.

Sunny Studio Stamps: Bighearted Bear Gift Tags by Nicky Meeks (featuring Scalloped Tag Circle Dies, Comic Strip Everyday Dies)

For this tag I used the coordinating mini scalloped die from the Scalloped Tags Circle Dies for my sentiment and my colouring of the bears etc is exactly the same as for the tags above except that my pink combination here is RV17, RV55 and RV23.  

I hope you feel inspired to create your own little tags for your Valentine's gifts and I wish you a wonderful day!

Sunny Studio Supplies Used:

Comic Strip Everyday Dies
Shop at:
Sunny Studio
Wrap Around Box Die
Wrap Around Box Die
Shop at:
Sunny Studio
Scalloped Tags-Circle
Shop at:
Sunny Studio
Bighearted Bears Stamps
Shop at:
Sunny Studio
Bighearted Bears Dies
Shop at:
Sunny Studio

Sunday, November 26, 2023

Merry Mocha Tags with Tammy

Hello friends! Tammy here with some fun Holiday tags featuring the adorable set, Merry Mocha. This set is a FREE gift with purchase for a limited time, while supplies last, so go get yours today! 

Sunny Studio Stamps: Merry Mocha Holiday Tags by Tammy Stark (featuring Scalloped Square Tag Dies, Basic Mini Shape 2 Dies)

To begin, I stamped the images from Merry Mocha, colored with Copic markers, and die cut with the Merry Mocha dies

Sunny Studio Stamps: Merry Mocha Holiday Tags by Tammy Stark (featuring Scalloped Square Tag Dies, Basic Mini Shape 2 Dies)

Next, I cut three white tags using the Scalloped Square Tag Dies. I then attached candy cane striped patterned paper, from the Joyful Holiday Paperto fit inside the stitched squares. I then layered a black cardstock square, that I white heat embossed with the fun sentiment from the Merry Mocha set.

Sunny Studio Stamps: Merry Mocha Holiday Tags by Tammy Stark (featuring Scalloped Square Tag Dies, Basic Mini Shape 2 Dies)

Next, I attached the die cut mugs to the tags using foam tape for dimension. I added white die cut snowflakes, cut using the Basic Mini Shape Dies 2then added some red and white bakers twine to finish up my tags! 

Thanks so much for stopping by! See you soon!

-------------------------------------------------------

The Merry Mocha Stamps used today are not available for purchase this holiday season but rather will be automatically included with all retail orders of $45 or more from our online store through November 27th at Midnight PDT. Here are all the details:

Receive free shipping on U.S. orders of $40+

+ Receive the exclusive mini "Merry Mocha" stamp set with a $45+ purchase.

+ Receive the coordinating "Merry Mocha" dies with a $75+ purchase.

+ 10% of retail sales will be donated to the Maui Strong Fund with the Hawaii Community Foundation.

*Please note: No discount codes are needed. All offers will be applied automatically and cannot be combined with additional discounts at checkout. Purchases are based on order subtotal, prior to shipping & tax.

Sunny Studio Black Friday 2023 Promotion with Exclusive Free Merry Mocha Stamps & Dies, Free Shipping + Maui Fundraiser

Supplies Used:

Basic Mini Shape Dies 2
Shop at:
Sunny Studio
Scalloped Tags-Square
Shop at:
Sunny Studio
Joyful Holiday Paper
Shop at:
Sunny Studio

Wednesday, November 8, 2023

Dashing Dachshund Card with Gladys

Hi crafty friends, Gladys here! I'm excited to be back on the blog today with a set of holiday tags featuring the adorable Dashing Dachshund mini stamp set and dies.

Sunny Studio Stamps: Dashing Dachshund Holiday Tags by Gladys Marcelino (featuring Scalloped Tag Dies)

To start, I used the Scalloped Tags Square die to cut from Bristol smooth cardstock. I placed washi tape along the dotted lines to keep the scallop edge white. Then I ink blended the background using tattered rose, picked raspberry, and seedless preserves distress oxide inks. To add more interest I splattered speckles of white paint and seedless preserves with a small paint brush.

Next, I stamped the images from the Dashing Dachshund stamp set. I colored them with copic markers then used the coordinating dies to cut them out. I had fun using pattern paper for their sweater.

Sunny Studio Stamps: Dashing Dachshund Holiday Tags by Gladys Marcelino (featuring Scalloped Tag Dies)

I stamped the sentiment directly on the tags making sure I had enough room for all the elements. I adhered the dachshund using double side foam tape for dimension. I used two different snowflake dies to cut from white cardstock and added sparkle with prisma glitter. I also added a bow using the stamps from Winter Wreaths stamp set. Finally, I attached twine to complete my tags.

Thanks so much for joining me today. Happy crafting!

Sunny Studio Supplies Used:

Scalloped Tags-Square
Shop at:
Sunny Studio
Winter Wreaths Stamps
Shop at:
Sunny Studio
Winter Wreaths Dies
Winter Wreaths Dies
Shop at:
Sunny Studio
Dashing Dachshund Stamps
Shop at:
Sunny Studio
Dashing Dachshund Dies
Shop at:
Sunny Studio

Thursday, October 19, 2023

Pretty Poinsettia Tags with Marine

Hey crafty friends, Marine here with you today, I'm back with this set of three Christmas shaker tags showcasing Pretty Poinsettia, a gorgeous and very easy to use layering stamp set. Every year, I like to create tags, you can put them on presents, hang them in the Christmas tree or in the house, etc. I personally send them to my crafty friends abroad along with a holiday card.

Sunny Studio Stamps: Pretty Poinsettia Holiday Tags by Marine Simon (featuring Scalloped Square Tag Dies, Holiday Greetings)

I knew I wanted to have three poinsettias on each tag, so, with the help of the layering guide on the Pretty Poinsettia product page, I started off by stamping nine poinsettias on 80lb Neenah solar white cardstock using the different layering stamps from the set along with Lawn Fawn dye inks: for the first layer (1a) I used peachy keen, for the second layer (1b) I used guava, and for the third layer (1c) I used lobster. Next I used my heat gun to dry the inks and prevent them from mixing into each other, I gold heat embossed the center of each poinsettia, and then cut my nine poinsettias using the matching die.

I gold heat embossed several leaves using the stamps 2a and 3a. And next I used Altenew dye inks to create green leaves. For the first layers (2a and 3a) I used frayed leaf, and for the second layers (2b alternate and 3b alternate) I used forest shades. And I used the matching dies to cut all the leaves.

While I was into the stamping process, I took the advantage of the opportunity to white heat emboss three Holiday Greetings on vellum that I cut using the coordinating dies.

Sunny Studio Stamps: Pretty Poinsettia Holiday Tags by Marine Simon (featuring Scalloped Square Tag Dies, Holiday Greetings)

Next I worked on the shaker tags, and started off by cutting all the different elements in three using the Scalloped Tag Square die set: the front panel out of red cardstock (and I used a smaller square die from my stash to cut an opening inside of each of those panels), acetate panels, vellum panels and All Is Bright panels. And here is how I built each shaker tag:

1. Attach the acetate panel at the back of the red panel using liquid glue along the four edges

2. Still at the back of that red panel, add foam strips on the four edges, use a powder tool along the inside edges of the foam to make it non sticky, clean the acetate using a cloth, and pour some shaker accessories on the acetate (here I used gold sequins from my stash)

3. Attach the vellum panel on top of the pattern paper panel using liquid glue along the four edges (this step is optional, I did this to mute the colors on the pattern papers a little bit)

4. Attach your vellum + pattern paper panel at the back of the red panel, directly on the foam strips to close the shaker tag

Sunny Studio Stamps: Pretty Poinsettia Holiday Tags by Marine Simon (featuring Scalloped Square Tag Dies, Holiday Greetings)

Next I created a handle at the top of each tag using gold thread, and added bows for more cuteness. And then I attached all the elements (poinsettias, leaves and greetings) on the tags using 3mm glue dots mostly to stick really well on the acetate, and also 1mm foam squares. And to add more shine to those tags, I added clear droplets here and there directly on the poinsettias.

And that's it! Those shaker tags were so fun to make, and stamping the poinsettias and seeing them taking shape was quite satisfying. I hope you will find inspiration in today's projects. Thanks so much for stopping by, and see you next week with more poinsettias, but in a different way!

Sunny Studio Supplies Used:

Scalloped Tags-Square
Shop at:
Sunny Studio
All Is Bright Paper
All Is Bright Paper
Shop at:
Sunny Studio
Holiday Greetings Stamps
Shop at:
Sunny Studio
Holiday Greetings Dies
Shop at:
Sunny Studio
Pretty Poinsettia Stamps
Shop at:
Sunny Studio
Pretty Poinsettia Dies
Shop at:
Sunny Studio

Wednesday, March 29, 2023

Spring Fever Patterned Paper Focused Cards with Catherine and Marie

Hello Crafty Friends! Catherine here, and today I am sharing a colorful spring card created with Spring Fever Paper and Rainy Days Dies.

Sunny Studio Stamps: Spring Fever Paper Focused Rainy Day Friendship Card by Catherine Cohen (featuring Scalloped Tag Dies)

To start, I added a stitched border by die cuting a stitched rectangle die onto a piece of  A2 white card stock.  Using Versamark Ink, I stamped the rain drops onto the background with the Rain Showers Stamp. I heat embossed the rain drops with clear embossing powder and set the card background aside.

For the tag, I die cut paper from Spring Fever Paper using Scalloped Tag Square Dies. Next, I die cut the cloudy background using a square die 3”x 3”.  Using the same die, I die cut a piece of acetate and wiped it with a dryer sheet to avoid static.  To make the white frame, I nested a 2.5” x 2.5” square die inside the 3”x 3” square die and ran it through my die cut machine with white cardstock. I repeated this with a piece of double-sided foam. I glued the acetate onto the white cardstock frame and then adhered it onto the foam frame. 

Sunny Studio Stamps: Spring Fever Paper Focused Rainy Day Friendship Card by Catherine Cohen (featuring Scalloped Tag Dies)

The umbrella was made using Rainy Days Dies with paper from Spring Fever Paper. I ink blended the umbrella frame and the tip with Hickory Smoke Distress Oxide. I glued the umbrella onto the cloudy background and added Crystal Clear Jewels and attached the acetate frame onto the background forming the shaker.  I glued the umbrella shaker onto the square tag. I adhered the entire tag onto the white embossed card background.

I added a colorful border using paper from the same pack die cut with Ribbon & Lace Border Dies. I added some rain drops from the Rainy Days Dies using blue cardstock and  highlighted a few with Clear Rain DropsI finished the card by tying a bow with yellow twine and a White Heat Embossed sentiment from Spring Showers Stamps.

Thank you so much for joining me today! Have a wonderful week!

--------------------------------------

Hello Crafty Friends, Marie here! I hope you are having a great Spring season so far! I'm happy to be back on the blog sharing a brand new card inspiration featuring Sunny Studio Stamps' Spring Fever Paper. Bright cheerful colors, and an array of beautiful patterns of polka dots, and florals are among the features I absolutely love about this amazing 6x6  paper pack! I love the variety of papers that can be used all year round and for so many different occasions, makes this pack one of my favorites in my stash! Today, I paired the Spring Fever pattern papers with Sunny's adorable Looking Sharp Stamps to create a fun and extra happy birthday card. 

Sunny Studio Stamps: Spring Fever Paper Focused Looking Sharp Birthday Card by Marie Marco

To start, I cut an A2 sized base panel from 110 lb. Neenah Solar white heavyweight cardstock. I cut another A2 sized panel of rainbow pattern paper from the Spring Fever Paper. I adhered the pattern paper to my base using double sided tape adhesive to ensure the paper lay super flat without any bubbles. Then,  I cut out three circles using 2 different sized circle dies from a bright yellow polka dot paper. I played around with the placement of the circles before adhering them to my card front. 

Next, I stamped out all the adorable cacti images on watercolor paper using Antique Linen Distress Ink. I also used a birthday cupcake image from the Panda Party Stamps.  I then water colored my images using Faber-Castell watercolor pencils. I used the corresponding Looking Sharp Dies to cut out the cacti images and used the Panda Party Dies to cut out the cupcake. I adhered all the images inside the yellow circles using double sided tape adhesive, and used small cuts of double sided foam strips to give the cupcakes dimension. 

Sunny Studio Stamps: Spring Fever Paper Focused Looking Sharp Birthday Card by Marie Marco

Lastly, I stamped out my sentiment onto some banner strips and adhered them to the card, and presto! A super fun birthday card for any of your cacti and succulent loving friends or family! I certainly have many people in my life that are  huge fans of these prickly plants so this card will find a home soon! Thank you so much for joining me today, friends! I hope I've inspired you to use more pattern papers in your creations! Until next week, stay safe and Happy Cardmaking! 

Sunny Studio Supplies Used:

Rain Showers Stamps
Rain Showers Stamps
Shop at:
Sunny Studio
Scalloped Tags-Square
Shop at:
Sunny Studio
Spring Showers Stamps
Shop at:
Sunny Studio
Panda Party Stamps
Panda Party Stamps
Shop at:
Sunny Studio
Panda Party Dies
Panda Party Dies
Shop at:
Sunny Studio
Rainy Days Dies
Rainy Days Dies
Shop at:
Sunny Studio
Ribbon & Lace Dies
Ribbon & Lace Dies
Shop at:
Sunny Studio
Spring Fever Paper
Spring Fever Paper
Shop at:
Sunny Studio