Showing posts with label Rounded Rectangle Dies. Show all posts

Saturday, May 30, 2026

Guest Designer Spotlight: Monkey Business Cards with Rachel Alvarado

Sunny Studio Stamps: Monkey Business & Jungle Vines Cards by Rachel Alvarado (featuring Rounded Rectangle Window Dies, Slimline Nature Border Dies)

Hello crafty friends! I hope your weekend is off to a great start! It's Rachel here, and I have two cards to share with you that showcase the adorable new Monkey Business Stamps and Jungle Vines Dies. I had so much fun making these cards with these products!

Sunny Studio Stamps: Monkey Business & Jungle Vines Cards by Rachel Alvarado (featuring Rounded Rectangle Window Dies, Slimline Nature Border Dies)

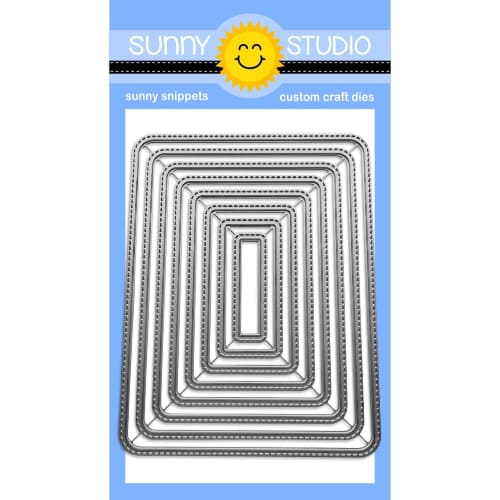
For my first card, I created a shadow box card that folds flat for shipping. This card measures at 5.5" tall, 4.25" wide, and 1.5" deep. When folded flat, it can fit in a standard A8 envelope and measures 5.5" tall and 5.75" long. For the front window of this shadow box, I die cut a rounded stitched rectangle using the Rounded Rectangle Window Dies

For the inside of the card, I added a few hills of grass using the Slimline Nature Border Dies. I die cut the grass pieces from white card stock and blended them with Twisted Citron, Mowed Lawn, and Rustic Wilderness Distress Ink. I also die cut my vines and foliage pieces from white card stock and used Copic Markers to give them some color and shading. For my monkeys, I stamped my images with Memento Tuxedo Black Ink onto a sheet of Neenah Solar White 110lb Card Stock and colored them with Copic Markers. I then die cut them using the coordinating Monkey Business Dies.

Sunny Studio Stamps: Monkey Business & Jungle Vines Cards by Rachel Alvarado (featuring Rounded Rectangle Window Dies, Slimline Nature Border Dies)

Lastly, I heat embossed my sentiment on black card stock using some Fine Detail White Embossing Powder and glued it to the front strip of grass.

Copic Colors Used:

  • Monkeys: E000, E00, E11, E04 (light areas); E43, E44, E47 (dark areas)
  • Foliage: YG01, YG06, YG17, YG67
  • Tree Limbs: E31, E23, E25, E29
  • Bananas: Y13, Y15, V12
Sunny Studio Stamps: Monkey Business & Jungle Vines Cards by Rachel Alvarado (featuring Rounded Rectangle Window Dies, Slimline Nature Border Dies)

I used the same Copic colors for my images on my second card as well as the Monkey Business Stamp Set and Dies. For my background, I used a beautiful piece of patterned paper from the Spring Fling Paper Pad. This pre-printed design makes it super easy to add some beautiful backgrounds without any fuss.

Sunny Studio Stamps: Monkey Business & Jungle Vines Cards by Rachel Alvarado (featuring Rounded Rectangle Window Dies, Slimline Nature Border Dies)

Once again, I heat embossed my sentiment with Fine Detail White Embossing Powder and cut it out using my paper trimmer before adhering it to my card.

I hope you enjoyed my cards today and will give these products a closer look! Thanks so much for stopping by!

Sunny Studio Supplies Used: 

Spring Fling Paper
Spring Fling Paper
Shop at:
Sunny Studio
Slimline Nature Borders
Shop at:
Sunny Studio
Rounded Rectangle Window Dies
Shop at:
Sunny Studio
Monkey Business Stamps
Shop at:
Sunny Studio
Monkey Business Dies
Shop at:
Sunny Studio
Jungle Vines Dies
Jungle Vines Dies
Shop at:
Sunny Studio

Thursday, December 11, 2025

Deck The Halls Card with Marine

Hello crafty friends, Marine here, so happy to be back with this bright and cheerful card featuring decorative baubles from Deck The Halls, like a close-up of a Christmas tree.

Sunny Studio Stamps: Deck The Halls Christmas Card by Marine Simon (featuring Classy Christmas, Bells & Baubles, Rounded Rectangle Mat Dies, Rounded Rectangle Window Dies)

I started off by stamping the images on 110lb Neenah solar white cardstock using Memento tuxedo black ink, I cut them with the coordinating dies and colored everything with my Ohuhu markers. For the branches, I stamped them using a green dye ink first, next I used green markers to add more depth and make those branches more full, and then used a brown marker to color the middle of each branch. Here is a detailed list of the stamp sets I used: • Deck The Halls - baubles • Classy Christmas & Bells & Baubles - branches • Scenic Route - strings of lights.

Sunny Studio Stamps: Deck The Halls Christmas Card by Marine Simon (featuring Classy Christmas, Bells & Baubles, Rounded Rectangle Mat Dies, Rounded Rectangle Window Dies)

When the coloring was done, I added highlights and details to the baubles using a white gel pen, added a dot of glossy accents to each light and to Rudolph's nose, I mixed copic opaque white ink with water and added splatters to the branches and then did the same with liquid stardust.

Next I cut a large Rounded Rectangle Mat panel out of a Joyful Holiday red gingham pattern paper, cut an opening out of it using the second largest Rounded Rectangle Window die to turn it into a frame, added white splatters to that frame, and set it aside to dry. I used the largest Rounded Rectangle Mat die again to cut a panel out of a Very Merry green pattern paper, added white splatters and liquid stardust splatters to it, and once dry, I attached my images to it using 1mm foam squares, except for the strings of lights that I stuck using liquid glue.

Sunny Studio Stamps: Deck The Halls Christmas Card by Marine Simon (featuring Classy Christmas, Bells & Baubles, Rounded Rectangle Mat Dies, Rounded Rectangle Window Dies)

I attached my red rounded frame using 2mm foam squares, next the panel to a 5,5 x 4,25 inches white panel and then to a matching card base. For my greeting, I white heat embossed "Merry Christmas" from Bells & Baubles on black cardstock, cut those words using the matching dies, and attached them at the bottom of my panel using 1mm foam squares. I also white heat embossed "May the season fill your home with joy" from Cozy Christmas on black cardstock, cut it into a fishtail banner and then stuck that banner at the top of my card using 1mm foam squares again.

And that's it! Thanks so much for stopping by, and see you next time!

Sunny Studio Supplies Used:

Deck The Halls Stamps
Shop at:
Sunny Studio
Deck The Halls Dies
Deck The Halls Dies
Shop at:
Sunny Studio
Very Merry 6x6 Paper
Shop at:
Sunny Studio
Scenic Route Stamps
Scenic Route Stamps
Shop at:
Sunny Studio
Scenic Route Dies
Scenic Route Dies
Shop at:
Sunny Studio
Classy Christmas Stamps
Shop at:
Sunny Studio
Classy Christmas Dies
Shop at:
Sunny Studio
Cozy Christmas Stamps
Shop at:
Sunny Studio
Joyful Holiday Paper
Shop at:
Sunny Studio
Bells & Baubles Stamps
Shop at:
Sunny Studio
Bells & Baubles Dies
Shop at:
Sunny Studio
Rounded Rectangle Mat Dies
Shop at:
Sunny Studio
Rounded Rectangle Window Dies
Shop at:
Sunny Studio

Wednesday, November 5, 2025

Holiday Hugs Card with Tina

Hello crafters, it’s Tina and for this sweet holiday card I am featuring one of my all time favorites, the Holiday Hugs stamp and die set! I love that the cute bear can hold several accessories for any occasion.

Sunny Studio Stamps: Holiday Hugs Winter Themed Christmas Card by Tina Henkens (featuring Frilly Frame Dies, Rounded Rectangle Dies, Holiday Greetings)

I grabbed a white card base from my stash and started to create a border using a combination of the Frilly Frames Stripes die (outer die) and a smaller Rounded Rectangle Window die. This gives you a lovely scalloped border, wide enough to frame the cute bear and leave some room for a large sentiment.

Next, I cut a rectangle from a teal polka dot paper (Dots & Stripes Pastels) with my scissors. It doesn’t have to be precise since the edges get covered with the frame. I stamped my cute bear and a Christmas stocking (Holiday Hugs stamp). All the coloring was done with my Copics in a festive red and green combo. While I had my Misti out, I also created the sentiment in a red ink from my stash (Holiday Greetings).

Sunny Studio Stamps: Holiday Hugs Winter Themed Christmas Card by Tina Henkens (featuring Frilly Frame Dies, Rounded Rectangle Dies, Holiday Greetings)

To assemble the card I glued the pattern paper to the back of the frame and adhered this piece to the card base with liquid glue. Next, I added the bear with foam tape and tucked the stocking in his little paws. The sentiment was turned into a chipboard piece by adding two layers of white to the back of the red one.

For adding snowflakes to my Christmas cards, I love using the Snowflake Circle Frame to create a bunch of them at once! Each snowflake was adorned with an Iridescent Clear Jewel in the center.

Thank you for joining me and happy crafting!

Sunny Studio Supplies Used:

Dots & Stripes Pastels 6x6 Paper
Shop at:
Sunny Studio
Frilly Frames Stripes Die
Shop at:
Sunny Studio
Snowflake Circle Frame
Shop at:
Sunny Studio
Holiday Greetings Stamps
Shop at:
Sunny Studio
Holiday Greetings Dies
Shop at:
Sunny Studio
Holiday Hugs Stamps
Holiday Hugs Stamps
Shop at:
Sunny Studio
Holiday Hugs Dies
Holiday Hugs Dies
Shop at:
Sunny Studio
Rounded Rectangle Window Dies
Shop at:
Sunny Studio

Thursday, October 16, 2025

Reindeer Games Card with Marine

Hello crafty friends, Marine here, I'm so happy to be back with this cheerful shaker card showcasing Santa and the reindeers getting ready for the holiday season. As very often I picked images from different sets to create a nice and cute mix & match scene, and as always everything is listed down below.

Sunny Studio Stamps: Reindeer Games Winter Themed Christmas Card by Marine Simon (featuring North Pole, Rounded Rectangle Window Dies, Rounded Rectangle Mat Dies)

So, speaking of which, I started off by stamping my images on 110lb Neenah solar white cardstock using an alcohol marker friendly black ink. I used the coordinating dies to cut them all, and then colored everything using my Ohuhu markers and Graph'it brush markers. Here is a detailed list of the stamp sets I used: • North Pole - Santa, north pole sign, nice list • Reindeer Games - reindeers • Snowmen In Sweaters - trees, snowflakes • Santa Claus Lane - presents, sack.

I added highlights and details to the images with a white gel pen, applied white blizzard nuvo drops to the trees to make the snow on them sparkle, and then moved on to the shaker panel and cut all the pieces I needed to build it. First, I cut a Rounded Rectangle Mat panel out of an All Is Bright turquoise paper using the largest die from the set. 

Sunny Studio Stamps: Reindeer Games Winter Themed Christmas Card by Marine Simon (featuring North Pole, Rounded Rectangle Window Dies, Rounded Rectangle Mat Dies)

Next I picked the fourth smallest Rounded Rectangle Window die and cut two openings out of my turquoise panel. And using that same fourth smallest die again, I cut two panels out of white cardstock and cut a wavy border out of each of those white panels to create two snowy borders. For the background of my shaker, I used the largest Rounded Rectangle Mat die again to cut a Joyful Holiday polka dot panel.

Before assembling my shaker panel, I added texture to the different pieces. I mixed copic opaque white ink with water and used a slim brush to add white splatters to the turquoise panel and to the polka dot panel, I mixed liquid stardust with water and added sparkling splatters to the snowy borders, and when my turquoise panel was dry, I stamped "Have a super jolly Christmas" from Reindeer Games at the very bottom using black ink.

Sunny Studio Stamps: Reindeer Games Winter Themed Christmas Card by Marine Simon (featuring North Pole, Rounded Rectangle Window Dies, Rounded Rectangle Mat Dies)

I attached a piece of acetate at the back of my turquoise panel using liquid glue, and still at the back of my panel, I attached foam strips around each opening and on the rest of the panel as well. I poured twenty White Snowflake confetti inside each opening and tiny clear crystal pieces as well, peeled all the backing papers off the foam strips, and then attached my polka dot panel to totally close my shaker panel. Back to the front of my panel, I stuck a snowy border at the bottom of each opening using liquid glue, attached my shaker panel to a 5,5 x 4,25 inches white panel and then to a white card base. Next I finally attached my images using 1mm and 2mm foam squares. 

And that's it! I hope that you like this lovely holiday shaker card! Thanks so much for stopping by, and see you next week!

Sunny Studio Supplies Used:

Santa Claus Lane Stamps
Shop at:
Sunny Studio
Santa Claus Lane Dies
Shop at:
Sunny Studio
North Pole Stamps
North Pole Stamps
Shop at:
Sunny Studio
North Pole Dies
North Pole Dies
Shop at:
Sunny Studio
All Is Bright Paper
All Is Bright Paper
Shop at:
Sunny Studio
Reindeer Games Stamps
Shop at:
Sunny Studio
Reindeer Games Dies
Reindeer Games Dies
Shop at:
Sunny Studio
Joyful Holiday Paper
Shop at:
Sunny Studio
Snowmen in Sweaters Stamps
Shop at:
Sunny Studio
Snowmen in Sweaters Dies
Shop at:
Sunny Studio
Rounded Rectangle Mat Dies
Shop at:
Sunny Studio
Rounded Rectangle Window Dies
Shop at:
Sunny Studio