Showing posts with label Sliding Window. Show all posts

Thursday, December 19, 2024

Baking Spirits Bright & Christmas Cookies Holiday Gift Set with Marine

Hello crafty friends, Marine here, I'm so happy to be back with this super cute set of interactive card + treat bag topper + shaker tags featuring the lovely gingerbread cookies from Baking Spirit Bright and Christmas Cookies

Sunny Studio Stamps: Baking Spirits Bright & Christmas Cookies Christmas Card, Shaker Tags, and Treat Bag by Marine Simon (featuring Scalloped Tag Dies, Sliding Window Dies, Stitched Rectangle Dies, Scalloped Oval Mat Dies, Ribbon & Lace Border Dies)

My first plan was to make the shaker tags and treat bag topper only, but I had some extra stamped images, so I quickly created a sliding card to go with my tags and treat bag topper. And to make sure that everything coordinates nicely, I used the All Is Bright 6x6 paper pack.

Sunny Studio Stamps: Baking Spirits Bright & Christmas Cookies Christmas Card, Shaker Tags, and Treat Bag by Marine Simon (featuring Scalloped Tag Dies, Sliding Window Dies, Stitched Rectangle Dies, Scalloped Oval Mat Dies, Ribbon & Lace Border Dies)

I started off by stamping all my images on kraft cardstock using memento tuxedo black ink. I cut them all using the coordinating dies, and colored everything using my alcohol markers. Here is a detailed list of the stamp sets I used: • Baking Spirit Bright - house, trees, stars, candy canes, small gingerbread man • Christmas Cookies - large gingerbread people.

Sunny Studio Stamps: Baking Spirits Bright & Christmas Cookies Christmas Card, Shaker Tags, and Treat Bag by Marine Simon (featuring Scalloped Tag Dies, Sliding Window Dies, Stitched Rectangle Dies, Scalloped Oval Mat Dies, Ribbon & Lace Border Dies)

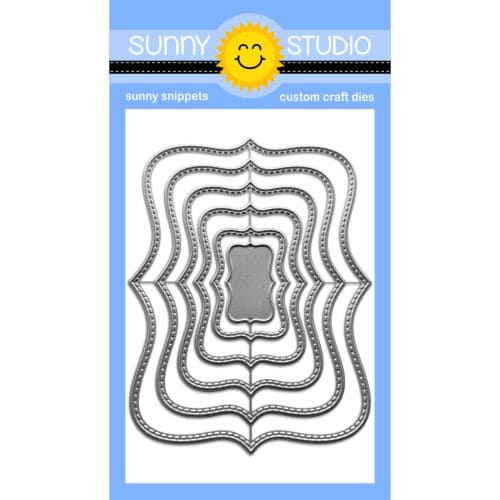
So, let's start with the Sliding Window card, shall we? I cut a 5 x 3,75 inches All Is Bright pink gingham panel using the largest Stitched Rectangle, cut the Sliding Window out of it, as well as the notch at the very top, and also cut a 5 x 3,25 inches All Is Bright green panel.

Sunny Studio Stamps: Baking Spirits Bright & Christmas Cookies Christmas Card, Shaker Tags, and Treat Bag by Marine Simon (featuring Scalloped Tag Dies, Sliding Window Dies, Stitched Rectangle Dies, Scalloped Oval Mat Dies, Ribbon & Lace Border Dies)

I folded my Sliding Window pink panel on the score lines, flipped it over, and added double sided tape on the slim bottom tab. I peeled the backing paper off this tab, flipped my 5 x 3,25 inches green panel over, and attached it at the back of my Sliding Window pink panel, lining up the bottom edge of my pink panel with the slim tab. And I wanted to frame my sliding pink panel nicely, so I cut a 5 x 3,75 inches All Is Bright snowflake panel, cut a Sliding Window out of it, as well as the notch, I trimmed that panel to get a frame, and I stuck that frame to my pink panel using liquid glue.

Next I cut an All Is Bright gingerbread man paper as wide as my sliding panel, I flipped my Sliding Window panel over, and added foam strips along the bottom edge, on the long edges as well, but not along the top edge. I peeled all the backing papers off, and attached my sliding panel to the gingerbread man panel. I attached my panel to a 5,25 x 4 inches All Is Bright stripe panel, and finally to a 5,5 x 4,25 inches All Is Bright red panel.

Sunny Studio Stamps: Baking Spirits Bright & Christmas Cookies Christmas Card, Shaker Tags, and Treat Bag by Marine Simon (featuring Scalloped Tag Dies, Sliding Window Dies, Stitched Rectangle Dies, Scalloped Oval Mat Dies, Ribbon & Lace Border Dies)

To totally complete my interactive panel, I attached the remaining piece of snowflake paper at the top of the green pull tab panel, cut an pink eyelet using a Sliding Window die, stuck that eyelet, pierced a hole through it, and added some turquoise twine to be able to pull the interactive panel.

Next I decorated the front of my Sliding Window panel. I cut two All Is Bright polka dot panels as wide as the interactive panel (3 inches), used a die from the Ribbon & Lace Border die set to create two scalloped borders, attached those borders using 1mm foam squares, and then I stuck the images to the scalloped borders and to the pull tab panel using 1mm and 2mm foam squares.

Sunny Studio Stamps: Baking Spirits Bright & Christmas Cookies Christmas Card, Shaker Tags, and Treat Bag by Marine Simon (featuring Scalloped Tag Dies, Sliding Window Dies, Stitched Rectangle Dies, Scalloped Oval Mat Dies, Ribbon & Lace Border Dies)

I created two different greetings: one for the front of the card, and one for the inside. For the first one, I cut my two Brilliant Banner 1 pieces out of red cardstock, I white heat embossed "Sweet Christmas Wishes" from Baking Spirits Bright on the front pieces, attached that front piece to the back piece using 1mm foam squares, and then I stuck the whole banner above the trees using 2mm foam squares. For the second greeting, I cut a small Scalloped Oval Mat 1 panel out of aqua cardstock, white heat embossed "Sugar & Spice Make Christmas So Nice" from Baking Spirits Bright on that scalloped panel, I pulled the interactive panel of my card, and attached my small scalloped panel on the bottom section using 1mm foam squares.

To finish my card, I added a few extra details: I cut a 3 inches wide slim stripe out of an All Is Bright paper, and attached it to the tab right below the gingerbread people using liquid glue. I added a few White Snowflake confetti around the Brilliant Banner 1, added highlights and details to the images using a white gel pen, and added a bow at the very bottom of my card using liquid glue.

Sunny Studio Stamps: Baking Spirits Bright & Christmas Cookies Christmas Card, Shaker Tags, and Treat Bag by Marine Simon (featuring Scalloped Tag Dies, Sliding Window Dies, Stitched Rectangle Dies, Scalloped Oval Mat Dies, Ribbon & Lace Border Dies)

Now let's move on the shaker tags! They both were made following the same steps and matching All Is Bright papers:

1. Cut a Scalloped Square Tag panel out of a snowflake paper, and used the fifth smallest Stitched Square die to cut an opening inside my tag panel

2. Cut a whole Scalloped Square Tag panel out of acetate, and attached that acetate panel to the back of the snowflake frame using liquid glue

3. Still at the back of the frame, added foam strips on the four edges

4. Poured some candy cane confetti from my stash inside the frame

5. Cut a whole Scalloped Square Tag panel out of a pink gingham paper, and stuck that pink panel to the foam strips to totally close the shaker tag

Sunny Studio Stamps: Baking Spirits Bright & Christmas Cookies Christmas Card, Shaker Tags, and Treat Bag by Marine Simon (featuring Scalloped Tag Dies, Sliding Window Dies, Stitched Rectangle Dies, Scalloped Oval Mat Dies, Ribbon & Lace Border Dies)

I cut a polka dot panel using the fifth smallest Stitched Square die again, trimmed that panel into two slim strips that I attached at the bottom of each shaker window using liquid glue, and then I stuck my images using 1mm and 2mm foam squares.

I created two identical greetings using Brilliant Banner 3 dies. I cut each banner piece out of red cardstock, white heat embossed "Sweet Holiday Wishes" from Baking Spirit Bright on the front piece, stuck that front piece to the back piece using 1mm foam squares, and then attached the whole banner to the shaker window using 2mm foam squares.

For the final details, I added highlights to the images using a white gel pen, and tied some ribbon with golden bells at the top of each tag.

Sunny Studio Stamps: Baking Spirits Bright & Christmas Cookies Christmas Card, Shaker Tags, and Treat Bag by Marine Simon (featuring Scalloped Tag Dies, Sliding Window Dies, Stitched Rectangle Dies, Scalloped Oval Mat Dies, Ribbon & Lace Border Dies)

And last but not least: the Treat Bag Topper. I used the main die to cut the base out of red cardstock, another base out of an All Is Bright snowflake paper and I trimmed the handle off, and one last base out of an All Is Bright red gingham paper and I trimmed it to keep the handle only. I attached the red gingham handle to the red Treat Bag Topper base using liquid glue, and next the snowflake panel. I used another Treat Bag Topper die to cut the pink gingham panel, attached it to the snowflake panel using liquid glue, and then stuck the images using 1mm and 2mm foam squares.

Sunny Studio Stamps: Baking Spirits Bright & Christmas Cookies Christmas Card, Shaker Tags, and Treat Bag by Marine Simon (featuring Scalloped Tag Dies, Sliding Window Dies, Stitched Rectangle Dies, Scalloped Oval Mat Dies, Ribbon & Lace Border Dies)

For my greeting, I first cut a light brown tag using a Window Quad Square die, I white heat embossed "Baking Spirit Bright" from Baking Spirit Bright on the lower section of my tag, cut the top decorative piece out of an All Is Bright gingerbread man paper, stuck it to the top of my tag using 1mm foam square, and tied the tag to the handle along with three golden bells using turquoise twine. I added highlights and details to the images using a white gel pen, glued a few White Snowflake confetti, and finally attached a bow on the handle using liquid glue.

Sunny Studio Supplies Used:

Stitched Rectangle Dies
Shop at:
Sunny Studio
Christmas Cookies Stamps
Shop at:
Sunny Studio
Christmas Cookies Dies
Shop at:
Sunny Studio
Sliding Window Dies
Sliding Window Dies
Shop at:
Sunny Studio
Scalloped Tags-Square
Shop at:
Sunny Studio
Window Quad Square Die
Shop at:
Sunny Studio
Scalloped Oval Mat 1 Dies
Shop at:
Sunny Studio
All Is Bright Paper
All Is Bright Paper
Shop at:
Sunny Studio
Ribbon & Lace Dies
Ribbon & Lace Dies
Shop at:
Sunny Studio
Brilliant Banner 1 Dies
Shop at:
Sunny Studio
Baking Spirits Bright Stamps
Shop at:
Sunny Studio
Baking Spirits Bright Dies
Shop at:
Sunny Studio
Treat Bag Topper Die
Shop at:
Sunny Studio
Stitched Square Dies
Shop at:
Sunny Studio
Brilliant Banner 3 Dies
Shop at:
Sunny Studio

Friday, August 9, 2024

Sliding Window Die Focused Card with Nicky

Hello there, this is Nicky with you today on the Sunny Studio blog and I'm sharing a fun Sliding Window Dies interactive card that uses a number of Sunny's products. Please read on for the details.

Sunny Studio Stamps: Sliding Window Die Focused Big Panda Card by Nicky Meeks (featuring Mini Grass Borders Dies, Beautiful Bluebells, Lovey Dovey)

If you've never made a sliding window card before I think my best advice would be for you to visit the Sunny Studio You Tube Channel and here's a LINK to a tutorial. You can probably start at around 10 mins 30 seconds to jump straight to how to make one. Additionally you can also search Sunny's You Tube channel for further sliding window card tutorials made by the design team over the years.

Sunny Studio Stamps: Sliding Window Die Focused Big Panda Card by Nicky Meeks (featuring Mini Grass Borders Dies, Beautiful Bluebells, Lovey Dovey)

To make my card I started by selecting my patterned papers which would work together. The pink cardstock is from Gingham Pastels 6x6 Cardstock and the green cardstock is something old from my stash and I used the Sliding Window Dies to create all of the different panels necessary to construct the card. Since patterned cardstock can be on the thinner side I decided to always back a panel of patterned paper with a panel of regular cardstock, gluing it down very thoroughly before tackling the die-cutting. This builds a sturdy card that can stand up to lots of opening and closing and it also feels nice and substantial to handle.

Sunny Studio Stamps: Sliding Window Die Focused Big Panda Card by Nicky Meeks (featuring Mini Grass Borders Dies, Beautiful Bluebells, Lovey Dovey)

With the card now formed, I set about making the decorative panel on the front using the Big Panda stamps and coordinating dies. I stamped in black ink and coloured the sweet Panda image using Copic markers in T7, T6, T5, T4, T3 and T2 together with C3, C1 C0 and C00 for the white parts and I blushed the cheeks with RV04, RV02 and RV00. I die cut the image and gave the panda a heart to hold. This heart as well as the flowers you see in the gingham grass were made using the Gift Card Envelope Dies. I created two grass panels using the Mini Grass Border Dies and glued in place, I then attached the panda to the window slider but only adhering at the bottom so that it would pop up freely and I added the simple die cut flowers to the grass.

To fill out the scene a little more I did a bit of layered stamping using the Beautiful Bluebells stamp set. I die cut the images using the coordinating dies and inserted the blooms around the Panda to add some next level cuteness. 

Sunny Studio Stamps: Sliding Window Die Focused Big Panda Card by Nicky Meeks (featuring Mini Grass Borders Dies, Beautiful Bluebells, Lovey Dovey)

Finally, and to complete the card I highlighted a few points with a white gel pen and I stamped the 'You Are So Lovely' sentiment from Lovey Dovey plus some of the heart images from the same set on the inside of the window. I glued a few sparkling clear sequins to the card and I chose to attach the decorative window panel to a regular card base so that a longer message could be hand written inside and it gives the recipient the opportunity to stand the card up the normal way and with the window closed or to lay it down and open the window exposing the inside message. It's always nice to have options!

I'll be back next Friday with something new so I hope to see you back here again a week from now.

Sunny Studio Supplies Used:

Sliding Window Dies
Sliding Window Dies
Shop at:
Sunny Studio
Gingham Pastels 6x6 Paper
Shop at:
Sunny Studio
Lovey Dovey Stamps
Lovey Dovey Stamps
Shop at:
Sunny Studio
Beautiful Bluebells Stamps
Shop at:
Sunny Studio
Beautiful Bluebells Dies
Shop at:
Sunny Studio
Gift Card Envelope Die
Shop at:
Sunny Studio
Mini Grass Border Dies
Shop at:
Sunny Studio
Big Panda Stamps
Big Panda Stamps
Shop at:
Sunny Studio
Big Panda Dies
Big Panda Dies
Shop at:
Sunny Studio

Thursday, July 25, 2024

Sliding Window Die Focused Card with Marine

Hello crafty friends, Marine here with you today! I'm so happy to be back with this fun and bright interactive Sliding Window card featuring three cute Fabulous Flamingos in a tropical scenery. Oh how I love to make tropical cards!

Sunny Studio Stamps: Sliding Window Die Focused card by Marine Simon (featuring Fabulous Flamingos, Tropical Birds, Silly Sloths, Stitched Rectangle Dies)

As very often I started off with the coloring and stamped all my images on 80lb Neenah solar white cardstock using an alcohol marker friendly black ink. I cut them all using the coordinating dies, and colored everything using my alcohol markers using corals for the flamingos, red for the flowers and different greens for the leaves. Here is a detailed list of the products I used: • Fabulous Flamingos - flamingos, hearts • Tropical Birds - ivy, leaves, flowers • Silly Sloths - flowers, leaves.

Sunny Studio Stamps: Sliding Window Die Focused card by Marine Simon (featuring Fabulous Flamingos, Tropical Birds, Silly Sloths, Stitched Rectangle Dies)

I cut a 5 x 3,75 inches Strathmore bristol smooth panel using the largest Stitched Rectangle, and colored it using oxide inks. I started off by covering it with cracked pistachio oxide ink to create a nice and even base. I added and blended some lucky clover oxide ink on the four edges, and then brought more interest to this background using a leafy stencil from my stash along with lucky clover oxide ink. I splattered clear water all over my panel and dried it using a paper towel. Next I mixed some pine needle oxide ink with water, used a small brush to make splatters on my panel, and then did the same with black soot oxide ink and with copic opaque white ink.

Next I cut and colored two additional Strathmore bristol smooth panels. The first one measures 5 x 3,25 inches, I cut the second one using the largest Stitched Rectangle die, and colored them both using the same colors. I first covered them with tattered rose oxide ink, and used the same leafy background stencil as before along with saltwater taffy oxide ink.

Sunny Studio Stamps: Sliding Window Die Focused card by Marine Simon (featuring Fabulous Flamingos, Tropical Birds, Silly Sloths, Stitched Rectangle Dies)

Once my leafy green panel was dry, I cut my Sliding Window out of it, as well as the notch at the top, folded my panel on the score lines, flipped it over, and added double sided tape on the slim bottom tab. I peeled the backing paper off this tab, flipped my 5 x 3,25 inches leafy pink panel over, and attached it at the back of my leafy green panel, lining up the bottom edge of the leafy green panel with the slim tab. I glued the small tab piece at the top of my leafy green panel, pierced a hole through that tab, cut a green eyelet using a die from Sliding Window, attached this eyelet to the tab, and added red twine to create a handle and be able to pull the interactive panel.

I flipped my leafy green panel over, and added foam strips along the bottom edge, on the side edges as well, but not along the top edge. I peeled all the backing papers off, and attached my leafy green panel to the remaining leafy pink panel to complete the whole interactive process. Next I cut a 5,25 x 4 inches white panel that I attached to a 5,5 x 4,25 inches Polka Dot Parade red pattern paper, and then stuck this whole panel to a white card base.

Sunny Studio Stamps: Sliding Window Die Focused card by Marine Simon (featuring Fabulous Flamingos, Tropical Birds, Silly Sloths, Stitched Rectangle Dies)

At the inside bottom of the card, I stamped "You're flamazing" from Fabulous Flamingos in black, added a few extra images, and did the same at the inside top of the pull tab. I also white heat embossed the banner from Little Birdie on vellum, embossed "Hello friend" from Chubby Bunny and Bighearted Bears inside the banner, cut it using the matching die, and attached it below the flamingos using clear foam squares. As always I finished my card by adding highlights and details to the images using a white gel pen.

And that's it! I hope that you like this lovely tropical card! Thanks so much for stopping by, and see you next week.

Sunny Studio Supplies Used:

Stitched Rectangle Dies
Shop at:
Sunny Studio
Sliding Window Dies
Sliding Window Dies
Shop at:
Sunny Studio
Chubby Bunny Stamps
Chubby Bunny Stamps
Shop at:
Sunny Studio
Fabulous Flamingos Stamps
Shop at:
Sunny Studio
Fabulous Flamingos Dies
Shop at:
Sunny Studio
Silly Sloths Stamps
Silly Sloths Stamps
Shop at:
Sunny Studio
Silly Sloths Dies
Silly Sloths Dies
Shop at:
Sunny Studio
Little Birdie Stamps
Shop at:
Sunny Studio
Little Birdie Dies
Little Birdie Dies
Shop at:
Sunny Studio
Bighearted Bears Stamps
Shop at:
Sunny Studio
Tropical Birds Stamps
Shop at:
Sunny Studio
Tropical Birds Dies
Tropical Birds Dies
Shop at:
Sunny Studio