Showing posts with label Scalloped Circle Mat Dies. Show all posts

Friday, June 23, 2023

Everything's Rosy Card with Tina

Hello crafty friends, it’s Tina and today we are talking about lots of layering! First up I am creating gorgeous flowers with the layering stamp and die set Everything’s Rosy! The detail in these stamps is just amazing and you end up with such great realistic roses.

Sunny Studio Stamps: Everything's Rosy Thank You Card by Tina Henkens (featuring Frilly Frame Dies, Big Bold Greetings, Spring Greenery Dies, Scalloped Circle Mat Dies)

As always with layering stamps I used a trick I learned from Jennifer McGuire using the dies and a stamping tool. You start by die cutting the basic shapes, in this case the two roses and the clustered leaves. I cut each shape several times. You put the negative pieces of cardstock inside the stamping tool, so you can just pop in the basic shapes.

Next, I removed all the stamps from the plastic sheet they come on. You place the first drawing (the 1a image) onto the cut basic shape for perfect placement. I secure the plastic in place with some low tack tape. Next, I place the coordinating stamp onto the drawing and line it up with the lines of the image. Then you just pick up the stamp with the door of your stamping tool and remove the plastic, you’ll get perfect stamping each time! Repeat the same process for each layer. I always stamp more images than I need, giving myself some room to play with the design.

Sunny Studio Stamps: Everything's Rosy Thank You Card by Tina Henkens (featuring Frilly Frame Dies, Big Bold Greetings, Spring Greenery Dies, Scalloped Circle Mat Dies)

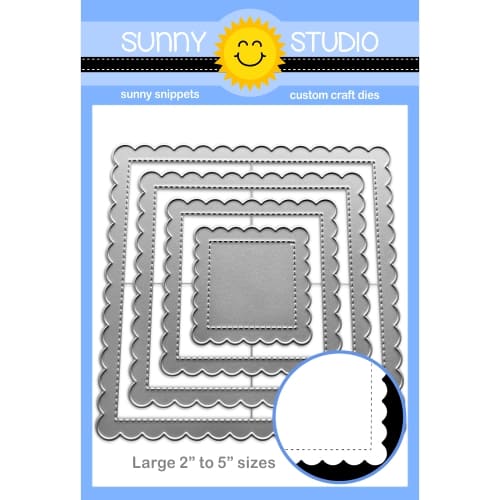
I created a white A2 card base and covered it with a pretty teal paper from the Sweater Weather paper pad. This ties in nicely with the teal inks I used on the leaves. I cut a white panel with the Frilly Frames Stripes Die and layered it on top of the teal one. Next, I added a white circle using the largest of the Scalloped Circle Mats 3.

Now it was time to lay down my roses and leaves, so I could see how much room I had left for a sentiment. I fiddled a bit with the placement and once I was happy, I could adhere the arrangement with liquid glue and dimensional foam tapes. As a little bonus, I added some white and teal leaves cut with the Spring Greenery dies.

I stamped the beautiful scripty ‘Thank You’ from the Big Bold Greetings in Versafine Onyx Black ink and cut it with the matching die. A few Chrystal Clear Jewels were scattered around the sentiment.

I hope you will create beautiful bouquets with these gorgeous, layered roses! Thank you for joining me and happy crafting!

Sunny Studio Supplies Used:

Everything's Rosy Stamps
Shop at:
Sunny Studio
Everything's Rosy Dies
Shop at:
Sunny Studio
Frilly Frames Stripes Die
Shop at:
Sunny Studio
Scalloped Circle Mat 3 Dies
Shop at:
Sunny Studio
Sweater Weather Paper
Shop at:
Sunny Studio
Spring Greenery Dies
Shop at:
Sunny Studio
Big Bold Greetings Stamps
Shop at:
Sunny Studio
Big Bold Greetings Dies
Shop at:
Sunny Studio

Thursday, May 4, 2023

Scrumptious Cupcakes Card with Marine

Hi crafty friends, Marine here today to offer you a delicious cupcake from Scrumptious Cupcakes! I created this birthday shaker card using bits and pieces from different sets, and the first thing I did was to create the background. 

Sunny Studio Stamps: Scrumptious Cupcakes Birthday Card by Marine Simon (featuring Bursting Hearts Dies, Scalloped Circle Mat Dies, Stitched Circle Dies)

I cut a 5,5 x 4,25 inches Strathmore bristol smooth panel, and used distress oxide inks to color it. From the center: kitsch flamingo, squeezed lemonade and salvaged patina. As always I splattered the panel with water and white ink to make it less flat, and set it aside to dry.

Next I worked on the shaker panel. I cut a white Bursting Hearts panel, as well as a white frame using a die from my stash. I attached the frame on the front of the bursting hearts panel, and at the back I stuck an acetate panel. Still at the back of the bursting hearts panel, I attached foam strips all along the four edges, added golden heart sequins on the acetate, and then stuck my oxide ink panel on the foam strips to close my shaker panel. I attached it on a card base, and then moved on to the cupcake.

I created it using Lawn Fawn Inks. For the cupcake case I used butter + lemonade + sunflower inks, for the cupcake itself I used doe ink, and for the frosting I used ballet slippers + peachy keen + wild rose inks.

Sunny Studio Stamps: Scrumptious Cupcakes Birthday Card by Marine Simon (featuring Bursting Hearts Dies, Scalloped Circle Mat Dies, Stitched Circle Dies)

I cut each element using the coordinating dies, and set them aside for a minute because I wanted to add a small background behind my cupcake. As a base I cut a scalloped circle out of a Dots & Stripes Pastels pattern paper using a Scalloped Circle Mat 1 die, and then I cut a gold glitter frame using the same Scalloped Circle Mat 1 die as well a Stitched Circle Large die to create a frame that I attached on the scalloped circle.

I stuck my scalloped element in the middle of the Bursting Hearts panel, and then the cupcake on top using 1mm foam squares. Next I white heat embossed my greeting on a Notebook Photo Corners black banner combining words from Garden Fairy and Panda Party, and I attached the banner below the cupcake.

And that's it! Thank you so much for stopping by, and see you next week!

Sunny Studio Supplies Used:

Dots & Stripes Pastels 6x6 Paper
Shop at:
Sunny Studio
Garden Fairy Stamps
Garden Fairy Stamps
Shop at:
Sunny Studio
Scalloped Circle Mat 1 Dies
Shop at:
Sunny Studio
Stitched Circle Large Dies
Shop at:
Sunny Studio
Bursting Heart Die
Bursting Heart Die
Shop at:
Sunny Studio
Panda Party Stamps
Panda Party Stamps
Shop at:
Sunny Studio
Notebook Photo Corners Dies
Shop at:
Sunny Studio
Scrumptious Cupcakes Stamps
Shop at:
Sunny Studio
Scrumptious Cupcakes Dies
Shop at:
Sunny Studio

Friday, March 3, 2023

Panda Party Cards with Tina and Vanessa

Hello crafty friends, Tina here with a festive card featuring the adorable Panda Party stamp and die set. With all their fun accessories, these cuties are ready to have a great time!

Sunny Studio Stamps: Panda Party Happy Anniversary Card by Tina (featuring Scalloped Circle Mat Dies, Frilly Frame Dies, Ribbon & Lace Border Dies)

First, I stamped and die cut all my images from this set and colored them with my Copic markers, adding extra details with a white gel pen. I followed the color scheme from a Spring Fever plaid paper.  Next, I cut a circle frame from this sheet using the largest die of the Scalloped Circle Mats 3 and a smaller circle from an Infinity set.

My card panel was cut from a piece of Neenah Solar White paper using the Frilly Frame Eyelet Lace die. Next, I dry embossed this panel with a bamboo folder from my stash. The Panda Party stamp set has lots of words you can mix and match to create a custom sentiment. I stamped the ‘Happy annibearsary’ onto a small white banner with Versafine Onyx Black ink.

Sunny Studio Stamps: Panda Party Happy Anniversary Card by Tina (featuring Scalloped Circle Mat Dies, Frilly Frame Dies, Ribbon & Lace Border Dies)

To assemble the card, I adhered the white embossed panel to a pink card base. Next, I mounted the circle frame with foam tape for dimension. The little pink rectangle for my bears to stand on was cut with one of the Ribbon And Lace Border dies.

I continued building the scene with the two banners and the sweet bears, making sure they all were given a party hat to celebrate! Lastly, I adhered the sentiment banner under the circle frame and added a few Pastel Mix Jewels for that extra bling! After considering white pompoms for the hats, I discovered that the smallest of the Pure White Jewels were a perfect match.

I hope you will create a fun party card with this sweet set too! Thank you for visiting the blog and happy crafting!

----------------------------------------------

Hello to you! Vanessa here with a fun explosion card using the cute Panda Party set.

Sunny Studio Stamps: Panda Party Birthday Card by Vanessa Menhorn (featuring Big Bold Greetings)

I created the box with the WRMK Explosion Card Punch Board. Onto the yellow background, I applied Distress Oxide inks with an ink blending tool and a circle stencil. Then I added white strips of cardstock to the bottom of the box. Now I stamped the images, colored everything with Copics, die-cut the pieces with the matching dies and adhered them to the box.

Sunny Studio Stamps: Panda Party Birthday Card by Vanessa Menhorn (featuring Big Bold Greetings)

Onto the tray, I stamped the sentiment from Big Bold Greetings and added the same circles. Finally, I used a white gel pen to highlight the images, sentiment and the circles.

Sunny Studio Stamps: Panda Party Birthday Card by Vanessa Menhorn (featuring Big Bold Greetings)

You will find a video on my instagram account to see the card in action. Have a wonderful weekend and thanks for stopping by!

Sunny Studio Supplies Used:

Frilly Frames-Eyelet Lace
Shop at:
Sunny Studio
Scalloped Circle Mat 3 Dies
Shop at:
Sunny Studio
Big Bold Greetings Stamps
Shop at:
Sunny Studio
Panda Party Stamps
Panda Party Stamps
Shop at:
Sunny Studio
Panda Party Dies
Panda Party Dies
Shop at:
Sunny Studio
Ribbon & Lace Dies
Ribbon & Lace Dies
Shop at:
Sunny Studio
Spring Fever Paper
Spring Fever Paper
Shop at:
Sunny Studio

Friday, December 2, 2022

Joyful Holiday Paper Focused Cards with Tina and Vanessa

Hello crafty friends, it’s Tina and today I have another Christmas card for you featuring the beautiful Joyful Holiday Papers! Patterned papers are perfect to create stunning panels on your cards or you can use them for paper piecing. I will be combining both techniques in this card.

Sunny Studio Stamps: Joyful Holiday Patterned Paper Focused Holiday Card by Tina (featuring Penguin Party, Cozy Christmas, Stitched Arch Dies, Winter Greenery)

First, I selected three pink papers from the pack that work very well together. After cutting a rectangle panel from the snowflake paper, I also used one of the Stitched Arch Dies to create a frame. I then inked up another rectangle from Neenah Solar White card stock with Distress Oxides  Peacock Feathers (floor) and Kitch Flamingo (wall) and sprinkled some water droplets for extra interest.

For my scene, I wanted to create a cozy and festive living room for one of the cute penguins from Penguin Party. He is totally ready for a wonderful Christmas! The chair, Christmas tree and the tree holder (which is actually the lamp shade up side down) are all from the Cozy Christmas set. I stamp these images on Neenah Solar White paper and again on pattern paper for the chair and the lamp shade. I fussy cut these last images on the black outer stamped lines. Next, I glued the pattern paper shapes to the images from white paper. This creates paper pieced images with a white border. I colored the cute penguin and Christmas tree with my Copic markers.

Sunny Studio Stamps: Joyful Holiday Patterned Paper Focused Holiday Card by Tina (featuring Penguin Party, Cozy Christmas, Stitched Arch Dies, Winter Greenery)

As for the festive decorations on this card, they consist of small branches from the Winter Greenery dies (in white, distress oxides Peacock Feathers and Twisted Citron) and the beautiful bow from the Winter Wreath set (distress oxides Spun Sugar and Kitch Flamingo). Next, I stamped a combined sentiment from Bear Hugs onto a small white banner.

And then I was ready to assemble the card, I mounted the snowflake panel to the inked background rectangle with foam tape for dimension. Both were glued directly to the card base. All the other elements were added with foam tape, except for the branches, I tucked them under the bow with a drop of liquid glue. And finally, I adhered the sentiment and a few Chrystal Clear Jewels for that extra sparkly touch!

And that finishes my Christmas paper piecing card! I hope you enjoy this technique as much as I did! Thank you for visiting the blog and I’ll see you soon!

------------------------------------------------

Hello to you! Vanessa here with a set of cute gift boxes made with the Joyful Holiday paper.

Sunny Studio Stamps: Joyful Holiday Patterned Paper Focused Holiday Card by Vanessa Menhorn (featuring Scalloped Circle Mat Dies, Window Quad Dies, Penguin Party)

I created the boxes with a score board, you will find a pic of the measurements below. To embellish the boxes, I made little rosettes using the Scalloped Circle Mat 1 Dies - be sure to check my Instagram to see a how-to-video

Sunny Studio Stamps: Joyful Holiday Patterned Paper Focused Holiday Card by Vanessa Menhorn (featuring Scalloped Circle Mat Dies, Window Quad Dies, Penguin Party)

I tied on matching baker's twine to each rosette and added two tags cut with the Window Quad Square Dies. Finally, I stamped the images from Penguin Party, colored these with Copics, die-cut the pieces with the matching dies and adhered the elements with foam tape.

Sunny Studio Stamps: Joyful Holiday Patterned Paper Focused Holiday Card by Vanessa Menhorn (featuring Scalloped Circle Mat Dies, Window Quad Dies, Penguin Party)

When trimming the paper for the lid, be sure to add a millimeter on every side to make the lid fit smoothly. These boxes are easy to make, the lid keeps closed and they provide enough space for sweets or other small surprises.

Enjoy your weekend and thanks for stopping by!

Sunny Studio Supplies Used:

Bear Hugs Stamps
Bear Hugs Stamps
Shop at:
Sunny Studio
Stitched Arch Dies
Stitched Arch Dies
Shop at:
Sunny Studio
Window Quad Square Die
Shop at:
Sunny Studio
Scalloped Circle Mat 1 Dies
Shop at:
Sunny Studio
Winter Greenery DIes
Shop at:
Sunny Studio
Cozy Christmas Stamps
Shop at:
Sunny Studio
Cozy Christmas Dies
Cozy Christmas Dies
Shop at:
Sunny Studio
Penguin Party Stamps
Shop at:
Sunny Studio
Penguin Party Dies
Penguin Party Dies
Shop at:
Sunny Studio
Winter Wreaths Stamps
Shop at:
Sunny Studio
Winter Wreaths Dies
Winter Wreaths Dies
Shop at:
Sunny Studio
Joyful Holiday Paper
Shop at:
Sunny Studio

Thursday, October 27, 2022

Reindeer Games Cards with Marine and Waleska

Hi crafty friends, Marine here with a new interactive card showcasing Santa and the reindeers on gift delivery duty during Christmas night. I had so much fun creating this card, and as always I searched through my Sunny Studio collection to see which images would fit in the scene I had in mind. 

Sunny Studio Stamps: Reindeer Games Holiday Card by Marine Simon (featuring Santa Claus Lane, Slimline Dies, Scalloped Circle Mat Dies)

So we have:
the reindeers, hats presents and greetings from Reindeer Games
the snowflakes from Snowman Kisses
the nice list from North Pole
the sleigh, candy cane, sack and Santa from Santa Claus Lane
the carrots from Bunnyville (to feed the reindeers ^^)

Sunny Studio Stamps: Reindeer Games Holiday Card by Marine Simon (featuring Santa Claus Lane, Slimline Dies, Scalloped Circle Mat Dies)

The first thing I did was to stamp all my cute images using an alcohol marker friendly black ink, cut them all using the coordinating dies, and used alcohol markers to color everything.

Next I cut two 8,5" x 3,5" bristol panels. I used the first panel to cut a cloud border using a die from the Slimline Nature Borders die set. I added a little of color using salvaged patina oxide ink, and stamped my "Have a super jolly Christmas" greeting in the left hand side corner. And I used the second panel to make a bright blue sky using salvaged patina, peacock feathers and blueprint sketch oxide inks. 

Sunny Studio Stamps: Reindeer Games Holiday Card by Marine Simon (featuring Santa Claus Lane, Slimline Dies, Scalloped Circle Mat Dies)

I set everything aside to dry and then created the interactive feature using the largest die from the Scalloped Circle Mat 1 die. And I invite you to watch the process video down below because it's always easier to understand how an interactive card was made with images.

Sunny Studio Stamps: Reindeer Games Holiday Card by Marine Simon (featuring Santa Claus Lane, Slimline Dies, Scalloped Circle Mat Dies)

I finished the card by adding snowflakes here and there, highlights and details using a white gel pen, and finally a dot of glossy accents on Rudolph's red nose to make it glow.

Sunny Studio Stamps: Reindeer Games Holiday Card by Marine Simon (featuring Santa Claus Lane, Slimline Dies, Scalloped Circle Mat Dies)

And that's it! Super cute and easy to put together, I hope that this will inspire you to make your own version, with or without the interactive feature, the most important is to have fun! Thank you so much for stopping by, and see you next week! 

---------------------------------------------------

Hello Friends, Waleska here. Have you seen the Santa and reindeers from the Reindeer Games stamp set? They are ready to deliver lots of fun this holiday season. This cute stamp includes five unique reindeer, I love each of them. They all have a different attitude. For my card today I will be using only one of them, but I will definitely make much more reindeer cards with all of them!


Sunny Studio Stamps: Reindeer Games Holiday Card by Waleska Galindo (featuring Winter Scenes)

I wanted to create an air view card of this fun reindeers delivering lots of presents. I started with the background, I stamped the trees of the Winter Scenes Stamp at the bottom of this panel and colored them with copic markers G09/YG07, I made a mask for them and then I colored the winter sky with Oxide Inks Tumbled Glass, Broken China and Chipped Sapphire. I stamped and colored the flying reindeer with E29/E27/E19/E15/E13 and adhere them, of course Rudolph is leading the way!

Sunny Studio Stamps: Reindeer Games Holiday Card by Waleska Galindo (featuring Winter Scenes)

I finally added the sentiment with white embossing powder and some white snowflakes, such a magical and fun scene! I adhere this panel to a red panel and to a kraft card base.

Thank you so much for stopping by today! Have a wonderful day!

Sunny Studio Supplies Used:

Santa Claus Lane Stamps
Shop at:
Sunny Studio
Santa Claus Lane Dies
Shop at:
Sunny Studio
Slimline Nature Borders
Shop at:
Sunny Studio
North Pole Stamps
North Pole Stamps
Shop at:
Sunny Studio
North Pole Dies
North Pole Dies
Shop at:
Sunny Studio
Winter Scenes Stamps
Shop at:
Sunny Studio
Winter Scenes Dies
Winter Scenes Dies
Shop at:
Sunny Studio
Scalloped Circle Mat 1 Dies
Shop at:
Sunny Studio
Bunnyville Stamps
Bunnyville Stamps
Shop at:
Sunny Studio
Bunnyville Dies
Bunnyville Dies
Shop at:
Sunny Studio
Reindeer Games Stamps
Shop at:
Sunny Studio
Reindeer Games Dies
Reindeer Games Dies
Shop at:
Sunny Studio
Snowman Kisses Stamps
Shop at:
Sunny Studio
Snowman Kisses Dies
Snowman Kisses Dies
Shop at:
Sunny Studio