Showing posts with label Layered Snowflake Frame. Show all posts

Monday, October 21, 2024

Merry Mocha Card by Leanne

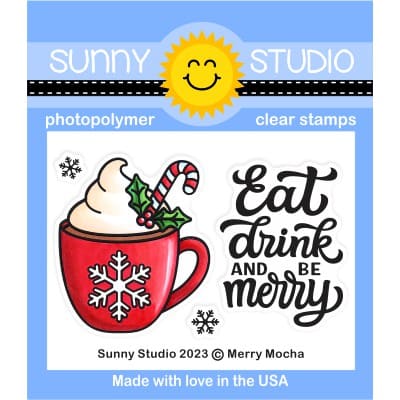
Hello everyone! Leanne here to share more holiday card inspiration. This one features the adorable little mugs from the Merry Mocha stamp set. I've repeated the image three times sitting atop a fun peppermint stripe border. 

Sunny Studio Stamps: Merry Mocha Christmas Card by Leanne West (featuring Layered Snowflake Frame Dies)

To recreate this card design you need the following Sunny Studio products:

This card is A2 size. For the top three quarters of the background, I blended on some Saltwater Taffy Distress Oxide Ink and generously splattered with thinned white paint. I added a one inch wide strip of the peppermint stripe patterned paper to the bottom.

Copics used to color the mugs: pink - R00, R30, R22; red - R22, R24, R27; green - G00, G03, G05; shading on whipped cream - YR30, R00; brown - E25, E44

Sunny Studio Stamps: Merry Mocha Christmas Card by Leanne West (featuring Layered Snowflake Frame Dies)

I added the mug images spaced evenly along the top edge of the stripe border. I then tied some white and silver baker's twine just below the mugs. 

To give the background some interest, I added the snowflakes. I die cut the snowflakes from white card stock and them lightly sprayed with some Barn Door Distress Spritz. This gives them a faint red tint and sparkle.

Sunny Studio Supplies Used: 

Snowflake Circle Frame
Shop at:
Sunny Studio
All Is Bright Paper
All Is Bright Paper
Shop at:
Sunny Studio
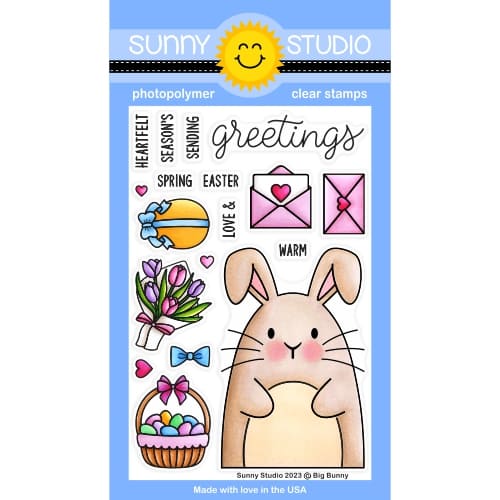
Big Bunny Stamps
Big Bunny Stamps
Shop at:
Sunny Studio
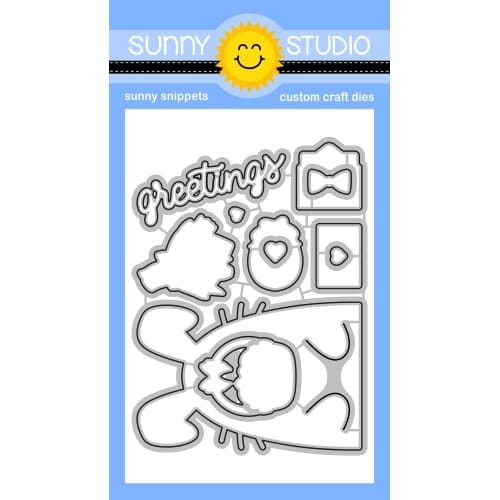
Big Bunny Dies
Big Bunny Dies
Shop at:
Sunny Studio
Merry Mocha Stamps
Merry Mocha Stamps
Shop at:
Sunny Studio
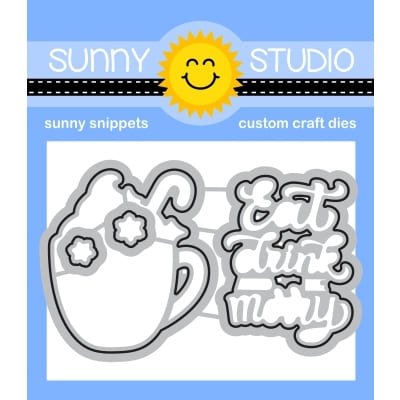
Merry Mocha Dies
Merry Mocha Dies
Shop at:
Sunny Studio

Wednesday, December 14, 2022

Snowman Kisses Cards with Marie and Alma

Hello Crafty Friends! Marie here. I hope you are all having a wonderful Holiday Season so far! Today I have another holiday card to share with you all featuring the cutest little snowmen images from Sunny Studio's Snowman Kisses Stamps. These little cuties are so fun to color with all their adorable expressions. You can highlight one or use all four like I did in this fun and festive shadow box card. 

Sunny Studio Blog: Snowman Kisses Snowflake Shadow Box Pop-up Winter Holiday Card by Marie Marco

For this card, I cut out all the pieces using a shadow box die from Bristol smooth cardstock to make the inking process super easy and smooth. I ink blended all my pieces front and back, using Distress Ink Oxides in the Color Salvaged Patina. I darkened up the front and back of the box using Distress Ink in the color Pine Needles. For the background panel, I inked it using Salvaged Patina, Uncharted Mariner, and Chipped Sapphire. For the side and back of the box, I used a snowflake stencil with Evergreen Bough Distress Ink. Then, using watered down white acrylic paint, I splattered the inside of the box, the background panel, and all the snow mound panels creating snow like texture. 

After putting my box together, I stamped out my snowman images from the Snowman Kisses Stamps using Distress Ink in Antique Linen. I always use this ink with my no line watercoloring as it disappears when it touches water. I colored all my images using Derwent Inktense water soluble pencils. After coloring my images, I cut them out using the corresponding Snowman Kisses Dies. I also used a candy cane image from the Penguin Party Stamps and used the Penguin Party Dies to cut them out. I adhered all my snowmen to my box card using Bearly Art Precision Craft Glue.

Sunny Studio Blog: Snowman Kisses Snowflake Shadow Box Pop-up Winter Holiday Card by Marie Marco

To make things even more super fun and festive, I die cut a bunch of tiny snowflakes from Bristol smooth cardstock and placed them inside my card using tiny strips of clear acetate. The acetate creates the illusion that the snowflakes are floating because it is clear! I love this technique and use it all the time! I adhered the snowflakes to the tip of the acetate strip using Bearly Art Precision Craft Glue. 

Moving on to the back of my card, I die cut a little rectangle and ink blended the edges using Candied Apple Distress ink, and stamped my sentiment in a red ink, and adhered my fourth snowman to the bottom of my panel for the cutest touch while leaving room for a personal note! 

Sunny Studio Blog: Snowman Kisses Snowflake Shadow Box Pop-up Winter Holiday Card by Marie Marco

Thank you so much for joining me today for this week's Card Making Inspiration! I am so smitten with the way this card turned out and I smile every time I see these snowmen! Have an amazing rest of the week and I wish you all the creative inspiration of the season! Until next time, Happy Cardmaking!!

------------------------------------------------

Today it's my turn, Alma, and I want to show you a little shadow box I made with the cute snowmen from the Snowman Kisses Stamps set. 


Sunny Studio Blog: Snowman Kisses Snowflake Shadow Box Pop-up Winter Holiday Card by Alexandra Stork

First, I cut two 4.5 by 9.5" strips of paper. Then I folded the strips at 2.5 and 7". 
In the "front" strip, I punched the window into the shadow box using the larger Layered Snowflake Frame Die. Then I cut out a 4.5 by 4.5" square and die cut using the smaller Layered Snowflake Frame Die. I glued this square behind the larger snowflake frame to create a layered effect. 


I then glued the front and back together. For the interior design, I punched the clouds from the Slimline Nature Border Dies twice at different heights and cut them to a length of 6.5". I scored these borders at 1" and at 5.5" and glued the two borders into the bottom of the box as snow clouds. You can now stick motifs anywhere. 


Sunny Studio Blog: Snowman Kisses Snowflake Shadow Box Pop-up Winter Holida

For the background I stamped a 4.5 by 4.5 inch paper with the Scenic Route Stamps set and die-cut them with the Scenic Route Dies and wiped the sky with Distress Oxide Inks in blue and turquoise tones. I glued the background to the map, as well as the string of lights from the Scenic Route Stamps set and Scenic Route DiesFinally, I stamped and coloured the snowmen from the Snowman Kisses Stamps set  and die-cut them with the Snowman Kisses Dies and glued them into the shadow box!

Your 3D card is ready! Have fun tinkering!

Sunny Studio Supplies Used:

Scenic Route Stamps
Scenic Route Stamps
Shop at:
Sunny Studio
Scenic Route Dies
Scenic Route Dies
Shop at:
Sunny Studio
Layered Snowflake Frame
Shop at:
Sunny Studio
Slimline Nature Borders
Shop at:
Sunny Studio
Penguin Party Stamps
Shop at:
Sunny Studio
Penguin Party Dies
Penguin Party Dies
Shop at:
Sunny Studio
Snowman Kisses Stamps
Shop at:
Sunny Studio
Snowman Kisses Dies
Snowman Kisses Dies
Shop at:
Sunny Studio

Thursday, November 11, 2021

Lazy Christmas Cards with Marine and Anja

Hey crafty friends, Marine here, I'm so happy to share with you this new holiday shaker card showcasing the lovely Lazy Christmas stamp set that features two super cute sloths. I stamped those cuties as well as two branches on white cardstock using an alcohol marker friendly black ink, cut them using the coordinating dies and then used my alcohol markers to color them.

Sunny Studio Stamps: Lazy Christmas Botanical Backdrop Dies Christmas Card by Marine Simon

After the coloring I moved on to the background and started by creating a turquoise panel. I cut a 5,5 x 4,25" Strathmore bristol panel and applied salvaged patina oxide ink all over the panel and then peacock feathers oxide ink on the edges to bring more contrast.

As always I added lots of splatters on the panel to make it less flat and more interesting: water, peacock feathers + water, liquid stardust + water and copic opaque white ink + water.

To frame the card, and give the sloths a habitat, I cut a Botanical Backdrop out of a dark green cardstock, and added a little bit of white splatters on those leaves as well. And to make this jungle card even more festive, I cut another Botanical backdrop out of a silver glitter cardstock. I attached the dark green botanical frame on top of the silver glitter frame, but turned the dark green frame so that the leaves don't match.

Sunny Studio Stamps: Lazy Christmas Botanical Backdrop Dies Christmas Card by Marine Simon

I cut a 5,5 x 4,25" heat resistant acetate panel that I placed in my misti tool, placed some stamps right in the middle of the acetate to create my sentiment and picked them up with the door of the misti tool. I applied powder all over the acetate panel using my powder bag to make it antistatic, and then I stamped my sentiment using clear embossing ink. I sprinkled white embossing powder on the ink and used my heat gun to melt the powder.

I attached the acetate panel at the back of the botanical frame using liquid glue at the back of the frame on the four edges and foam squares at the back of some leaves to bring some dimension.

Sunny Studio Stamps: Lazy Christmas Botanical Backdrop Dies Christmas Card by Marine Simon

Stuck two layers of foam strips at the back of the frame on the four edges, and used my powder brush tool to apply a generous amount of powder all along the foam strips. This will keep the sequins away from the foam strips. I cleaned the acetate using a microfiber cloth, and poured a mix of sequins directly on the acetate, I carefully peeled the backing papers off the foam strips, and then I stuck my oxide panel on the foam strips to totally close the my shaker panel.

Next I attached the two little sloths and the branches. I used glue dots to stick the branches and foam squares to stick the sloths. And finally I added highlights and details on the images using a white gel pen.

Sunny Studio Stamps: Lazy Christmas Botanical Backdrop Dies Christmas Card by Marine Simon

And that's it, we have a super fun and festive shaker card that features the cutest little sloths, and I hope that you like it. Feel welcome to check the process video (click on the photo above), and I will see you next week with a new card!

----------------------------------------------------

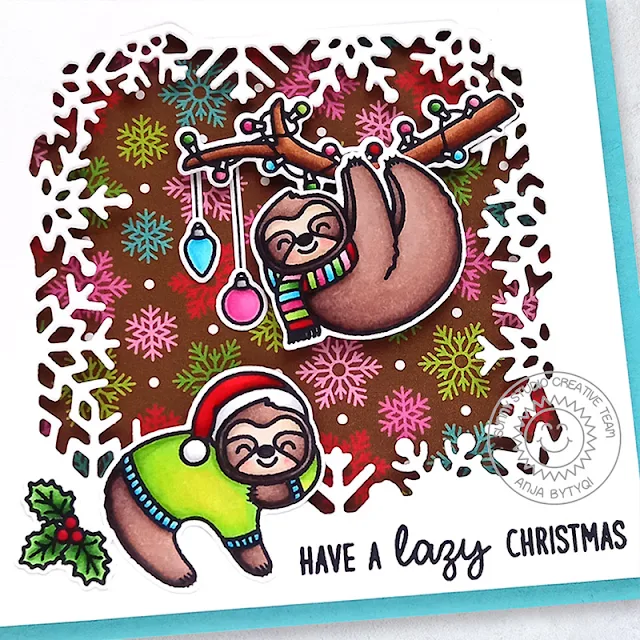
Hi everyone, Anja here and today I'm back with another holiday card showcasing the Lazy Christmas Stamps. These sloths are just the cutest!

Sunny Studio Stamps: Lazy Christmas Layered Snowflake Frame Dies Christmas Card by Anja Bytyqi

First, I started off with a 4 3/8" x 4 3/8" card base and trimmed down a piece of white cardstock to 4" x 4". I ran it through my die cutting machine with one of the Layered Snowflake Frame Dies. The patterned paper that went behind the opening is from the All Is Bright 6x6 Paper pack. The sentiment was stamped in VersaFine Onyx Black Ink. To create a bit of dimension, I adhered the snowflake frame with foam tape.

Sunny Studio Stamps: Lazy Christmas Layered Snowflake Frame Dies Christmas Card by Anja Bytyqi

Next, I stamped the images in Memento Tuxedo Black Ink and colored them with Copic Markers. I cut everything out with the coordinating dies. I used foam tape again to pop up my images. Only the Christmas baubles and the holly & berries were adhered flat with liquid glue.

Thank you so much for stopping by! Have a wonderful day!

Sunny Studio Supplies Used:

Lazy Christmas Stamps
Shop at:
Sunny Studio
Lazy Christmas Dies
Lazy Christmas Dies
Shop at:
Sunny Studio
Botanical Backdrop Die
Shop at:
Sunny Studio
Layered Snowflake Frame
Shop at:
Sunny Studio
All Is Bright Paper
All Is Bright Paper
Shop at:
Sunny Studio

Wednesday, October 21, 2020

Penguin Pals Cards and Video Tutorial with Ana and Christy

Hello friends! It’s Ana today sharing an adorable Christmas card featuring Penguin Pals stamps and coordinating dies.

Sunny Studio Stamps: Penguin Pals Winter Scenes Slimline Dies Frilly Frame Dies Winter Themed Christmas Cards by Ana Anderson

To create a night winter scene for these sweet penguins, I blended Chipped Sapphire and Wilted Violet distress inks on white cardstock, then added white splatter (snowflakes) using diluted white paint. While the background was drying, I stamped, colored and die cut the images from Penguin Pals. Trees and igloo are from Winter Scenes stamps.

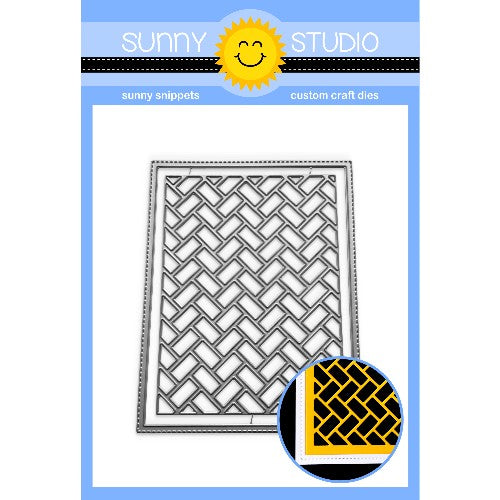
Once I was done coloring, I cut the images with coordinating dies. I created the snow hills with Slimline Nature Borders dies, then trimmed the background and the hills with stitched frame die (Frilly Frames Herringbone).

Sunny Studio Stamps: Penguin Pals Winter Scenes Slimline Dies Frilly Frame Dies Winter Themed Christmas Cards by Ana Anderson

I stamped the sentiment (from Penguin Pals) on the bottom snowy hill, inked the tops lightly with Chipped Sapphire, then adhered the hills to the background. I added the images and finished the card by adding white highlights with white gel pen.

Don’t you think this card turned out so cute! I just love those adorable little penguins so much!

-------------------------------------------------

Hey friends, it's Christy here with a fun card featuring the adorable Penguin Pals. I also pulled in the igloo from Winter Scenes and colored all the images with Copics, then trimmed them out with the matching dies

Sunny Studio Stamps: Penguin Pals Winter Scenes Slimline Dies Frilly Frame Dies Winter Themed Christmas Card by Christy Reuling

To set the stage, I took the Layered Snowflake Frame and die cut it out of some Holiday Cheer 6x6 paper, that I also ran through with the outer die from Frilly Frames Quatrefoil to get that nice stitching detail along the outside edge. I stamped a sentiment on the bottom, then popped it up over another sheet of patterned paper and a few layers of snow banks that I cut out using the Slimline Nature Borders.

Sunny Studio Stamps: Penguin Pals Winter Scenes Slimline Dies Frilly Frame Dies Winter Themed Christmas Card by Christy Reuling

I adhered my images to the scene and finished off the card with a few additional snowflakes and a bit of Stickles Glitter Glue. Please check out my video tutorial below:


Sunny Studio Supplies Used:

Holiday Cheer 6x6 Paper
Shop at:
Sunny Studio
Layered Snowflake Frame
Shop at:
Sunny Studio
Frilly Frames Herringbone
Shop at:
Sunny Studio
Frilly Frames Quatrefoil
Shop at:
Sunny Studio
Slimline Nature Borders
Shop at:
Sunny Studio
Penguin Pals Stamps
Penguin Pals Stamps
Shop at:
Sunny Studio
Penguin Pals Dies
Penguin Pals Dies
Shop at:
Sunny Studio
Winter Scenes Stamps
Shop at:
Sunny Studio
Winter Scenes Dies
Winter Scenes Dies
Shop at:
Sunny Studio

Wednesday, September 30, 2020

Slimline Die Focused Cards with Ana and Christy

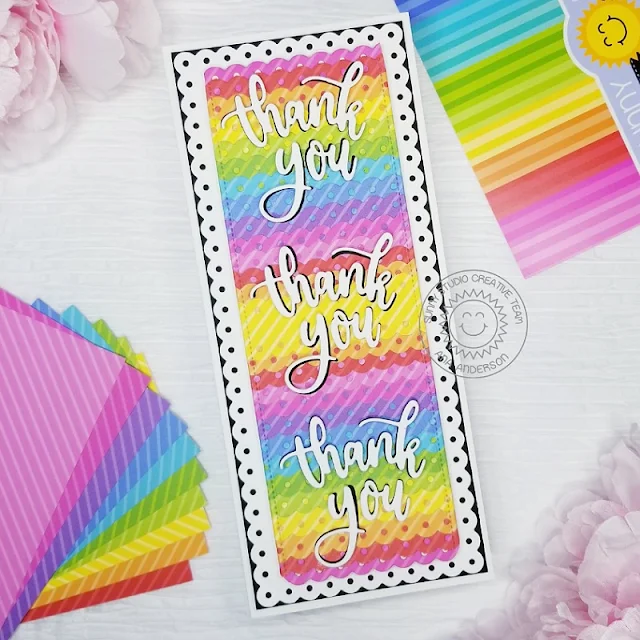
Hi crafties and welcome back! It’s Ana here today with a slimline thank you card featuring Slimline Scalloped Frame dies, Slimline Basic Border dies and Sleek Stripes paper.

Sunny Studio Stamps: Slimline Dies Thank You Card by Ana Anderson

I was in the mood for a rainbow card today and decided to use some beautiful patterned papers from the newest release, in combination with new Slimline dies. For this design I used all colors (except for black), from Sleek Stripes paper pack and cut each piece with scalloped border die (from Slimline Basic borders die set). Since the dies are so long, I was able to cut three borders at once, so the process of die cutting actually didn’t take that long.

I used stitched panel die (Slimline Scalloped Frames) to cut a piece of cardstock, then started to adhere patterned paper pieces, starting with the yellow in the middle. Once all the pieces were adhered, I “trimmed” the excess using the same die.

Sunny Studio Stamps: Slimline Dies Thank You Card by Ana Anderson

I die cut thank you word 6 times (3 white and 3 black) and added them to the panel. Finally, I die cut the background scalloped panel which I backed with black cardstock to match the letters.

I just love the way this card turned out! That bright rainbow background just makes me so happy. Thank you so much for stopping by, I hope you have a fantastic day!

----------------------------------------------

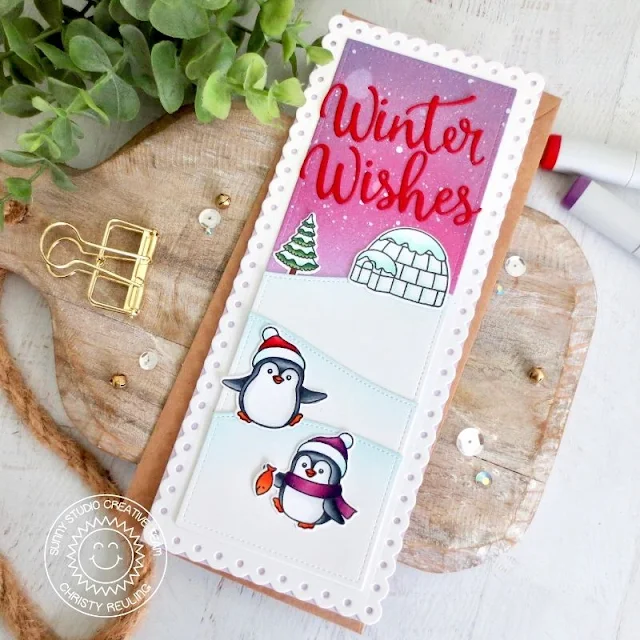
Hey friends, it's Christy here with a fun slimline card! I stamped out images from Penguin Pals and Winter Scenes and colored them with Copic markers, then trimmed them out with the matching dies.  

Sunny Studio Stamps: Slimline Dies Penguin Pals Winter Scenes Winter Card by Christy Reuling

For the background, I die cut the center rectangle from the Slimline Scalloped Frame out twice from Bristol Smooth Surface Cardstock. On the first, I created a night sky by blending on Distress Ink in Shaded Lilac, Seedless Preserves, and Dusty Concord. The second I die cut into three pieces using the Slimline Nature Borders, and sponged on a little Tumbled Glass at the top of each hillside. I also cut the scalloped border out of white cardstock and made a slimline card base out of light purple.

Sunny Studio Stamps: Slimline Dies Penguin Pals Winter Scenes Winter Card by Christy Reuling

To assemble, I adhered the scalloped frame to the card base, then added the background panel, and the three snowy hillsides. I adhered my images with liquid glue. As a finishing touch, I die cut the scripty word sentiment from the Layered Snowflake Frame out of red cardstock and added that to the top of my scene.

If you'd like to see how this card came together, check out the video tutorial on my YouTube channel, Christy Gets Crafty.

In honor or National Card Making Day on Saturday we're having a little fall flash sale. Use discount code "WCMD2020" at checkout to save 25% off these 21 fall favorites through tonight at Midnight PST. Limit one promo code per order.

Sunny Studio Supplies Used:

Layered Snowflake Frame
Shop at:
Sunny Studio
Slimline Basic Borders
Shop at:
Sunny Studio
Slimline Nature Borders
Shop at:
Sunny Studio
Slimline Scalloped Frame
Shop at:
Sunny Studio
Penguin Pals Stamps
Penguin Pals Stamps
Shop at:
Sunny Studio
Penguin Pals Dies
Penguin Pals Dies
Shop at:
Sunny Studio
Winter Scenes Stamps
Shop at:
Sunny Studio
Winter Scenes Dies
Winter Scenes Dies
Shop at:
Sunny Studio
Sleek Stripes Paper
Sleek Stripes Paper
Shop at:
Sunny Studio