Showing posts with label Bells & Baubles. Show all posts

Monday, October 13, 2025

Bells & Baubles Christmas Cards with Mendi

Hello and welcome! This is Mendi here today, popping in to share some Christmas cards featuring our Bells & Baubles Stamps.

Sunny Studio Christmas Ornament Cards using Bells & Baubles, Holiday & Season's Greetings Stamps, and Stitched Rectangle Dies

I started by creating the backgrounds in two different tone-on-tone color schemes for both of my cards today. For this card, I used Neenah Desert Storm Kraft cardstock, which I darkened around the edges using a light touch of Vintage Photo Distress ink. I then layered it with a second piece of kraft cardstock, which I had die-cut using our Stitched Rectangle Dies. I then stamped the fir tree branch from the Bells & Baubles Stamps in opposing corners using Gina K. Kraft Ink.

To embellish this particular card, I added three layered vintage glass ornament baubles in red, blue, and hot pink, stringing them with gold thread, which I taped to the back of each die-cut before adhering them with liquid adhesive. I then wrapped the threads tightly around the back of my Kraft card panel before taping them down. This set comes with a darling bow stamp image, which I had considered adding to the top of each ornament. Unfortunately, I only had one pre-stamped one in red, so I pulled out some 3/8" wide organza ribbon in each color to tie a bow and adhere with more liquid adhesive. For my "Happy Holidays" sentiment, I heat embossed the phrase from the Holiday Greetings Stamps and then added beneath it "from our family to yours" from the Inside Greetings Holidays Stamps onto a red pennant strip from the Notebook Photo Corners Dies.

Red Ornament ink colors used:
Hot Pink Ornament ink colors used:
Ornament Bauble Hanger: Hero Arts Caramel

Sunny Studio Christmas Ornament Card using Bells & Baubles & Holiday Greetings Clear Stamps and Stitched Rectangle Craft Dies

For my second card, I started it the same way as my first card, with all the same elements for the background, but this time I turned my card for a horizontal landscape orientation, and went with an olive green tone-on-tone look using PinkFresh Studio Olive Ink. For my greeting, I heat-embossed a sentiment with silver embossing powder from our Season's Greetings Stamps, accentuating the smaller "Season's" word by putting it onto a shortened red pennant strip from the 
Notebook Photo Corners Dies. I embellished my card with two layered silver bells, topped with a red bow, from the Bells & Baubles Stamps and some green sprigs from the same Season's Greetings Stamps and the coordinating Season's Greetings Dies (which are currently only $1 in our online shop).

Sunny Studio Silver Bell Christmas Card using Bells & Baubles & Season's Greetings Clear Stamps, and Stitched Rectangle Dies

Here's a better photo taken at an angle to show how beautifully the silver embossing powder used for the greeting catches the light and plays off the "Silver Bells" theme.


Sunny Studio Silver Bell Christmas Card using Bells & Baubles & Season's Greetings Clear Stamps, and Stitched Rectangle Dies

That wraps up my projects for today. Thanks so much for hanging out with me. I hope I've inspired you to spread a little happiness by sending out a card to someone you love. ðŸ’›

Don't forget to check out the Season's Greetings StampsSeason's Greetings Dies, and Season's Greetings Word Dies in our online shop, which are all currently on sale!

Also, please check out all the card ideas using these sets on each of their product pages. I always make sure to upload tons of card ideas following the product image so there are lots of ideas to scroll through there organized by set.

Supplies Used:

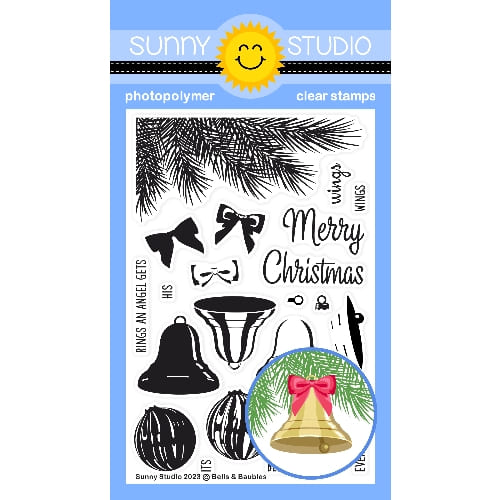
Bells & Baubles Stamps
Shop at:
Sunny Studio
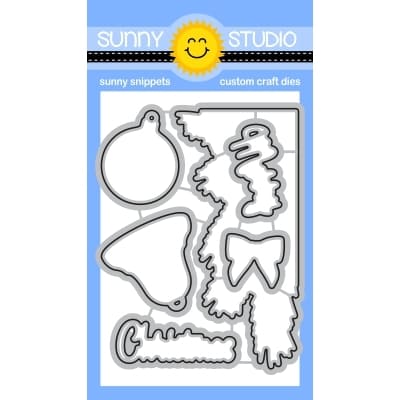
Bells & Baubles Dies
Shop at:
Sunny Studio
Holiday Greetings Stamps
Shop at:
Sunny Studio
Holiday Greetings Dies
Shop at:
Sunny Studio
Stitched Rectangle Dies
Shop at:
Sunny Studio
Season's Greetings Stamps
Shop at:
Sunny Studio
Season's Greetings Dies
Shop at:
Sunny Studio
Season's Greetings Word Dies
Shop at:
Sunny Studio
Inside Greetings-Holidays
Shop at:
Sunny Studio
Notebook Photo Corners Dies
Shop at:
Sunny Studio
Hero Arts White Detail
Shop at:
Sunny Studio
VersaMark Watermark Ink
Shop at:
Sunny Studio
PinkFresh Over The Hills Ink
Shop at:
Sunny Studio

Sunday, December 17, 2023

Bells & Baubles Card with Rachel

Hello friends! It's Rachel here with a Christmas shaker card featuring the beautiful Bells & Baubles layering stamp set. 

Sunny Studio Stamps: Bells & Baubles Christmas Card by Rachel Alvarado (featuring Fancy Frame Dies)

I started my card by first stamping my ornaments onto a sheet of smooth white card stock. I used a layering of Altenew Pink Pearl, Heart Beat, and Vineyard Berry Inks. I also stamped some pine branches using some Pinkfresh Aquamarine Ink. Next, I used the Bells & Baubles Die Set to cut my stamped images. I set these images aside to then work on my card background.

For the base of my card, I used a top-folding A2 sized piece of white card stock and layered it with a 4" x 5.25" piece of dark green card stock. On top of that piece, I added a 3.75" x 5" layer on which I had blended some Salvaged Patina Distress Oxide Ink. I added a few spatters of diluted Copic Opaque White Paint as well as some dots of green Copic Markers before adding this piece to my card base. 

Sunny Studio Stamps: Bells & Baubles Christmas Card by Rachel Alvarado (featuring Fancy Frame Dies)

Next, I adhered my ornaments and pine branches and then added 4 layers (adhered together with liquid adhesive) of scalloped rectangle frames that I had die cut from white card stock using the Fancy Frames Rectangle Dies. To finish the shaker portion of my card, I next added a 3.75" x 5" piece of clear acetate and one more scalloped rectangle frame to the top.

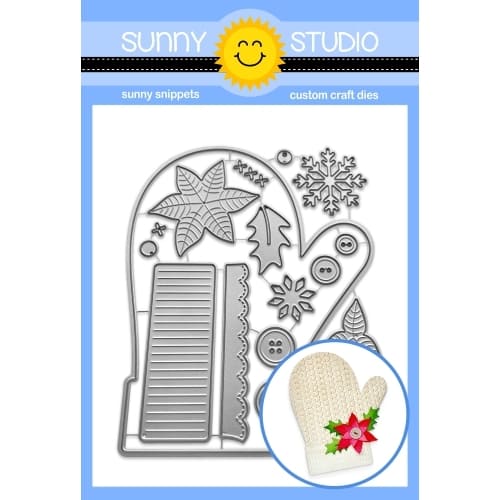
Lastly, I added my sentiment that I had heat embossed onto some more dark green card stock and also added some holly and berries from the Woolen Mitten Die Set.

Thanks so much for taking the time to drop by today! Wishing you all a lovely day!

Sunny Studio Supplies Used:

Fancy Frames- Rectangles
Shop at:
Sunny Studio
Woolen Mitten Dies
Woolen Mitten Dies
Shop at:
Sunny Studio
Bells & Baubles Stamps
Shop at:
Sunny Studio
Bells & Baubles Dies
Shop at:
Sunny Studio

Thursday, December 7, 2023

Bells & Baubles Shaker Ornament with Marine

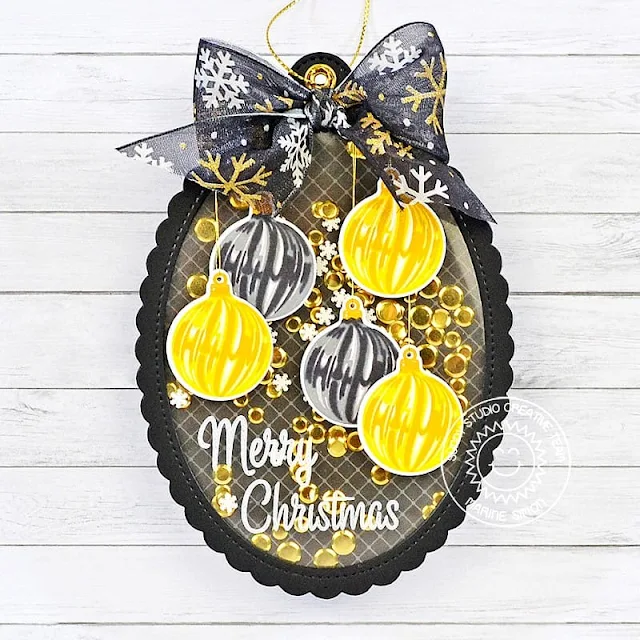
Hello crafty friends, Marine here, I'm so happy to be back on the blog with this shaker ornament showcasing Bells & Baubles. As you can see, I kind of went out of my comfort zone with this gold and black color palette, I'm more of a let-throw-all-the-colors-on-one-single-card kind of girl, but I was actually inspired by my friend and fellow crafter Bobbi Lemanski who recently shared a beautiful set of black + gold + white tags, and I thought it would be a fun challenge for me.

Sunny Studio Stamps: Bells & Baubles Shaker Christmas Ornament by Marine Simon (featuring Scalloped Oval Mat Dies, Stitched Oval Dies)

So I started off by stamping five baubles on 80lb Neenah solar white cardstock using Lawn Fawn premium dye inks. I stamped each image twice to get a nice impression, and then used the coordinating dies to cut everything. Here are the color combinations I picked:

 golden baubles: butter + sunflower + no. 2 pencil

 black baubles: manatee + hippo + black licorice

 toppers: no. 2 pencil

I cut a scalloped oval frame out of black cardstock using the largest die from Scalloped Oval Mat 1 and the largest die from Stitched Oval 2. I also cut an acetate panel using the largest die from Scalloped Oval Mat 1 again, and attached that acetate panel at the back of my black scalloped frame using liquid glue. I stamped my "Merry Christmas" greeting from Bells & Baubles at the bottom of the acetate panel using white stazon ink.

Sunny Studio Stamps: Bells & Baubles Shaker Christmas Ornament by Marine Simon (featuring Scalloped Oval Mat Dies, Stitched Oval Dies)

I attached the baubles directly on the acetate using 1mm foam squares, and added golden threads that I secured and stuck at the top back of the frame using thin pieces of tape. I added foam strips at the back of my frame, all along the oval shape, and poured my shaker material inside the acetate window: golden sequins from my stash, and White Snowflake Confetti.

Next I created the handle for my ornament. I cut two black pieces using the smallest die from Stitched Arch, and attached both elements back to back using liquid glue. I also cut two gold mirror eyelets using a die from Sliding Window, attached one of them on the front of my handle, and the second at the back.

Sunny Studio Stamps: Bells & Baubles Shaker Christmas Ornament by Marine Simon (featuring Scalloped Oval Mat Dies, Stitched Oval Dies)

Using the largest die from Scalloped Oval Mat 1 again, I cut a panel out of a Classic Sunburst black paper, and attached my handle piece at the top back using liquid glue. I cut another scalloped panel out of black cardstock that I glued at the back of the other, and then stuck that panel to the foam strips to totally close my shaker ornament.

To finish my ornament, I added golden thread on the handle, tied a bow using ribbon from my stash and attached it at the top of the frame using liquid glue. And that's it! I had a really good time making this ornament, and I think it would look amazing with traditional colors like red + green + gold, or even with wintery colors like teal + blue + silver. 

Thanks so much for stopping by, and see you next week!

Sunny Studio Supplies Used:

Sliding Window Dies
Sliding Window Dies
Shop at:
Sunny Studio
Stitched Arch Dies
Stitched Arch Dies
Shop at:
Sunny Studio
Classic Sunburst Paper
Shop at:
Sunny Studio
Scalloped Oval Mat 1 Dies
Shop at:
Sunny Studio
Stitched Oval 2 Dies
Shop at:
Sunny Studio
Bells & Baubles Stamps
Shop at:
Sunny Studio
Bells & Baubles Dies
Shop at:
Sunny Studio

Wednesday, November 15, 2023

Bells & Baubles Card with Gladys

Hi crafty friends, Gladys here! I'm excited to be back on the blog today with a holiday card using the Bells & Baubles layering stamps and dies.

Sunny Studio Stamps: Bells & Baubles Christmas Card by Gladys Marcelino

To start, I cut an A2 panel from white cardstock and added some color on the opposite edges using distress oxide inks in mowed lawn. I used the tree branch to stamp directly on the top left of the card panel. I stamp it again on a piece of white cardstock and used the coordinating die to cut it. For more interest I used Gansai Tambi starry watercolors in gold loosen with some water to splatter all over the tree branch and panel. 

Next, I used Pinkfresh premium dye inks for the ornaments. Since it is a layering stamp set I chose a light, medium, and dark colors to make the layers stand out. I used my Misti to help me line up the stamps in place. Once again I used the coordinating dies to cut them out.

Blue: sky blue, summer shower, seaside
Green: ocean breeze, aquamarine, mermaid cove
Purple:  soft lilac, lavender, candy violet

Sunny Studio Stamps: Bells & Baubles Christmas Card by Gladys Marcelino

I arranged all the elements on my card and pop them up with double sided foam tape. Finally, I heat embossed the beautiful "Merry Christmas" sentiment on vellum with gold embossing powder to tie in all the gold specks on the card.

Thanks so much for joining me today. Happy crafting!

Sunny Studio Supplies Used:

Bells & Baubles Stamps
Shop at:
Sunny Studio
Bells & Baubles Dies
Shop at:
Sunny Studio

Monday, October 30, 2023

Bells & Baubles Tags with Bobbi

Hi there, Bobbi here with you! I’m sharing some tags featuring the new Bells & Baubles stamps and coordinating diesThis stamp set is a multi-layering set allowing you to achieve incredible dimension without coloring/shading or highlighting. 

Sunny Studio Stamps: Bells & Baubles Christmas Tags by Bobbi Lemanski (featuring Mini Mat & Tag Dies)

The stamps are designed to do the work for you! All you need to do is stamp in the order of the key on the packaging and use color shades that work together (i.e., three inks that go light-to-dark in one color family).

Sunny Studio Stamps: Bells & Baubles Christmas Tags by Bobbi Lemanski (featuring Mini Mat & Tag Dies)

I made this tag using three shades of gold for the bells. I used Distress Oxide Ink in Antique Linen, Fossilized Amber and Brushed Corduroy. I embossed the evergreens in a beautiful shimmery silver embossing powder. The sparkle is really pretty. I attached the evergreens to a black tag using a foam dot. I tucked the two bells underneath the evergreens. I stamped the sentiment in black on white and cut the words. I glued them to the top of the evergreens to finish the tag. The tag is from the Mini Mat and Tag 3 dies.

Sunny Studio Stamps: Bells & Baubles Christmas Tags by Bobbi Lemanski (featuring Mini Mat & Tag Dies)

Using the Mini Mat & Tag 4 dies, I cut another black tag for this next tag. I stamped the ornament using three Distress Oxide Inks in Worn Lipstick, Festive Berries and Aged Mahogany. I added gold dots using my gold gel pen. I stamped the bow using the same inks. I embossed the evergreens in white and attached them at the top with a foam dot. I splattered the tag with white paint to finish it.

Sunny Studio Stamps: Bells & Baubles Christmas Tags by Bobbi Lemanski (featuring Mini Mat & Tag Dies)

For my last tag, I flipped the gold and silver and made the bells silver and the evergreens in gold. I used gem stickers in gold for the bells’ clappers. Gem stickers in red were added for berries on the evergreens.

Thanks for stopping by today. If you want to see more ideas and inspiration from me, subscribe to my blog, BobbiHartDesign.com. I’ll send you updates on new posts! You can also find me on Instagram as @BobbiHartDesign and on Facebook as BobbiHartDesign.

Sunny Studio Supplies Used:

Mini Mat & Tag 3 Dies
Shop at:
Sunny Studio
Mini Mat & Tag 4 Dies
Shop at:
Sunny Studio
Bells & Baubles Stamps
Shop at:
Sunny Studio
Bells & Baubles Dies
Shop at:
Sunny Studio

Saturday, October 28, 2023

Sunny Saturday Share: Holiday Themed Customer Cards


Hey everyone, how are you all doing this weekend? I'm so excited to be popping in today with a Sunny Saturday Share. There have been so many amazing cards popping up on Instagram that have made my jaw drop so I couldn't wait to share them with all of you! 

Holiday Hugs and Too Cute to Spook card by Adou

Sunny Studio Stamps: Holiday Hugs & Too Cute To Spook Holiday Themed Customer Card by Adou

Happy Owl-o-ween and Critter Country card by JoAnn Ross

Sunny Studio Stamps: Happy Owl-o-ween Holiday Themed Customer Card by JoAnn Ross

Too Cute to Spook treat boxes by Angela Pahl

Sunny Studio Stamps: Too Cute to Spook Holiday Themed Customer Treat Boxes by Angela Pahl

Too Cute to Spook ATC card by Kelly

Sunny Studio Stamps: Too Cute To Spook Holiday Themed Customer Card by Kelly

Reindeer Games card by Teresa Beaven

Sunny Studio Stamps: Reindeer Games Holiday Themed Customer Card by Teresa Beaven

Bells & Baubles and Frilly Frame Herringbone card by Danielle Dunlop

Sunny Studio Stamps: Bells & Baubles Holiday Themed Customer Card by Danielle Dunlop

Holiday Hugs card by Cornelie Wilmink

Sunny Studio Stamps: Holiday Hugs Holiday Themed Customer Card by Cornelie Wilmink

Bells & Baubles card by Danielle Dunlop

Sunny Studio Stamps: Bells & Baubles Holiday Themed Customer Card by Danielle Dunlop

Holiday Hugs card by Amy Tsuruta

Sunny Studio Stamps: Holiday Hugs Holiday Themed Customer Card by Amy Tsuruta

Winter Wreaths and Season’s Greetings card by Becky

Sunny Studio Stamps: Winter Wreaths & Season's Greetings Holiday Themed Customer Card by Becky

Thank you for sharing all these fabulous ideas with us! I hope you will continue to share your gorgeous projects with us--It always makes my day to see them. You can tag us on instagram with the hashtag #sunnystudiostamps or share your projects with us in our flickr group or on our facebook page. ☺


Sunny Studio Supplies Used:

Happy Owl-o-ween Dies
Shop at:
Sunny Studio
Happy Owl-o-ween Stamps
Shop at:
Sunny Studio
Season's Greetings Stamps
Shop at:
Sunny Studio
Season's Greetings Dies
Shop at:
Sunny Studio

Reindeer Games Stamps
Shop at:
Sunny Studio
Reindeer Games Dies
Reindeer Games Dies
Shop at:
Sunny Studio
Too Cute To Spook Stamps
Shop at:
Sunny Studio
Too Cute To Spook Dies
Shop at:
Sunny Studio
Winter Wreaths Stamps
Shop at:
Sunny Studio
Winter Wreaths Dies
Winter Wreaths Dies
Shop at:
Sunny Studio
Critter Country Paper
Shop at:
Sunny Studio
Bells & Baubles Stamps
Shop at:
Sunny Studio
Frilly Frames Herringbone
Shop at:
Sunny Studio
Bells & Baubles Dies
Shop at:
Sunny Studio
Holiday Hugs Stamps
Holiday Hugs Stamps
Shop at:
Sunny Studio
Holiday Hugs Dies
Holiday Hugs Dies
Shop at:
Sunny Studio