Sunday, April 30, 2023

Special Day Card with Cathy

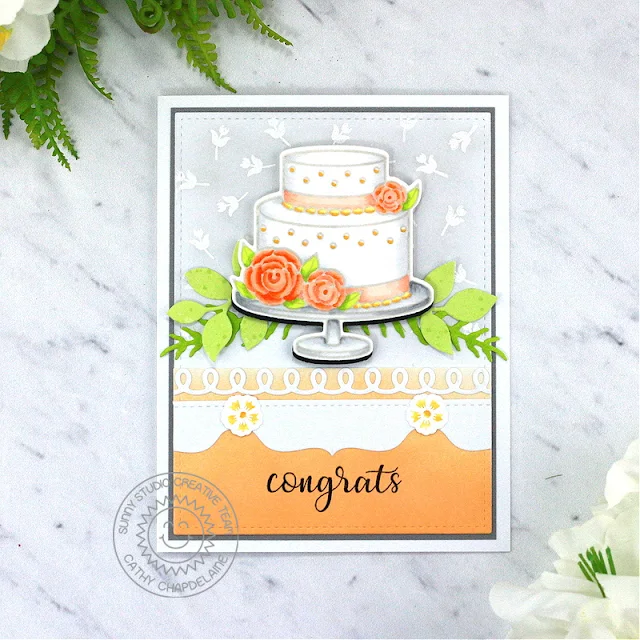
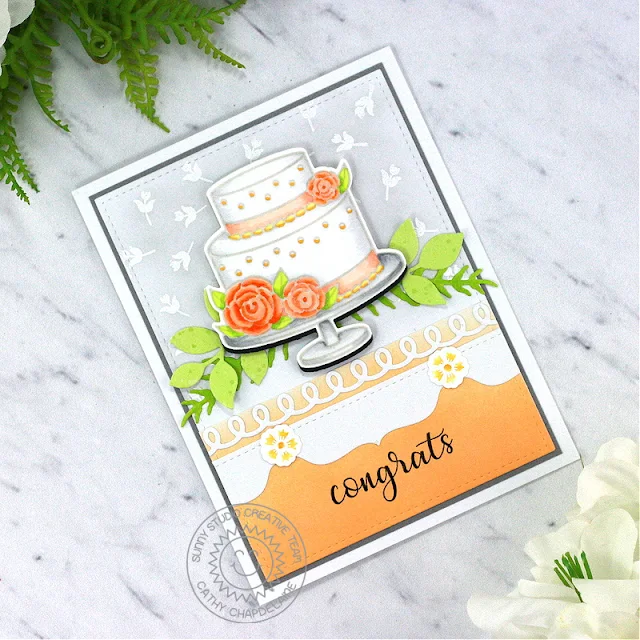
Hey friends! Cathy here today sharing a card featuring this gorgeous cake from the Special Day Stamps! I love a peachy orange/lime green color scheme as the weather gets warmer and I think this would make for a perfect summer wedding congrats card.

Sunny Studio Stamps: Special Day Wedding Card by Cathy Chapdelaine (featuring Icing Border Dies, Spring Greenery, Stitched Rectangle Dies)

I started this card by die-cutting a piece of white cardstock using the largest Stitched Rectangles Die. On the top half of the piece, I stamped a small rose from the Everything’s Rosy Stamps multiple times in Versamark ink and heat embossed them with white embossing powder. I then lightly inked over the roses with Lost Shadow Distress ink.

Next, I die-cut a second piece of white cardstock with the same Stitched Rectangle Die, cut it straight across at 2” and inked it in a gradient from light to dark using Dried Marigold Distress ink. I heat embossed the “congrats” sentiment from the Everything’s Rosy Stamps with black embossing powder 1/2" from the bottom of the cardstock.

Sunny Studio Stamps: Special Day Wedding Card by Cathy Chapdelaine (featuring Icing Border Dies, Spring Greenery, Stitched Rectangle Dies)

For a little extra fanciness, I die-cut an Icing Border Die from white cardstock, adhered it at the top of the Dried Marigold piece and trimmed the excess from the right and left edges. I also die-cut 3 tabs from the Notebook Tabs Dies from white cardstock, adhered one centered on the Dried Marigold piece below the Icing Border and adhered the other 2 tabs to each side, trimming the excess from the edges. To cover where the tabs meet, I stamped a flower from the Fabulous Flamingos Stamps twice on white cardstock using Versamark ink and heat embossed them with white embossing powder. I then used a water brush and painted the inside of the flowers using yellow and orange inks. I die-cut the flowers using the coordinating dies and adhered them where the tabs meet. I adhered the Dried Marigold piece to the bottom of the Stitched Rectangle die-cut, matted the piece on silver cardstock and adhered it to an A2 card base.

Sunny Studio Stamps: Special Day Wedding Card by Cathy Chapdelaine (featuring Icing Border Dies, Spring Greenery, Stitched Rectangle Dies)

Next, I inked 2 pieces of white cardstock (one with Twisted Citron Distress ink and one with Mowed Lawn Distress ink) and die-cut leaves using the Spring Greenery Dies. I adhered these above the Dried Marigold piece. To keep a light and airy feel to the card, I stamped the cake from the Special Day Stamps in light gray ink on Neenah Classic Crest 80lb solar white cardstock, colored it with Copics and die-cut it using the coordinating dies. To make the cake stand out a bit more and balance the black sentiment, I die-cut a piece of black cardstock with the coordinating cake die, cut the top portion of the cake off leaving just the cake stand portion and adhered the colored cake slightly overlapping the black die-cut. I then adhered the cake over the leaves with foam tape.

Sunny Studio Stamps: Special Day Wedding Card by Cathy Chapdelaine (featuring Icing Border Dies, Spring Greenery, Stitched Rectangle Dies)

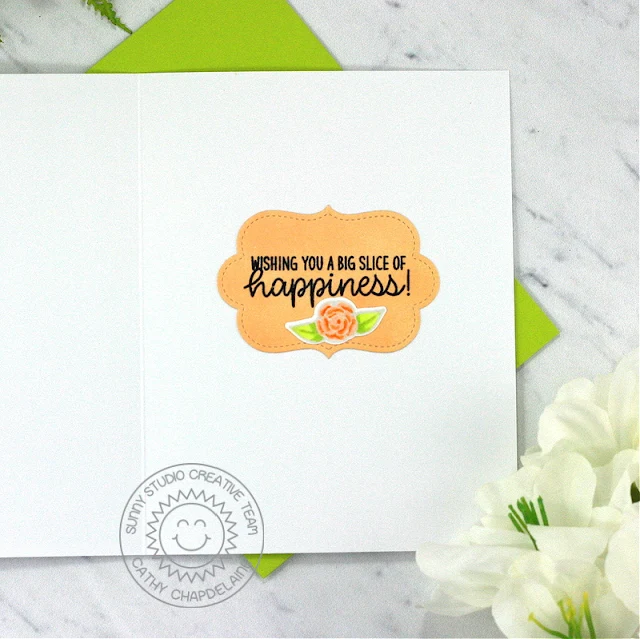
On the inside of the card, I heat embossed the sentiment from the Special Day Stamps with black embossing powder on white cardstock and die-cut it using a label die from the Sliding Window Dies. I then inked the die-cut with Dried Marigold Distress ink. I stamped a rose from the Special Day Stamps in light gray ink, colored it with Copics and die-cut it using the coordinating dies.

I hope you enjoyed and thanks for stopping by! For more inspiration, please visit my blog www.inkredibleadventures.com and you can also find me on Instagram as @cathy.chapdelaine.

Sunny Studio Supplies Used:

Stitched Rectangle Dies
Shop at:
Sunny Studio
Icing Border DIes
Icing Border DIes
Shop at:
Sunny Studio
Sliding Window Dies
Sliding Window Dies
Shop at:
Sunny Studio
Everything's Rosy Stamps
Shop at:
Sunny Studio
Fabulous Flamingos Stamps
Shop at:
Sunny Studio
Spring Greenery Dies
Shop at:
Sunny Studio
Notebook Tabs Dies
Notebook Tabs Dies
Shop at:
Sunny Studio
Special Day Stamps
Special Day Stamps
Shop at:
Sunny Studio
Special Day Dies
Special Day Dies
Shop at:
Sunny Studio

Saturday, April 29, 2023

Guest Designer Spotlight: A Cut Above Cards with Leanne West

Hello everyone! Leanne here and I'm excited to be here showcasing some the new stamps and dies from the summer release. I just love anything related to school and crafting supplies. So I was thrilled to see the new A Cut Above stamps, Notebook Photo Corners, and Notebook Tabs dies

Sunny Studio Stamps: A Cut Above & Notebook Die Focused Cards by Leanne West

I'm sharing three clean and fairly simple note cards which would be quick and easy to mass produce. With the end of the school year coming up, we will need lots of teacher thank you cards. These designs would also be great if you need thank you or birthday cards for any of your co-workers.  

First off, I'd like to talk about how I set up my Misti for mass producing layered stamped images. I die cut a bunch of blanks using the coordinating dies from A Cut Above. I then use a template overtop the black Misti pad. I find that I can position the stamps easily using the negative space of my die cut templates because I can clearly see the open area. I close the Misti door with the stamps perfectly placed. I then put the blank die cut pieces into the template and stamp the first layer. I repeat this process until all the layers have been stamped. I did this with different colors so I'd get many completed stamped images as you can see in my colorful scissors mini slimline card.  I love the little scissor image and could not resist stamping them in all the colors of the rainbow. 

Sunny Studio Stamps: A Cut Above & Notebook Die Focused Cards by Leanne West

I also really love the Notebook dies and line stamp to create realistic mini notebook pages. I simply used one notebook page on each of the A2 sized cards and a greeting plus a few stamped images. This design can be easily replicated and results in a very eye catching card especially with bright happy colors. 

Sunny Studio Stamps: A Cut Above & Notebook Die Focused Cards by Leanne West

On all my cards today, I have used the Lots of Dots Embossing Folder to create the textures backgrounds. I thought this was a great way to add interest to the cards without distracting from the focal images.  

Other Sunny Studio supplies used were the Thank You Word dies and Inside Greetings Birthday Stamps

Sunny Studio Supplies Used:

Thank You Words Die
Thank You Words Die
Shop at:
Sunny Studio
Lots of Dots Embossing
Shop at:
Sunny Studio
Inside Greetings Birthday
Shop at:
Sunny Studio
A Cut Above Stamps
A Cut Above Stamps
Shop at:
Sunny Studio
A Cut Above Dies
A Cut Above Dies
Shop at:
Sunny Studio
Notebook Photo Corners Dies
Shop at:
Sunny Studio
Notebook Tabs Dies
Notebook Tabs Dies
Shop at:
Sunny Studio

Friday, April 28, 2023

Perfect Gift Boxes Card with Tina

Hello crafty friends, it’s Tina with a colorful birthday card featuring the beautiful Perfect Gift Boxes dies. I love that these packages have their matching ribbons and festive bows!

Sunny Studio Stamps: Perfect Gift Boxes Birthday Card by Tina Henkens (featuring Big Bold Greetings, Panda Party)

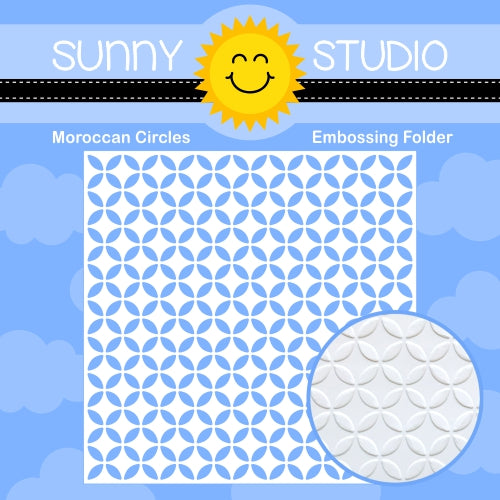
To create the illusion of dimension I started by dry embossing three panels of white Neenah cardstock using the Moroccan Circles, Lots Of Dots and Sunburst embossing folders. The last panel will be my background for this card. I used the other two to die cut 3 large and 3 smaller packages. Next, I also cut the bows from plain white paper.

All my coloring was done by ink blending the boxes and bows with distress oxides Kitsch Flamingo, Spiced Marmalade, Squeezed Lemonade, Twisted Citron, Salty Ocean and Dusty Concord. I used a blending brush to get a smooth coverage and added extra layers to get a two-toned look.

The lids and the ribbons were cut from matching glitter cardstocks from my stash. The sparkle gives these boxes an extra festive look. Being a big fan of cute critters, I stamped a sweet bear from Panda Party and colored him with my copic markers. I added a small white pompom from my stash to his cute party hat! Now, I could place my boxes and panda onto the Sunburst panel to decide my layout.

Sunny Studio Stamps: Perfect Gift Boxes Birthday Card by Tina Henkens (featuring Big Bold Greetings, Panda Party)

There was enough room at the top of the card for a sentiment from the Big Bold Greetings stamp and die set. To give the card an additional festive layer, I cut a rectangle border from a polka dot paper (Spring Fever pad) with two rectangle dies (from this Infinity set). I repeated this step twice from white cardstock for dimension.

I began to assemble the card by gluing the white sunburst panel to a card base, on the bottom of the panel I added a ‘white floor’ piece splattered with Salty Ocean oxide. Next, I adhered the border and arranged all the gift boxes, with the panda playing peek-a-boo! Lastly, I added the sentiment and a few embellishments from the Pastel Mix, Bright Mix and Iridescent Clear jewels.

I hope you will enjoy creating with these fun Perfect Gift Boxes dies! Thank you for joining me and happy crafting!

Sunny Studio Supplies Used:

Sunburst Embossing
Sunburst Embossing
Shop at:
Sunny Studio
Lots of Dots Embossing
Shop at:
Sunny Studio
Moroccan Circles Embossing
Shop at:
Sunny Studio
Big Bold Greetings Stamps
Shop at:
Sunny Studio
Big Bold Greetings Dies
Shop at:
Sunny Studio
Panda Party Stamps
Panda Party Stamps
Shop at:
Sunny Studio
Panda Party Dies
Panda Party Dies
Shop at:
Sunny Studio
Spring Fever Paper
Spring Fever Paper
Shop at:
Sunny Studio
Perfect Gift Boxes Dies
Shop at:
Sunny Studio

Thursday, April 27, 2023

A Cut Above Card with Marine

Hey crafty friends, Marine here! I'm so happy to be back on the blog and to start sharing the projects I've made using the new products! So exciting! I'm starting off today with some colorful scissors from A Cut Above. I went for a simple design with the scissors all lined up on my panel, but used bright colors to create a beautiful rainbow.

Sunny Studio Stamps: A Cut Above Everyday Card by Marine Simon (featuring Hayley Alphabet Dies)

I first cut a 5,5 x 4,25 inches Strathmore bristol smooth panel, and used distress oxide inks to color it. From the left to the right: kitsch flamingo, dried marigold, squeezed lemonade, twisted citron and salvaged patina. I splattered water and white ink on the panel to make it less flat, and set it aside to dry.

Next I created the scissors using distress oxide inks again to match the background. For each scissor, I did the grey metal part using lost shadow + hickory smoke + black soot distress oxide inks. And for each colored handle part, I used:

- pink: kitsch flamingo + picked raspberry
- orange: dried marigold + spiced marmalade
- yellow: squeezed lemonade + mustard seed
- green: twisted citron + mowed lawn
- aqua: salvaged patina + peacock feathers

Sunny Studio Stamps: A Cut Above Everyday Card by Marine Simon (featuring Hayley Alphabet Dies)

I used the coordinating die to cut each element, and then I attached them on my panel using 1mm foam squares.

I picked my "You're a cut above the rest" greeting from A Cut Above, and I wanted the word "cut" to pop, so I die cut the letters out of gold glitter cardstock using the Hayley Lowercase Alphabet, glued them below the scissors, and then white heat embossed the rest of the greeting. And finally I added golden heart sequins on each side.

And that's it! I hope you like this super bright card! Thanks so much for stopping by, and see you next time!

Sunny Studio Supplies Used:

Hayley Lowercase Alphabet Dies
Shop at:
Sunny Studio
A Cut Above Stamps
A Cut Above Stamps
Shop at:
Sunny Studio
A Cut Above Dies
A Cut Above Dies
Shop at:
Sunny Studio

Wednesday, April 26, 2023

Birthday Cat Card with Catherine

Hello Crafty Friends! Catherine here, and I am so excited to share my first card for the new summer release! For my first card, I created a birthday card featuring the adorable Birthday Cat Stamps.

Sunny Studio Stamps: Birthday Cat Birthday Card by Catherine Cohen (featuring Ribbon & Lace Border Dies, Quilted Hearts Dies, Fancy Frame Dies)

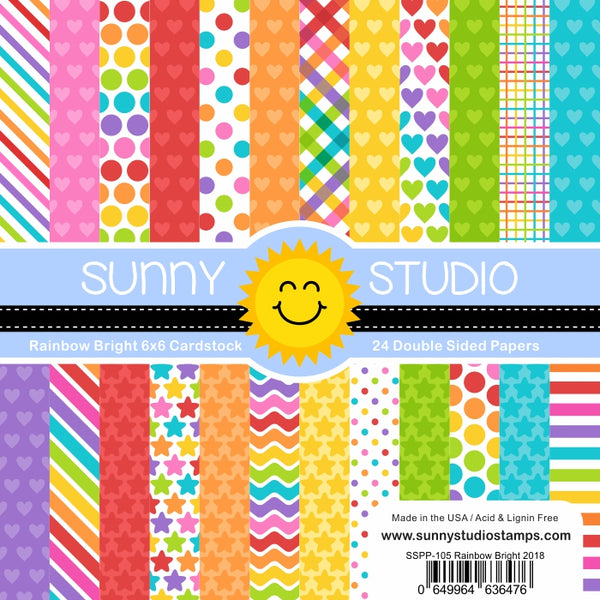
To start, I die cut the background with A2 white cardstock using Quilted Hearts Portrait Die. I cut diagonal paper strips from paper in Rainbow Bright 6x6 Paper and taped the strips to the back of the background. I adhered the background onto another piece of A2 white cardstock.

Next, I made the colorful heart border using paper from the same set. I added a strip of pink cardstock for contrast.

Sunny Studio Stamps: Birthday Cat Birthday Card by Catherine Cohen (featuring Ribbon & Lace Border Dies, Quilted Hearts Dies, Fancy Frame Dies)

I made the top of the cake stand  by die cutting white cardstock with Ribbon & Lace Border Dies and trimming the border to 3”W x 3/8” H. I ink blended the edges with Mowed Lawn Distress Oxide. For the stand, I used the outer edges of the third smallest oval in Stitched Oval Dies to make the curve shape and I inked blended the edges with the same color. I added a bow from Sweet Treat House Add-On and ink blended the bow with Worn Lipstick and Picked Raspberry Distress Oxide.

I stamped the cuties from Birthday Cat Stamps and die cut the images with the Birthday Cat Dies. I colored the images with Copic Markers listed in my blog link below. I added a white frame from Fancy Frames Rectangle Dies and a White Heat embossed sentiment from Birthday Cat Stamps.

Thanks so much for joining me today! Please feel free to visit me at Crafti-Cat for the list of Copic Markers used. Have a wonderful week!

Sunny Studio Supplies Used:

Fancy Frames- Rectangles
Shop at:
Sunny Studio
Rainbow Bright 6x6 Paper
Shop at:
Sunny Studio
Stitched Oval Dies
Stitched Oval Dies
Shop at:
Sunny Studio
Sweet Treats House Add-on
Shop at:
Sunny Studio
Quilted Hearts Portrait
Shop at:
Sunny Studio
Ribbon & Lace Dies
Ribbon & Lace Dies
Shop at:
Sunny Studio
Birthday Cat Stamps
Birthday Cat Stamps
Shop at:
Sunny Studio
Birthday Cat Dies
Birthday Cat Dies
Shop at:
Sunny Studio

Tuesday, April 25, 2023

Notebook Die Focused Card with Isha

Hello everyone! Isha here today with a cute card featuring the new Notebook dies. You must have seen all the gorgeous inspiration by Mendi featuring the new release.

Sunny Studio Stamps: Notebook Die Focused Birthday Card by Isha Gupta (featuring Big Bold Greetings, Purrfect Birthday)

I started by creating the background by inking the gelli plate with distress oxide inks, and took the print onto a white card. Stamp the images from the Purrfect Birthday stamps to create a background. Adhere this panel to the card base.

Die-cut the notebook panel from the Notebook Photo Corners die from pink card and vellum, tear them from bottom. Adhere the vellum to the pink die-cut using 3d foam. Adhere to the card. Stamp the word "Happy Birthday" from the Big Bold Greetings onto black card using versamark ink, sprinkle WOW! opaque white embossing powder and heat set. Die-cut using the coordinating dies

Sunny Studio Stamps: Notebook Die Focused Birthday Card by Isha Gupta (featuring Big Bold Greetings, Purrfect Birthday)

Die-cut the tab using the Notebook Tabs dies. Sponge a bit of color to the edges. Stamp the sentiment from the Critters On The Go stamp set. Adhere to the card.

Thanks for stopping by and have a nice day!

Sunny Studio Supplies Used:

Purrfect Birthday Stamps
Shop at:
Sunny Studio
Purrfect Birthday Dies
Shop at:
Sunny Studio
Critters on the Go Stamps
Shop at:
Sunny Studio
Big Bold Greetings Stamps
Shop at:
Sunny Studio
Big Bold Greetings Dies
Shop at:
Sunny Studio
Notebook Photo Corners Dies
Shop at:
Sunny Studio
Notebook Tabs Dies
Notebook Tabs Dies
Shop at:
Sunny Studio

Monday, April 24, 2023

Scrumptious Cupcakes Card with Bobbi

Hi Sunny friends! It’s Bobbi here with some yummy cupcakes using the new Scrumptious Cupcakes stamp set and coordinating dies by Sunny Studio Stamps. This set includes multiple stamp layers so you can achieve perfect results every time. Just line up the layers and stamp away! My 5″ X 7″ card includes five of these adorable cakes with different frosting tops and accessories.

Sunny Studio Stamps: Scrumptious Cupcakes Birthday Card by Bobbi Lemanski

To make this card, I stamped the cupcakes, three with chocolate cake and two with vanilla cake. I made three with blue liners and two with aqua. For the frosting, I used three shades of each color – orange, pink, red, green and lavender.  The set has three different frosting shapes. I also added candles and cherries on top to accessorize each one.

Sunny Studio Stamps: Scrumptious Cupcakes Birthday Card by Bobbi Lemanski


I attached each topper using a foam dot to make the tops stand out from the bottoms. I also stamped the “happy birthday” sentiment from the set in black on white cardstock and fussy cut the design. I glued on some confetti over the sentiment for extra color. It was cut from 1/8″ strips of cardstock. I used Pearl Pen in different colors to add dimensional sprinkles on top of each cupcake. I set them aside to dry. 

Sunny Studio Stamps: Scrumptious Cupcakes Birthday Card by Bobbi Lemanski


For the card base, I splattered random color all over the front using watercolor paint in coordinating colors. Once it was dry, I added 7″ long X 1″ tall strips of blue and green cardstock hand cut to create some party fringe. Each strip was attached to the bottom edge, overlapping the two. I also added 1/8″ strips of aqua and yellow (with faux white stitches added to the yellow strip) to the top of the fringe border for a finished look. More hand cut confetti pieces were added over the splattered paint background. I attached the cupcakes and the sentiment above and over the fringe to finish the card.

Thanks for stopping by today. If you want to see more ideas and inspiration from me, subscribe to my blog, BobbiHartDesign.com. I’ll send you updates on new posts! You can also find me on Instagram as @BobbiHartDesign and on Facebook as BobbiHartDesign.

Sunny Studio Supplies Used:

Scrumptious Cupcakes Stamps
Shop at:
Sunny Studio
Scrumptious Cupcakes Dies
Shop at:
Sunny Studio