Showing posts with label Frilly Frames. Show all posts

Friday, September 19, 2025

Harvest Mice & Fall Friends Cards with Mendi

Hello and welcome! This is Mendi here today, popping in to share some fall cards featuring our Fall Friends Stamps and Harvest Mice Stamps.

Sunny Studio Autumn Pumpkins, Fox & Mouse Cards using Harvest Mice, Truckloads of Love & Fall Friends Clear Stamps Craft Dies

My first card combines the fox, pumpkins, and greetings in the foreground from the Fall Friends Stamps, with the trees from the Woodsy Autumn Stamps, and the truck with the smaller fox and the load of pumpkins from the Truckloads of Love Stamps. To frame my scene I used the outer zig-zag edged die from the Frilly Frames Chevron Dies and blended a light amount of Broken China Distress Ink for my Sky with Tea Dye ink for the ground.

Sunny Studio Autumn Pumpkins Fox Card using Fall Friends & Truckloads of Love Clear Stamps, Frilly Frames Chevron Craft Dies

For my second card, I created a scene using the mice, pumpkins, wheelbarrow, and corn stalks from the Harvest Mice Stamps. This time, I framed my scene with a smaller zig-zag edged mat using the Mini Mat & Tag 4 Dies and masked off the edges with masking material before inking my sky and ground like I had for my first card. I repeatedly stamped the corn stalk directly onto my scene at different heights with VersaFine Clair Verdant Green Ink. I chose the smaller mat size so that more of the cute orange gingham print from the Critter Country Paper pack would be visible in my background.

Sunny Studio Autumn Pumpkins Mouse Card using Harvest Mice Clear Stamps, Mini Mat & Tag 4 Craft Dies & Critter Country Paper

That wraps up my projects for today. Thanks so much for hanging out with me. I hope I've inspired you to spread a little happiness by sending out a card to someone you love. ðŸ’›

Don't forget to check out our Fall Friends StampsHarvest Mice Stamps, Woodsy Autumn StampsFrilly Frames Chevron Dies, and Critter Country Paper in our online shop, which are all currently on sale!

Also, please check out all the card ideas using these sets on each of their product pages. I always make sure to upload tons of card ideas following the product image so there are lots of ideas to scroll through there organized by set.

Supplies Used:

Fall Friends Stamps
Fall Friends Stamps
Shop at:
Sunny Studio
Fall Friends Dies
Fall Friends Dies
Shop at:
Sunny Studio
Frilly Frames Chevron Die
Shop at:
Sunny Studio
Woodsy Autumn Stamps
Shop at:
Sunny Studio
Woodsy Autumn Dies
Woodsy Autumn Dies
Shop at:
Sunny Studio
Harvest Mice Stamps
Harvest Mice Stamps
Shop at:
Sunny Studio
Harvest Mice Dies
Harvest Mice Dies
Shop at:
Sunny Studio
Mini Mat & Tag 4 Dies
Shop at:
Sunny Studio
Critter Country Paper
Shop at:
Sunny Studio
Truckloads of Love Stamps
Shop at:
Sunny Studio
Truckloads of Love Dies
Shop at:
Sunny Studio
Spellbinders Masking Sheets
Shop at:
Sunny Studio
Versafine Onyx Black Ink
Shop at:
Sunny Studio
Versafine Clair Ink- Acorn
Shop at:
Sunny Studio
Versafine Clair Ink- Verdant
Shop at:
Sunny Studio
PinkFresh Studio Blending Brushes
Shop at:
Sunny Studio

Wednesday, September 17, 2025

Too Cute To Spook Card with Tina

Hello crafters, it’s Tina and I love making fun Halloween cards! Of course they have to include cute critters and the Too Cute To Spook stamp and Die set has you covered. It is everything you need to make heaps of adorable spooky cards!

Sunny Studio Stamps: Too Cute To Spook Halloween Card by Tina Henkens (featuring Frilly Frame Dies, Fancy Frame Dies, Autumn Tree Dies)

After creating a simple white card base, I cut a green background panel (Preppy Prints) with the outer die from the Frilly Frames Chevron setFor my focal point I used the middle die from Fancy Frames Circles and since I wanted to make this frame pop, so I cut it from white card stock. I inked up the middle part with vibrant Twisted Citron Distress Oxide and a blending brush. For more dimension I added some water splatters with a fine paint brush.

The beautiful Autumn Tree die, cut from black paper, was the perfect dramatic backdrop for my spooky scene. From the Too Cute To Spook stamp, I selected two cuties, a bat and a pumpkin (the other pumpkin is from Fall Kiddos). I colored everything in fun Halloween colors with my Copics.

Sunny Studio Stamps: Too Cute To Spook Halloween Card by Tina Henkens (featuring Frilly Frame Dies, Fancy Frame Dies, Autumn Tree Dies)

Then it was time to put the card together and create the scene, I glued the background in place and mounted the images with foam tape. Lastly, I stamped a matching sentiment (Bewitching) on a small white banner with a purple ink from my stash and added it below the circle. I scattered a few Orange Topaz Jewels across the tree, I really love these for Fall and Halloween projects!

I hope you have fun creating your adorable spooky projects! Thank you for joining me and happy crafting!

Sunny Studio Supplies Used:

Bewitching Stamps
Bewitching Stamps
Shop at:
Sunny Studio
Fancy Frames-Circle Dies
Shop at:
Sunny Studio
Preppy Prints 6x6 Paper
Shop at:
Sunny Studio
Fall Kiddos Stamps
Fall Kiddos Stamps
Shop at:
Sunny Studio
Fall Kiddos Dies
Fall Kiddos Dies
Shop at:
Sunny Studio
Frilly Frames Chevron Die
Shop at:
Sunny Studio
Too Cute To Spook Stamps
Shop at:
Sunny Studio
Too Cute To Spook Dies
Shop at:
Sunny Studio
Autumn Tree Die
Autumn Tree Die
Shop at:
Sunny Studio

Wednesday, August 27, 2025

Elegant Leaves Card with Tina

Hello crafters, it’s Tina and today I am sharing my first autumnal card of the season! As we are slowly transitioning into those cozy Fall vibes, I just love the rich vibrant colors nature brings us. As most crafters I am always in need of birthday cards, and I struggle with male cards. So, I came up with this fun design, perfect for those Autumn birthdays!

Sunny Studio Stamps: Elegant Leaves Birthday Card by Tina Henkens (featuring Ribbon & Lace Border Dies, Frilly Frame Dies, Stitched Circle Dies)

After creating a white card base, I cut a white panel with the outer die of the Frilly Frames Stripes die. Next, I selected two scraps of white card stock and ran them both through the machine with the same die.

The large white scalloped panel got further embellished with the inner die of the Frilly Frames Retro Petals set. I love how all these ‘Frilly’ dies can be combined to create endless new designs! I kept all the inner pieces in place with a sheet of Press ‘n Seal (a great item to have in your stash!) and glued the panel to the card base.

Sunny Studio Stamps: Elegant Leaves Birthday Card by Tina Henkens (featuring Ribbon & Lace Border Dies, Frilly Frame Dies, Stitched Circle Dies)

The other two white scalloped scrap pieces were turned into nice borders by using one of the Ribbon & Lace Border dies. To create more contrast, I colored them both in a teal color with the ink to paper technique (just pull the ink pad across the paper a few times). I love how this not only gave the borders a nice color but also a kind of velvety look! Next, I glued both pieces to the top and bottom of the white embossed panel.

I then stamped a beautiful leave (Elegant Leaves) in four Fall colors and used the matching die to cut them out. Together they create a beautiful wreath, I added a white circle on top (Stitched Circles Large) with a sentiment from the Party Pets setTo complete the design, I glued a few Pure White Jewels across the wreath.

Thank you for joining me and happy crafting!

Sunny Studio Supplies Used:

Frilly Frames Stripes Die
Shop at:
Sunny Studio
Elegant Leaves Stamps
Shop at:
Sunny Studio
Elegant Leaves Dies
Elegant Leaves Dies
Shop at:
Sunny Studio
Frilly Frames Retro Petals Dies
Shop at:
Sunny Studio
Stitched Circle Large Dies
Shop at:
Sunny Studio
Ribbon & Lace Dies
Ribbon & Lace Dies
Shop at:
Sunny Studio
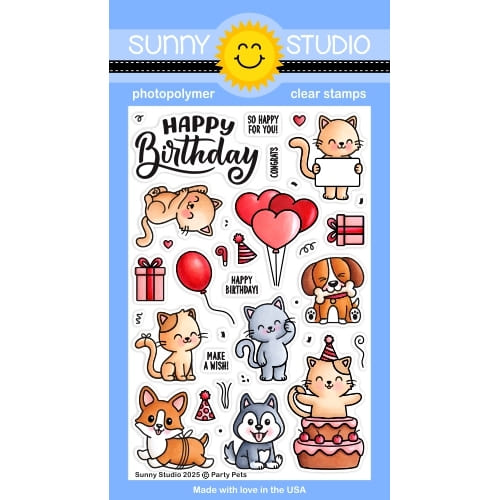
Party Pets Stamps
Party Pets Stamps
Shop at:
Sunny Studio

Wednesday, August 6, 2025

Mermaid Kisses Card with Tina

Hello crafters, it’s Tina and today we are off to the beach! For this card I combined the sweet Mermaid Kisses stamp and die set with the beautiful Ocean View scene.

Sunny Studio Stamps: Mermaid Kisses Summer Themed Card by Tina Henkens (featuring Ocean View, Frilly Frame Dies)

After creating a teal card base, I stamped the ocean scene onto a white panel which I cut with the outer die of Frilly Frames ChevronThen I started coloring this view with my Copic markers. I wanted to create that foam look of waves crushing the beach, so I added lots of white details with a gel pen.

To finish this scene, I ink blended a summer sun with a stencil from my stash and Distress Oxides Spun Sugar and Squeezed Lemonade. I masked of the horizon line, but not the palm trees since I was using small brushes.

Sunny Studio Stamps: Mermaid Kisses Summer Themed Card by Tina Henkens (featuring Ocean View, Frilly Frame Dies)

Next, I selected a cutie from the Mermaid Kisses stamp set and also some seashells and starfish. From the Ocean View set I picked the rock with seaweed, but decided to cut away the seaweed portion with my scissors. All the coloring was done with Copics in bright tones.

Before assembling the card, I pulled a sentiment from the Mermaid Kisses stamp and used a blue ink from my stash. I love how this large phrase fills in the rightside corner nicely! To complete the design, I added the images with foam tape. As a final embellishment, a few Champagne Clear jewels were glued on each side of the sentiment.

And that finishes this fun beach scene! Thank you for joining me and happy crafting!

Sunny Studio Supplies Used:

Frilly Frames Chevron Die
Shop at:
Sunny Studio
Ocean View Stamps
Ocean View Stamps
Shop at:
Sunny Studio
Ocean View Dies
Ocean View Dies
Shop at:
Sunny Studio
Mermaid Kisses Stamps
Shop at:
Sunny Studio
Mermaid Kisses Dies
Mermaid Kisses Dies
Shop at:
Sunny Studio

Wednesday, July 23, 2025

Big Panda Card with Tina

Hi crafty friends, Tina here and today I am creating a ‘get well’ project for my sister who is recovering from surgery. What better way to cheer her up then to send her a card featuring the cute Big Panda stamp and die set.

Sunny Studio Stamps: Big Panda Get Well Card by Tina Henkens (featuring Frilly Frame Dies, Notebook Tab Dies, Brilliant Banner Dies, Heartfelt Wishes)

The whole idea for this design was combining the panda with a bold background. I browsed through my paper pads and came across this gorgeous rainbow wavy sheet (Spring Fever) which I cut to size so it would fit inside a white scalloped panel (Frilly Frames Polka-Dots). After gluing these two pieces together, I adhered both to a white card base.

Next, I stamped the cute panda (Big Panda stamp), a little bow, the flower bouquet and a letter (Big Bunny). I cut all the images with the matching dies, making sure to use the special die which cuts the arms of the panda. Now the bear can hold the flowers, so cute!! After coloring the images with my copics, I added some white highlights with a gel pen.

Sunny Studio Stamps: Big Panda Get Well Card by Tina Henkens (featuring Frilly Frame Dies, Notebook Tab Dies, Brilliant Banner Dies, Heartfelt Wishes)

Although the panda looked cute against the bold background, I still decided to add an extra layer of vellum to tone the brightness down a bit. I wanted this layer to stick well to the pattern paper, so I adhered the vellum to a large piece of double sided sticky paper before cutting it with the spiral notebook die (Notebook Tabs dies). I glued this piece to the wavy paper at a little angle. My sentiment was taken from the Heartfelt Wishes set and stamped with Versafine Onyx Black ink onto a white banner (Brilliant Banner 1).

To assemble the card, I placed the banner near the bottom of the vellum notebook page so I could tug in the bear behind this piece. I added the bow, flowers and letter and mounted everything with foam tape. After sprinkling a few Iridescent Clear Jewels this sweet project was ready!

Thank you for visiting the blog and happy crafting!

Sunny Studio Supplies Used:

Heartfelt Wishes Stamps
Shop at:
Sunny Studio
Frilly Frames Polka-Dot
Shop at:
Sunny Studio
Spring Fever Paper
Spring Fever Paper
Shop at:
Sunny Studio
Notebook Tabs Dies
Notebook Tabs Dies
Shop at:
Sunny Studio
Brilliant Banner 1 Dies
Shop at:
Sunny Studio
Big Bunny Stamps
Big Bunny Stamps
Shop at:
Sunny Studio
Big Bunny Dies
Big Bunny Dies
Shop at:
Sunny Studio
Big Panda Stamps
Big Panda Stamps
Shop at:
Sunny Studio
Big Panda Dies
Big Panda Dies
Shop at:
Sunny Studio