Showing posts with label Sprawling Surfaces. Show all posts

Wednesday, June 11, 2025

Puppy Parents Card with Tina

Hello crafters, it is Tina and today I am creating a sweet card for my husband, who is an incredible Dad and also a dog lover. Our two dogs Mira and Lena bring so much love and joy in our lives. When I saw the Puppy Parents stamp and die set, I knew it would be perfect for this project!

Sunny Studio Stamps: Puppy Parents Father's Day Card by Tina Henkens (featuring Sprawling Surfaces, Fancy Frame Dies, Stitched Arch Dies, Brilliant Banner Dies)

Of course, I selected the two fluffiest doggies of this adorable bunch since they look just like ours. To set the scene, I also stamped the sweet doghouse, a few balls, the food bowl, and some bones.

After creating a simple white card base, I die cut all the layers for this card. Starting with the white frame (largest of the Fancy Frames Rectangle dies), I backed this frame with a sheet of pink striped paper (Dots & Stripes Pastels) and finally I cut a white arched panel (Stitched Arch dies).

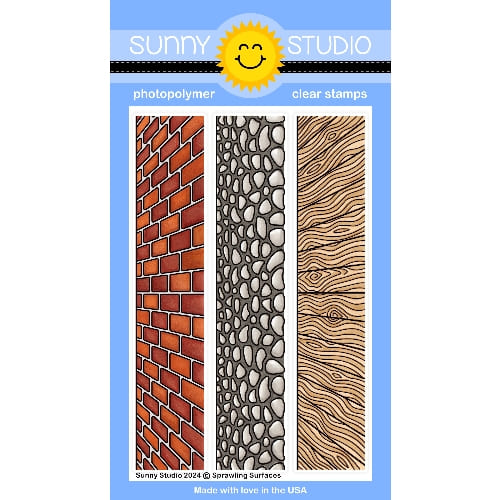
This last piece will become the base for my scene. First, I stamped a cobblestone border (Sprawling Surfaces). Next, I masked off this part of the panel with some Post-It tape and added a pink cloudy sky with a stencil from my stash and Spun Sugar Distress Oxide.

Sunny Studio Stamps: Puppy Parents Father's Day Card by Tina Henkens (featuring Sprawling Surfaces, Fancy Frame Dies, Stitched Arch Dies, Brilliant Banner Dies)

I pulled out my Copic Markers and colored all the images as well as the stone border. But when I did a try-out of the scene and put the dogs in place, it felt a bit busy. A piece of vellum is a good option to soften a busy background. Die cutting with the Stitched Arch again gave me the perfect vellum layer. I used a tape runner for vellum to attach this layer to the background and felt much happier with the design!

The arched shape of the Brilliant Banner 4 die was a perfect match for the scene, my Misti worked great to curve the combined sentiment from the Puppy Parents stamp (the red ink was pulled from my stash).  As a final embellishment, I added a few Pink Spinel Jewels.

I hope you will enjoy these fun Puppy Parents stamps as much as I did! Thank you for joining me and happy crafting!

Sunny Studio Supplies Used:

Fancy Frames- Rectangles
Shop at:
Sunny Studio
Dots & Stripes Pastels 6x6 Paper
Shop at:
Sunny Studio
Puppy Parents Stamps
Shop at:
Sunny Studio
Puppy Parents Dies
Puppy Parents Dies
Shop at:
Sunny Studio
Stitched Arch Dies
Stitched Arch Dies
Shop at:
Sunny Studio
Brilliant Banner 4 Dies
Shop at:
Sunny Studio 
Sprawling Surfaces Stamps
Shop at:
Sunny Studio

Tuesday, May 27, 2025

Grad Cat Card with Amanda

Hey crafty friends! It’s Amanda here sharing a fun little graduation card with you! This card was a lot of fun to make using a masking technique!

Sunny Studio Stamps: Grad Cat Graduation Card by Amanda Fitterer (featuring Spring Scenes, Sprawling Surfaces)

First, I stamped my cat from the Grad Cat Stamps. Using the leftover ink on the stamp, I stamped it again on a piece of Heffy Doodle Memo Tape. I used scissors to fussy cut the mask out and then placed it over the cat.

Next, I stamped the Spring Scenes Stamps, which includes the background, bench, and lamppost. Using the same masking technique to mask this image. For the rocky sidewalk, I used the Sprawling Surfaces Stamps.

Before removing my masks, I ink blended Catherine Pooler Hot Tub ink for the sky. Once that was complete, I removed all the masks so that I could color in my scene.

Sunny Studio Stamps: Grad Cat Graduation Card by Amanda Fitterer (featuring Spring Scenes, Sprawling Surfaces)

Here are the Copic markers I ued:
Grass: YG11, YG61, YG63, YG67
Trees: G00, G20, G24, G40, G43, G46, YG11, YG61, YG63, YG67, YG41, YG45
E50, E53, E55, E57
Bench: R35, R37, R39, T2, T6
Road: N2, N3, N5, N7
Cap: C5, C7, C9
Cat: E40, E41, E42, E43, R30, R32
Lamppost: BG72, BG75, BG78

I added a few highlights and dots with a White Gelly Rolly pen. I adhered my card panel to my A2 card base with liquid glue.

Such a simple and sweet grad card that my kitty-loving niece will love! Thanks so much for stopping by the Sunny Studio Stamps Blog today! Come back tomorrow for more inspiration!!

Sunny Studio Supplies Used:

Spring Scenes Stamps
Shop at:
Sunny Studio
Grad Cat Stamps
Grad Cat Stamps
Shop at:
Sunny Studio
Sprawling Surfaces Stamps
Shop at:
Sunny Studio

Tuesday, May 13, 2025

City Streets Card with Amanda

Hey crafty friends, Amanda here! Do you ever use masking to create a one layer card? It’s a great way to use your stamps that don’t have coordinating dies! Or, if you just want to try out a different look to your cards! 

Sunny Studio Stamps: City Streets Card by Amanda Fitterer (featuring Foxy Friends, Sprawling Surfaces)

To create this card, I used Heffy Memo Tape for my masking. You can also use sticky notes or other masking tape. For this technique, I start by determining the order in which the images need to be stamped and masked. For this card, the umbrella needs to be stamped first. So, I stamped the umbrella with my MISTI Then, without removing my stamp, I put a piece of Heffy Memo Tape down over top of the stamped image and used the leftover ink on the stamp to stamp the image. This gives me an outline to cut for my mask. Using scissors, I cut out the umbrella and placed the mask over the stamped image on the card panel.

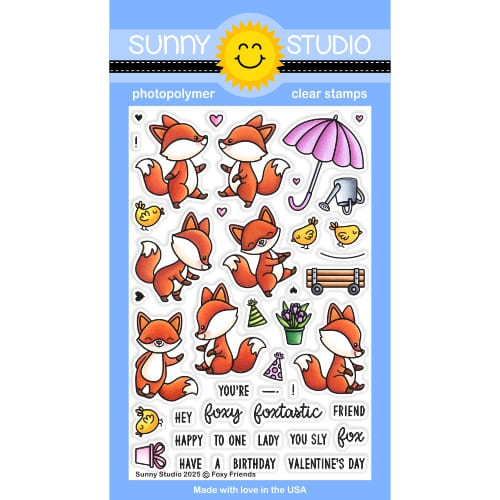
Next, I stamped the fox and birds from the Foxy Friends Stamps. Using the same technique as I did with the umbrella, I created masks for these images and placed them over the stamped images.

The next layer is the Sprawling Surfaces. Then, the City Streets buildings and lamp post. I didn’t need a mask for either of these layers. However, if you wanted to ink blend a sky or background, you could mask off the buildings, lamp post, and street to do this!

Sunny Studio Stamps: City Streets Card by Amanda Fitterer (featuring Foxy Friends, Sprawling Surfaces)

Now that I’ve got all my stamped images done, I can remove all the masks and color the scene with Copic markers. I used tones of brown, gray, blue-green, yellow-green and red.

The final step is to create my sentiment. In stead of stamping it directly onto the background, I decided to put it on a black banner. To do this, I stamped the sentiment with my WOW! embossing pad on black cardstock and then I applied white embossing powder to it. I melted the powder with my heat tool and then trimmed it into a flag banner with my paper trimmer and scissors.

Thank you for coming by the Sunny Studio Stamps blog today! I hope you enjoy the rest of your week and find some time to get crafty!!

Sunny Studio Supplies Used:

City Streets Stamps
City Streets Stamps
Shop at:
Sunny Studio
Sprawling Surfaces Stamps
Shop at:
Sunny Studio
Foxy Friends Stamps
Foxy Friends Stamps
Shop at:
Sunny Studio

Tuesday, March 18, 2025

Background Basics 2 Card with Amanda

Hello there, crafters, Amanda here! I hope your week is off to a great start! Today, I am sharing a cute little kitty card I created for a special birthday!

Sunny Studio Stamps: Background Basics 2 Focused Birthday Card by Amanda Fitterer (featuring Party Pets, Sprawling Surfaces, Fancy Frame Rectangle Dies, Moroccan Circles Embossing Folder)

This card has quite a few layers, so let me explain how I created each one! First, I used the Fancy Frames Rectangle Dies and cut both of the larger frames. I only used the outside layer of each cutout and saved the inside frames for another card. Next, I ran a piece of mint paper through my die-cutting machine with the Morrocan Circles Embossing Folder

Then, I trimmed a piece of white cardstock to 2.75” x 4” for my background panel. On this panel, I masked off the bottom portion with some tape. I ink blended Catherine Pooler's Hot Tub ink on the entire area. Then, I stamped the Background Basics 2 Stamps with Catherine Pooler’s Sea Glass ink.

I masked off the top portion of the panel and then stamped the wood floor image from the Sprawing Surfaces Stamps. I colored the floor with E21, E23, and E25 Copic markers.

Now, with all those layers complete, we can assemble the card! I glued the mint panel to an A2 card base. Then, I added the outside frame, adhering it with thin foam tape. Then, I glued the background panel to the center of the card. And finally, I used more thin foam tape to adhere the inner frame to the card.

Sunny Studio Stamps: Background Basics 2 Focused Birthday Card by Amanda Fitterer (featuring Party Pets, Sprawling Surfaces, Fancy Frame Rectangle Dies, Moroccan Circles Embossing Folder)

Now, we can move on to the main event: the kitties! I stamped the cats, accessories, and sentiment from the Party Pets Stamps with black ink. Then, I colored them in with Copic markers.

Here are the marker colors I used:
Cats: W8, YR24, YR27, N0, N1, N8, N9, R22, R30
Green Areas: YG000, YG00, YG01, YG03, YG05
Blue/Green Areas: BG 11, BG13, BG32
Pink Areas: RV10, RV21, RV23, RV25, R00, R20, R22


I die cut the images and sentiment out with the 
coordinating die set. I added them to the card using foam squares. To add a little bit of detail, I added 3 Iridescent Clear Jewels.

The card is finished!  I love how the layers make this card unique and eye-catching! Thanks for stopping by the Sunny Studio Stamps blog today! Come back tomorrow for more inspiration! 

Sunny Studio Supplies Used:

Fancy Frames- Rectangles
Shop at:
Sunny Studio
Moroccan Circles Embossing
Shop at:
Sunny Studio
Sprawling Surfaces Stamps
Shop at:
Sunny Studio
Background Basics 2 Stamps
Shop at:
Sunny Studio
Party Pets Stamps
Party Pets Stamps
Shop at:
Sunny Studio
Party Pets Dies
Party Pets Dies
Shop at:
Sunny Studio

Wednesday, February 12, 2025

Cat Antics card with Tina

Hi crafty friends, Tina here and I had so much fun creating this sweet birthday card with the adorable Cat Antics stamp and die set! I love these kitties so much that I initially colored five of them! But sometimes you have to adjust your design plans since I only had room for three. So, I put the other two aside for a future card!

Sunny Studio Stamps: Cat Antics Birthday Card by Tina Henkens (featuring Wishes Word Die, Special Day, Rounded Rectangle Mat Dies, Background Basics 2, Sprawling Surfaces)

For this project, I kept to a strict color scheme of beige, brown, coral, and red tones. I started by coloring the big celebration cake (Special Day), the banners (Panda Party), presents, party hat (Party Pets) and the sweet cats with their ball of yarn (Cat Antics stamp). I added some white details to make the images pop.

To match the color scheme, I create a cream card base. Next, I cut a white panel with the largest of the Rounded Rectangle Mat dies. Since I wanted a white border around my scene, I used a smaller die from the same set. This provides you with the border and a smaller rectangle mat for scene building.

First, I stamped my background onto this smaller mat panel. For the bottom part (after masking of the top part with some Post It tape) I used the wood floor stamp (Sprawling Surfaces) and a brown ink from my stash. Using a small blending brush to add more brown ink to the planks.

Sunny Studio Stamps: Cat Antics Birthday Card by Tina Henkens (featuring Wishes Word Die, Special Day, Rounded Rectangle Mat Dies, Background Basics 2, Sprawling Surfaces)

Then I lowered the Post It tape to stamp the ‘wallpaper’ part of the card with a light pink ink and the fun diagonal grid stamp (Background Basics 2). You can only see it on the left side of the card, but I drew in a baseboard with a black pen and colored it with a dark brown pencil.

My sentiment consists of a large die cut (Wishes word) and a Happy Birthday stamp (Punny Fruit Greetings, Versafine Onyx Black ink). Next, I could build the entire scene.
Adding a few
Crystal clear Jewels finishes this sweet project.

I can’t wait to see all these adorable kitties featured in your projects! Thank you for visiting the blog and happy crafting!

Sunny Studio Supplies Used:

Wishes Word Die
Wishes Word Die
Shop at:
Sunny Studio
Panda Party Stamps
Panda Party Stamps
Shop at:
Sunny Studio
Panda Party Dies
Panda Party Dies
Shop at:
Sunny Studio
Special Day Stamps
Special Day Stamps
Shop at:
Sunny Studio
Special Day Dies
Special Day Dies
Shop at:
Sunny Studio
Sprawling Surfaces Stamps
Shop at:
Sunny Studio
Punny Fruit Greetings
Shop at:
Sunny Studio
Background Basics 2 Stamps
Shop at:
Sunny Studio
Cat Antics Stamps
Cat Antics Stamps
Shop at:
Sunny Studio
Cat Antics Dies
Cat Antics Dies
Shop at:
Sunny Studio
Party Pets Stamps
Party Pets Stamps
Shop at:
Sunny Studio
Party Pets Dies
Party Pets Dies
Shop at:
Sunny Studio
Rounded Rectangle Mat Dies
Shop at:
Sunny Studio

Tuesday, February 11, 2025

Inside Greetings Belated Birthday Card with Amanda

Hey crafty friends! You’re here with Amanda today and I’m so happy to be here with you! Today I’m going to walk you through how I made this square belated birthday card!

Sunny Studio Stamps: Inside Greetings Belated Birthday Focused Card by Amanda Fitterer (featuring Sprawling Surfaces, Tulip Path Background, Party Pets)

Are you loving the background on this card?! Me too! I used a combination of the new Tulip Path Background Stamps, the Spring Scenes Stamps and the Sprawling Surfaces Stamps. There’s quite a few layers, but I’ll break down each one!

I started by trimming a piece of white cardstock to 6”x12” for my card base. I scored it at the 6” mark and folded it. My next layer is the sky background panel. I trimmed this piece of white cardstock to 5.5”x5.5”. I lightly blended Catherine Pooler’s Hot Tub ink on the top portion of the panel.  

For the next layer, I’ve trimmed another piece of white cardstock to 5.5”x5.5”. On this panel, I stamped the main background stamp from the Tulip Path Background Stamps. I used the coordinating dies to cut out the foreground.

My next layer is the Spring Scenes Stamps. I stamped the image on a piece of white cardstock trimmed to 5.5”x 3”. I used the coordinating dies to trim off the top part of the panel. On the bottom portion, I stamped the rocky road stamp from the Sprawling Surfaces Stamps.

I colored the entire background with Copic markers. Then, I assembled the card. I glued the background layers to the card base. I propped the foreground layer up with foam tape.

Sunny Studio Stamps: Inside Greetings Belated Birthday Focused Card by Amanda Fitterer (featuring Sprawling Surfaces, Tulip Path Background, Party Pets)

Now that all my layers are complete, it’s time to stamp my cuties! The 2 bunnies are from the Tulip Path Background Stamps. The little kitty and the birthday accessories are from the Party Pets Stamps. I used Copic markers to color in all my stamped images. I used the coordinating dies to cut out all the images. I propped all these little guys up with 3D foam squares and adhered them to the card.

The “Happy Birthday” sentiment is also from the Party Pets Stamps. My banner sentiment is from the Inside Greetings Belated Birthday Stamps. I love that these clear stamps are so flexible!Although it’s a straight stamp, I was able to bend it into a wave on my stamping platform. After stamping it, I simply used scissors to cut it into a banner. I placed a thin piece of foam tape behind it and then adhered it to my card.

The card is finished! What a fun and colorful card to give to a friend! I hope you enjoyed this blog post and will come back tomorrow for more inspiration! Thanks for coming by the Sunny Studio Stamps blog!

Sunny Studio Supplies Used:

Spring Scenes Stamps
Shop at:
Sunny Studio
Spring Scenes Dies
Spring Scenes Dies
Shop at:
Sunny Studio
Sprawling Surfaces Stamps
Shop at:
Sunny Studio
Tulip Path Background Stamps
Shop at:
Sunny Studio
Tulip Path Background Dies
Shop at:
Sunny Studio
Inside Greetings Belated Birthday
Shop at:
Sunny Studio
Party Pets Stamps
Party Pets Stamps
Shop at:
Sunny Studio
Party Pets Dies
Party Pets Dies
Shop at:
Sunny Studio