Showing posts with label Stitched Arch Dies. Show all posts

Monday, December 16, 2024

Season's Greetings Holiday Gift Tags with Leanne

Hello friends! Leanne here and I'm sharing some Christmas tags today. I've combined some pretty holiday paper with a big Merry Christmas greeting for these festive tags. 

Sunny Studio Stamps: Seaon's Greetings Holiday Gift Tags by Leanne West (featuring Stitched Arch Dies, Woolen Mitten Dies, Brilliant Banner Dies, Inside Greetings Seasons)

Below are all the Sunny Studio supplies needed to recreate these tags.

Joyful Holiday paper pad - Patterned paper used for tag base.

Stitched Arch dies - I used the largest die in the set to cut out the tag base. I then punched a whole at the top with 1/4" paper punch. 

Season's Greetings stamp set companion dies - For the large Merry Christmas. The pink ones have been stamped with Catherine Pooler Party Dress ink. The red is CP Rouge ink. 

Woolen Mitten dies - For the holly leaves. 

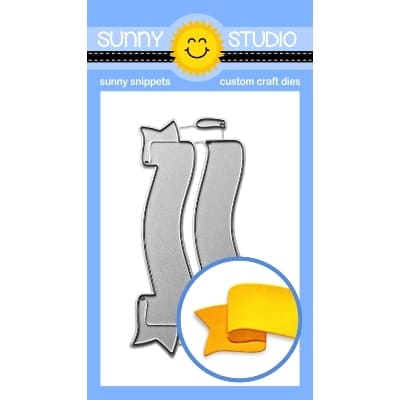
Brilliant Banner 3 die - For the white banner I stamped to/from on.

Inside Greetings Seasons stamp set - For the to & from.

Sunny Studio Stamps: Seaon's Greetings Holiday Gift Tags by Leanne West (featuring Stitched Arch Dies, Woolen Mitten Dies, Brilliant Banner Dies, Inside Greetings Seasons)

To make the tags extra special, I added a little clay peppermint piece to the holly leaves and tied a jingle bell to the ribbon. The finished tag with ribbon measures 6 inches tall and 4 inches wide. 

One time saving tip I wanted to pass along...  when you need many of the stamped and die cut Merry Christmas words, die cut several blanks first with the companion die. Then use the negative die cut in a Misti to line up the stamp in that negative space. Close the Misti lid to pick up the stamp and place a blank die cut Merry Christmas piece into that opening. Stamp as you normally would, repeating the process with all the blanks. 

Sunny Studio Supplies Used:

Season's Greetings Stamps
Shop at:
Sunny Studio
Season's Greetings Dies
Shop at:
Sunny Studio
Stitched Arch Dies
Stitched Arch Dies
Shop at:
Sunny Studio
Joyful Holiday Paper
Shop at:
Sunny Studio
Woolen Mitten Dies
Woolen Mitten Dies
Shop at:
Sunny Studio
Inside Greetings Seasons
Shop at:
Sunny Studio
Brilliant Banner 3 Dies
Shop at:
Sunny Studio

Saturday, November 30, 2024

Guest Designer Spotlight: Snowmen In Sweaters Card by Tammy Stark

Hi friends, Tammy Stark here with you today! I'm so excited to be guest designing with Sunny Studio for the holidays! The holiday release is full of adorableness with something for everyone! I created a card using one of my favorite sets, Snowmen in Sweaters. I love everything snowmen, so this will be a set I reach for year after year!

Sunny Studio Stamps: Snowmen In Sweaters Winter Themed Holiday Card by Tammy Stark (featuring Stitched Arch Dies, Buffalo Plaid Dies, Lacy Snowflake Dies)

To begin, I stamped Snowmen in Sweaterscolored with Copic markers, and die cut the images with the Snowmen in Sweaters Dies. I just love the big, bold sentiment, which was stamped in a vibrant red ink. I wanted to create a fun snow globe scene, so I used the largest die from the Stitched Arch Dies to create the snow globe base. I lightly inked it with Speckled Egg Distress Oxide ink, then attached the stamped images with foam tape. I splattered white acrylic paint onto the snow globe scene to create a super snowy effect. I then cut a thin rectangle from kraft paper to create the snow globe base.

Sunny Studio Stamps: Snowmen In Sweaters Winter Themed Holiday Card by Tammy Stark (featuring Stitched Arch Dies, Buffalo Plaid Dies, Lacy Snowflake Dies)

Next, I cut a piece of pink cardstock, just slightly smaller than A2 size and embossed it with the Buffalo Plaid Straight Die. I just love the subtle effect and dimension the Buffalo Plaid die gives to the background! I then attached the pink embossed background to a white A2 base, then adhered the snow globe using foam tape for dimension.

Sunny Studio Stamps: Snowmen In Sweaters Winter Themed Holiday Card by Tammy Stark (featuring Stitched Arch Dies, Buffalo Plaid Dies, Lacy Snowflake Dies)

Lastly, I added some white snowflakes, die cut using the Lacy Snowflake Dies and Snowflake Circle Frame Die to complete my card.

Thanks so much for stopping by. Happy Holidays to you all!!

Sunny Studio Supplies Used:

Lacy Snowflakes Die
Lacy Snowflakes Die
Shop at:
Sunny Studio
Snowflake Circle Frame
Shop at:
Sunny Studio
Stitched Arch Dies
Stitched Arch Dies
Shop at:
Sunny Studio
Snowmen in Sweaters Stamps
Shop at:
Sunny Studio
Snowmen in Sweaters Dies
Shop at:
Sunny Studio
Buffalo Plaid Straight Die
Shop at:
Sunny Studio

Wednesday, November 27, 2024

Let's Chill Card with Tina: Black Friday Exclusive!

Hello crafters, it is Tina with a cute Holiday card in which the two adorable seals from Let’s Chill are the stars of the show! This set is a Black Friday gift, with purchase exclusive and it is not for sale.

Sunny Studio Stamps: Let's Chill Winter Themed Card by Tina Henkens (featuring Bear Hugs, Winter Scenes, Stitched Arch Dies, Holiday Greetings, Snowflake Circle Frame Dies)

My design is a shaped card using the largest of the Stitched Arch Dies. After cutting a panel from white card stock, I used the same die to create my card base. For a bold and dramatic background I blended Broken China and Uncharted Mariner Distress Oxides and I was pleasantly surprised to see how well they work together! I splattered the panel with water and white paint and put it aside to dry.

Next, I stamped and cut the two cute seals and also two ice blocks (Bear Hugs, Winter Scenes) for them to sit on. As usual, I colored with my Copics and added white gel pen accents.

Sunny Studio Stamps: Let's Chill Winter Themed Card by Tina Henkens (featuring Bear Hugs, Winter Scenes, Stitched Arch Dies, Holiday Greetings, Snowflake Circle Frame Dies)

My sentiment is a large ‘Merry Christmas’ from the Holiday Greetings stamp and die setI love the scripty font and also the size, it fills the complete sky portion of this card. After putting the seals in place with foam tape, I adhered the sentiment (I cut three layers and glued them together for dimension).

To add extra icy elements, I sprinkled white snowflakes across the scene. These were cut with an all-time favorite die (Snowflake Circle Frame) which I use a lot in my Christmas card making. I glued some Iridescent Clear Jewels to center of the snowflakes for that extra festive bling!

This card was so fun to make, and I hope it inspired you to create a project with this sweet set! Happy crafting!

------------------------------------------------------

The Let's Chill Stamps used today are not available for purchase this holiday season but instead will be automatically included with all retail orders of $50 or more from our online store through December 2 at Midnight PDT. Here are all the details:

Receive free shipping on U.S. retail orders of $40+

+ Receive the exclusive mini "Let's Chill" stamp set with a $50+ purchase.

+ Receive the coordinating "Let's Chill" dies with a $75+ purchase.

+ 10% of retail sales will be donated to UNICEF USA.

*Please note: No discount codes are needed. All offers will be applied automatically and cannot be combined with additional discounts at checkout. Purchases are based on order subtotal, prior to shipping & tax.

Sunny Studio Black Friday 2024 Promotion with Exclusive Free Let's Chill Stamps & Dies, Free Shipping + UNICEF Fundraiser

Other Supplies Used:

Bear Hugs Stamps
Bear Hugs Stamps
Shop at:
Sunny Studio
Bear Hugs Dies
Bear Hugs Dies
Shop at:
Sunny Studio
Snowflake Circle Frame
Shop at:
Sunny Studio
Stitched Arch Dies
Stitched Arch Dies
Shop at:
Sunny Studio
Winter Scenes Stamps
Shop at:
Sunny Studio
Winter Scenes Dies
Winter Scenes Dies
Shop at:
Sunny Studio
Holiday Greetings Stamps
Shop at:
Sunny Studio
Holiday Greetings Dies
Shop at:
Sunny Studio

Monday, November 25, 2024

Let's Chill Card with Leanne: Black Friday Exclusive!

Hi everyone! Leanne here and I'm sharing a fun shaker card today. My card features some adorable images from the Black Friday gift with purchase exclusive stamp set, Let's Chill. I pulled out some older stamp and die sets along with the Let's Chill set to create this little winter scene and shaker window. All are listed below with a description of how they were used. 

Sunny Studio Stamps: Let's Chill Love Themed Card by Leanne West (featuring Stitched Arch Dies, Lovey Dovey)

Let's Chill Stamp Set & coordinating dies - For the seal and heart images plus "let's chill" sentiment

Lovey Dovey Stamp Set & coordinating dies - For the "you're my favorite" sentiment

Stitched Arch Die - I used the largest die in the set to create the shaker window. 

Joyful Holiday Paper Pack - The colorful polka dot pattern paper made a fun frame for my scene. 

Sunny Studio Stamps: Let's Chill Love Themed Card by Leanne West (featuring Stitched Arch Dies, Lovey Dovey)

I created the shaker part in the tradition way by adhering a piece of clear acetate behind the frame for the window and building a shaker well with thick foam tape strips. I filled the shaker with some iridescent heart confetti and snowflake sequins. 

Copics: R00, R30, RV11, RV13, T0, T2, C0, C1, C3, C5

I Copic colored the stamped images (colors used listed above). I created a little snow bank for the seals sit on with the same Stitched Arch Die used for the shaker window. I stamped "let's chill" onto the snow bank. I added the seals, hearts, and "you're my favorite" with thin foam squares so they would be popped up a bit. Lastly I adhered my completed shaker scene to an A2 size card base. 

----------------------------------------------

The Let's Chill Stamps used today are not available for purchase this holiday season but instead will be automatically included with all retail orders of $50 or more from our online store through December 2 at Midnight PDT. Here are all the details:

Receive free shipping on U.S. retail orders of $40+

+ Receive the exclusive mini "Let's Chill" stamp set with a $50+ purchase.

+ Receive the coordinating "Let's Chill" dies with a $75+ purchase.

+ 10% of retail sales will be donated to UNICEF USA.

*Please note: No discount codes are needed. All offers will be applied automatically and cannot be combined with additional discounts at checkout. Purchases are based on order subtotal, prior to shipping & tax.

Sunny Studio Black Friday 2024 Promotion with Exclusive Free Let's Chill Stamps & Dies, Free Shipping + UNICEF Fundraiser

Other Supplies Used:

Stitched Arch Dies
Stitched Arch Dies
Shop at:
Sunny Studio
Lovey Dovey Stamps
Lovey Dovey Stamps
Shop at:
Sunny Studio
Lovey Dovey Dies
Lovey Dovey Dies
Shop at:
Sunny Studio
Joyful Holiday Paper
Shop at:
Sunny Studio

Thursday, November 21, 2024

Distinctive Door Holiday Add-on Die Focused Tags with Marine

Hello crafty friends, Marine here, I'm super happy to be back on the blog with this trio of shaker tags showcasing multiple die sets, including the Distinctive Door Holiday Add-On that I used on its own to create three mini scenes in jars.

Sunny Studio Stamps: Distinctive Door Holiday Add-On Die Focused Holiday Tags by Marine Simon (featuring Comic Strip Everyday Dies, Stitched Arch Dies, Brilliant Banner Dies, Ribbon & Lace Border Dies)

I started off by cutting all the pieces to build the backgrounds, and each background was built following the same steps:

1. Cut a Stitched Arch panel out of Strathmore bristol smooth cardstock, and divide it in half. On the lower part, blend some tumbled glass and broken china oxide inks using a hill stencil to create a snow border. And on the upper part, blend some broken china, uncharted mariner and chipped sapphire oxide inks to create a night sky.

2. Mix some tumbled glass oxide ink with water, and add splatters to the snow border using a slim brush. Splatter water droplets on the sky, and dry them using a paper towel. Mix some chipped sapphire oxide ink with water, and add splatters to the sky. Mix some copic opaque white ink with water, and add more splatters all over the Stitched Arch panel, and then do the same with liquid stardust. Cut a small hole at the top of this panel.

Sunny Studio Stamps: Distinctive Door Holiday Add-On Die Focused Holiday Tags by Marine Simon (featuring Comic Strip Everyday Dies, Stitched Arch Dies, Brilliant Banner Dies, Ribbon & Lace Border Dies)

3. Cut another Stitched Arch panel out of Strathmore bristol smooth cardstock, cut the bottom using a wavy die, and add the same inks and same textures as before to create a slim snow border.

4. Cut another Stitched Arch panel out of a Holiday Cheer snowflake pattern paper, and use a Ribbon & Lace Border die to cut the top of the panel. Add some uncharted mariner and chipped sapphire oxide inks on the edges, and add splatters of copic opaque white ink. Cut a small hole at the top of this panel.

Sunny Studio Stamps: Distinctive Door Holiday Add-On Die Focused Holiday Tags by Marine Simon (featuring Comic Strip Everyday Dies, Stitched Arch Dies, Brilliant Banner Dies, Ribbon & Lace Border Dies)

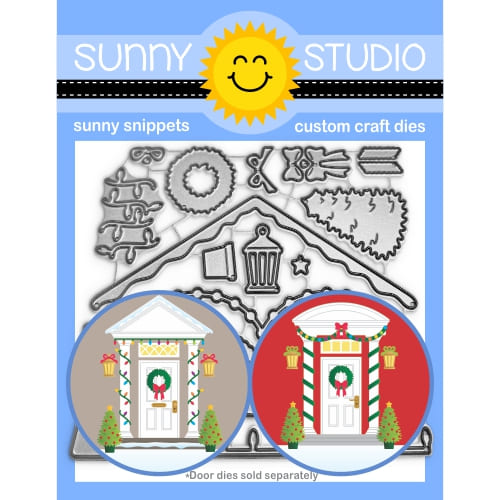
I set all those elements aside to dry, and then cut all the bits and pieces out of colored cardstock. I used distress inks to add shadows and more depth to each element, and also splattered white ink to give the illusion of snow or frost on all the pieces. Here is a detailed list of the die sets I used: • Distinctive Door Holiday Add-On - trees, strings of lights, bows, piles of snow • Window Quad Circle - poinsettias • Rustic Winter - deer • Comic Strip Everyday - car, house.

Sunny Studio Stamps: Distinctive Door Holiday Add-On Die Focused Holiday Tags by Marine Simon (featuring Comic Strip Everyday Dies, Stitched Arch Dies, Brilliant Banner Dies, Ribbon & Lace Border Dies)

I assembled a few of the pieces to build the car, house, poinsettias, etc. and then created the jars using Summer Jar Mug dies. And once again, each jar was built following the same steps:

1. Cut a jar frame out of holographic cardstock and cut the handle off.

2. Cut a whole jar out of acetate, and stick it at the back of the jar frame using liquid glue.

3. Still at the back of the frame, add foam strips all around the jar, following the curved edges.

4. Cut another whole jar out of vellum, and attach trees and a main focal object (house, car or deer) using liquid glue.

5. Sprinkle a few White Snowflake confetti on the die-cut pieces.

6. Peel the backing papers off the foam strips at the back of the jar frame, and attach the jar frame to the vellum frame to close the jar.

7. Cut another jar out of light brown woodgrain cardstock, trim the lid off and add some vintage photo distress ink on the edges to darken it, add copic opaque white ink splatters, and stick the lid to the holographic shaker jar.

8. Glue a pile of snow on one side of the jar using liquid glue.

9. Tie some golden thread around the lid.

Sunny Studio Stamps: Distinctive Door Holiday Add-On Die Focused Holiday Tags by Marine Simon (featuring Comic Strip Everyday Dies, Stitched Arch Dies, Brilliant Banner Dies, Ribbon & Lace Border Dies)

Next I cut three different banners out of dark blue cardstock using Brilliant Banner 1Brilliant Banner 2 and Brilliant Banner 3, and silver heat embossed a greeting on each banner. "Sweet" is from Christmas Cookie, "Have a... holiday season" is from Santa Claus Lane, and the whole thing reads "Have a sweet holiday season". To make those banners pop on the tag, I used the same dies to cut the banners a second time out of holographic cardstock, and I layered each banner with its twin using 1mm foam squares.

Next I finally assembled and attached everything on my Stitched Arch panels. I first glued the jar using liquid glue, and then the slim snowy hill using 2mm foam squares. I attached the straight string of lights at the back of the topper element using liquid glue, and then stuck the topper piece using 1mm foam squares. Attached a banner between the jar and string of lights, added a poinsettia and a Christmas tree, cut one last Stitched Arch panel out of white cardstock, cut a hole at the top of this panel, attached it at the back of the tag to finish it nicely, and cut a white eyelet using a Mini Mat & Tag 4 die that I glued at the top of the tag.

Sunny Studio Stamps: Distinctive Door Holiday Add-On Die Focused Holiday Tags by Marine Simon (featuring Comic Strip Everyday Dies, Stitched Arch Dies, Brilliant Banner Dies, Ribbon & Lace Border Dies)

For the last details, I glued a white pearl in the middle of each poinsettia, a tiny confetti star at the top of each Christmas tree, applied white blizzard nuvo drops to the lights, tied a double bow that I attached below each eyelet, and finally added a handle using some slim silver ribbon from my stash.

And that's it! I went a little bit crazy to build those shaker tags, and they took me longer than the standard type of card I usually make, but sometimes I like to throw myself into more complicated projects! If you ever wanted to recreate those tags, my advice would be to die cut all the pieces first, then do all the inking, next the jar, and finally all the assembly. Thanks so much for stopping by, and see you next week!

Sunny Studio Supplies Used:

Christmas Cookies Stamps
Shop at:
Sunny Studio
Comic Strip Everyday Dies
Shop at:
Sunny Studio
Holiday Cheer 6x6 Paper
Shop at:
Sunny Studio
Rustic Winter Dies
Rustic Winter Dies
Shop at:
Sunny Studio
Santa Claus Lane Stamps
Shop at:
Sunny Studio
Stitched Arch Dies
Stitched Arch Dies
Shop at:
Sunny Studio
Window Quad Circle Die
Shop at:
Sunny Studio
Mini Mat & Tag 4 Dies
Shop at:
Sunny Studio
Ribbon & Lace Dies
Ribbon & Lace Dies
Shop at:
Sunny Studio
Brilliant Banner 1 Dies
Shop at:
Sunny Studio
Brilliant Banner 2 Dies
Shop at:
Sunny Studio
Summer Jar Mug Dies
Summer Jar Mug Dies
Shop at:
Sunny Studio
Brilliant Banner 3 Dies
Shop at:
Sunny Studio
Distinctive Door Holiday Add-on
Shop at:
Sunny Studio