Showing posts with label Stitched Rectangles. Show all posts

Thursday, May 29, 2025

Everything's Rosy Card with Marine

Hello crafty friends, Marine here, I'm very happy to be back with something different than I usually do. I mean, you know that I'm a "the busier the merrier" type of girl with lots and lots of critters. Well, today I'm sharing this floral shaker card showcasing the gorgeous Everything's Rosy stamp set, and I had a blast creating all those beautiful roses and foliage with this layering stamp set!

Sunny Studio Stamps: Everything's Rosy Miss You card by Marine Simon (featuring Big Bold Greetings, Frilly Frame Dies, Stitched Rectangle Dies, Spring Greenery Dies)

And speaking of which, I started off by stamping the roses and leaves, using all the layers, along with Lawn Fawn premium dye inks and Altenew crisp dye inks. For the roses, light to dark I used frosty pink (Alt.) + peachy keen (LF) + guava (LF) + lobster (LF) + raspberry (LF). And for the leaves, light to dark I used frayed leaf (Alt.) + forest glades (Alt.) + moss (Alt.)

I cut all the images using the matching dies, mixed some copic opaque white ink with water and used a slim brush to add splatters to each rose and piece of greenery, and set them aside to dry. I also cut additional pieces of greenery out of vellum using Spring Greenery dies, added white ink splatters to each piece and set them aside as well for later.

Next I cut a 5,5 x 4,25 inches Strathmore bristol smooth panel, and started by covering it with tattered rose oxide ink. I added a brick pattern to my panel using a brick stencil from stash along with saltwater taffy oxide ink, splattered water all over the panel and dried it with a paper towel, mixed some worn lipstick oxide ink with water and added more splatters to the panel, and then did the same with copic opaque white ink.

Sunny Studio Stamps: Everything's Rosy Miss You card by Marine Simon (featuring Big Bold Greetings, Frilly Frame Dies, Stitched Rectangle Dies, Spring Greenery Dies)

Once my panel was dry, I cut an opening out of it right in the center using the second largest Stitched Rectangle die, kept the frame piece only, and added a piece of acetate at the back of my brick frame using liquid glue. And I wanted my roses to be climbing up on a lattice, so I cut three white panels using the same die I used to create the opening, and cut a lattice design out of each white panel using the Frilly Frame Lattice die set. I layered the three lattice panels on top of each other using liquid glue to create a little bit of dimension, and then attached my lattice panel in the middle of my brick panel, right on the acetate using liquid glue again.

I flipped my brick panel over, added foam strips along the opening, close to the edges, and on the edges of the panel as well. I poured a lot of Pink Blossoms confetti inside the acetate opening, peeled all the foam strips backing papers off, and then closed my shaker panel with a Flirty Flowers pink panel.

Next, back to the front of the brick panel. Along with my climbing roses, I wanted to add some extra foliage, so I cut a Botanical Backdrop panel out of green cardstock, added some rustic wilderness oxide ink to darken some spots, mixed that same ink with water and added splatters to the leaves, did the same with copic opaque white ink, and attached this leafy panel to my brick panel using 1mm foam squares.

Sunny Studio Stamps: Everything's Rosy Miss You card by Marine Simon (featuring Big Bold Greetings, Frilly Frame Dies, Stitched Rectangle Dies, Spring Greenery Dies)

Before attaching the roses and leaves, I wanted to frame my panel with wood, so I used the Tropical Trees die set to cut my frame out of light brown woodgrain cardstock, attached it to my panel using liquid glue, and then finally stuck the roses and leaves using 1mm and 2mm foam squares, and the vellum greenery using liquid glue. For my greeting, I white heat embossed "Miss you" from Big Bold Greetings on dark brown cardstock, cut it using the matching die, and attached it to my panel using foam squares again. I attached my panel to a white card base, and to finish my card I added a scattering of clear droplets from my stash for shine and brightness.

And that's it! I hope that you like this card as much as I enjoyed creating it. It was pretty amazing to see those beautiful roses come to life layer after layer, and it was super easy to line everything up! Thanks so much for stopping by, and see you next week!

Sunny Studio Supplies Used:

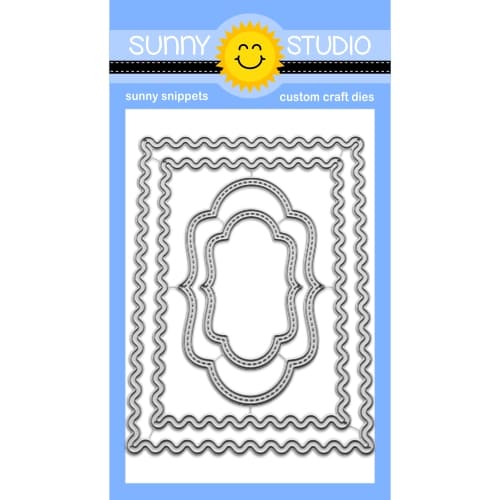
Stitched Rectangle Dies
Shop at:
Sunny Studio
Flirty Flowers 6x6 Paper
Shop at:
Sunny Studio
Everything's Rosy Stamps
Shop at:
Sunny Studio
Everything's Rosy Dies
Shop at:
Sunny Studio
Frilly Frames Lattice Dies
Shop at:
Sunny Studio
Spring Greenery Dies
Shop at:
Sunny Studio
Tropical Trees Backdrop
Shop at:
Sunny Studio
Big Bold Greetings Stamps
Shop at:
Sunny Studio
Big Bold Greetings Dies
Shop at:
Sunny Studio
Botanical Backdrop Die
Shop at:
Sunny Studio

Sunday, May 18, 2025

Sealiously Sweet Card with Hanh

Hello Crafty Friends! This is Hanh on the Sunny Studio Stamps blog today with a fun birthday card featuring these adorable seals from the Sealiously Sweet set. I just adore the sweet faces on these critters and love that there's a variety of positions and props.

Sunny Studio Stamps: Sealiously Sweet Summer Themed Birthday Card by Hanh Nguyen (featuring Tropical Scenes, Stitched Rectangle Dies)

I stamped the images from the Sealiously Sweet Stamps and the island and tree from the Tropical Scenes Stamps sets onto a piece of Neenah Solar White 110 lb cardstock with Memento Tuxedo Black ink and used the coordinating Sealiously Sweet Dies and Tropical Scenes Dies to die cut them out. I colored them with Copic markers and highlighted them with a white gel pen.

COPIC COLORS:
Seals: W00/1/3, W3, R20
Tree: E33/37/39, YG01/03/17/67
Sand: E30/31/33
Watermelon: R22/24, YG03/17
Floaties: R05/24/29, Y13/15/19, B12/14/16
Sunglasses: B14, R24, T5
Water droplets: B0000/00

Sunny Studio Stamps: Sealiously Sweet Summer Themed Birthday Card by Hanh Nguyen (featuring Tropical Scenes, Stitched Rectangle Dies)

For the background, I took a piece of white cardstock (4.25" x 5.5") and ink blended Tumbled Glass, Salty Ocean and Blueprint Sketch Distress Oxide inks. I splattered a little water onto the ink to create a bit of distressed interest. Once the ink was dry, the panel was trimmed with the largest die from the Stitched Rectangle Dies set. 

I stamped the "Have a Sealiously Awesome Birthday" sentiment from the Sealiously Sweet set onto the panel with Memento Tuxedo Black ink. A piece of craft foam was added to the backside of the panel before it was adhered to a white A2 card base.

Sunny Studio Stamps: Sealiously Sweet Summer Themed Birthday Card by Hanh Nguyen (featuring Tropical Scenes, Stitched Rectangle Dies)

I adhered the island and its contents to the panel with liquid adhesive. The three seals in the water were adhered with foam tape for a bit of dimension and interest. 

I appreciate you taking the time to stop by and visit today. I hope you liked my card. For more info and ideas, be sure to visit the Sunny Studio Stamps Shop. Please also visit my INSTAGRAM feed for more inspirations. 

Have a wonderful and crafty day! 

Sunny Studio Supplies Used:

Stitched Rectangle Dies
Shop at:
Sunny Studio
Sealiously Sweet Stamps
Shop at:
Sunny Studio
Sealiously Sweet Dies
Shop at:
Sunny Studio
Tropical Scenes Stamps
Shop at:
Sunny Studio
Tropical Scenes Dies
Shop at:
Sunny Studio

Thursday, May 8, 2025

Frilly Frame Polka Dot Die Focused Card with Marine

Hello crafty friends, Marine here, I'm thrilled to be back with this magical birthday card featuring cute fairies and chicky peacocks. I've had this idea of turning the turkeys from Turkey Day into peacocks since the set was released, so I'm very happy to finally be sharing this bright and colorful card with you.

Sunny Studio Stamps: Frilly Frame Polka Dot Die Focused Birthday Card by Marine Simon (featuring Turkey Day, Garden Fairy, Stitched Rectangle Dies, Brilliant Banner Dies)

I started off by stamping all the images using an alcohol marker friendly black ink, I cut them all using the coordinating dies, and colored everything using my Ohuhu markers in yellow, green and aqua, which is my favorite color combination at the moment.

Here is a detailed list of the stamp sets I used: • Turkey Day - peacocks • Tulip Path Background - butterflies • Garden Fairy - fairies, flowers • Garden Critters - grass.

Next I worked on the background and started by cutting two 4,5 x 3,25 inches panels out of aqua cardstock using the second largest Stitched Rectangle die. On the first aqua panel, I used the polka dot die from the Frilly Frame Polka Dot die set to cut a million circles out of it, and then I attached that panel to the second aqua panel using liquid glue. Next I cut more tiny circles out of green, yellow and aqua cardstock using the same die, and then filled each circle spot on the aqua panel with my colorful tiny circles. It was quite a tedious task but I think it's totally worth it, I really love the result.

Sunny Studio Stamps: Frilly Frame Polka Dot Die Focused Birthday Card by Marine Simon (featuring Turkey Day, Garden Fairy, Stitched Rectangle Dies, Brilliant Banner Dies)

I added some texture to my polka dot panel: I mixed copic opaque white ink with water and used a slim brush to splatters all over it, I did the same with fossilized amber distress spritz for a touch of gold, and then the same again with peacock feathers distress spritz to match with the peacocks.

I cut a 5,25 x 4 inches scalloped panel out of shiny turquoise cardstock using the other die from the Frilly Frame Polka Dot die set, and attached my polka dot panel to it using 1mm foam tape. Next I stuck my scalloped panel to a 5,5 x 4,25 inches aqua panel using 1mm foam tape again, and then the whole thing to a white card base using liquid glue.

Sunny Studio Stamps: Frilly Frame Polka Dot Die Focused Birthday Card by Marine Simon (featuring Turkey Day, Garden Fairy, Stitched Rectangle Dies, Brilliant Banner Dies)

For my greeting, I used the Brilliant Banner 1 die set, and cut the different pieces out of cardstock that match with the images. I white heat embossed "Hoping you day is magical" from Garden Fairy on the main piece, assembled the banner using 1mm foam squares, attached it right at the top of my panel, and then stuck all the images using 1mm and 2mm foam squares. I added white blizzard nuvo drops to the fairies and butterflies wings to finish my card. 

And that's it! I hope that those cute peacocks have inspired you to create your own colorful birdies. Thanks so much for stopping by, and see you next week!

Sunny Studio Supplies Used:

Garden Fairy Stamps
Garden Fairy Stamps
Shop at:
Sunny Studio
Garden Fairy Dies
Garden Fairy Dies
Shop at:
Sunny Studio
Garden Critters Stamps
Shop at:
Sunny Studio
Garden Critters Dies
Shop at:
Sunny Studio
Frilly Frames Polka-Dot
Shop at:
Sunny Studio
Brilliant Banner 1 Dies
Shop at:
Sunny Studio
Turkey Day Stamps
Turkey Day Stamps
Shop at:
Sunny Studio
Turkey Day Dies
Turkey Day Dies
Shop at:
Sunny Studio
Tulip Path Background Stamps
Shop at:
Sunny Studio
Tulip Path Background Dies
Shop at:
Sunny Studio
Stitched Rectangle Dies
Shop at:
Sunny Studio

Sunday, April 27, 2025

Birthday Mouse Card with Hanh

Hello Crafty Friends! This is Hanh on the Sunny Studio Stamps blog today with a fun birthday card featuring images from the Harvest MiceMerry Mice and Birthday Mouse sets. I love how the mice from these sets play so well together. 

Sunny Studio Stamps: Birthday Mouse Birthday Card by Hanh Nguyen (featuring Harvest Mice, Merry Mice, Stitched Circle Dies, Stitched Rectangle Dies)

I stamped the images from the Harvest Mice Stamps, Merry Mice Stamps and Birthday Mice Stamps sets onto a piece of Neenah Solar White 110 lb cardstock with Memento Tuxedo Black ink and used the coordinating Harvest Mice DiesMerry Mice Dies and Birthday Mouse Dies to die cut them out. I colored them with Copic markers and highlighted them with a white gel pen.

COPIC COLORS:
Mice: E50/51/53/33/35, R000/20
Cheese: Y13/15/19
Balloons: YG00/01/03/17, RV000/10/13/14, Y11/13/15/19
Bicycle: RV13/14, C1, W5/7

Sunny Studio Stamps: Birthday Mouse Birthday Card by Hanh Nguyen (featuring Harvest Mice, Merry Mice, Stitched Circle Dies, Stitched Rectangle Dies)

For the background, I took a piece of white cardstock (4.25" x 5.5") and die cut two windows into it using the third largest circle dies from the Stitched Circle Small Dies and Stitched Circle Large Dies. Using this panel as a guide, I ink blended Spun Sugar and Mowed Lawn Distress Oxide inks onto a piece of Bristol Smooth cardstock in the location of those windows. I used Copic markers (YG01/03) to add dots to the green inking for a bit of interest. I adhered the two panels to each other using foam tape.

For the sentiment, I stamped the words from the Harvest Mice stamps set with Versamark Watermark ink onto a piece of black cardstock and heat embossed with Detail White Embossing Powder. I used one of the sentiment strip dies from the Stitched Rectangle Dies to die cut it out. 

Sunny Studio Stamps: Birthday Mouse Birthday Card by Hanh Nguyen (featuring Harvest Mice, Merry Mice, Stitched Circle Dies, Stitched Rectangle Dies)

I adhered the sentiment and colored images to the front of the card with foam tape for additional dimension and interest. The card front was adhered to an A2 white card base (4.25" x 5.5"). I finished the card with a few Majestic Clear Confetti.

I appreciate you taking the time to stop by and visit today. I hope you liked my card. For more info and ideas, be sure to visit the Sunny Studio Stamps Shop. Please also visit my INSTAGRAM feed for more inspirations.

Have a wonderful and crafty day!

Sunny Studio Supplies Used:

Stitched Rectangle Dies
Shop at:
Sunny Studio
Merry Mice Stamps
Merry Mice Stamps
Shop at:
Sunny Studio
Merry Mice Dies
Merry Mice Dies
Shop at:
Sunny Studio
Harvest Mice Stamps
Harvest Mice Stamps
Shop at:
Sunny Studio
Harvest Mice Dies
Harvest Mice Dies
Shop at:
Sunny Studio
Stitched Circle Small Dies
Shop at:
Sunny Studio
Stitched Circle Large Dies
Shop at:
Sunny Studio
Birthday Mouse Stamps
Shop at:
Sunny Studio
Birthday Mouse Dies
Birthday Mouse Dies
Shop at:
Sunny Studio

Sunday, April 20, 2025

Party Pets Card with Hanh

Hello Crafty Friends! This is Hanh on the Sunny Studio Stamps blog today with a clean and simple birthday card to share with you showcasing this adorable pup from the Party Pets set. I absolutely adore this set and find myself repeatedly reaching for it. 

Sunny Studio Stamps: Party Pets Birthday Card by Hanh Nguyen (featuring Slimline Nature Border Dies, Stitched Rectangle Dies)

I stamped the images from the Party Pets stamps set onto a piece of Neenah Solar White 110 lb cardstock with Memento Tuxedo Black ink and used the coordinating Party Pets Dies to die cut them out. I colored them with Copic markers and highlighted them with a white gel pen.

COPIC COLORS:
Dog: E50/51/53/33/35, R000/20, R22
Balloons: RV000/10/21/13/14

I used the Slimline Nature Borders Dies to die cut a piece of clear acetate to make my own cloud stencil. I ink blended a cloudy background with this stencil and some Spun Sugar Distress Oxide ink onto a piece of Bristol Smooth cardstock. Once the panel was dry, I used the second largest die from the Stitched Rectangle Dies to die cut the panel.

Sunny Studio Stamps: Party Pets Birthday Card by Hanh Nguyen (featuring Slimline Nature Border Dies, Stitched Rectangle Dies)

I adhered a piece of craft foam to the backside of the panel before adhering it to a piece of white cardstock that was matted with a slightly larger piece of black cardstock (4.25" x 5.5").

For the sentiment, I stamped one of the sentiments from the Party Pets stamps set with Versamark Watermark ink onto a piece of black cardstock and heat embossed with Detail White Embossing Powder. I used the coordinating Party Pets Dies to die cut it out. 

Sunny Studio Stamps: Party Pets Birthday Card by Hanh Nguyen (featuring Slimline Nature Border Dies, Stitched Rectangle Dies)

I adhered the sentiment and colored images to the front of the inked panel with foam tape for a bit of dimension and interest. Finally, I adhered the panel to a white A2 card base (4.25" x 5.5"). I finished the card with a few Majestic Clear Confetti.

I appreciate you taking the time to stop by and visit today. I hope you liked my card. For more info, ideas and to check out the entire Spring Release, be sure to visit the Sunny Studio Stamps Shop. Please also visit my INSTAGRAM feed for more inspirations.

Have a wonderful and crafty day!

Sunny Studio Supplies Used:

Stitched Rectangle Dies
Shop at:
Sunny Studio
Slimline Nature Borders
Shop at:
Sunny Studio
Party Pets Stamps
Party Pets Stamps
Shop at:
Sunny Studio
Party Pets Dies
Party Pets Dies
Shop at:
Sunny Studio