Showing posts with label Enchanted. Show all posts

Thursday, April 13, 2023

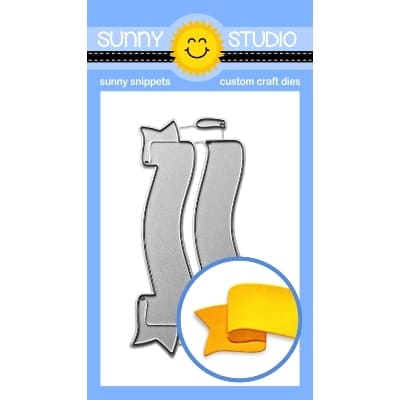
Ribbon & Lace Border Die Focused Cards with Waleska and Marine

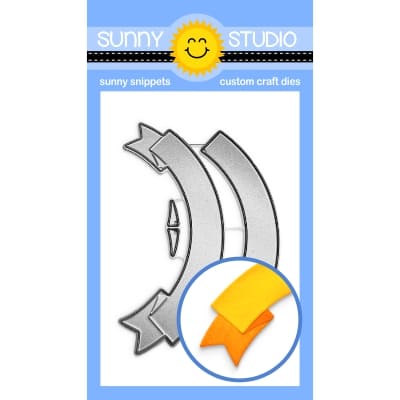
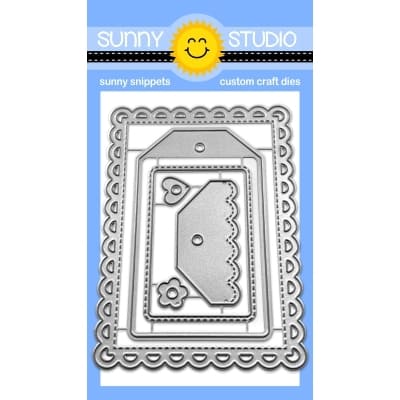
Hello Friends, Waleska here. With this card I wanted to thank each of you that read my blog posts and are very kind to me on social media when I share my Sunny Studio Stamps cards.  My card today features the Ribbon and Lace Border dies and the Garden Fairy Stamps.


Sunny Studio Stamps: Ribbon & Lace Border Die Focused Card by Waleska Galindo (featuring Garden Fairy)

To create this card I started with the color palette I wanted something soft and spring and the Spring Fever paper has some beautiful prints and colors. I then cut some stripes with the Ribbon and Lace Border dies. I cut an A2 size card base and used one of the scalloped borders to create a beautiful border on the front, I then used the different color stripes to create a design on the front of this panel.


Sunny Studio Stamps: Ribbon & Lace Border Die Focused Card by Waleska Galindo (featuring Garden Fairy)

I stamped two of the cute fairies from the Garden Fairy Stamps and colored them with copic markers matching the colors of the paper I already used. I also stamped the word Thanks from the Big Bold Greetings stamps with Versafine Ink. I adhere the fairies and word on the front of the panel and to finish my card I added some gems to the scalloped border. Again thank you so much for stopping by today! Remember to stay safe and crafty!

---------------------------------------

Hello crafty friends, Marine here with you today, back with this Cinderella inspired card. I've had this idea in mind for weeks, so I'm super happy to finally share this card with you. As very often I wanted to feature a bunch of images on my card, so once again I went for a slimline design, but used two Ribbon & Lace Borders to add an extra something else to the very bottom of my card.

Sunny Studio Stamps: Ribbon & Lace Border Die Focused Card by Marine Simon (featuring Enchanted)

So, I started off by cutting an 8,5 x 3,5 inches Strathmore bristol smooth panel, and I used the straight die from Ribbon & Lace Borders to cut an inch out of the bottom of this panel. Next I colored my panel using stencils and oxide inks: mowed lawn + rustic wilderness for the hills, and wilted violet + blueprint sketch + black soot for the night sky.

Sunny Studio Stamps: Ribbon & Lace Border Die Focused Card by Marine Simon (featuring Enchanted)

I stamped my images on Transotype perfect coloring paper using an alcohol marker friendly black ink, cut them all using the coordinating dies, and used my alcohol markers to color everything. Here are the stamps I picked:

the castle, the coach, and a princess from Enchanted
two mice & the pumpkins from Harvest Mice
the tiny hat from Christmas Critters
the flowers from Chubby Bunny + from Chickie Baby
the trees from Spring Scenes
the grass from Garden Critters

Sunny Studio Stamps: Ribbon & Lace Border Die Focused Card by Marine Simon (featuring Enchanted)

Once all the images were colored, I attached them all on my panel using foam squares, and next I worked on the final details. I used another die from Ribbon & Lace borders to cut a scalloped border out of some purple glitter cardstock. I embossed my "Hoping your day is magical" greeting from Garden Fairy in silver on a piece of pink dotted paper from Spring Fever, and I attached those different pieces on a purple card base. And as always I finished my card by adding highlights and details on the images using a white gel pen.

Sunny Studio Stamps: Ribbon & Lace Border Die Focused Card by Marine Simon (featuring Enchanted)

And that's it! I really love how it turned out, with all the pumpkins, the coach, and the mice... I hope you like it too! As always, feel welcome to check the process video for more details! Thank you so much for stopping by, and see you next time!

Sunny Studio Supplies Used:

Christmas Critters Stamps
Shop at:
Sunny Studio
Christmas Critters DIes
Shop at:
Sunny Studio
Chubby Bunny Stamps
Chubby Bunny Stamps
Shop at:
Sunny Studio
Chubby Bunny Dies
Chubby Bunny Dies
Shop at:
Sunny Studio
Chickie Baby Stamps
Chickie Baby Stamps
Shop at:
Sunny Studio
Chickie Baby Dies
Chickie Baby Dies
Shop at:
Sunny Studio
Enchanted Stamps
Enchanted Stamps
Shop at:
Sunny Studio
Enchanted Dies
Enchanted Dies
Shop at:
Sunny Studio
Spring Scenes Stamps
Shop at:
Sunny Studio
Spring Scenes Dies
Spring Scenes Dies
Shop at:
Sunny Studio
Harvest Mice Stamps
Harvest Mice Stamps
Shop at:
Sunny Studio
Harvest Mice Dies
Harvest Mice Dies
Shop at:
Sunny Studio
Garden Fairy Stamps
Garden Fairy Stamps
Shop at:
Sunny Studio
Garden Fairy Dies
Garden Fairy Dies
Shop at:
Sunny Studio
Big Bold Greetings Stamps
Shop at:
Sunny Studio
Garden Critters Stamps
Shop at:
Sunny Studio
Garden Critters Dies
Shop at:
Sunny Studio
Ribbon & Lace Dies
Ribbon & Lace Dies
Shop at:
Sunny Studio
Spring Fever Paper
Spring Fever Paper
Shop at:
Sunny Studio

Tuesday, November 15, 2022

Snowman Kisses & Snow One Like You Cards with Kavya and Isha

Hi folks! Kavya on the blog here with another fun card inspired by a movie that you might have watched once or twice (if you have kids!) - Frozen! This adorable Snowman Kisses stamp set reminded me of Olaf and I just had to figure out a way to create a Frozen themed card!

Sunny Studio Stamps: Snowman Kisses Winter Card by Kavya (featuring Enchanted, Country Scenes)

I started off by stamping and coloring a bunch of images from Snowman KissesEnchanted Stamps and Country Scenes Stamps. I then ink blended a soy using blue and purple dye inks. 

Sunny Studio Stamps: Snowman Kisses Winter Card by Kavya (featuring Enchanted, Country Scenes)

Adhered the images and added a heat embossed sentiment to finish off my card!

Hope you like this card :) Happy crafting!

----------------------------------------

Hello everyone! Isha here with a card featuring the Snow One Like You stamps and dies. This is one of the cutest stamps in my collection :)

Sunny Studio Stamps: Snow One Like You Winter Card by Isha Gupta (featuring Classy Christmas, Holiday Greetings, Circle Snowflake Frame Dies)

I decided to frame this by stamping the pine leaves from the Classy Christmas stamp set all around the mat layer. Sponge slightly all around. Flick white paint to it. Stamp the image, colour using copic markers and die-cut using coordinating dies.

Sunny Studio Stamps: Snow One Like You Winter Card by Isha Gupta (featuring Classy Christmas, Holiday Greetings, Circle Snowflake Frame Dies)

Stamp the sentiment from the Holiday Greetings stamp set and die-cut using the coordinating diesDie-cut the frame from the Snowflake Circle Frame die. Adhere to the layer. Adhere the sentiment and the images using 3D foam.

Thank you for dropping by and have a nice day!

Sunny Studio Supplies Used:

Snowflake Circle Frame
Shop at:
Sunny Studio
Enchanted Stamps
Enchanted Stamps
Shop at:
Sunny Studio
Enchanted Dies
Enchanted Dies
Shop at:
Sunny Studio
Classy Christmas Stamps
Shop at:
Sunny Studio
Classy Christmas Dies
Shop at:
Sunny Studio
Country Scenes Stamps
Shop at:
Sunny Studio
Country Scenes Dies
Country Scenes Dies
Shop at:
Sunny Studio
Holiday Greetings Stamps
Shop at:
Sunny Studio
Holiday Greetings Dies
Shop at:
Sunny Studio
Snow One Like You Stamps
Shop at:
Sunny Studio
Snow One Like You Dies
Shop at:
Sunny Studio

Thursday, June 9, 2022

Country Carnival Cards with Marine and Marieke

Hello crafty friends, Marine here, thanks so much for stopping by! With today's card I take you to a theme park to have some fun, and eat popcorn and cotton candy! This super bright and colorful pop-up card features the adorable Country Carnival stamp set, and to complete my scene, I also picked the castle from Enchanted, and the trees from Spring Scenes.

Sunny Studio Stamps: Country Carnival Birthday Card by Marine Simon (featuring Enchanted, Spring Scenes)

As always, I started off by stamping all the images using an alcohol marker friendly black ink, and I colored them using my alcohol markers in kind of a traditional funfair/amusement park colors: red and yellow, with a little bit of aqua and light grey.

Sunny Studio Stamps: Country Carnival Birthday Card by Marine Simon (featuring Enchanted, Spring Scenes)

Next I created the pop-up card base using colored cardstock, as well as a paper from Heroic Halftones and another one from Rainbow Bright. On the front, I white heat embossed my sentiment " Wishing you lots of fun on your birthday" from Country Carnival, I added highlights and details on the images using a white gel pen, and then I attached them all inside the box using 3mm glue dots.

Sunny Studio Stamps: Country Carnival Birthday Card by Marine Simon (featuring Enchanted, Spring Scenes)

And that's it! Hope you like this new cute and fun card! As always, feel welcome to watch the process video for more information and details (click on the image above). See you next week!

--------------------------------------------------

Hello Sunny Studio friends, Marieke here. Today I hope to inspire you with an interactive light card. 

Sunny Studio Stamps: Country Carnival Birthday Card by Marieke Slaats

For today I started with the background, I cut two blue rectangles and adhered them temporarily onto each other. Using a sunburst stencil and Peacock Feathers Distress ink, I ink blended the rays. Splattered some white paint and let it dry.

Sunny Studio Stamps: Country Carnival Birthday Card by Marieke Slaats

I used the Halo lights by Pearblossom Press. To figure out where I wanted everything to go I stamped the images of the Country Carnival and cut them using the matching dies. Placed the Ferris Wheel onto the card and decided how big the circle behind it needed to be. Die cut the circle, stamped the Press Here sentiment on the small rectangle and adhered the light mechanism behind the panel. Glued the smaller rectangle on to the bigger rectangle using foam tape. Adhered the background onto a white top fold basecard.

Colored up all the images using my Copic markers and added some white gel pen details to the bears. 

Used Copic Colors:
Bears - E57, E55, E53, E51, E50 / R22
Red - R59, R29, R27, R24
Yellow - Y17, Y15, Y13, Y11
Teal - BG15, BG13, BG11
Orange - YR09, YR04, YR02
White - C5,C3,C1, 0
Black - N8, N6, N4
Blue - B24

Sunny Studio Stamps: Country Carnival Birthday Card by Marieke Slaats

Heat set the sentiment on some yellow cardstock and cut it into a banner. Heat set the other sentiment on some black cardstock and cut it using my scissors. Glued everything on the card using foam tape.

Sunny Studio Supplies Used:

Rainbow Bright 6x6 Paper
Shop at:
Sunny Studio
Heroic Halftones 6x6 Paper
Shop at:
Sunny Studio
Enchanted Stamps
Enchanted Stamps
Shop at:
Sunny Studio
Enchanted Dies
Enchanted Dies
Shop at:
Sunny Studio
Spring Scenes Stamps
Shop at:
Sunny Studio
Spring Scenes Dies
Spring Scenes Dies
Shop at:
Sunny Studio
Country Carnival Stamps
Shop at:
Sunny Studio
Country Carnival Dies
Shop at:
Sunny Studio

Friday, April 22, 2022

Sneak Peek: Country Carnival Stamps + Summer Release in Review Video

Hello and welcome to our final Sneak Peek!  All this week I have been showcasing cards using our newest Summer collection which is now available for purchase!  Yay!

I've created a video showcasing not only today's sneak peeks, but all the new products from our Summer 2022 release and a closer look at the 40+ cards I made with them (which you can view below or at our YouTube channel HERE).


Today I'm also sharing one last set of ideas using our new Country Carnival Stamps. Before you run off to shop, I hope you will also join me for a closer look at this fun set and all the cards I made using them.

Card No. 1: For my first card I paired our darling new Country Carnival Stamps with the train from our Holiday Express Stamps and the teddy bears to match from our Beach Buddies StampsTo get everything to fit that I wanted to add to my scene, I went with a larger "canvas", creating a 5.5" square card base. I colored all my images in bright, happy primary colors with small touches of orange and green using Copic Markers. 

To separate my larger bears in the foreground from the smaller bears in the background, I inked up and trimmed two sloping hillsides using our Slimline Nature Border Dies which were inked up using Twisted Citron and Mowed Lawn Distress inks. For my sentiment I combined the words "Wishing You a" from our Bear Hugs Stamps, "Thrilling" from the Country Carnival Stamps, and "Birthday!" from our Kiddie Pool Stamps. Lastly to continue with my birthday theme and add some additional rainbow colors to my card I added two striped party hats to the bears on my train using our Froggy Friends StampsSunny Studio Theme Park Summer Fair with Train Birthday Card (using Country Carnival, Holiday Express & Beach Buddies Stamps, Slimline Nature Border Dies)

Card No. 2: Next up is an Amusement Theme Park Card combining the new Country Carnival Stamps with the princesses and castle from our Enchanted Stamps. I once again wanted to work with a larger canvas to fit all the adorable elements, so I went with a 4" wide x 8.5" high slimline card base. To add subtle clouds to my background, I added to the two stitched clouds that come with our Fluffy Cloud Dies. I then layered in a number of grassy hillsides cutting the grass patterned paper from our Spring Fling Paper pack using our Slimline Nature Border Dies

To create the walkway to my castle, I colored some scratch paper using Copic Markers and then traced the edge with a sharpie (using some copy paper below to protect my desk). This gave the path the look of a stamped image so that it would blend perfectly to match the stamped path in the Spring Scenes park border in the foreground. I then added two my Sleeping Beauty and Snow White characters to stand in front of the park bench. Lastly I stamped my greeting using a birthday sentiment from the Country Carnival set using Versafine Onyx Black Ink, stamping the words "lots of fun" onto a small pennant strip to add interest and a touch of color to the top portion of my card.

Sunny Studio Disney Inspired Theme Park Girls Princess Birthday Card (using Country Carnival, Enchanted & Spring Scenes Stamps, Spring Fling Paper, Fluffy Cloud & Slimline Nature Border Dies)

Card No. 3: For my next Country Carnival project to share, I have a fun interactive light-up card using Chibitronics White Lights. To start I inked my background blending Mermaid Lagoon, Salty Ocean, Prize Ribbon and Chipped Sapphire for my night's sky. I then added a string of lights using a border from our Scenic Route Stamps, adding stars to my sky using a white Sharpie Paint Pen. For my Country Carnival images I tried to color them with more dramatic shadows and yellow glowing highlights to sell the bright lights. I also made sure to keep my background lighter and brighter where my ferris wheel and carousel would be positioned to lend to the glowing effect. To build up the area around my battery, I added two layers of foam tape along the bottom inch of my card, adding stitching to my second strip of black cardstock with our Slimline Basic Border Dies.
Sunny Studio Interactive Light Up Amusement Park Card (using Country Carnival, Scenic Route Stamps & Slimline Basic Border Die)

Lighted View: For my "Push Here" button, I stamped and heat embossed an image from Lawn Fawn's Push Here Stamps. These super cool Chibitronics Lights retail for about $1 per LED light bulb so unfortunately I wasn't able to light up my entire string of lights as much as I would have liked to so I limited myself to three bulbs for the hanging lights and added two more to my scene, with one in the center of my ferris wheel and another just above the center horse on my carousel. To see how you can create a light-up card of your own, I found this to be a super helpful video tutorial HERE. The only other supplies I needed to purchase to was Copper Tape and batteries and I now have plenty of them on hand for lots of future cards.

Sunny Studio Interactive Light Up Amusement Park Card (using Country Carnival, Scenic Route Stamps & Slimline Basic Border Die)

Card No. 4: As I was looking at our Beach Buddies Critters, I realized their ears might be able to be colored like mouse ears. Unfortunately they didn't quite look like mouse ears when I did it though so I exaggerated them by tracing around a small circle template with my Copic Multi-liner pen and coloring them a solid black to hide the original stamped lines. I also used that same pen to trace around the edge of a larger circle to form the bottom brim of the hat and then fussy cut them out by hand since my altered ears wouldn't have cut properly with the dies.

For my background, I die-cut a scalloped panel using our Frilly Frames Polka-Dot Dies layered over a yellow patterned paper from our Polka-dot Parade Paper pack. I inked my sky and grass using Tumbled Glass and Twisted Citron Distress Inks and stamped the tufts of grass from our Farm Fresh Stamps. For the rest of my scene, I put my critters in the wagon from our Fall Friends Stamps and added a bouquet of balloons from our Floating By Stamps. To complete my theme park scene I used the carousel from our new Country Carnival Stamps and the two trees from our Spring Scenes Stamps
Sunny Studio Life With You Is Fun Critters with Mouse Ears in Wagon with Carousel Card (using Country Carnival, Fall Friends, Beach Buddies, Spring Scenes Stamps, Polka-dot Parade Paper & Frilly Frames Polka-dot Dies)

Card No. 5: For my next Country Carnival card I went with a clean and simple design with a bit of an artsy flair. I started by inking up an A2 sized cardstock panel using finger dauber using Kitsch Flamingo, Saltwater Taffy, Squeezed Lemonade, Twisted Citron, Salvaged Patina, Mermaid Lagoon and Shaded Lilac distress inks. I thought it sort of looks like the colorful fair lights at night when you sort of squint your eyes with the bokeh effect. I then die-cut it down with the stitched edge using our Frilly Frames Retro Petals Dies, mounting it onto a 4-1/4" x 5-1/2" black cardstock panel before adhering them to the front of my A2 sized card. 

For my sentiment, I heat embossed my congrats greeting from the Country Carnival set onto a stitched pennant from our Stitched Rectangle Dies. Lastly I adhered the stamped ferris wheel to my card front with foam tape to make it pop up and take center stage against the colorful background. I elected to not color the image since I thought my rainbow bokeh background had enough going on already. Plus I really liked the pop art feel of leaving it a plain black & white line drawing with the colors peeking through the spokes with the openings created by the die.

Card No. 6: My last Country Carnival card of the day is a Dumbo inspired scene, pairing the two clouds and elephant from our Baby Elephants Stamps with the circus tent from our Country Carnival Stamps. To help my dumbo fly, I fashioned a feather for him to carry by just sketching one out on scratch paper and fussy cutting it out. I love that one doesn't have to be must of an artist to make something like this. For both the clouds in my background and the brush along the bottom of my card I turned to the same cloud border from our Slimline Nature Border Dies. To complete my card I heated embossed the greeting "Just a note to lift you up" from our Balloon Rides Stamps, using Versamark Ink with Hero Arts White Detail Embossing Powder.
Sunny Studio Dumbo Inspired Elephant Flying Over Circus Tents Card (using Country Carnival, Baby Elephants & Balloon Rides Stamps & Slimline Nature Border Dies)

With each new collection we always have a new free mini die we include automatically with orders placed in our online store. For this release we have a fun little dragonfly die!

Sunny Studio Blog: Spring 2022 Free Mini Dragonfly Die Automatically Comes with all Sunny Studio Store Purchases

Card No. 7: I couldn't resist creating a card with this release's free mini dragonfly die that comes with each Sunny Studio website purchase. I combined it with several of our past Basic Mini Shape 2 Dies (for tiny hearts and butterfly) and Basic Mini Shape 4 Dies (for the ladybug). 

To start my card I used a rainbow grid patterned paper from our Spring Sunburst Paper pack for my background. I then layered it with a strip of lilac cardstock along the bottom which had been die-cut along the edge using the stitched border from our Slimline Basic Border Dies and a white scalloped border from our Eyelet Lace Border Dies. To frame each of my garden critters, I used 4 of the stitched cutouts from our new Wonky Windows Dies to form a 2 x 2 grid on my card front, cutting them from both aqua blue cardstock for the sky and again from green for my grass. I then cut the green versions a second time using the grassy border from our Picket Fence Dies. I also cut a number of small white fluffy clouds using our Comic Strip Everyday Dies to scatter between the four mini scenes and a speech bubble for my sentiment using the Comic Strip Speech Bubble Dies. My "happy mother's day" sentiment was actually pieced together using words from three separate stamp sets including our Happy Thoughts StampsBeach Buddies Stamps and Kiddie Pool Stamps.
Sunny Studio Grid Style Spring Dragonfly, Ladybug & Butterfly Mother's Day Card (using Wonky Window, Picket Fence, Eyelet Lace Border, Slimline Basic Border Dies & Spring Sunburst Paper)

When shopping we have a couple different ongoing promotions you can choose from to be entered at checkout depending on which offer is better for you (one discount code per order).

Sunny Studio Stamps: Save $5 on orders of $49 or more using Promo code SAVE5 at checkout OR use promo code FREESHIP on orders of $25 or more to receive free US shipping. Limit One Discount code per order.

That wraps up today's sneak peeks. I'm so happy you spent the week with me! I read all your comments and they mean so much!  I'd love to give one last $50 gift code to one lucky winner today using the rafflecopter below. 

Our five daily contests this week run through tomorrow, April 23rd at Midnight PST with winners announced here on Sunday, April 24th. :)

a Rafflecopter giveaway Here's a closer look at the our new Country Carnival Stamps & Dies used today:

Sunny Studio Blog: Summer Country Carnival 4x6 County Fair Theme Park Clear Photopolymer Stamps 

Other Supplies Used:

Froggy Friends Dies
Froggy Friends Dies
Shop at:
Sunny Studio
Froggy Friends Stamps
Shop at:
Sunny Studio
Beach Buddies Stamps
Shop at:
Sunny Studio
Beach Buddies Dies
Beach Buddies Dies
Shop at:
Sunny Studio

Fall Friends Stamps
Fall Friends Stamps
Shop at:
Sunny Studio
Fall Friends Dies
Fall Friends Dies
Shop at:
Sunny Studio
Holiday Express Stamps
Shop at:
Sunny Studio
Holiday Express Dies
Shop at:
Sunny Studio
Tsukineko Jumbo Dauber
Shop at:
Sunny Studio
Versafine Onyx Black Ink
Shop at:
Sunny Studio
Polka-dot Parade 6x6 Paper
Shop at:
Sunny Studio
Frilly Frames Polka-Dot
Shop at:
Sunny Studio
Fluffy Clouds Dies
Fluffy Clouds Dies
Shop at:
Sunny Studio
Scenic Route Stamps
Scenic Route Stamps
Shop at:
Sunny Studio
Scenic Route Dies
Scenic Route Dies
Shop at:
Sunny Studio
Enchanted Stamps
Enchanted Stamps
Shop at:
Sunny Studio
Enchanted Dies
Enchanted Dies
Shop at:
Sunny Studio
Floating By Stamps
Floating By Stamps
Shop at:
Sunny Studio
Floating By Dies
Floating By Dies
Shop at:
Sunny Studio
Spring Scenes Stamps
Shop at:
Sunny Studio
Spring Scenes Dies
Spring Scenes Dies
Shop at:
Sunny Studio
Spring Fling Paper
Spring Fling Paper
Shop at:
Sunny Studio
Slimline Basic Borders
Shop at:
Sunny Studio
Slimline Nature Borders
Shop at:
Sunny Studio
Farm Fresh Stamps
Farm Fresh Stamps
Shop at:
Sunny Studio
Balloon Rides Stamps
Shop at:
Sunny Studio
Baby Elephants Stamps
Shop at:
Sunny Studio
Baby Elephants Dies
Baby Elephants Dies
Shop at:
Sunny Studio
Kiddie Pool Stamps
Kiddie Pool Stamps
Shop at:
Sunny Studio
Hero Arts White Detail
Shop at:
Sunny Studio
VersaMark Watermark Ink
Shop at:
Sunny Studio
Domed Ink Blending Foam
Domed Ink Blending FoamShop at:
Sunny Studio
Picket Fence Border Dies
Shop at:
Sunny Studio
Bear Hugs Stamps
Bear Hugs Stamps
Shop at:
Sunny Studio
Comic Strip Everyday Dies
Shop at:
Sunny Studio
Happy Thoughts Stamps
Shop at:
Sunny Studio
Spring Sunburst 6x6 Paper
Shop at:
Sunny Studio
Comic Strip Speech Bubble Dies
Shop at:
Sunny Studio
Eyelet Lace Borders
Eyelet Lace Borders
Shop at:
Sunny Studio
Wonky Windows Die
Wonky Windows Die
Shop at:
Sunny Studio
Stitched Rectangle Dies
Shop at:
Sunny Studio
Mini Basic Shape Dies 2
Shop at:
Sunny Studio
Frilly Frames Retro Petals Dies
Shop at:
Sunny Studio
Basic Mini Shape Dies 4
Shop at:
Sunny Studio