Showing posts with label Layered Basket. Show all posts

Wednesday, March 20, 2024

Beautiful Bluebells Card with Tina

Hello crafters, it’s Tina and today I am back on the blog with a gorgeous layering stamp set called Beautiful Bluebells and it’s coordinating dies.   

Sunny Studio Stamps: Beautiful Bluebells Birthday Card by Tina Henkens (featuring Frilly Frame Dies, Layered Basket, Window Quad Dies)

With these sets I always like to start with die cutting all the shapes from white Neenah card stock. I keep this paper to put into my Misti to do all the stamping. The die cut pieces will fit into this sheet as little puzzle pieces. And so, I can stamp multiple flowers at the same time, building them up layer by layer. For the flowers I used several blue and green inks from my stash.

Another trick I always use when doing layered stamping is to use the sheet the stamps come on as a guide for positioning. I saw this once in a card making video and have been doing this technique ever since.

Knowing the flowers would really be very bright and the star of the show, I needed a toned-down background with still some interest to it. I created a white panel with the Frilly Frames Chevron dies and added it to a white card base. To make this background more dimensional, I added foam tape to the frame and some of the chevron strips. Other strips were just glued to the base.

Sunny Studio Stamps: Beautiful Bluebells Birthday Card by Tina Henkens (featuring Frilly Frame Dies, Layered Basket, Window Quad Dies)

The Beautiful Bluebells are a perfect match for the large Layered Basket Stamps. I stamped just two layers of this set in a pale pink ink from my stash. Then I fussy cut the basket and made the edges a little darker by adding extra ink with a blending brush.

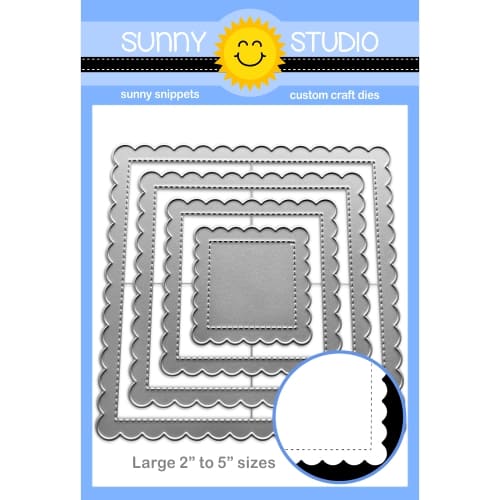
The little tag was made with dies from the Window Quad Square set. I had to trim it a bit to make it fit the basket. Next, I stamped the sentiment from Truckloads Of Love in the same pink ink as used before. After wrapping a piece of white twine around the basket I adhered it to the background with foam tape and added the tag with a little bow.

For the beautiful bouquet, I just started gluing the biggest flowers to the chevron panel with a repositionable tape runner so I could arrange the composition while adding more flowers. Next, I sprinkled some white paint splatters over the whole card front. Several Pure White Jewels were added across the design as a finishing touch.

Thank you for joining me and happy crafting!

Sunny Studio Supplies Used:

Frilly Frames Chevron Die
Shop at:
Sunny Studio
Window Quad Square Die
Shop at:
Sunny Studio
Layered Basket Stamps
Shop at:
Sunny Studio
Layered Basket Dies
Layered Basket Dies
Shop at:
Sunny Studio
Truckloads of Love Stamps
Shop at:
Sunny Studio
Beautiful Bluebells Stamps
Shop at:
Sunny Studio
Beautiful Bluebells Dies
Shop at:
Sunny Studio

Friday, September 29, 2023

Pretty Pumpkins Card with Tina

Hello crafty friends, it’s Tina and today’s project consists of lots of Pretty Pumpkins! This is a beautiful layering set and I love that the pumpkins come in three sizes. Loads of possibilities for your card designs!

Sunny Studio Stamps: Pretty Pumpkins Fall Themed Card by Tina Henkens (featuring Layered Basket, Frilly Frame Dies, Autumn Greenery Dies, Ribbon & Lace Border Dies)

As always, I used the printed sheet on which the stamps come as my guide for placement. For the pumpkins I went with teal, coral, and yellow colors. I used several inks from my stash to get that great dimensional look these stamps provide! The set comes with it’s own leaves but I decided to go for the Autumn Greenery dies which I inked in similar colors. To create that rustic fall look, I added lots of splatters with matching inks and white gouache.

Next, I stamped and die cut the Layered Basket onto a piece of cream paper that I had dry embossed with the Woodgrain embossing folder. I took a blending brush to darken the edges of the basket. I wanted to add a scalloped strip using one of the Ribbon And Lace Border dies. This white border was perfect for my sentiment as well (Words Of Gratitude).

Sunny Studio Stamps: Pretty Pumpkins Fall Themed Card by Tina Henkens (featuring Layered Basket, Frilly Frame Dies, Autumn Greenery Dies, Ribbon & Lace Border Dies)

I created a white card base and adhered a coral gingham panel (Frilly Frames Eyelet Lace die and Gingham Pastels pad). Next, I added a white border.

Then it was time to assemble the pumpkin scene starting with the basket and working my way up. I used some temporary glue so I could arrange all the elements until I was happy with the design. Lastly, I added the leaves and pumpkin in front of the basket and scattered a few Chrystal Clear Jewels over the entire scene.

Thank you for joining me and I hope you have fun creating cards with these pretty pumpkins! Happy crafting!

Sunny Studio Supplies Used:

Words of Gratitude Stamps
Shop at:
Sunny Studio
Pretty Pumpkins Dies
Shop at:
Sunny Studio
Pretty Pumpkins Stamps
Shop at:
Sunny Studio
Gingham Pastels 6x6 Paper
Shop at:
Sunny Studio
Woodgrain Embossing
Woodgrain Embossing
Shop at:
Sunny Studio
Frilly Frames-Eyelet Lace
Shop at:
Sunny Studio
Layered Basket Stamps
Shop at:
Sunny Studio
Layered Basket Dies
Layered Basket Dies
Shop at:
Sunny Studio
Autumn Greenery Dies
Shop at:
Sunny Studio
Ribbon & Lace Dies
Ribbon & Lace Dies
Shop at:
Sunny Studio

Wednesday, February 22, 2023

Easter Cards with Marie and Catherine

Hey Crafty Friends, Marie here. With Spring fast approaching, I am looking forward to another one of my favorite holidays of the whole entire year and that is Easter Sunday! When I was little, my mom would hide easter eggs all around the house and we would have Sunday mass and have a big family brunch right after. For my family, Easter is just as important as Christmas, and there would always be Easter cards and gifts exchanged! So this year, I will be giving my mom this Easter shadow box card featuring Sunny Studio Stamps' Chubby Bunny Stamps with elements from their Bunnyville Stamps

Sunny Studio Stamps: Chubby Bunny Easter Card by Marie Marco (featuring Bunnyville)

To begin the process of creating this card, I used a shadow box die from Heffy Doodle. I cut out all my shadow box pieces from Bristol Smooth cardstock paper. I then ink blended the outside of my box using Cotton Candy Ink from MFT, and Salvaged Patina Distress Ink for the inside as well as for the cloud stenciled background. For all my grass panels, I used my favorite grass colored ink combination in Twisted Citron and Mowed Lawn Distress Ink. I went over all the grass panels with water droplets for some light texture. After inking my entire box, I put it together using double sided tape adhesive and Bearly Art Precision Craft Glue. 

Sunny Studio Stamps: Chubby Bunny Easter Card by Marie Marco (featuring Bunnyville)

Next, I stamped out all my images from the Chubby Bunny Stamp Set and Bunnyville stamps onto watercolor paper using Antique Linen Distress Ink. I colored all my images using Faber Castell Watercolor pencil. I then cut out all my images using the coordinating Chubby Bunny Dies and I fussy cut the carrot images from Bunnyville. The Bunnyville stamps also come with Bunnyville Dies

Finally, after coloring and die cutting, I played around with placement and adhered all my images inside my shadow box. I really love how this card came together! I love all the bright Spring Colors and how happy, playful,  and festive these adorable bunnies look! I can't wait to hand deliver this one to my mom this year! As always Crafty friends, thanks so much for joining me today on another card inspiration! Until next time, Happy Crafty Cardmaking! 

-------------------------------------------

Hello Crafty Friends! Catherine here, and today I am sharing a fun easter basket card created with Eggs To Dye For Stamps and Layered Basket Stamps.

Sunny Studio Stamps: Eggs To Dye For Easter Card by Catherine Cohen (featuring Fancy Frame Dies, Stitched Rectangle Dies, Layered Basket)

To start, I embossed a piece of white cardstock 3 ¾”W x 5” H with Lots of Dots Embossing folder. I then die cut a lacy frame with white cardstock from Fancy Frames Rectangle Dies. I adhered the frame onto the polka dot embossed background.

I stamped a basket with the Layered Basket Stamps using Pinkfresh Studio Ink Cubes- Urban Raincoat. I used three colors from the set, Misty Coast, Rocky Slope, and Metropolis. I splattered some Metropolis ink mixed with water onto the basket for added texture.

I stamped the eggs with the following Altenew inks and die cut the eggs with the coordinating dies, Eggs To Dye For Dies. For the blue and purple egg, I White Heat embossed the eggs after I stamped them.

Pink – Frosty Pink, Pink Diamond, Pinkalicious
Purple- Soft Lilac, Lavender Fields
Blue- Caribbean Sky

Sunny Studio Stamps: Eggs To Dye For Easter Card by Catherine Cohen (featuring Fancy Frame Dies, Stitched Rectangle Dies, Layered Basket)

Next, I stamped the chick using light brown ink and colored it with Copic Markers listed in my blog link below.

For the sentiments, I White Heat embossed the sentiments onto a banner from Stitched Rectangle Dies and a tag from Stitched Oval 2 Dies. I added white brads to the oval tag on the basket. I adhered the eggs, chick, basket, and sentiment onto the polka dot background. I thought it would be fun to add some pink grass for the basket. I finished the card by adhering it onto a background with paper from Subtle Grey Tones 6x6 Paper.

Thanks so much for stopping by! For more inspiration, please feel free to visit me at Crafti-Cat! Have a great day!

Sunny Studio Supplies Used:

Stitched Rectangle Dies
Shop at:
Sunny Studio
Fancy Frames- Rectangles
Shop at:
Sunny Studio
Chubby Bunny Stamps
Chubby Bunny Stamps
Shop at:
Sunny Studio
Chubby Bunny Dies
Chubby Bunny Dies
Shop at:
Sunny Studio
Lots of Dots Embossing
Shop at:
Sunny Studio
Subtle Grey Tones Paper
Shop at:
Sunny Studio
Eggs To Dye For Stamps
Shop at:
Sunny Studio
Eggs To Dye For Dies
Shop at:
Sunny Studio
Layered Basket Stamps
Shop at:
Sunny Studio
Layered Basket Dies
Layered Basket Dies
Shop at:
Sunny Studio
Stitched Oval 2 Dies
Shop at:
Sunny Studio
Bunnyville Stamps
Bunnyville Stamps
Shop at:
Sunny Studio
Bunnyville Dies
Bunnyville Dies
Shop at:
Sunny Studio

Friday, January 27, 2023

Spring Bouquet Cards with Vanessa and Tina

Hello to you! Vanessa here with a mini slimline card using the gorgeous Spring Bouquet set.

Sunny Studio Stamps: Spring Bouquet Floral Hello Card by Vanessa Menhorn

I trimmed a panel of light blue cardstock slightly smaller than my white card base and embossed it with the Moroccan Circles Embossing Folder before adhering it to the card. Then I stamped the flowers, die-cut the pieces with the matching dies and adhered them with foam tape.

Sunny Studio Stamps: Spring Bouquet Floral Hello Card by Vanessa Menhorn

Now I die-cut the banner from Fancy Frames Rectangle Dies from white cardstock, stamped the hello, trimmed the strip and adhered it.

I hope you like today's spring card! Have a wonderful weekend, see you next week!

------------------------------------------

Hello crafty friends, it’s Tina with a colorful selection of flowers for you today! Each year, after putting away the Christmas decorations our house feels a bit empty, so I bring in some cheerful Spring flowers. The new Spring Bouquet stamp and die set is perfect to create your own happy floral arrangements! I combined it with the Layering Basket and made a fun shaped card.

Sunny Studio Stamps: Spring Bouquet Floral Hello Card by Tina (featuring Layered Basket)

First, I stamped all my flowers three times using different inks from my stash for the individual layers. This is where having ink swatches comes in handy! I used two green tones for the stems and leaves. Next, I die cut all these images with the coordinating dies.

The basket was stamped in shades of brown. After die cutting the inked basket, I cut 5 extra basket shapes from white cardstock. For the sentiment I went with the beautiful scripty ‘Hello’ from the Spring Bouquet set and used a small die from my stash that framed the word really well. All my stamped elements were now ready, and I could start assembling the shaped card.

To create the base, I took one of the white baskets and scored it at about a ¼ inch from the top. I added a strip of strong score tape to that top part and glued the piece to a second white piece. That gave me the ‘standing basket’ shape you see in the above picture. I had three more white basket shapes left, I cut the middle part out of all of them, creating three sided frames. These were all stacked onto the base, creating room for the stems of the flowers. Finally, I added the ‘stamped basket’ as a top layer.

Sunny Studio Stamps: Spring Bouquet Floral Hello Card by Tina (featuring Layered Basket)

Then it was time to create the bouquet! Glue dots are your best friend during this stage, since they allow you to easily shift the flowers around while you are doing the arrangement. I glued a few flowers to the stems to get the height I needed. Leaves were added randomly.

To gives extra support to the bouquet, I added white die cuts to the back. Lastly, I adhered the sentiment label to the basket and sprinkled a few Chrystal Clear jewels.

This shaped card was so much fun to make, and I hope you give this idea a try! Thank you for joining me and happy crafting!

Sunny Studio Supplies Used:

Fancy Frames- Rectangles
Shop at:
Sunny Studio
Moroccan Circles Embossing
Shop at:
Sunny Studio
Layered Basket Stamps
Shop at:
Sunny Studio
Layered Basket Dies
Layered Basket Dies
Shop at:
Sunny Studio
Spring Bouquet Stamps
Shop at:
Sunny Studio
Spring Bouquet Dies
Spring Bouquet Dies
Shop at:
Sunny Studio

Monday, January 9, 2023

Sneak Peek: Spring Bouquet, Tranquil Tulips & Big Bold Greetings Stamps

Hello and welcome to the first day of our Spring Sneak Peek Week!  All this week I will be sharing cards showcasing our newest collection which will be available for purchase this Friday!

Card No. 1: Today I am kicking things off with two brand new layering stamp sets and one everyday sentiment stamp set called Big Bold Greetings. For this card I used the new layered iris, daffodil and hyacinth flowers from our new Spring Bouquet Stamps. To hold my floral arrangement, I turned to our Watering Can Stamps which I stamped in a sunny yellow ink combo.

For my larger 5x7 card base, I inked some Tumbled Glass distress ink in the middle of my white cardstock panel and then created a wood embossed "table" using our Woodgrain Embossing Folder. To give my wood a darker color in the recessed portions like letterpress printing, I used an ink brayer to apply VersaFine Clair Acorn Ink directly to the raised surface of my plastic embossing folder before sandwiching my paper to run through my die-cutting machine. Pigment ink is a must for this technique as it will adhere and apply smoothly on the plastic surface and not bead up like a dye ink would. For my gingham napkin, I cut a piece of patterned paper from our Joyful Holiday Paper pack using our Stitched Rectangle Dies. Lastly, I added my "thank you" words using our new Big Bold Greetings Stamps.
Sunny Studio Flowers Floral Arrangement Thank You Card (using Spring Bouquet, Big Bold Greetings & Watering Can Stamps, Woodgrain Embossing Folder & Joyful Holiday Paper)

Card No. 2: Next up is a card showcasing the daffodil image from the Spring Bouquet Stamps. I love that simply by changing the angle for this single flower image, you can still create a card that doesn't feel too repetitive. I embossed the navy cardstock for my background using our Moroccan Circles Embossing Folder and then cut my scalloped strip both along the top and bottom using our new slimline style Ribbon & Lace Border Dies (which I will be sharing more peaks of later in the week). Lastly, for my greetings I paired the "hello" from this Spring Bouquet Stamp set with the word "sweet" from our Sealiously Sweet Stamps and the word "friend" from our Outback Critters Stamps.Sunny Studio Hello Friends Navy Scalloped Daffodil Card (using Spring Bouquet, Moroccan Circles Embossing Folder and Ribbons & Lace Border Dies)

Card No. 3: This next card focuses on the hyacinth flowers from the Spring Bouquet Stamp set which I arranged using our Layered Basket Stamps. For my background, I inked layers of fluffy clouds using masks I die-cut with our Slimline Nature Border Dies and Shaded Lilac Distress Ink. I then used the grassy border from that same die set to cut layers of grass to nestle my basket between, along with the straight grass border from our Picket Fence Dies. Finally I added two little bumblebees from the set with a bow from our Winter Wreaths Stamps and the "thanks" sentiment from our Big Bold Greetings Stamps.Sunny Studio Hyacinth Floral Flowers Thank You Card (using Spring Bouquet, Big Bold Greetings & Layered Basket Stamps, Slimline Nature Border Dies)


Card No. 4: For this pop-up box style card (using Lawn Fawn's scalloped box card pop-up die) I created an exploding flower garden that magically folds to lay flat in the envelope for mailing. I mixed the flowers from both our new Spring Bouquet Stamps and Tranquil Tulips Stamps, adding four separate internal tiers within the box to attach my flowers to for a more full, staggered appearance.
Sunny Studio Floral Flower Pop-up Box Card (using Tranquil Tulips & Spring Bouquet Stamps, Hayley Alphabet Dies & Classic Gingham Paper)

Side View: To decorate my box, I cut panels using both sides of our Classic Gingham Paper cut from a coordinating green color to compliment my flower stems. I then cut out the letters from white cardstock to spell out the word "spring" using our new Hayley Alphabet Uppercase and Hayley Alphabet Lowercase Dies (which I will be sharing more as the week progresses). To finish out my "Spring Greetings" phrase, I heat embossed the word "greetings" using our older retiring Timeless Tulips Stamps.
Sunny Studio Floral Flower Pop-up Box Card (using Tranquil Tulips & Spring Bouquet Stamps, Hayley Alphabet Dies & Classic Gingham Paper)

Card No. 5: Switching my focus to our new Tranquil Tulip Stamps, I have a sweet birthday card featuring potted tulips with the flower pot I borrowed from our Potted Rose Stamps. I actually created this card with just two stamped flower pots, but I cut one in half so I could give the illusion there were three lined up in a row and running off the edge of my card. To add the stitched and scalloped edges along the top and bottom of my card, I turned once again to our new slimline style Ribbon & Lace Border Dies. Lastly I stamped and die-cut the "happy birthday" phrase in Lavender ink to match one of my tulips using our new Big Bold Greetings Stamps and coordinating dies.Sunny Studio Blog: Layered Spring Flowers in Flowerpot Birthday Card (using Tranquil Tulips, Potted Rose, Big Bold Greetings Stamps & Ribbons and Lace Border Dies)

Card No. 6: I couldn't resist creating a Valentine's Day inspired floral arrangement using the new Tranquil Tulips Stamps together with our Vintage Jar Stamps. This time rather than cut out the individual stems using the coordinating dies, I just stamped them directly onto my jar to give my arrangement a more realistic look and to save myself the extra step. It also gave me a nice flat surface to adhere my love themed greeting to using our Lovey Dovey Stamps. For my card background I cut a panel of green gingham patterned paper from our Joyful Holiday Paper pack and topped it with a scalloped "V" shaped panel using our Fishtail Banner II Dies and the stitched edge from our new Ribbon & Lace Border Dies. I just adore this complimentary color scheme!Sunny Studio Floral Flowers in Jar Scalloped Valentine's Day Card (using Tranquil Tulips, Lovey Dovey & Vintage Jar Stamps, Slimline Basic Border & Fishtail Banner II Dies, Joyful Holiday Paper)


Card No. 7: Keeping with that same color scheme, my last card of the day features a gorgeous tulip field utilizing the same new Tranquil Tulips Stamps. Before I started adhering my flowers to my card base, I applied some Twisted Citron Distress ink around the bottom three edges, fading it out to white in the center of my card. When I was done adhering all my tulips, I added my sentiment which I stamped onto a pennant strip cut out using our Stitched Rectangle Dies. The word "thanks" was taken directly from the Tranquil Tulips set which I paired with the phrases "a big" and "for all you do" from our Words of Gratitude Stamps. I love when I can stretch my supplies and create new looks by mixing sentiments from different sets!
Sunny Studio Tulip Fields Thank You Card (using Tranquil Tulips & Words of Gratitude Stamps, Stitched Rectangle Dies)

I frequently am asked which ink colors I used for my layered images.  While I think there are so many great options out there, these are the colors I used today for my stamped images from light to dark:

Peach Tulips
PinkFresh Ballet Slipper
Gina K. Innocent Pink
PinkFresh Coral Reef

Red Tulips
Hero Arts Cotton Candy
Hero Arts Pale Tomato
Gina K. Red Velvet


Deep Red Tulips
Concord & 9th Honeysuckle
PinkFresh Candy Apple
Concord & 9th Cranberry

Hot Pink Tulips
Gina K. Bubblegum Pink
Hero Arts Ultra Pink
Gina K.Passionate Pink

Purple Tulips
PinkFresh Soft Lilac
PinkFresh Lavender
Gina K. Wild Lilac

Daffodil
PinkFresh Sunshine
PinkFresh Sweet Mustard
PinkFresh Marigold
PinkFresh Apricot

Iris
PinkFresh Lavender
Gina K. Wild Lilac

Hero Arts Grape Juice
PinkFresh Sweet Mustard

Hot Pink Hyacinth
PinkFresh Sparkling Rose
PinkFresh Bubble Gum
Gina K.Passionate Pink

Pink Hyacinth
Gina K. Bubblegum Pink
PinkFresh Sparkling Rose
PinkFresh Bubble Gum

Lavender Hyacinth
PinkFresh Soft Lilac

Lawn Fawn Fresh Lavender
PinkFresh Lavender

Periwinkle Hyacinth
Simon Says Stamp Hydrangea
Ranger Archival Violet
MFT Purple Rain (retired)

Leaf 1
Gina K. Lucky Clover (or Hero Arts Fresh Lawn)
PinkFresh Olive

Leaf 2 
PinkFresh Key Lime
Concord & 9th Parsley

Basket (Card No. 3)
Hero Arts Soft Sand
Gina K. Sandy Beach
Concord & 9th Wheat or Gina K. Kraft
Hero Arts Cup O' Joe

To help you line up our layered stamps like a pro I've created a special layering guide (you can click on the photo below to view it larger).  The guide shows the stamps starting with the lightest ink color, working towards the darkest, but sometimes I find it easier to start backwards. They both work depending on what your preference is.  The black outline indicates where that layer touches the previously stamped layer.  :)


That wraps up today's sneak peek. I'm so happy you joined me today! I'd love to give a $50 gift code to one lucky winner using the rafflecopter below. Our daily sneak peek contests run through Saturday, January 14th at Midnight PST with the winners announced here on Sunday, January 15th. :)

a Rafflecopter giveaway

Here's a closer look at the our new Spring Bouquet Stamps & Dies, Tranquil Tulips Stamps & Dies and Big Bold Greetings Stamps & Dies used today and available for purchase on Friday, January 13th.

Sunny Studio Blog: Spring Bouquet Floral Flowers Layering 4x6 Clear Photopolymer Stamps Sunny Studio Blog: Spring Bouquet Floral Flowers Layering Metal Cutting Dies

Sunny Studio Blog: Tranquil Tulips Floral Flowers Layering 4x6 Clear Photopolymer Stamps  Sunny Studio Blog: Tranquil Tulips Floral Flowers Layering Metal Cutting Dies

Sunny Studio Blog: Big Bold Greetings Everyday Sentiments 4x6 Clear Photopolymer Stamps Sunny Studio Blog: Big Bold Greetings Everyday Sentiments Metal Cutting Dies

Other Sunny Studio Supplies Used (some items are not available until January 13):

Fishtail Banner II Dies
Shop at:
Sunny Studio
Timeless Tulips Stamps
Shop at:
Sunny Studio
Stitched Rectangle Dies
Shop at:
Sunny Studio
Words of Gratitude Stamps
Shop at:
Sunny Studio

Moroccan Circles Embossing
Shop at:
Sunny Studio
Sealiously Sweet Stamps
Shop at:
Sunny Studio
Slimline Nature Borders
Shop at:
Sunny Studio
Layered Basket Stamps
Shop at:
Sunny Studio
Layered Basket Dies
Layered Basket Dies
Shop at:
Sunny Studio
Lovey Dovey Stamps
Lovey Dovey Stamps
Shop at:
Sunny Studio
Lovey Dovey Dies
Lovey Dovey Dies
Shop at:
Sunny Studio
Winter Wreaths Stamps
Shop at:
Sunny Studio
Winter Wreaths Dies
Winter Wreaths Dies
Shop at:
Sunny Studio
Ribbon & Lace Dies
Ribbon & Lace Dies
Shop at:
Sunny Studio
Hero Arts White Detail
Shop at:
Sunny Studio
VersaMark Watermark Ink
Shop at:
Sunny Studio
Vintage Jar Dies
Vintage Jar Dies
Shop at:
Sunny Studio
Vintage Jar Stamps
Vintage Jar Stamps
Shop at:
Sunny Studio
Classic Gingham 6x6 Paper
Shop at:
Sunny Studio
Joyful Holiday Paper
Shop at:
Sunny Studio
Potted Rose Stamps
Potted Rose Stamps
Shop at:
Sunny Studio
Potted Rose Dies
Potted Rose Dies
Shop at:
Sunny Studio
Watering Can Stamps
Watering Can Stamps
Shop at:
Sunny Studio
Watering Can Dies
Watering Can Dies
Shop at:
Sunny Studio
Woodgrain Embossing
Woodgrain Embossing
Shop at:
Sunny Studio
Outback Critters Stamps
Shop at:
Sunny Studio
Hayley Lowercase Alphabet Dies
Shop at:
Sunny Studio
Hayley Uppercase Alphabet Dies
Shop at:
Sunny Studio

Tsukineko Jumbo Dauber
Shop at:
Sunny Studio
Versafine Onyx Black Ink
Shop at:
Sunny Studio