Friday, July 26, 2024

Strawberry Patch Die Focused Card with Nicky

Hello there, this is Nicky with you today on the blog and I'm sharing a circular card, featuring our Strawberry Patch Diesthat was inspired by a photo I saw online of a cake decorated with fresh strawberries including the leaves and flowers.

Sunny Studio Stamps: Strawberry Patch Die Focused Card by Nicky Meeks (featuring Punny Fruit Greetings)

To create this card I die cut two large circles of white cardstock which would form the front and back of my card base. With the back panel, I cut a sliver off at what would be the bottom so that it would stand up without rolling around when it was being displayed and at the top I scored a line that would form a 'hinge' and above the line I added ScorPal tape and then adhered the front and back panels together.

I did some soft ink blending on the front panel using Blush Pink ink by The Stamp Market. I splattered on some water and blotted it up then dotted in a little interest with Copic markers just to distress it a little.

Sunny Studio Stamps: Strawberry Patch Die Focused Card by Nicky Meeks (featuring Punny Fruit Greetings)

I used the Strawberry Patch Dies to die cut sturdy white cardstock and made a juicy pile of strawberries by ink blending the parts. I used Lipstick Red and Gumdrop by The Stamp Market to blend. I then began building a 'wreath' of strawberries and their leaves around the edge of the 'cake' that I had been inspired by.  Building and gluing until I had gone all the way around and then for balance I tucked in the odd extra leaf or two and then added the little flowers.

Sunny Studio Stamps: Strawberry Patch Die Focused Card by Nicky Meeks (featuring Punny Fruit Greetings)

To finish it up I grabbed the Punny Fruit Greetings stamp set and some black sentiment strips. I stamped the sentiment with Versamark Ink and heat embossed in white and added these strips to the centre of the cake using dimensional foam tape.

Last but not least, I stamped around the sentiments using 1st, 2nd and 3rd generation impressions of the little heart included in the sentiment stamp set and the same Lipstick Red ink I had blended the strawberries with. Card done! Slice of cake anyone?

Thanks for reading the blog today and I'll see you next Friday with something new.

Sunny Studio Supplies Used:

Punny Fruit Greetings
Shop at:
Sunny Studio
Strawberry Patch Dies
Shop at:
Sunny Studio

Thursday, July 25, 2024

Sliding Window Die Focused Card with Marine

Hello crafty friends, Marine here with you today! I'm so happy to be back with this fun and bright interactive Sliding Window card featuring three cute Fabulous Flamingos in a tropical scenery. Oh how I love to make tropical cards!

Sunny Studio Stamps: Sliding Window Die Focused card by Marine Simon (featuring Fabulous Flamingos, Tropical Birds, Silly Sloths, Stitched Rectangle Dies)

As very often I started off with the coloring and stamped all my images on 80lb Neenah solar white cardstock using an alcohol marker friendly black ink. I cut them all using the coordinating dies, and colored everything using my alcohol markers using corals for the flamingos, red for the flowers and different greens for the leaves. Here is a detailed list of the products I used: • Fabulous Flamingos - flamingos, hearts • Tropical Birds - ivy, leaves, flowers • Silly Sloths - flowers, leaves.

Sunny Studio Stamps: Sliding Window Die Focused card by Marine Simon (featuring Fabulous Flamingos, Tropical Birds, Silly Sloths, Stitched Rectangle Dies)

I cut a 5 x 3,75 inches Strathmore bristol smooth panel using the largest Stitched Rectangle, and colored it using oxide inks. I started off by covering it with cracked pistachio oxide ink to create a nice and even base. I added and blended some lucky clover oxide ink on the four edges, and then brought more interest to this background using a leafy stencil from my stash along with lucky clover oxide ink. I splattered clear water all over my panel and dried it using a paper towel. Next I mixed some pine needle oxide ink with water, used a small brush to make splatters on my panel, and then did the same with black soot oxide ink and with copic opaque white ink.

Next I cut and colored two additional Strathmore bristol smooth panels. The first one measures 5 x 3,25 inches, I cut the second one using the largest Stitched Rectangle die, and colored them both using the same colors. I first covered them with tattered rose oxide ink, and used the same leafy background stencil as before along with saltwater taffy oxide ink.

Sunny Studio Stamps: Sliding Window Die Focused card by Marine Simon (featuring Fabulous Flamingos, Tropical Birds, Silly Sloths, Stitched Rectangle Dies)

Once my leafy green panel was dry, I cut my Sliding Window out of it, as well as the notch at the top, folded my panel on the score lines, flipped it over, and added double sided tape on the slim bottom tab. I peeled the backing paper off this tab, flipped my 5 x 3,25 inches leafy pink panel over, and attached it at the back of my leafy green panel, lining up the bottom edge of the leafy green panel with the slim tab. I glued the small tab piece at the top of my leafy green panel, pierced a hole through that tab, cut a green eyelet using a die from Sliding Window, attached this eyelet to the tab, and added red twine to create a handle and be able to pull the interactive panel.

I flipped my leafy green panel over, and added foam strips along the bottom edge, on the side edges as well, but not along the top edge. I peeled all the backing papers off, and attached my leafy green panel to the remaining leafy pink panel to complete the whole interactive process. Next I cut a 5,25 x 4 inches white panel that I attached to a 5,5 x 4,25 inches Polka Dot Parade red pattern paper, and then stuck this whole panel to a white card base.

Sunny Studio Stamps: Sliding Window Die Focused card by Marine Simon (featuring Fabulous Flamingos, Tropical Birds, Silly Sloths, Stitched Rectangle Dies)

At the inside bottom of the card, I stamped "You're flamazing" from Fabulous Flamingos in black, added a few extra images, and did the same at the inside top of the pull tab. I also white heat embossed the banner from Little Birdie on vellum, embossed "Hello friend" from Chubby Bunny and Bighearted Bears inside the banner, cut it using the matching die, and attached it below the flamingos using clear foam squares. As always I finished my card by adding highlights and details to the images using a white gel pen.

And that's it! I hope that you like this lovely tropical card! Thanks so much for stopping by, and see you next week.

Sunny Studio Supplies Used:

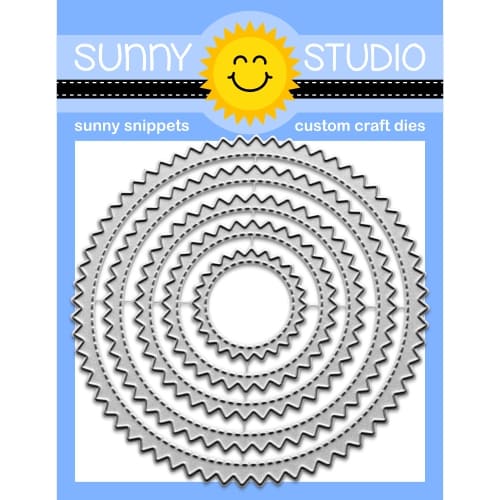
Stitched Rectangle Dies
Shop at:
Sunny Studio
Sliding Window Dies
Sliding Window Dies
Shop at:
Sunny Studio
Chubby Bunny Stamps
Chubby Bunny Stamps
Shop at:
Sunny Studio
Fabulous Flamingos Stamps
Shop at:
Sunny Studio
Fabulous Flamingos Dies
Shop at:
Sunny Studio
Silly Sloths Stamps
Silly Sloths Stamps
Shop at:
Sunny Studio
Silly Sloths Dies
Silly Sloths Dies
Shop at:
Sunny Studio
Little Birdie Stamps
Shop at:
Sunny Studio
Little Birdie Dies
Little Birdie Dies
Shop at:
Sunny Studio
Bighearted Bears Stamps
Shop at:
Sunny Studio
Tropical Birds Stamps
Shop at:
Sunny Studio
Tropical Birds Dies
Tropical Birds Dies
Shop at:
Sunny Studio

Wednesday, July 24, 2024

Limitless Labels Die Focused Card with Tina

Hello crafters, it’s Tina and today I have a fun shaker card for you made with one of the nesting Limitless Labels dies combined with some yummy treats from the Candy Shoppe set.

Sunny Studio Stamps: Limitless Label Die Focused Candy Shoppe Best Wishes Card by Tina Henkens (featuring Frilly Frame Dies)

My background panel was made from a sheet of beautiful grey paper (Subtle Grey Tones) since I knew I’d be selecting bright colors for the sweets.

To create the shaker I used the outside die from the Frilly Frames Eyelet Lace dies and one of the Limitless Labels dies. Next, I adhered some clear acetate to the back of this panel using strong double-sided tape. Then, I build my shaker wall with foam tape and filled up the shaker with clear and pink sequins from my stash. To close this shaker, I cut a pink piece of the Striped Silly papers.

Sunny Studio Stamps: Limitless Label Die Focused Candy Shoppe Best Wishes Card by Tina Henkens (featuring Frilly Frame Dies)

After stamping the gumball machine, gummi bears and other sweets I started coloring with my trusted Copic markers. I went with fun and happy colors! I stamped the sentiment from Heartfelt Wishes in pink ink on a white banner and adhered it to the bottom of my shaker card.

Next, I mounted the gumball machine and arranged the other sweets left and right. I love finishing a card with some embellishments and today I chose for the Crystal Clear Jewels since my project was so colorful.

This card was fun to make, and I hope it inspired you to create a shaker card as well! Happy crafting!

Sunny Studio Supplies Used:

Candy Shoppe Stamps
Candy Shoppe Stamps
Shop at:
Sunny Studio
Candy Shoppe Dies
Candy Shoppe Dies
Shop at:
Sunny Studio
Striped Silly 6x6 Paper
Shop at:
Sunny Studio
Subtle Grey Tones Paper
Shop at:
Sunny Studio
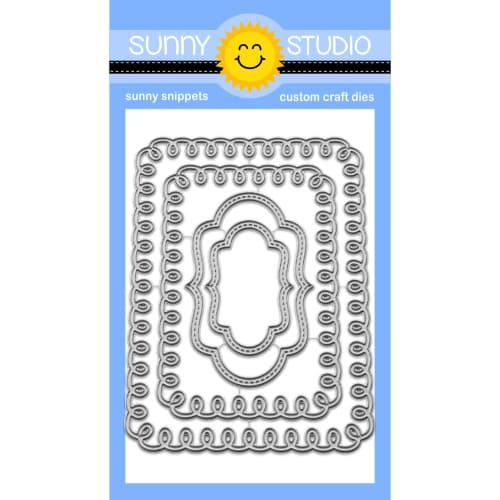
Frilly Frames-Eyelet Lace
Shop at:
Sunny Studio
Limitless Labels 1 Dies
Shop at:
Sunny Studio

Monday, July 22, 2024

Summer Jar Mug Die Focused Card with Leanne

Hello everyone! Leanne here to share a friendship card featuring the Summer Jar Mug. I have made the jar mug into a shaker for this card and I've colored plus filled it to look like a refreshing cup full of pink lemonade. 

Sunny Studio Stamps: Summer Jar Mug Die Focused Card by Leanne West  (featuring Punny Fruit Greetings, Sweet Word Die, Strawberry Patch Dies, Scalloped Oval Mat Dies)

Here's a list of the Sunny Studio products you'll need to create this A2 card design: 

Summer Jar Mug dies - for the mug, straw, and tiny lemon slice die cuts 
Scalloped Oval Mat 3 dies - for the scalloped oval mat
Punny Fruit Greetings -  for the stamped words "friends make life" 
Sweet Word die -  for the die cut word "sweet"
Strawberry Patch dies - for the tiny flower die cut
Classic Gingham Paper - for the gingham background mat

The Sweet Word die is retired but if you don't have it you can use alphabet dies to spell out the word. The Hayley Upper Case or Chloe Alphabet dies would work great! 

Sunny Studio Stamps: Summer Jar Mug Die Focused Card by Leanne West  (featuring Punny Fruit Greetings, Sweet Word Die, Strawberry Patch Dies, Scalloped Oval Mat Dies)

To make this jar mug into a fun shaker, I have adhered several layers of the jar mug frame together. I die cut one solid mug shape for the back and 5 layers of the open mug frame to make it thick enough to allow for the shaker bits to move around freely. I filled the shaker well with tiny pink balls and iridescent confetti bits. I then adhered clear acetate and one final mug frame piece over top. The back solid piece and top frame piece were lightly colored with pink ink prior to assembly to enhance the pink lemonade look. 

When adhering the jar mug frame layers together to build up the shaker well, be sure to include the straw in between two layers toward the back. I forgot to do this and after I had my shaker completely assembled, I had to cut a small slit in the back to slide the straw inside the mug. 

Sunny Studio Supplies Used:

Sweet Word Die
Sweet Word Die
Shop at:
Sunny Studio
Classic Gingham 6x6 Paper
Shop at:
Sunny Studio
Scalloped Oval Mat 3 Dies
Shop at:
Sunny Studio
Punny Fruit Greetings
Shop at:
Sunny Studio
Strawberry Patch Dies
Shop at:
Sunny Studio
Summer Jar Mug Dies
Summer Jar Mug Dies
Shop at:
Sunny Studio

Sunday, July 21, 2024

Wild Cherry Die Focused Card with Cathy

Hey friends! Cathy here today with a clean and simple card for you featuring the Wild Cherry Dies.

Sunny Studio Stamps: Wild Cherry Die Focused Card by Cathy Chapdelaine (featuring Frilly Frame Eyelet Lace Dies, Scalloped Oval Mat Dies, Stitched Oval Dies, Brilliant Banner Dies, Punny Fruit Greetings)

I love the look of retro vintage fruit labels and I thought the Wild Cherry Dies would be perfect for this. First, I cut a piece of light aqua cardstock 4 1/2" x 6” and die-cut the piece using the Frilly Frames Eyelet Lace Die (I die-cut it twice to span the entire cardstock piece). I then die-cut the piece with the largest Stitched Rectangle Die and adhered it centered on an A2 card front.

Next, I die-cut the second largest Scalloped Oval Mat 2 Dies from black and white cardstock. I adhered the black oval centered on the card front and inlaid the white circles from the white die-cut oval. I die-cut the third largest Stitched Oval Die from white cardstock and inked the top half lightly with Spun Sugar Distress ink. I then inked a sun ray stencil on the top half of the oval with Spun Sugar applying harder pressure for a subtle effect. I die-cut a piece of paper from the All is Bright Paper using the same Stitched Oval Die, cut across the oval at 1 1/2" and adhered it to the bottom of the inked oval. I then adhered this combined piece to the black oval.

Sunny Studio Stamps: Wild Cherry Die Focused Card by Cathy Chapdelaine (featuring Frilly Frame Eyelet Lace Dies, Scalloped Oval Mat Dies, Stitched Oval Dies, Brilliant Banner Dies, Punny Fruit Greetings)

To finish, I die-cut the Brilliant Banner 1 Die from white cardstock and stamped the sentiment using the Punny Fruit Greetings Stamps (I used Memento “LadyBug” ink for the “cherry” sentiment). I also heat embossed the sentiment with clear embossing powder for a little shine. I then inked the banner with Lost Shadow Distress ink and added some shadows with gray Copics. I die-cut the banner again from black cardstock and layered/adhered the two together. I die-cut the cherries from white cardstock and colored them with Copics. Sweet and simple!

I hope you enjoyed and thanks for stopping by today! For more inspiration, please visit my blog www.inkredibleadventures.com and you can also find me on Instagram as @cathy.chapdelaine.

Sunny Studio Supplies Used:

Stitched Rectangle Dies
Shop at:
Sunny Studio
Stitched Oval Dies
Stitched Oval Dies
Shop at:
Sunny Studio
Frilly Frames-Eyelet Lace
Shop at:
Sunny Studio
Scalloped Oval Mat 2 Dies
Shop at:
Sunny Studio
All Is Bright Paper
All Is Bright Paper
Shop at:
Sunny Studio
Brilliant Banner 1 Dies
Shop at:
Sunny Studio
Punny Fruit Greetings
Shop at:
Sunny Studio
Wild Cherry Dies
Wild Cherry Dies
Shop at:
Sunny Studio