Showing posts with label Fall Friends. Show all posts

Tuesday, September 23, 2025

Fall Scenes & Too Cute To Spook Card with Amanda

Hey, hey, crafty friends, Amanda here! Halloween is just around the corner, and I'm celebrating with this fun card I created! I'm here to explain how I made it so you can get inspired to make something crafty today!

Sunny Studio Costume Critter & Haunted House Halloween Card using Fall Scenes and Too Cute To Spook Clear Stamps & Craft Dies


First, I created an A2 card base out of white cardstock. I trimmed the cardstock to 5.5" x 8.5" and then scored it at 4.25". I, then, folded it on the score line. Next, I pulled out my Critter Country Paper. This pack is full of beautiful fall colors and patterns! I trimeed the orange polka-dot date paper down to 4" x 5.25" and then glued it directly to my card base.

I also pulled out the dark orange polka dot paper, the pumpkin pattern paper, and the green plaid paper. I ran the pumpkin paper through my die cutting machine with the large notebook paper die from the Notebook Photo Corners Die. I also cut a plain piece of white cardstock with this die as well. I cut the photo corners out of the dark orange paper. I created the tab from the green plaid paper with the Notebook Tabs Dies.

Next, I trimmed a piece of white cardstock to 3 - 3/8" x 2 - 5/8". On this panel, I stamped the Fall Scenes background stamp. I also stamped the "trick or treat" from the Too Cute To Spook Stamps on a separate small piece of white cardstock with my MISTI.

Sunny Studio Costume Critter & Haunted House Halloween Card using Fall Scenes and Too Cute To Spook Clear Stamps & Craft Dies

Then, it was time to color! I used Copic markers to color my scene and here are the markers I used:
  • Grass: YG00, YG21, YG23, YG25, YG17
  • All Orange spots:  YR04, YR09
  • Lights: Y13
  • House: N4, N5, N7
  • Concrete: C1, C2, C4
  • Sky: B41
  • Critter: E35, E25, E27, E29, YG23, YG 25, W3, W5, W7, N9, RV21, V05

I also added some white highlights to the little bear with a white Gelly Roll pen. 
I used the Too Cute to Spook Dies to cut out my little costumed friend. Next, I arranged everything as I wanted it on the card and started adhering the pieces together! I used foam squares, tape, and liquid glue to assemble everything.

I love all the layers to this card and that sweet little bear in his costume! Hopefully, you're feeling inspired to make a card yourself! Have fun! 

Supplies Used:
Fall Scenes Stamps
Fall Scenes Stamps
Shop at:
Sunny Studio
Fall Scenes Dies
Fall Scenes Dies
Shop at:
Sunny Studio
Too Cute To Spook Stamps
Shop at:
Sunny Studio
Too Cute To Spook Dies
Shop at:
Sunny Studio
Notebook Photo Corners Dies
Shop at:
Sunny Studio
Notebook Tabs Dies
Notebook Tabs Dies
Shop at:
Sunny Studio
Memento Tuxedo Black Ink Pad
Shop at:
Sunny Studio
Hero Arts Intense Black Ink
Shop at:
Sunny Studio
Critter Country Paper
Shop at:
Sunny Studio

Friday, September 19, 2025

Harvest Mice & Fall Friends Cards with Mendi

Hello and welcome! This is Mendi here today, popping in to share some fall cards featuring our Fall Friends Stamps and Harvest Mice Stamps.

Sunny Studio Autumn Pumpkins, Fox & Mouse Cards using Harvest Mice, Truckloads of Love & Fall Friends Clear Stamps Craft Dies

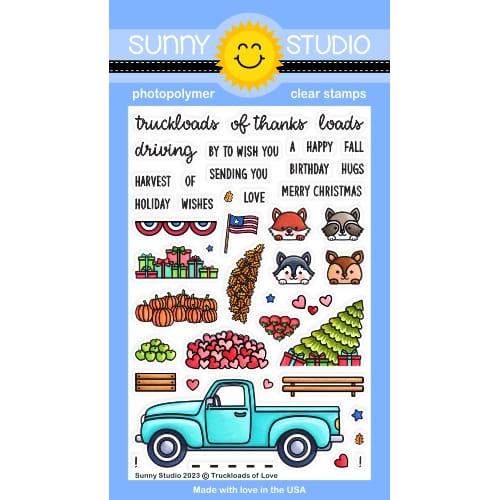
My first card combines the fox, pumpkins, and greetings in the foreground from the Fall Friends Stamps, with the trees from the Woodsy Autumn Stamps, and the truck with the smaller fox and the load of pumpkins from the Truckloads of Love Stamps. To frame my scene I used the outer zig-zag edged die from the Frilly Frames Chevron Dies and blended a light amount of Broken China Distress Ink for my Sky with Tea Dye ink for the ground.

Sunny Studio Autumn Pumpkins Fox Card using Fall Friends & Truckloads of Love Clear Stamps, Frilly Frames Chevron Craft Dies

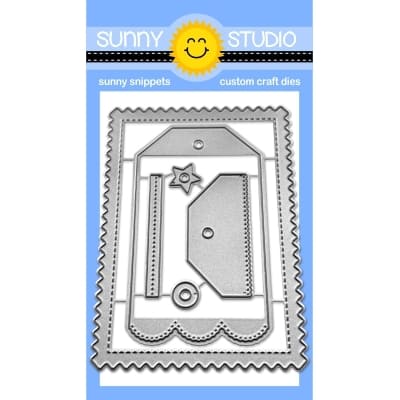
For my second card, I created a scene using the mice, pumpkins, wheelbarrow, and corn stalks from the Harvest Mice Stamps. This time, I framed my scene with a smaller zig-zag edged mat using the Mini Mat & Tag 4 Dies and masked off the edges with masking material before inking my sky and ground like I had for my first card. I repeatedly stamped the corn stalk directly onto my scene at different heights with VersaFine Clair Verdant Green Ink. I chose the smaller mat size so that more of the cute orange gingham print from the Critter Country Paper pack would be visible in my background.

Sunny Studio Autumn Pumpkins Mouse Card using Harvest Mice Clear Stamps, Mini Mat & Tag 4 Craft Dies & Critter Country Paper

That wraps up my projects for today. Thanks so much for hanging out with me. I hope I've inspired you to spread a little happiness by sending out a card to someone you love. ðŸ’›

Don't forget to check out our Fall Friends StampsHarvest Mice Stamps, Woodsy Autumn StampsFrilly Frames Chevron Dies, and Critter Country Paper in our online shop, which are all currently on sale!

Also, please check out all the card ideas using these sets on each of their product pages. I always make sure to upload tons of card ideas following the product image so there are lots of ideas to scroll through there organized by set.

Supplies Used:

Fall Friends Stamps
Fall Friends Stamps
Shop at:
Sunny Studio
Fall Friends Dies
Fall Friends Dies
Shop at:
Sunny Studio
Frilly Frames Chevron Die
Shop at:
Sunny Studio
Woodsy Autumn Stamps
Shop at:
Sunny Studio
Woodsy Autumn Dies
Woodsy Autumn Dies
Shop at:
Sunny Studio
Harvest Mice Stamps
Harvest Mice Stamps
Shop at:
Sunny Studio
Harvest Mice Dies
Harvest Mice Dies
Shop at:
Sunny Studio
Mini Mat & Tag 4 Dies
Shop at:
Sunny Studio
Critter Country Paper
Shop at:
Sunny Studio
Truckloads of Love Stamps
Shop at:
Sunny Studio
Truckloads of Love Dies
Shop at:
Sunny Studio
Spellbinders Masking Sheets
Shop at:
Sunny Studio
Versafine Onyx Black Ink
Shop at:
Sunny Studio
Versafine Clair Ink- Acorn
Shop at:
Sunny Studio
Versafine Clair Ink- Verdant
Shop at:
Sunny Studio
PinkFresh Studio Blending Brushes
Shop at:
Sunny Studio

Wednesday, September 3, 2025

Harvest Mice Card with Tina

Hello crafters, it’s Tina and I am so excited for the change of the season! Autumn is coming and I made a card with the adorable Harvest Mice stamp and die set.

Sunny Studio Stamps: Harvest Mice Card with Tina Henkens (featuring Staggered Circles Dies, Fall Friends)

Not only are these the cutest mice ever, they also are the perfect size and fit for the fun Staggered Circles die. I love having this kind of die in my stash since it is so helpful to create a beautiful design with just one pass through the die cut machine. No measuring or overthinking placement, this die does all the work for you!

My panel was created from a piece of white card stock and cut with a mini slimline die from my stash. Then I cut the five circles with the Staggered Circles die, letting the outer circles overlap with the edge of the panel. Next, I removed the circles and used a large striped stencil to apply the pattern with Saltwater Taffy Distress Oxide and a blending brush.

Sunny Studio Stamps: Harvest Mice Card with Tina Henkens (featuring Staggered Circles Dies, Fall Friends)

After creating a matching white card base, I added the striped panel and the 5 white circles. Then it was time to make mini scenes for each circle. I browsed through my stash selected 3 cute mice, some pumpkins and apples, leaves, mushrooms and an acorn from the Harvest Mice and Fall Friends. I used some autumnal Copic colors and a white gel pen for highlights.

Then I played around with placement and mounted the images to the circles with foam tape. Finally, I stamped a combined sentiment (Harvest Mice) on a white piece of card stock with Versafine Onyx Black inkTo match the pumpkins, I scattered a few Orange Topaz Jewels across the card.

I can’t wait to see your fun Autumn cards! Thank you for joining me and happy crafting!

Sunny Studio Supplies Used:

Fall Friends Stamps
Fall Friends Stamps
Shop at:
Sunny Studio
Fall Friends Dies
Fall Friends Dies
Shop at:
Sunny Studio
Staggered Circles Die
Shop at:
Sunny Studio
Harvest Mice Stamps
Harvest Mice Stamps
Shop at:
Sunny Studio
Harvest Mice Dies
Harvest Mice Dies
Shop at:
Sunny Studio

Tuesday, August 26, 2025

Fall Friends Card with Amanda

Hey there, Sunny Studio Stamps fans! Welcome to the blog! It’s Amanda here with you today and I’m getting ready for Fall! So I’ve made this super cute Fall card to share with you!

Sunny Studio Stamps: Fall Friends Friendship Card by Amanda Fitterer (featuring Comic Strip Speech Bubble Dies)

This card features the stamp set called Fall Friends! I love these images so much that I couldn’t decide which ones to put on the card! So, I created a layout that would let me put almost all the images on one card!

I created my background with the Comic Strip Speech Bubbles Dies. I die-cut just the frame from this set with white cardstock. On the inner rectangles, I inked blended some Catherine Pooler inks with a blending brush. I used Cashmere for the top two rectangles and Succulent for the bottom ones. After I was finished blending them, I spritzed them with a spray bottle filled with water. 

On my magnetic craft mat, I laid my A2 card base down. Next, I secured the frame down onto my card base with magnets. This allows me to use the frame as a guide for placing my rectangles perfectly. I added some liquid glue to the backs of my rectangles and placed them onto the card base.

Sunny Studio Stamps: Fall Friends Friendship Card by Amanda Fitterer (featuring Comic Strip Speech Bubble Dies)

Next, I stamped all my critters and images on a piece of white cardstock with black ink. I colored all the images in with Copic markers, focusing on muted Autumn colors. I added some highlights with a white Gelly Roll pen. Then, I die-cut all the images out with the 
coordinating die set. I used low-tack tape to keep the dies in place while running them through my die-cutting machine.

I arranged all the images on my card where I think I wanted them to go, starting with the largest images first. As I was making my layout, I grabbed the sentiment from the stamp set and placed the words in the upper right corner, arranging the images around it. I took a photo of the card layout so I wouldn't forget how I liked it!  

Then, I moved all the images to the side, leaving my sentiment in place. I put the card base into my MISTI and stamped my sentiment with black ink. Finally, I placed 3D foam squares behind all the images and adhered them to the card! All finished! Don't you just want to squeeze all those little critters?!  

I hope you find some time to get crafty today and that this card inspires you! See you back here next week! 

Sunny Studio Supplies Used:

Fall Friends Stamps
Fall Friends Stamps
Shop at:
Sunny Studio
Fall Friends Dies
Fall Friends Dies
Shop at:
Sunny Studio
Comic Strip Speech Bubble Dies
Shop at:
Sunny Studio

Tuesday, August 19, 2025

Fall Friends Card with Amanda

Hey crafty friends! It’s Amanda here with you celebrating BACK TO SCHOOL time!  I can’t believe summer is coming to a close already! But, it’s time to make those teacher cards! So, I’m here with you today sharing this adorable card I made for one of my kids’ teachers! I created a lot of layers for this card to give it a ton of dimension!

Sunny Studio Stamps: Fall Friends Back To School Teacher Card by Amanda Fitterer (featuring Fall Scenes, Punny Apple Greetings)

First, I grabbed a piece of white cardstock and trimmed it to 4.25”x5.5”. On this panel, I lightly blended Catherine Pooler’s Oh Boy! ink all around the panel, focusing on the top portion. This will be for my background and the sky.

Next, on another piece of white cardstock trimmed to 4.25”x5.5”, I stamped the fence and tree image from the Fall Scenes Stamps. This stamp has available coordinating dies, so I used the appropriate die to cut out the top part of the panel. Then, I colored the entire scene with Copic markers. I placed 3D foam strips behind the grass, fence, and tree and then adhered it to my background panel.

The cute critters, applies, wagon, tree stump, and basket images come from the Fall Friends Stamps. I satmped extra apples, since this card is for a teacher! I colored all the images in with Copic markers. I added a few highlights with a white Gelly Roll pen. Then, I die cut each image out with the coordinating dies.

Sunny Studio Stamps: Fall Friends Back To School Teacher Card by Amanda Fitterer (featuring Fall Scenes, Punny Apple Greetings)

I adhered 3D foam squares behind all the images. For some images, I needed to add an extra layer of foam squares to prop them up higher (such as the deer). Then, I added everything to the scene.

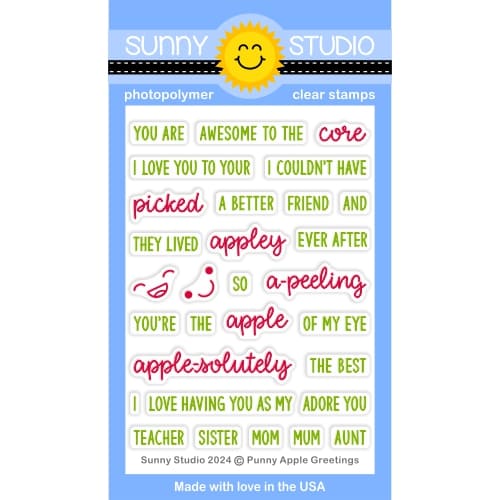
My sentiment comes from the Punny Apple Greetings Stamps. First, I grabbed a piece of scrap white cardstock. I stamped the word “picked” with Catherine Pooler Rouge ink first. Then, I placed the other words on each side and stamped them with black ink. I trimmed the cardstock down into a long strip and cut a little ribbon end. I put 2 layers of foam strips behind the sentiment and added it to the card to finish it off!

That’s all for me today, friends! I hope you’re feeling inspired to make something crafty today!

Sunny Studio Supplies Used:

Fall Friends Stamps
Fall Friends Stamps
Shop at:
Sunny Studio
Fall Friends Dies
Fall Friends Dies
Shop at:
Sunny Studio
Fall Scenes Stamps
Fall Scenes Stamps
Shop at:
Sunny Studio
Fall Scenes Dies
Fall Scenes Dies
Shop at:
Sunny Studio
Punny Apple Greetings
Shop at:
Sunny Studio