Showing posts with label Happy Thoughts. Show all posts

Friday, December 20, 2024

Snowmen in Sweaters Holiday Gift Bag with Nicky

Well hello everyone, this is Nicky with you today on the Sunny Studio Stamps blog where I'm sharing a fun Snowmen In Sweaters Holiday Gift Bag project. Read on for all the details:

Sunny Studio Stamps: Snowmen in Sweaters Holiday Gift Bag by Nicky Meeks (featuring Lacy Snowflakes Dies, Sweet Treat Gift Bag Dies, Eyelet Lace Border Dies, Happy Thoughts)

I started by taking two matching sheets of patterned paper from the All Is Bright 6 x 6 Cardstock and I assembled the Sweet Treats Bag Die which is a very simple process and can be found in a useful video created by Sunny owner Mendi in THIS VIDEO.

I then adorned the bag with two snow drifts at the bottom of both the front and the back, using the Slimline Nature Borders Die, and I added a double layer of lace around the top edge (also front and back) using the Eyelet Lace Borders Die.

Sunny Studio Stamps: Snowmen in Sweaters Holiday Gift Bag by Nicky Meeks (featuring Lacy Snowflakes Dies, Sweet Treat Gift Bag Dies, Eyelet Lace Border Dies, Happy Thoughts)

With the bag formed I used some cotton cord and knotted the handles in place and set it to one side.

I stamped the snowmen from Snowmen In Sweaters using Memento Ink in Black Tuxedo and I coloured the images with the following Copic marker combinations inspired by colours from the patterned paper:

Snowmen - C3, C1, C0, BG000
Teal - BG49, BG15, BG32
Red - R59, R39, R29, R27
Pink - RV63, RV52
Black - T9, T6, T4
White - C3, C1, C0
Blush - R22, R21, R20, R00
Noses - YR09, YR04

Sunny Studio Stamps: Snowmen in Sweaters Holiday Gift Bag by Nicky Meeks (featuring Lacy Snowflakes Dies, Sweet Treat Gift Bag Dies, Eyelet Lace Border Dies, Happy Thoughts)

I shaded their coloured clothing using T3 and T2. Images were die cut, with the coordinating Snowmen In Sweaters Die, then highlighted with a white gel pen and applied to the bag with foam tape.

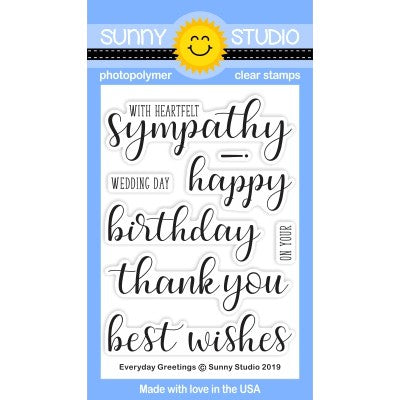
To adorn the bag further I added the little gift tag with the sentiment stamped from Happy Thoughts, I also added some Lacy Snowflakes die-cuts and a few sparkling clear sequins.

Thanks for stopping by the blog today to read about this treat bag, I hope you feel inspired to tackle one for yourself. Happy crafting!

Sunny Studio Supplies Used:

Lacy Snowflakes Die
Lacy Snowflakes Die
Shop at:
Sunny Studio
Happy Thoughts Stamps
Shop at:
Sunny Studio
Sweet Treats Gift Bag
Shop at:
Sunny Studio
Eyelet Lace Borders
Eyelet Lace Borders
Shop at:
Sunny Studio
Slimline Nature Borders
Shop at:
Sunny Studio
All Is Bright Paper
All Is Bright Paper
Shop at:
Sunny Studio
Snowmen in Sweaters Stamps
Shop at:
Sunny Studio
Snowmen in Sweaters Dies
Shop at:
Sunny Studio

Friday, October 11, 2024

Striped Stencils Focused Card with Nicky

Happy Friday everyone this is Nicky with you today on Sunny Studio Stamps blog and I have a frosty Christmas card to share with you, incorporating our Striped Stencilsso please read on for all the details.

Sunny Studio Stamps: Striped Stencil Focused Winter Holiday Card with Nicky Meeks (featuring Stitched Ovals Dies, Scenic Route, Snowmen in Sweaters, Happy Thoughts)

To create this card I took an A2 white panel of cardstock and I used the diagonal striped stencil from the Striped Stencils set and used glitter embossing paste to create the dazzling stripes. I set this to one side to dry.

I then used the Stitched Oval 2 Die to create two ovals. One was cut from vellum and the other from white cardstock. I stamped a little background image to the cardstock oval using the Scenic Route stamp set. I added a hint of pink ink blending to it and used Copic markers to add a little colour to the fir trees. I then glued this panel to the larger vellum panel and then secured this to the glittered background. This whole panel was then adhered to a slightly larger red panel and then to a slightly larger white card base.

I stamped the Snowmen in Sweaters and coloured with the following Copic markers:

Snowmen (white parts) - C3, C1, C0
Blushes - R22, R21, R20, R00
Blue - B99, B97, B45
Red - R59, R39, R27, R24
Brown - E47, E44, E43

Sunny Studio Stamps: Striped Stencil Focused Winter Holiday Card with Nicky Meeks (featuring Stitched Ovals Dies, Scenic Route, Snowmen in Sweaters, Happy Thoughts)

I die cut the images using the coordinating Snowmen in Sweaters Die and then used foam tape to apply them to the little background scene.

To complete the card, I stamped the sentiments from Happy Thoughts and applied them with more foam tape and I used some of Sunny's little snowflake dies to embellish the card. Points were highlighted with a white gel pen and then this chilly scene was complete!

I appreciate you reading the blog today, I'll be back next Friday with something new to share!  Happy crafting!

Sunny Studio Supplies Used:

Happy Thoughts Stamps
Shop at:
Sunny Studio
Scenic Route Stamps
Scenic Route Stamps
Shop at:
Sunny Studio
Stitched Oval 2 Dies
Shop at:
Sunny Studio
Snowmen in Sweaters Stamps
Shop at:
Sunny Studio
Snowmen in Sweaters Dies
Shop at:
Sunny Studio
Diagonal & Straight Stripes Stencils
Shop at:
Sunny Studio

Wednesday, April 10, 2024

Designer's Choice: Holiday Hugs Card with Tina

Hello crafters, it’s Tina and today I am mixing and matching several sets for this designer’s choice blog post. The darling bear from Holiday Hugs is perfect for all your winter cards but I wanted to see how I could make him the focal point of a Spring birthday card!

Sunny Studio Stamps: Holiday Hugs Birthday Card by Tina Henkens (featuring Make A Wish, Frilly Frame Dies, Quilted Hearts Dies, Stitched Arch Dies, Brilliant Banner Dies, Happy Thoughts)

To achieve this look, I had to mask off his scarf with some Post-it tape while I was stamping. It went really well and next I used the matching dies to cut him out. I love the special die for the arms! To remove the scarf with more precision or make it easier to do for mass production, here are detailed steps to achieve this look:

  1. Stamp the bear onto masking material and cut out the scarf with scissors, leaving a thin shadow for a little wiggle room.
  2. Then, stamp a sheet of paper with the bear image using your Misti tool.
  3. Cut a sheet of cardstock the same size as the paper used in Step 2. Using a lightbox or a well-lit window, position the blank sheet of cardstock over that stamped image and position your hand-cut mask on the cardstock where that scarf will stamp. 
  4. Put the blank cardstock with the scarf mask in place back into your Misti, ink up your image, and stamp it onto the cardstock with the mask in place.
  5. Remove the mask and use a black fine-tip marker (one that will work with your desired coloring medium) to sketch the missing sides of the bear. A Memento marker or Copic Multiliner pen are both excellent choices.
  6. Use scissors to trim down the die-cut bear to account for the missing scarf.

Whilst browsing through my stash I selected a few birthday related stamps like the big cake (Make A Wish), the gift (Holiday Hugs), the bouquet (Big Bunny) and the letters (Bighearted Bears).All these items were colored with alcohol markers in fun Spring colors.

My card base is an A2 size and made from white heavy weight card stock. For the pink gingham frame I used a Joyful Holiday paper, which was cut with the outer of the Frilly Frames Eyelet Lace dies and the largest of the Stitched Arched Dies.

Sunny Studio Stamps: Holiday Hugs Birthday Card by Tina Henkens (featuring Make A Wish, Frilly Frame Dies, Quilted Hearts Dies, Stitched Arch Dies, Brilliant Banner Dies, Happy Thoughts)

Since the coloring was so bright, I opted for a white backdrop. The upper part is dry embossed with the Quilted Hearts folder, whilst the lower part was run through the Lots Of Dots folder (but that is difficult to see in the pictures). I added foam tape to the gingham frame and lower part of the background and adhered all the elements to my card base. Next, I added the cute bear and all his birthday accessories!

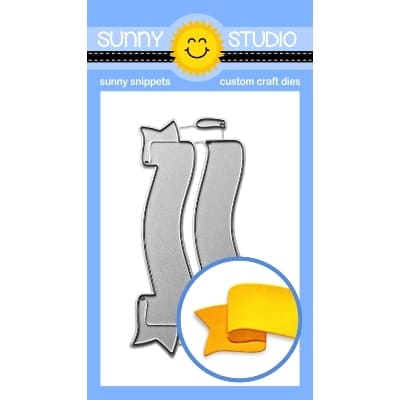
I love how the Brilliant Banner 2 Die perfectly fits on top of the arched frame. The combined sentiment was selected from the Happy Thoughts set and stamped in Versafine Onyx Black Ink. For some bling, I adhered a few Crystal Clear Jewels which are one of my favorites.

I hope you got inspired to experiment with stamp masking, it’s such a fun technique! Thank you for joining me and happy crafting!

Sunny Studio Supplies Used:

Happy Thoughts Stamps
Shop at:
Sunny Studio
Make A Wish Stamps
Make A Wish Stamps
Shop at:
Sunny Studio
Make A Wish Dies
Make A Wish Dies
Shop at:
Sunny Studio
Lots of Dots Embossing
Shop at:
Sunny Studio
Frilly Frames-Eyelet Lace
Shop at:
Sunny Studio
Stitched Arch Dies
Stitched Arch Dies
Shop at:
Sunny Studio
Quilted Hearts Portrait
Shop at:
Sunny Studio
Brilliant Banner 2 Dies
Shop at:
Sunny Studio
Holiday Hugs Stamps
Holiday Hugs Stamps
Shop at:
Sunny Studio
Holiday Hugs Dies
Holiday Hugs Dies
Shop at:
Sunny Studio
Big Bunny Stamps
Big Bunny Stamps
Shop at:
Sunny Studio
Big Bunny Dies
Big Bunny Dies
Shop at:
Sunny Studio

Wednesday, March 13, 2024

Mini Grass Border Die Focused Card with Tina

Hi crafty friends, Tina here and today we are creating a sweet Easter card featuring the Mini Grass Border dies. I combined these products with the adorable Big Bunny stamp and die set.

Sunny Studio Stamps: Mini Grass Border & Big Bunny Easter Card by Tina Henkens (featuring Bunnyville, Frilly Frame Dies, Happy Thoughts, Stitched Semi-Circle Dies)

Starting with a white card base I added a bright orange polka dot paper from Spring Fever that was cut with the border of the Frilly Frames Stripes die. I used that same die combined with the Mini Grass Border dies to create two grassy hills from a green sheet of the same paper pad (Spring Fever).

To complete the background scene, I pulled the largest of the Stitched Semi Circle dies and inked this piece with Distress Oxide Squeezed Lemonade. I adhered the background pieces to the card base with liquid glue and added the two grass borders with some foam tape.

Sunny Studio Stamps: Mini Grass Border & Big Bunny Easter Card by Tina Henkens (featuring Bunnyville, Frilly Frame Dies, Happy Thoughts, Stitched Semi-Circle Dies)

For this card I mixed and matched the cute bunny with the Easter basket (Big Bunny stamp) with three big carrots from Bunnyville. I love how all these elements work so well together. All the coloring was done with my Copic markers in happy colors that would match my background elements.

Next, I tucked the bunny in the grass border and noticed that the handle of the handle of the Easter basket was too high for this design. So, I just cut it off and the basket still looks adorable! I added all my elements to the background adding dimension where needed.

The sentiment was selected from the Happy Thoughts set and stamped onto a small white strip with Versafine Onyx Black ink. To complete this fun project, I sprinkled a few Crystal Clear Jewels onto the card.

Thank you for visiting the blog and happy crafting!

Sunny Studio Supplies Used:

Happy Thoughts Stamps
Shop at:
Sunny Studio
Frilly Frames Stripes Die
Shop at:
Sunny Studio
Stitched Semi-Circle Dies
Shop at:
Sunny Studio
Bunnyville Stamps
Bunnyville Stamps
Shop at:
Sunny Studio
Bunnyville Dies
Bunnyville Dies
Shop at:
Sunny Studio
Spring Fever Paper
Spring Fever Paper
Shop at:
Sunny Studio
Big Bunny Stamps
Big Bunny Stamps
Shop at:
Sunny Studio
Big Bunny Dies
Big Bunny Dies
Shop at:
Sunny Studio
Mini Grass Border Dies
Shop at:
Sunny Studio

Wednesday, March 6, 2024

Spring Garden Die Focused Card with Tina

Hello crafters, it’s Tina and today I am featuring the fun Spring Garden dies! This set includes a variety of cute flowers and all the tools a gardener would need. I decided to go for a pastel Easter card, combining the dies with two adorable bunnies from Bunnyville. They are sized perfectly to fit inside the watering can and flowerpot!

Sunny Studio Stamps: Spring Garden Die Focused Easter Card by Tina Henkens (featuring Bunnyville, Stitched Arch Dies, Frilly Frame Dies, Mini Grass Dies, Picket Fence Dies, Happy Thoughts, Winter Greenery Dies)

I started with a white card base and a purple flower frame made from a sheet of the Flirty Flowers papers. After cutting a panel with the outer die from the Frilly Frames Eyelet Lace die, I used the largest of the Stitched Arched dies.

We are creating a little flower garden scene, so I also made two grassy borders with one of the Mini Grass Border dies and inked them with Distress Oxide Lucky Clover. Next, I pulled out the Picket Fence die. I love how the white of the fence gives extra dimension to the grass portion of this card. I kept my background fairly neutral with some soft yellow clouds (Distress Oxide Squeezed Lemonade and a cloud stencil from my stash). The two bunnies from Bunnyville where colored in grey tones with Copic Markers, and I added some details with a white gel pen.

Sunny Studio Stamps: Spring Garden Die Focused Easter Card by Tina Henkens (featuring Bunnyville, Stitched Arch Dies, Frilly Frame Dies, Mini Grass Dies, Picket Fence Dies, Happy Thoughts, Winter Greenery Dies)

Then it was time for a bunch of die cutting, I used a sheet of white Neenah paper and did my ink blending in happy Spring colors (Distress Oxide Squeezed lemonade, Kitsch Flamingo, Wilted Violet, Lucky Clover).

After assembling the garden tools and flowers with some liquid glue, I arranged all the elements on the card panel. Next, I decided where I would stamp my sentiment from Happy Thoughts in Versafine Onyx Black ink. After gluing the cloud panel to the card base, I added the grass borders and the fence. Next, I popped up the flower frame with foam tape. Then I added all my garden elements and bunnies. To create a garland for the top of the arch I used flowers from the Spring Garden dies and some purple leaves made with one of the Winter Greenery dies.

A few Crystal Clear Jewels were added for some fun bling. Thank you for joining me and happy crafting!

Sunny Studio Supplies Used:

Picket Fence Border Dies
Shop at:
Sunny Studio
Happy Thoughts Stamps
Shop at:
Sunny Studio
Flirty Flowers 6x6 Paper
Shop at:
Sunny Studio
Frilly Frames-Eyelet Lace
Shop at:
Sunny Studio
Stitched Arch Dies
Stitched Arch Dies
Shop at:
Sunny Studio
Winter Greenery DIes
Shop at:
Sunny Studio
Bunnyville Stamps
Bunnyville Stamps
Shop at:
Sunny Studio
Bunnyville Dies
Bunnyville Dies
Shop at:
Sunny Studio
Spring Garden Dies
Spring Garden Dies
Shop at:
Sunny Studio
Mini Grass Border Dies
Shop at:
Sunny Studio