Showing posts with label Classy Christmas. Show all posts

Wednesday, November 19, 2025

Classy Christmas Card with Tina

Hello crafters, it’s Tina and I love to add sparkle and shine to my Christmas cards! For this project, I pulled my golden pigment ink and a golden paint pen to provide lots of holiday cheer! And although I adore cute critters, I also enjoy coloring beautiful flowers like these poinsettias from the Classy Christmas stamp and die set.

Sunny Studio Stamps: Classy Christmas Holiday Card by Tina Henkens (featuring Frilly Frame Dies, Dapper Diamonds Embossing Folder, Limitless Labels Dies, Season's Greetings)

I stamped and cut all the flowers, leaves and berries so I could arrange them in the two corners of my card. For this project, I selected pink, red, yellow and blue Copic markers. I added lots of sparkle to the flowers and berries with a fine gold paint pen.

After creating a coral card base, I cut a white panel using the scalloped die from the Frilly Frames Stripes set. I wanted to keep a white border, so I masked the edges with Post-it tape before inking my panel with a stripe stencil and the golden pigment ink. I set this panel aside since this ink takes a while to dry.

Sunny Studio Stamps: Classy Christmas Holiday Card by Tina Henkens (featuring Frilly Frame Dies, Dapper Diamonds Embossing Folder, Limitless Labels Dies, Season's Greetings)

I love adding layers to my projects by dry embossing (Dapper Diamonds folder) a piece of white card stock cut with the largest of the Limitless Labels 1I distressed the edges of this piece with the same gold ink before gluing it to the scalloped piece and the card base.

Bold sentiments are amazing focal points of cards, and that is why I love the Season’s Greetings Stamps and Word Dies so much! I stamped the Merry Christmas in gold, and while that was drying (yes, I needed a bit of patience for this card, but it was well worth the wait!) I played around with the floral arrangement. Finally, I glued all the elements in place and used foam tape to add the large sentiment. For some extra shine, I sprinkled a few Gold Jewels on each side of the card.

I hope you got inspired by this project, and I can’t wait to see your take on this layout. Thank you for joining me, and happy crafting!

Sunny Studio Supplies Used:

Dapper Diamonds Embossing
Shop at:
Sunny Studio
Frilly Frames Stripes Die
Shop at:
Sunny Studio
Season's Greetings Stamps
Shop at:
Sunny Studio
Season's Greetings Dies
Shop at:
Sunny Studio
Classy Christmas Stamps
Shop at:
Sunny Studio
Classy Christmas Dies
Shop at:
Sunny Studio
Limitless Labels 1 Dies
Shop at:
Sunny Studio


Mendi here popping in to share that Glassboard Studio has added an incredible new Scrapbook Magnetic Glass Craft Mat to their line-up. The size is a bit more manageable for travel than my favorite 36x24 mat, and it's also the perfect size for making cards! I love that it's oversized, so you not only have room to work on a 2-page scrapbook layout, but have an extra 1" border around it. The magnetic surface will also be super helpful for keeping elements in place until I glue them down. Use the code SUNNYSTUDIO to save 20% off through tonight at Midnight. After that, the code will still be good to save 15% off every day. 💛

Tuesday, November 11, 2025

Classy Christmas Card with Amanda

Hello there, friends! It’s Amanda with you on the blog today and I’m here to share a beautiful holiday card with you!

Sunny Studio Stamps: Classy Christmas Holiday Card by Amanda Fitterer (featuring Build-A-Greeting Holidays)

This card features the absolutely stunning Classy Christmas Stamps which has poinsettias, pinecones, leaves, and berries! They are beautiful and so fun to mix and match to create different kinds of layouts! For my layout, I stamped all 3 flowers, all of the leaves, and 3 berries. I colored the images in with Copic markers. Here are the markers I used:

R32, R35, R37, R56, R59, R85
G43, G46, G85

Then, I cut them out with the coordinating Classy Christmas Dies. To create my card base, I trimmed a white piece of cardstock to 5.5”x8.5” and then scored it in the center and folded it. My red background paper is from the All is Bright Paper set. I trimmed that paper to 4”x5.25” and then glued it to my card base.

Sunny Studio Stamps: Classy Christmas Holiday Card by Amanda Fitterer (featuring Build-A-Greeting Holidays)

Next, I trimmed a white piece of cardstock to 3.5”x4.75”. Before adhering this paper to the card, I ink blended a small amount of Catherine Pooler Rouge ink in the lower left corner. I lightly blended it, working my way out to the edges. Then, I glued it to my card base. 
I placed 3D foam squares behind all of the stamped images and then arranged them in the lower left corner of the panel. I placed the pointsettias first and then worked my way around.

On some black cardstock, I stamped my sentiments from the Build-a-Greetings Holiday Stamps with a WOW! Embossing ink pad and then sprinkled white embossing powder on it. I melted the powder with my heat tool. Once completely dry, I trimmed my sentiments down into strips, using my scissors to create a banner edge. Then, I put 3D foam strips behind them and added them to the card. 

The final step was to add some gold dots with a gold Gelly Roll pen. I added them to the center of each flower and around the background.

What an elegant card, eh? Who knew I could be so fancy!? I hope you’re feeling inspired to make something today! Have a good one!

Sunny Studio Supplies Used:

Classy Christmas Stamps
Shop at:
Sunny Studio
Classy Christmas Dies
Shop at:
Sunny Studio
All Is Bright Paper
All Is Bright Paper
Shop at:
Sunny Studio
Build-a-Greeting Holidays
Shop at:
Sunny Studio

Saturday, October 11, 2025

Classy Christmas Poinsettia & Holly Cards with Mendi

Hello and welcome! This is Mendi here today, popping in to share some Christmas cards featuring our Classy Christmas Stamps.

Sunny Studio Poinsettia & Holly Holiday Cards using Classy Christmas Stamps, Craft Dies & Quilted Hearts Embossing Folder

First, I made a card focusing on the holly leaves and berry images from the Classy Christmas Stamps. I arranged the holly groupings around a navy Scalloped Oval Mat 1 Die, which I then mounted onto a white Stitched Oval 2 Die. For my background, I embossed a piece of red cardstock using the Quilted Hearts Embossing Folder and inked the edges with Candied Apple and Fired Brick Distress Ink. I completed my card by heat-embossing the "Have a holly jolly Christmas" greeting from the Deck The Halls Stamps to tie my theme together.

Sunny Studio Red & Navy Holly Scalloped Oval Holiday Card using Classy Christmas Stamps & Quilted Hearts Embossing Folder

For my second card, I die-cut a navy scalloped mat using the Frilly Frames Eyelet Lace Dies and backed the lace openings with black cardstock before mounting it onto a green A2-sized panel. I then embellished my card with the poinsettias, leaves, pinecones, and berries from the Classy Christmas Stamps, which I had colored with Copic Markers. Lastly, I white heat-embossed my "Merry Christmas" phrase from the Holiday Greetings Stamps onto a piece of navy cardstock and die-cut it using the coordinating Holiday Greetings Dies to help it blend into my background.

Sunny Studio Poinsettia Navy Scalloped Holiday Card using Classy Christmas Clear Stamps & Frilly Frames Eyelet Lace Craft Die Sunny Studio Poinsettia Navy Scalloped Holiday Card using Classy Christmas Clear Stamps & Frilly Frames Eyelet Lace Craft Die

That wraps up my projects for today. Thanks so much for hanging out with me. I hope I've inspired you to spread a little happiness by sending out a card to someone you love. ðŸ’›

Don't forget to check out the Classy Christmas Stamps and Classy Christmas Dies in our online shop, which are currently on sale!

Also, please check out all the card ideas using these sets on each of their product pages. I always upload tons of card ideas following the product image, so there are lots of ideas to scroll through, organized by set.

Supplies Used: 

Deck The Halls Stamps
Shop at:
Sunny Studio
Frilly Frames-Eyelet Lace
Shop at:
Sunny Studio
Classy Christmas Stamps
Shop at:
Sunny Studio
Classy Christmas Dies
Shop at:
Sunny Studio
Scalloped Oval Mat 1 Dies
Shop at:
Sunny Studio
Stitched Oval 2 Dies
Shop at:
Sunny Studio
Holiday Greetings Stamps
Shop at:
Sunny Studio
Holiday Greetings Dies
Shop at:
Sunny Studio
Quilted Hearts Embossing
Shop at:
Sunny Studio
PinkFresh Studio Blending Brushes
Shop at:
Sunny Studio
Hero Arts White Detail
Shop at:
Sunny Studio
VersaMark Watermark Ink
Shop at:
Sunny Studio

Thursday, October 9, 2025

Classy Christmas Card with Marine

Hello crafty friends, Marine here with you today! I'm back with this traditional holiday card showcasing the gorgeous Classy Christmas stamp set. Such beautiful images to color, and I'm sure that the same design would look great in blues for a frosty and more wintery look, or pinks for a cute and whimsical look.

Sunny Studio Stamps: Classy Christmas Holiday Card by Marine Simon (featuring Holiday Greetings, Woodgrain Embossing Folder)

I started off by stamping my Classy Christmas images on 110lb Neenah solar white cardstock using an alcohol marker friendly black ink. I cut them all using the matching dies, and then colored everything using my Ohuhu markers. When the coloring was done, I mixed copic opaque white ink with water and used a slim brush to add white splatters on all my images, I did the same with fossilized amber distress spritz, and then set everything aside to dry.

Sunny Studio Stamps: Classy Christmas Holiday Card by Marine Simon (featuring Holiday Greetings, Woodgrain Embossing Folder)

I cut a 5,5 x 4,25 inches dark kraft panel, placed it inside my Woodgrain embossing folder, applied brown ink inside the folder on the opposite side of the panel, closed the embossing folder and ran it through my die cutting machine to create a nice tone on tone brown woodgrain texture. I mixed vintage photo distress ink with water and used a slim brush to add brown splatters all over my panel, did the same with white ink, and then the same again with fossilized amber distress spritz. And when my panel was dry, I attached it to a white card base.

Sunny Studio Stamps: Classy Christmas Holiday Card by Marine Simon (featuring Holiday Greetings, Woodgrain Embossing Folder)

Next I attached all the images symmetrically at the top and bottom using 1mm and 2mm foam squares, creating a beautiful wreath. I white heat embossed "Season's greetings" from Holiday Greetings on dark brown cardstock, cut it using the matching die, and finally stuck my sentiment right in the center of the wreath using foam squares again. 

And that's it! Thanks so much for stopping by, and see you next week!

Sunny Studio Supplies Used:

Woodgrain Embossing
Woodgrain Embossing
Shop at:
Sunny Studio
Classy Christmas Stamps
Shop at:
Sunny Studio
Classy Christmas Dies
Shop at:
Sunny Studio
Holiday Greetings Stamps
Shop at:
Sunny Studio
Holiday Greetings Dies
Shop at:
Sunny Studio

Monday, December 11, 2023

Pretty Poinsettia Card with Bobbi

Hi friends, Bobbi here. I hope you’ve been staying busy making your holiday cards. I’ve been making mine the last few weeks and I’m having so much fun with the holiday sets. Today’s card features the Pretty Poinsettia stamp set and coordinating die setI’m also using another great complementary set called, Classy Christmas stamps and dies.

Sunny Studio Stamps: Pretty Poinsettia Christmas Card by Bobbi Lemanski (featuring Classy Christmas)

To make this 5″ X 7″ card, I started with a pattern paper from the Joyful Holiday Paper Pack. It’s a pretty grey and white gingham pattern. It’s nice and neutral. Since my card is 5″ wide and 7″ long and the paper is 6″ wide and 6″ long, I cut the paper to fit and then added 1/8″ bands of color across the bottom in green and red to cover the seam at the bottom.

Sunny Studio Stamps: Pretty Poinsettia Christmas Card by Bobbi Lemanski (featuring Classy Christmas)

For the wreath design, I stamped the poinsettias in three colors of red using the three layers of stamps in the set. This layered stamping really creates beautiful and dimensional flowers. I created a wreath to attach the poinsettias to by stamping evergreens, leaves, pinecones and berries in a circular design using the stamps from Classy Christmas. I tucked the berries and pinecones into the wreath, allowing them to peek out around the red flowers. I splattered the wreath with white paint for snow.

Sunny Studio Stamps: Pretty Poinsettia Christmas Card by Bobbi Lemanski (featuring Classy Christmas)

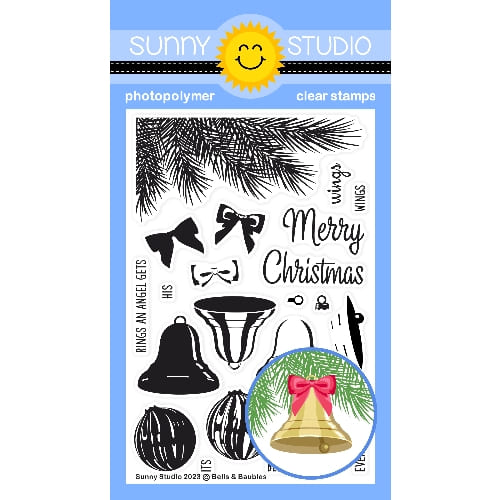
Lastly, I stamped the "Merry Christmas" sentiment from the Bells & Baubles stamp set in black between the colored bands and attached a natural twine string bow to the wreath.


Thanks for stopping by today. If you want to see more ideas and inspiration from me, subscribe to my blog, BobbiHartDesign.com. I’ll send you updates on new posts! You can also find me on Instagram as @BobbiHartDesign and on Facebook as BobbiHartDesign.


Sunny Studio Supplies Used:


Classy Christmas Stamps
Shop at:
Sunny Studio
Classy Christmas Dies
Shop at:
Sunny Studio
Joyful Holiday Paper
Shop at:
Sunny Studio
Bells & Baubles Stamps
Shop at:
Sunny Studio
Pretty Poinsettia Stamps
Shop at:
Sunny Studio
Pretty Poinsettia Dies
Shop at:
Sunny Studio

Tuesday, November 7, 2023

Pretty Poinsettia Card with Isha

Hello everyone! Isha, here today with a bright and festive Christmas card featuring the Pretty Poinsettia stamps and dies. These stamps give a beautiful effect and it is so easy to align all the layers. We can stamp multiple images at the same time and then mass produce these cards.

Sunny Studio Stamps: Pretty Poinsettia Christmas Card by Isha Gupta (featuring Dotted Diamond Dies, Spring Greenery Dies)

I started by taking a white card layer and used the Dotted Diamond Portrait die for a lovely texture. Add some teal splatters using salvaged patina distress ink. 

Sunny Studio Stamps: Pretty Poinsettia Christmas Card by Isha Gupta (featuring Dotted Diamond Dies, Spring Greenery Dies)

Stamp the images and die-cut using coordinating dies:

Poinsettia - Pretty Poinsettia stamps and dies
Fir leaves - Classy Christmas stamps and dies
Sentiment - Christmas Critters
Fern leaves from silver card  - Spring Greenery dies

Create the cluster, add the sentiment. Adhere this layer to a pink cardbase.

Thank you for dropping by and have a nice day!

Sunny Studio Supplies Used:

Christmas Critters Stamps
Shop at:
Sunny Studio
Classy Christmas Stamps
Shop at:
Sunny Studio
Classy Christmas Dies
Shop at:
Sunny Studio
Spring Greenery Dies
Shop at:
Sunny Studio
Dotted Diamond Portrait
Shop at:
Sunny Studio
Pretty Poinsettia Stamps
Shop at:
Sunny Studio
Pretty Poinsettia Dies
Shop at:
Sunny Studio