Friday, April 30, 2021

Stitched Rectangle Die Focused Cards with Kay and Candice

Hi there! Kay here and I'm sharing a card I created with some of the fun new products from the brand new release! I'm using the new Stitched Rectangle dies and the adorable Looking Sharp stamp set.

Sunny Studio Stamps: Stitched Rectangle Dies Looking Sharp Birthday Card by Kay Miller

So for my card, I first off stamped all of the images and sentiment from the Looking Sharp stamp set in Tuxedo Black ink onto white cardstock. I then used a fine line black marker and ruler and drew the line across to give the illusion they are sitting on a table. I then colored everything with Copic markers.

Sunny Studio Stamps: Stitched Rectangle Dies Looking Sharp Birthday Card by Kay Miller

I then cut the colored piece out with the middle sized Stitched Rectangle die. I used some light teal cardstock Aqua Mist from Papertrey Ink and the largest Stitched Rectangle die to cut a second larger mat. I added the larger blue mat to the card base with double sided tape and then added the colored panel on top of this with foam tape.

I hope you have enjoyed my card today! Thanks so much for stopping by!

---------------------------------------------------

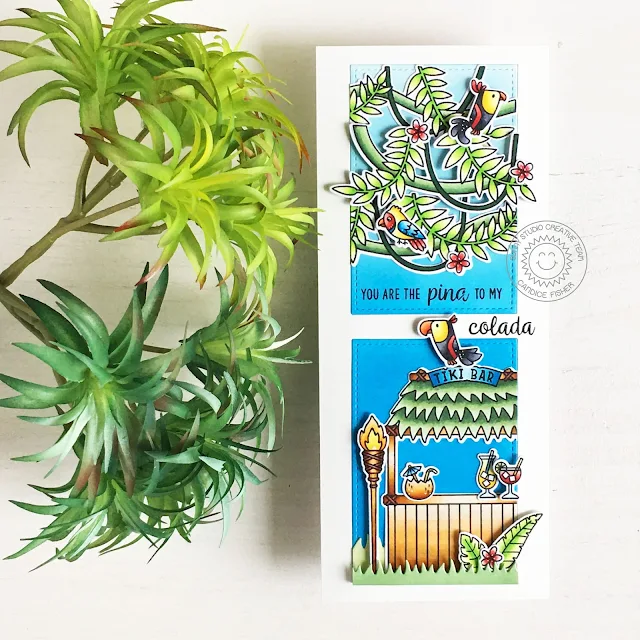
Are you in love with this new release as much as I am?! It's Candice back on this Friday sharing a fun summery card with you highlighting a fun way to use the new Stitched Rectangles on a slimline design!

Sunny Studio Stamps: Stitched Rectangle Dies Tropical Scenes Tiki Time Outback Critters Card by Candice Fisher

I used these Sunny Studio products on my slimline design:

I began my slimline with an 8 1/2 x 3 1/2 card base. For the background, I first trimmed a piece of Bristol Smooth cardstock to cover the card front, die cut the 2 stitched rectangles to create a frame, and inked the inside pieces with salty ocean and tumbled glass. I then die-cut 2 grass pieces, inked them with rustic wilderness and bundled sage, and adhered to the bottom insert.

Sunny Studio Stamps: Stitched Rectangle Dies Tropical Scenes Tiki Time Outback Critters Card by Candice Fisher

Next, I stamped the images from the sets listed above, colored them with Copic markers, and used the coordinating dies to cut them out. I glued the background images onto the inked stitched rectangles and trimmed the edges. I then glued the frame and the stitched rectangles to my card front and used foam tape to add dimension to the scenes. I finished by stamping the sentiment in Versafine black ink!

Thank you for stopping by with me today!

Sunny Studio Supplies Used:

Looking Sharp Stamps
Shop at:
Sunny Studio
Looking Sharp Dies
Looking Sharp Dies
Shop at:
Sunny Studio
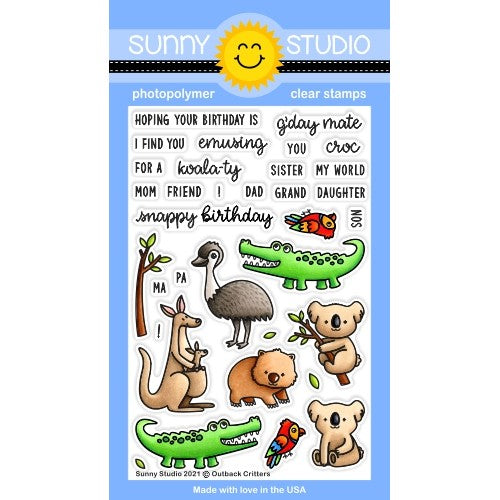
Outback Critters Stamps
Shop at:
Sunny Studio
Outback Critters Dies
Shop at:
Sunny Studio
Tiki Time Stamps
Tiki Time Stamps
Shop at:
Sunny Studio
Tiki Time Dies
Tiki Time Dies
Shop at:
Sunny Studio
Picket Fence Border Dies
Shop at:
Sunny Studio
Stitched Rectangle Dies
Shop at:
Sunny Studio
Tropical Scenes Stamps
Shop at:
Sunny Studio
Tropical Scenes Dies
Shop at:
Sunny Studio

Thursday, April 29, 2021

Looking Sharp Cards with Anja and Vanessa

Hello everyone, Anja here with you today. The new Looking Sharp stamp set features cacti and succulent plants which are even cuter with smiley faces and little accessories. I created a birthday card with three of them.

Sunny Studio Stamps: Looking Sharp Scenic Route Cactus Themed Punny Birthday Card by Anja Bytyqi

I started off with a white A2 landscape card base and trimmed a piece of Bristol cardstock to be slightly smaller. For my warm sunset background, I blended together the Distress Oxide Inks Scattered Straw, Dried Marigold and Crackling Campfire. I used one of the Winter Scenes Dies to create a ground for my plants to stand on. The earthy ink colors are Antique Linen, Gathered Twig and Walnut Stain. For some texture, I added ink splatters with a paint brush. When it was completely dry, I stamped the punny sentiment in VersaMark Ink and heat embossed it in white.

Sunny Studio Stamps: Looking Sharp Scenic Route Cactus Themed Punny Birthday Card by Anja Bytyqi

I remembered the hanging light strings from the Scenic Route set and thought they were a great addition to my little birthday scene. All images were stamped in Memento Tuxedo Black Ink and I colored them with Copic Markers. I used the coordinating dies to cut everything out.

Finally, I assembled my card by adhering the background and lights with liquid glue and popping up the ground and plant images with foam tape.

Thank you so much for stopping by! Have an awesome day!

------------------------------------------------

Hello to you! Vanessa here with a cute birthday card using the adorable Looking Sharp stamps

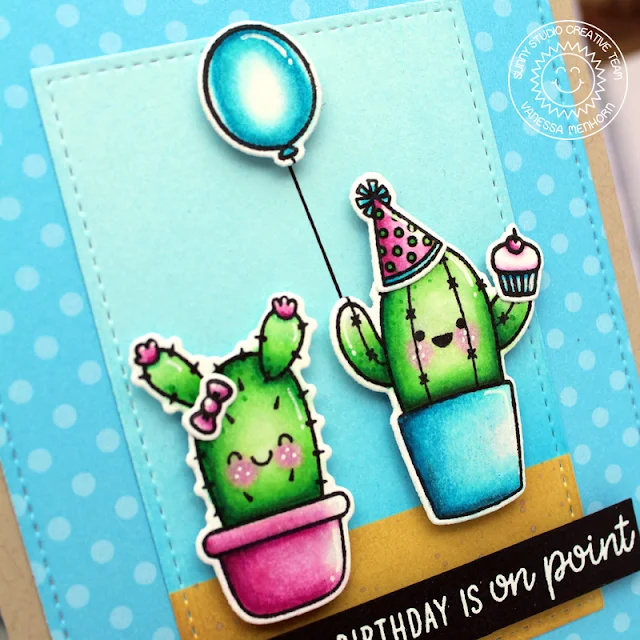
Sunny Studio Stamps: Looking Sharp Stitched Rectangle Dies Cactus Themed Punny Birthday Card by Vanessa Menhorn

I first die-cut the stitched rectangle from blue polka dot paper and adhered it to the Kraft card base. Now I die-cut a smaller rectangle from white cardstock, inked the bottom part with Brushed Corduroy and the top part with Tumbled Glass Distress Oxide inks and adhered it. 

These are the sets I used today:
Looking Sharp stamps + dies (cacti, hat, bow, sentiment)
Oceans of Joy stamps + dies (balloon)
Party Pups stamps + dies (cupcake)
Stitched Rectangle Dies
Dots & Stripes Pastels Paper

Sunny Studio Stamps: Looking Sharp Stitched Rectangle Dies Cactus Themed Punny Birthday Card by Vanessa Menhorn

I stamped the images onto white cardstock, colored them with Copic markers, die-cut the elements with the matching dies and adhered everything to the card with foam tape. Finally, I stamped and heat-embossed the sentiment onto a strip of black cardstock and adhered it

This set is such fun! Love the cute images. Thanks for visiting today!

Sunny Studio Supplies Used:

Oceans of Joy Dies
Oceans of Joy Dies
Shop at:
Sunny Studio
Oceans of Joy Stamps
Shop at:
Sunny Studio
Looking Sharp Stamps
Shop at:
Sunny Studio
Looking Sharp Dies
Looking Sharp Dies
Shop at:
Sunny Studio
Stitched Rectangle Dies
Shop at:
Sunny Studio
Party Pups Stamps
Party Pups Stamps
Shop at:
Sunny Studio
Party Pups Dies
Party Pups Dies
Shop at:
Sunny Studio
Dots & Stripes Pastels 6x6 Paper
Shop at:
Sunny Studio
Scenic Route Stamps
Scenic Route Stamps
Shop at:
Sunny Studio
Scenic Route Dies
Scenic Route Dies
Shop at:
Sunny Studio
Winter Scenes Dies
Winter Scenes Dies
Shop at:
Sunny Studio

Wednesday, April 28, 2021

Outback Critters Cards with Julia and Franci

Hey crafty friends! It’s Julia here with a fun scene card! I started by stamping out my images from the adorable new Outback Critters, as well as from the previously released Feeling Froggy (flies and dragonfly) and A Bird's Life and colored them in using Copic Markers.

Sunny Studio Stamps: Outback Critters A Bird's Life Slimline Dies Card by Julia Englich

I ink blended the sky using a cloud stencil and then I die cut two grassy hills using the Slimline Nature Borders. I ink blended those as well and added splatters and a few bushels of grass from the Chickie Baby stamp set for added interest. I heat embossed the sentiment from Outback Critters in white onto black cardstock and cut it into a little banner.

Sunny Studio Stamps: Outback Critters A Bird's Life Slimline Dies Card by Julia Englich

After that, I added my background to a card base and layered the grassy hills on top. I then die cut the Comic Strip Everyday die out of white cardstock, snipped off the inside pieces and added it on top of my background and hills. I adhered all my cute images using liquid glue and foam squares. Finally, I added quite a few white gel pen highlights. I really hope you like it!

Inks used: Salty Ocean, Shabby Shutters, Peeled Paint, Forest Moss Distress Oxide Copic Markers used: E50, E51, E53, E55, E57; W0, W1, W3, W5, W7, W9; B00, B02, B05; R11, R14, R17; Y000, Y11, Y13, Y15; YG01, YG93, YG95, YG97, G17.

Thank you so much for spending time with me today! Have a wonderful day!

---------------------------------------------

Hello everyone! It's Franci here with a fun card showcasing the new Outback Critters set. "Snappy Birthday" how much fun is that?! Ha!

Sunny Studio Stamps: Outback Critters Stitched Rectangle Dies Card by Franci Vignoli

First of all I die cut 2 stitched rectangles out of white cardstock and patterned paper from the Summer Splash paper set. Then I linked the center of the white rectangle with a soft yellow ink and stamped my sentiment at the bottom.

I stamped, colored with my Copics and die cut all my images, added some little hearts from the new Happy Hamster set and glued everything down with foam adhesive.

Sunny Studio Stamps: Outback Critters Stitched Rectangle Dies Card by Franci Vignoli

I glued my colorful panel to the front of my card with liquid glue and added the decorated one with more foam adhesive. Finally I added some googly eyes to my crocodiles and some Sky Blue Jewels.

Thanks a lot for stopping by. Have a lovely day!

Sunny Studio Supplies Used:

A Bird's Life Stamps
Shop at:
Sunny Studio
A Bird's Life Dies
A Bird's Life Dies
Shop at:
Sunny Studio
Happy Hamsters Stamps
Shop at:
Sunny Studio
Happy Hamsters Dies
Happy Hamsters Dies
Shop at:
Sunny Studio
Outback Critters Stamps
Shop at:
Sunny Studio
Outback Critters Dies
Shop at:
Sunny Studio
Stitched Rectangle Dies
Shop at:
Sunny Studio
Comic Strip Everyday Dies
Shop at:
Sunny Studio
Summer Splash 6x6 Paper
Shop at:
Sunny Studio
Chickie Baby Stamps
Chickie Baby Stamps
Shop at:
Sunny Studio
Chickie Baby Dies
Chickie Baby Dies
Shop at:
Sunny Studio
Slimline Nature Borders
Shop at:
Sunny Studio
Feeling Froggy Stamps
Shop at:
Sunny Studio
Feeling Froggy Dies
Feeling Froggy Dies
Shop at:
Sunny Studio

Tuesday, April 27, 2021

Cupcake Shaped Die Focused Cards with Kavya and Isha

Hi folks, Kavya here. I am back on the blog with another fun card using the new Cupcake Shape Dies. For the past few weeks, I have been finding coloring very therapeutic. So, I jumped at the opportunity to color this gorgeous die from the new release! This set comes with pretty much everything (from sprinkles to cherries!) to make a delicious cupcake and all of these elements can be combined in endless ways to create a unique cupcake each time! 

Sunny Studio Stamps: Cupcake Shaped Die Candy Shoppe Inside Greetings Birthday Card by Kavya

I first started off by die cutting the cupcake and the cherry out of white cardstock. I colored all of these elements using Prismacolors and alcohol makers. My sister is a huge fan of The Scran Line and she suggested that I use some of his cupcakes as inspiration. I went with traditional colors but if you want to try out some weird and fun color combos, I suggest you check out his IG … you won’t be disappointed!  Later, I die cut the sprinkles using pink cardstock and then colored on top to make them a bit more realistic! 

Sunny Studio Stamps: Cupcake Shaped Die Candy Shoppe Inside Greetings Birthday Card by Kavya

I wanted to turn this into a card so I die cut the cupcake outline out of white cardstock twice attached the two using a brad fastener/split pins. Now, I can rotate the cupcake to reveal a message inside! Finally, I adhered the cupcake on top and combined various sentiments from Inside Greetings Birthday and Candy Shoppe stamp sets to stamp a message for a special friend. 

I hope you liked this fun yet healthy (I mean it's zero calories right?) cupcake! Be sure to check back tomorrow for more inspiration!

--------------------------------------------

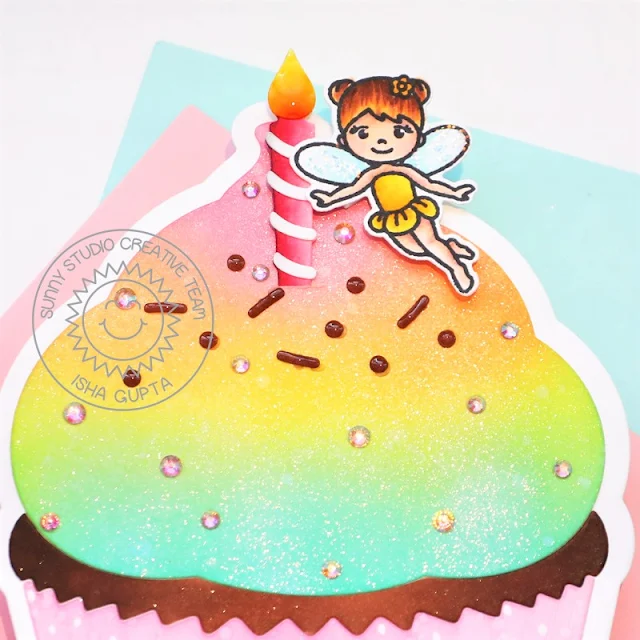
Hello everyone! Isha here, sharing a shaped card with you. I love creating shaped cards and this new Cupcake Shaped Die is the perfect size. You can adhere it to a standard US card size or create a shaped card perfect to go in the US size envelope.

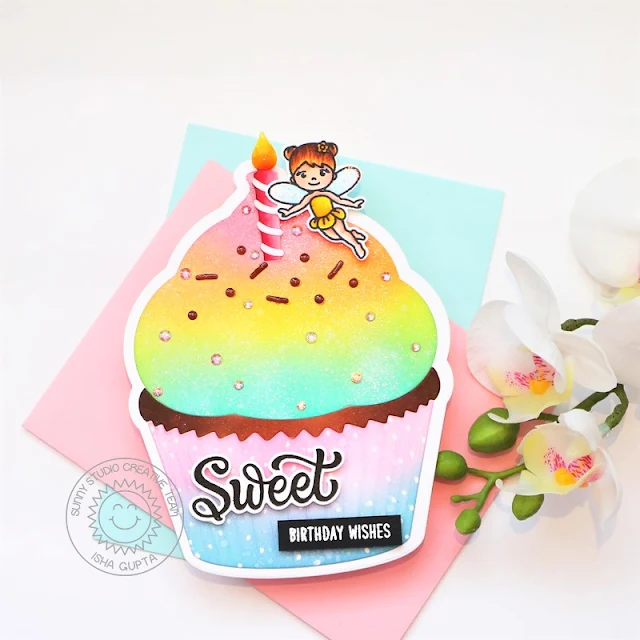
Sunny Studio Stamps: Cupcake Shaped Die Candy Shoppe Garden Fairy Birthday Card by Isha Gupta

To start, I die-cut two white cupcake base panels to create the card base. Score one of the pieces from top to make the shape card and adhere this to the back of the front panel . The score line will help the card to stand.

Die-cut all the parts of the cupcake. I decided to make rainbow color frosting as I recently made a rainbow layered cake for my daughters birthday :) Spray this with Imagine sparkle spray. I made the cake part chocolate by coloring it with brown copic markers. I then sponged some inks to create the wrapper and added some white dots to keep the whimsical theme going :)

Sunny Studio Stamps: Cupcake Shaped Die Candy Shoppe Garden Fairy Birthday Card by Isha Gupta

I then colored the candle using Copic markers. Adhere the flame and add some glossy accents. Color the sprinkles in chocolate, add glossy accent and adhere to the frosting.

Stamp the fairy from the Garden Fairy Stamp set, color, die-cut using the coordinating dies. Adhere to the cupcake as if the fairy is putting the candle onto the cake. Stamp the sentiment from the Candy Shoppe stamp set, die-cut the word Sweet using the coordinating dies. Adhere to the card. To finish, I added some Iridescent Jewels to the frosting.

Try creating shaped cards with any supplies you might have and tag Sunny studio on social media. We would love to see your creations. Thanks for dropping by.

Sunny Studio Supplies Used: 

Candy Shoppe Stamps
Candy Shoppe Stamps
Shop at:
Sunny Studio
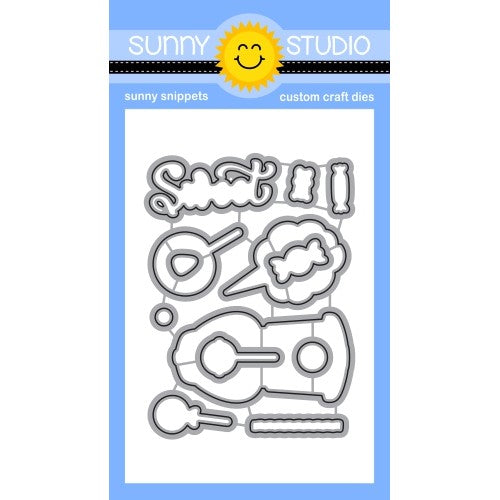
Candy Shoppe Dies
Candy Shoppe Dies
Shop at:
Sunny Studio
Cupcake Shape Dies
Cupcake Shape Dies
Shop at:
Sunny Studio
Garden Fairy Stamps
Garden Fairy Stamps
Shop at:
Sunny Studio
Garden Fairy Dies
Garden Fairy Dies
Shop at:
Sunny Studio
Inside Greetings Birthday
Shop at:
Sunny Studio