Showing posts with label North Pole. Show all posts

Monday, November 3, 2025

Santa Claus Lane & North Pole Christmas Cards with Mendi

Hello and welcome! This is Mendi here today, popping in to share some Christmas cards featuring our Santa Claus Lane Stamps and North Pole Stamps.

Sunny Studio Holiday Christmas Cards using Santa Claus Lane, North Pole & Reindeer Games Clear Stamps & Cutting Craft Dies

My first card today, showcasing our Santa Claus Lane Stamps, is a rare creation for me because it utilizes only a single stamp set. I blended three large dots onto my card front using Salvaged Patina, Kitsh Flamingo, and Twisted Citron Distress inks to create a way to ground three mini scenes created with the images from the set. First, I have Santa holding a candy cane going down the chimney. My next scene has the other Santa from the set next to a decorated Christmas tree using the included ornaments, star, and gifts. My last scene along the bottom of my card has Santa standing next to the fireplace with four stockings hanging from the mantel. As a finishing touch, I stamped a greeting from the set in my card's top, right corner.

Sunny Studio Santa by Holiday Tree & Fireplace Chimney Christmas Card using Santa Claus Lane Clear Stamps & Metal Craft Dies

For my second card I used Mrs. Claus, Santa in a new pose, two elves, and the sign from our 
North Pole Stamps, with the reindeer from Reindeer Games Stamps, and the sleigh and bags of toys from the Santa Claus Lane Stamps. To set the mood of the North Pole in my background, I inked my sky using Salty Ocean Distress Ink, added snowflakes with a white gel pen, and then layered in the snowy fir trees and hills using the Scene Route Stamps. Lastly, I stamped the "Spreading Christmas Cheer" sentiment from the North Pole set onto a thin pennant strip from the Notebook Photo Corners Dies.

Sunny Studio Santa & Elves Holiday Christmas Card using North Pole, Reindeer Games & Scenic Route Clear Stamps & Craft Dies

That wraps up my projects for today. Thanks so much for hanging out with me. I hope I've inspired you to spread a little happiness by sending out a card to someone you love. ðŸ’›

Don't forget to check out the Santa Claus Lane Stamps and North Pole Stamps in our online shop, which are both currently on sale!

Also, please check out all the card ideas using these sets on each of their product pages. I always make sure to upload tons of card ideas following the product image, so there are lots of ideas to scroll through, organized by set.

Supplies Used: 

Santa Claus Lane Stamps
Shop at:
Sunny Studio
Santa Claus Lane Dies
Shop at:
Sunny Studio
Scenic Route Stamps
Scenic Route Stamps
Shop at:
Sunny Studio
Scenic Route Dies
Scenic Route Dies
Shop at:
Sunny Studio
North Pole Stamps
North Pole Stamps
Shop at:
Sunny Studio
North Pole Dies
North Pole Dies
Shop at:
Sunny Studio
Reindeer Games Stamps
Shop at:
Sunny Studio
Reindeer Games Dies
Reindeer Games Dies
Shop at:
Sunny Studio
Notebook Photo Corners Dies
Shop at:
Sunny Studio
PinkFresh Studio Blending Brushes
Shop at:
Sunny Studio
Versafine Onyx Black Ink
Shop at:
Sunny Studio
Zig Chisel Tip Glue Pen
Shop at:
Sunny Studio

Thursday, October 16, 2025

Reindeer Games Card with Marine

Hello crafty friends, Marine here, I'm so happy to be back with this cheerful shaker card showcasing Santa and the reindeers getting ready for the holiday season. As very often I picked images from different sets to create a nice and cute mix & match scene, and as always everything is listed down below.

Sunny Studio Stamps: Reindeer Games Winter Themed Christmas Card by Marine Simon (featuring North Pole, Rounded Rectangle Window Dies, Rounded Rectangle Mat Dies)

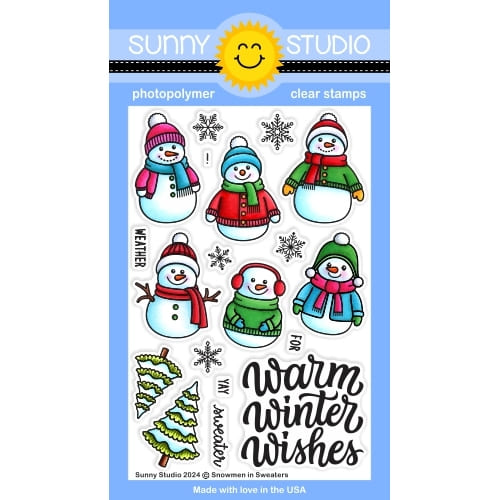
So, speaking of which, I started off by stamping my images on 110lb Neenah solar white cardstock using an alcohol marker friendly black ink. I used the coordinating dies to cut them all, and then colored everything using my Ohuhu markers and Graph'it brush markers. Here is a detailed list of the stamp sets I used: • North Pole - Santa, north pole sign, nice list • Reindeer Games - reindeers • Snowmen In Sweaters - trees, snowflakes • Santa Claus Lane - presents, sack.

I added highlights and details to the images with a white gel pen, applied white blizzard nuvo drops to the trees to make the snow on them sparkle, and then moved on to the shaker panel and cut all the pieces I needed to build it. First, I cut a Rounded Rectangle Mat panel out of an All Is Bright turquoise paper using the largest die from the set. 

Sunny Studio Stamps: Reindeer Games Winter Themed Christmas Card by Marine Simon (featuring North Pole, Rounded Rectangle Window Dies, Rounded Rectangle Mat Dies)

Next I picked the fourth smallest Rounded Rectangle Window die and cut two openings out of my turquoise panel. And using that same fourth smallest die again, I cut two panels out of white cardstock and cut a wavy border out of each of those white panels to create two snowy borders. For the background of my shaker, I used the largest Rounded Rectangle Mat die again to cut a Joyful Holiday polka dot panel.

Before assembling my shaker panel, I added texture to the different pieces. I mixed copic opaque white ink with water and used a slim brush to add white splatters to the turquoise panel and to the polka dot panel, I mixed liquid stardust with water and added sparkling splatters to the snowy borders, and when my turquoise panel was dry, I stamped "Have a super jolly Christmas" from Reindeer Games at the very bottom using black ink.

Sunny Studio Stamps: Reindeer Games Winter Themed Christmas Card by Marine Simon (featuring North Pole, Rounded Rectangle Window Dies, Rounded Rectangle Mat Dies)

I attached a piece of acetate at the back of my turquoise panel using liquid glue, and still at the back of my panel, I attached foam strips around each opening and on the rest of the panel as well. I poured twenty White Snowflake confetti inside each opening and tiny clear crystal pieces as well, peeled all the backing papers off the foam strips, and then attached my polka dot panel to totally close my shaker panel. Back to the front of my panel, I stuck a snowy border at the bottom of each opening using liquid glue, attached my shaker panel to a 5,5 x 4,25 inches white panel and then to a white card base. Next I finally attached my images using 1mm and 2mm foam squares. 

And that's it! I hope that you like this lovely holiday shaker card! Thanks so much for stopping by, and see you next week!

Sunny Studio Supplies Used:

Santa Claus Lane Stamps
Shop at:
Sunny Studio
Santa Claus Lane Dies
Shop at:
Sunny Studio
North Pole Stamps
North Pole Stamps
Shop at:
Sunny Studio
North Pole Dies
North Pole Dies
Shop at:
Sunny Studio
All Is Bright Paper
All Is Bright Paper
Shop at:
Sunny Studio
Reindeer Games Stamps
Shop at:
Sunny Studio
Reindeer Games Dies
Reindeer Games Dies
Shop at:
Sunny Studio
Joyful Holiday Paper
Shop at:
Sunny Studio
Snowmen in Sweaters Stamps
Shop at:
Sunny Studio
Snowmen in Sweaters Dies
Shop at:
Sunny Studio
Rounded Rectangle Mat Dies
Shop at:
Sunny Studio
Rounded Rectangle Window Dies
Shop at:
Sunny Studio

Thursday, December 12, 2024

Diagonal & Straight Stripes Stencil Focused Card with Marine

Hello crafty friends, Marine here, I'm so happy to be back on the blog with this holiday card featuring the mouse family again. This time, they're back for a Christmas adventure, whether they're busy decorating the tree, or enjoying some quiet time by the fireplace, or delivering presents larger than the chimney pipe! I love how this slimline card turned out, and how we get three mini scenes on one single card.

Sunny Studio Stamps: Diagonal & Straight Stripes Stencil Focused Cozy Christmas Card by Marine Simon (featuring Santa Claus Lane, Merry Mice, North Pole, Christmas Critters)

As very often, I started off by stamping all the images on 110lb Neenah solar white cardstock using an alcohol marker friendly black ink. I cut them all using the matching dies, and colored everything using my Ohuhu markers and my Graph'it brush markers.

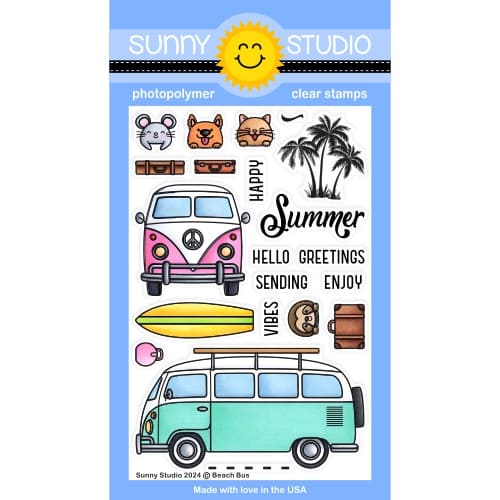
Here is a detailed list of the stamp sets I used: • Cozy Christmas - armchairs, Christmas tree, cushions, lamp, glass of milk, presents • Santa Claus Lane - fireplace, chimney, stockings, sleigh, presents, baubles • Christmas Critters - mouse, reindeer antlers • Lazy Christmas - large presents • Merry Mice - mice, hat • Beach Bus - mouse • North Pole - cookie plate, presents • Harvest Mice - mouse.

Sunny Studio Stamps: Diagonal & Straight Stripes Stencil Focused Cozy Christmas Card by Marine Simon (featuring Santa Claus Lane, Merry Mice, North Pole, Christmas Critters)

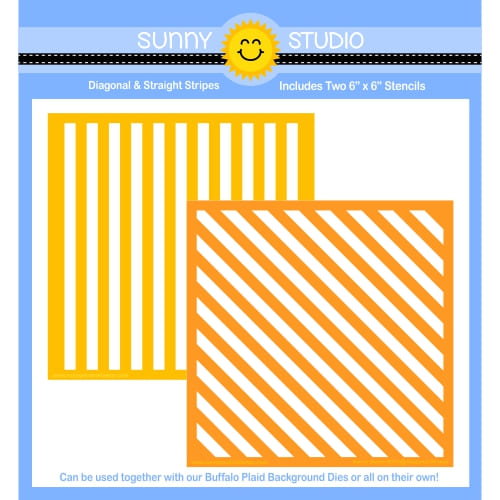
Next I cut an 8,5 x 3,5 inches Strathmore bristol smooth panel that I divided in different sections, from bottom to top: floor, wallpaper, roof and sky. I started off with the floor, and created a base first using antique linen oxide ink. And to make a parquet floor, I used the Straight Stripes stencil along with vintage photo oxide ink to create a wood plank pattern. For the wallpaper, I did a base first using saltwater taffy oxide ink, and I used the Diagonal Stripes stencil along with worn lipstick oxide ink to add a nice pattern to my wall. I kept the roof simple, and did a 1/4" separation stripe using hickory smoke and black soot oxide inks. And finally I did the sky using salty ocean, prize ribbon and black soot oxide inks.

Sunny Studio Stamps: Diagonal & Straight Stripes Stencil Focused Cozy Christmas Card by Marine Simon (featuring Santa Claus Lane, Merry Mice, North Pole, Christmas Critters)

As always, I added texture to my background. I mixed some vintage photo oxide ink with water, and added splatters to the parquet floor. Mixed some worn lipstick oxide ink with water, and added splatters to the wall. Splattered water on the sky and dried the paper with a paper towel. Mixed some chipped sapphire oxide ink with water, added more splatters to the sky, and did the same with liquid stardust. Finally, I mixed some copic opaque white ink with water, and added white splatters all over the panel.

Sunny Studio Stamps: Diagonal & Straight Stripes Stencil Focused Cozy Christmas Card by Marine Simon (featuring Santa Claus Lane, Merry Mice, North Pole, Christmas Critters)

Once the panel was dry, I white heat embossed "Merry Christmouse" from Merry Mice at the very bottom, and attached all the images using 1mm and 2mm foam squares. Added highlights and details to the images using a white gelly roll pen, a dot of glossy accents on the berries on the wall and lights in the tree, and to make the snow on the chimney sparkle, I added liquid glue, sprinkled fine glitter on the glue, let it dry and removed the excess of glitter with a fluffy brush.

And that's it! Thanks so much for stopping by, and see you next time!

Sunny Studio Supplies Used:

Christmas Critters Stamps
Shop at:
Sunny Studio
Christmas Critters DIes
Shop at:
Sunny Studio
Santa Claus Lane Stamps
Shop at:
Sunny Studio
Santa Claus Lane Dies
Shop at:
Sunny Studio
Merry Mice Stamps
Merry Mice Stamps
Shop at:
Sunny Studio
Merry Mice Dies
Merry Mice Dies
Shop at:
Sunny Studio
Harvest Mice Stamps
Harvest Mice Stamps
Shop at:
Sunny Studio
Harvest Mice Dies
Harvest Mice Dies
Shop at:
Sunny Studio
North Pole Stamps
North Pole Stamps
Shop at:
Sunny Studio
North Pole Dies
North Pole Dies
Shop at:
Sunny Studio
Cozy Christmas Stamps
Shop at:
Sunny Studio
Cozy Christmas Dies
Cozy Christmas Dies
Shop at:
Sunny Studio
Beach Bus Stamps
Beach Bus Stamps
Shop at:
Sunny Studio
Beach Bus Dies
Beach Bus Dies
Shop at:
Sunny Studio
Diagonal & Straight Stripes Stencils
Shop at:
Sunny Studio