Showing posts with label Catch A Wave Dies. Show all posts

Friday, July 11, 2025

Mermaid Kisses & Oceans of Joy Cards with Mendi

Hello and welcome! This is Mendi here today, popping in to share some sea-themed cards for summer using our Mermaid Kisses Stamps and Oceans of Joy Stamps.

Sunny Studio Under The Sea Summer Cards using Mermaid Kisses & Oceans of Joy Clear Craft Stamps & Catch A Wave Cutting Dies

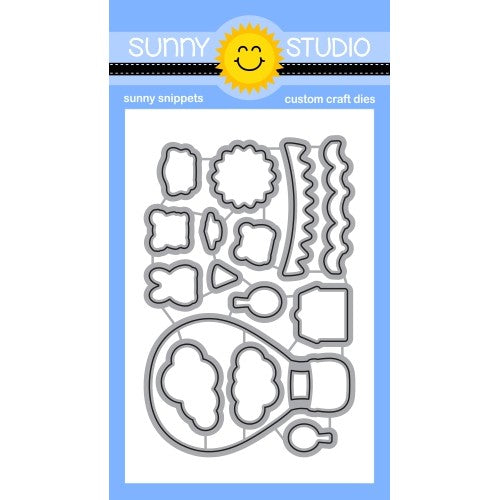
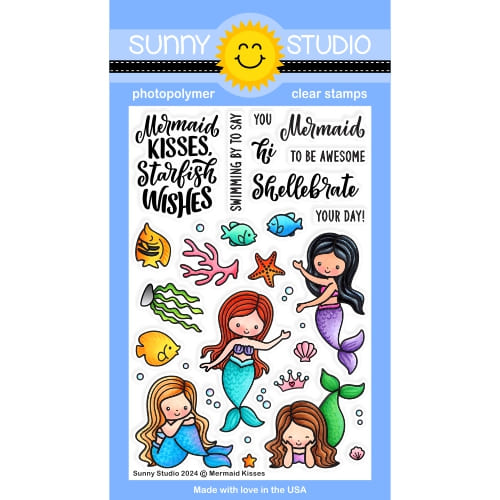
For my first card using the Mermaid Kisses Stamps, I paired the mermaids with the dolphin and the octopus from our Oceans of Joy Stamps, the palm trees from our Sending Sunshine Stamps and Ocean View Stamps, and the island from our Tropical Scenes Stamps. To create the waves to tuck my critters between, I cut four layers using our Catch A Waves Dies. I added the sunrays behind my island, using a soft lilac print from our Spring Sunburst Paper pack, and stamped my punny birthday greeting using a sentiment from the Mermaid Kisses set.

Sunny Studio Shellebrate Your Day Birthday Card using Mermaid Kisses & Oceans of Joy Clear Craft Stamps & Catch A Wave Dies

For my second card, I started with a sparkly background I originally created for the posts shared HERE and HERE. This was my first attempt where I had some of the glitter gel seep below the stencil I had made with our Frilly Frames Lattice Dies. However, always the saver, I hated to throw it away, so I held onto it for six years "just in case." Well, I finally put it to good use, hiding most of my boo-boos behind the giant whale (and turtle) from our Oceans of Joy Stamps. It adds such a pretty sparkle to the scene in person! I added coral and kelp to my sea floor using images from our Best Fishes Stamps, Magical Mermaids Stamps, and the Mermaid Kisses Stamps. Lastly, I added the mermaid and sentiment from the Mermaid Kisses, stamping it onto a pennant strip from the Notebook Photo Corner Dies.

Sunny Studio Swimming By To Say Hi Whale Card using Mermaid Kisses & Oceans of Joy Clear Stamps & Frilly Frames Lattice Dies

That wraps up my projects for this morning. I hope I've inspired you in your own cardmaking and that you spread a little happiness by sending out a card to a loved one today. 😊

Don't forget to check out our Oceans of Joy Stamps, Best Fishes Stamps, Magical Mermaids Stamps, and Catch A Waves Dies in our online shop, which are all currently on sale!

Also, please check out all the card ideas using these sets on each of their product pages. I always make sure to upload tons of card ideas following the product image so there are lots of ideas to scroll through there organized by set. ðŸ’›

Supplies Used:

Magical Mermaid Stamps
Shop at:
Sunny Studio
Magical Mermaid Dies
Shop at:
Sunny Studio
Oceans of Joy Stamps
Shop at:
Sunny Studio
Oceans of Joy Dies
Oceans of Joy Dies
Shop at:
Sunny Studio
Spring Sunburst 6x6 Paper
Shop at:
Sunny Studio
Frilly Frames Lattice Dies
Shop at:
Sunny Studio
Catch A Wave Dies
Catch A Wave Dies
Shop at:
Sunny Studio
Best Fishes Stamps
Best Fishes Stamps
Shop at:
Sunny Studio
Best Fishes Dies
Best Fishes Dies
Shop at:
Sunny Studio
Tropical Scenes Stamps
Shop at:
Sunny Studio
Tropical Scenes Dies
Shop at:
Sunny Studio
Ocean View Stamps
Ocean View Stamps
Shop at:
Sunny Studio
Ocean View Dies
Ocean View Dies
Shop at:
Sunny Studio
Notebook Photo Corners Dies
Shop at:
Sunny Studio
Mermaid Kisses Stamps
Shop at:
Sunny Studio
Mermaid Kisses Dies
Mermaid Kisses Dies
Shop at:
Sunny Studio
PinkFresh Studio Blending Brushes
Shop at:
Sunny Studio
Tsukineko Jumbo Dauber
Shop at:
Sunny Studio
Versafine Onyx Black Ink
Shop at:
Sunny Studio

Tuesday, July 8, 2025

Stitched Arch Die Focused Card with Amanda

Hey crafters! It’s Amanda here! Today, I’m sharing this fun summer card and how I made it! Keep reading to see all the products I used, Copic markers, and how I put it all together!

Sunny Studio Stamps: Stitched Arch Die Focused Summer Card by Amanda Fitterer (featuring Catch A Wave Dies, Kiddie Pool, Ocean View)

The first step to creating this card is to trim a piece of white cardstock to 4.25”x5.5”. Next, using some low tack tape, secure the largest of the Stitched Arch Dies in the center of the panel. Set this panel aside for later.

Next, grab 2 pieces of blue or teal cardstock for the waves. Using the Catch a Wave Dies, create 2 waves that are approximately 4” wide. Glue the waves together and then place foam tape behind them.

On an A2 card base, glue a piece of red cardstock directly to the front of it. Then, attach your waves with the foam tape. Place foam tape only on the upper portion of the arch panel.  Put glue on the bottom portion where it touches the waves. This will keep the arch panel level.

Grab your Ocean View and Kiddie Pool Stamp Sets, a MISTI or stamping platform, and alcohol marker-friendly black ink. Stamp the images with the black ink and then get your Copic markers ready!

Here are the Copic marker colors I used to color this scene:

Girl:
Hair: E53, E55, E57, E59
Skin: E00, E11, E13
Mouth: R37, R59
Suit: RV23, RV25, RV29
Goggles: B02, B06 (B21 for the lenses)

Crab: RV23, RV25, Rv29, R46

Rocks: N4, N5, N6, N8

Plants & Shell: 
YR000, YR12, YR15, YR16, YR18
Y32, Y35, Y38
E00, E13
BG11, BG13, BG15

Sunny Studio Stamps: Stitched Arch Die Focused Summer Card by Amanda Fitterer (featuring Catch A Wave Dies, Kiddie Pool, Ocean View)

Once coloring is complete, trim the images out with the coordinating dies or fussy cut them with scissors. Add some white highlights and dots with a white Gelly Roll pen.

On a small piece of black cardstock, stamp the sentiment with a WOW embossing pad, apply white embossing powder, and then melt the powder with a heat tool. Trim the sentiment into a strip and then create a flag/banner edge with scissors.

Glue the rocks and plants directly to the waves, having the edges poke out in front of the arch. Then, put 3D foam squares behind the girl, crab, shell, and sentiment strip and add them to the scene. Finally, glue a few of the Clear Jewels around the card to complete the card!

What a fun layout for a card using that Stitched Arch Die! I hope you enjoyed reading about this card! Come back tomorrow for more crafty inspo! 

Sunny Studio Supplies Used:

Catch A Wave Dies
Catch A Wave Dies
Shop at:
Sunny Studio
Stitched Arch Dies
Stitched Arch Dies
Shop at:
Sunny Studio
Ocean View Stamps
Ocean View Stamps
Shop at:
Sunny Studio
Ocean View Dies
Ocean View Dies
Shop at:
Sunny Studio
Kiddie Pool Stamps
Kiddie Pool Stamps
Shop at:
Sunny Studio
Kiddie Pool Dies
Kiddie Pool Dies
Shop at:
Sunny Studio

Wednesday, August 7, 2024

Mermaid Kisses Card with Tina

Hello crafters, it’s Tina and today I am creating an underwater scene with one of the cute mermaids from the Mermaid Kisses stamp and die set.

Sunny Studio Stamps: Mermaid Kisses Ocean Themed Birthday Card by Tina Henkens (featuring Frilly Frame Dies, Stitched Arch Dies, Catch A Wave Dies, Tropical Scenes, Dotted Diamond Dies)

I started with a white card base and added a layer of white card stock which was cut with the outer die from Frilly Frames Stripes die and embellished with the Dotted Diamonds Portrait dieThe card panel consists of a Stitched Arch cut from white paper, divided into three wave parts (Catch A Wave dies) and colored with blue inks from my stash. After cutting another arch, I used this one as my base to attach the wave parts. Then it was time to stamp the sentiment from Mermaid Kisses directly to the top of this panel using Versafine Onyx Black ink.

I wanted my mermaid to rest on the sea bottom surrounded by beautiful corals so I stamped the ocean scene from Tropical Scenes and used the matching die to cut it out. To give it the ‘arch shape’ I used the largest Stitched Arch once more. After stamping and die cutting the mermaid and cute fish from Mermaid Kisses, I used my Copics to color all the images including the coral scene in vibrant tones.

Sunny Studio Stamps: Mermaid Kisses Ocean Themed Birthday Card by Tina Henkens (featuring Frilly Frame Dies, Stitched Arch Dies, Catch A Wave Dies, Tropical Scenes, Dotted Diamond Dies)

Next, I added foam tape to this ocean border and mounted it to the bottom of the waves panel. Thereafter, this panel was adhered to the white diamond background. Finally, I added the fish, mermaid with crown, starfish, and seashells to the scene. I love finishing a card with some embellishments and today I chose the beautiful Iridescent Jewels.

Thank you for joining me and I am looking forward to seeing your gorgeous creations with these sweet mermaids! Happy crafting!

Sunny Studio Supplies Used:

Frilly Frames Stripes Die
Shop at:
Sunny Studio
Catch A Wave Dies
Catch A Wave Dies
Shop at:
Sunny Studio
Tropical Scenes Stamps
Shop at:
Sunny Studio
Tropical Scenes Dies
Shop at:
Sunny Studio
Stitched Arch Dies
Stitched Arch Dies
Shop at:
Sunny Studio
Dotted Diamond Portrait
Shop at:
Sunny Studio
Mermaid Kisses Stamps
Shop at:
Sunny Studio
Mermaid Kisses Dies
Mermaid Kisses Dies
Shop at:
Sunny Studio

Sunday, May 5, 2024

Sliding Window Die Focused Card with Cathy

Hey friends! Cathy here today and I’m excited to share an ocean themed card using the Sliding Window Dies!

Sunny Studio Stamps: Sliding Window Die Focused Ocean Themed Card by Cathy Chapdelaine (featuring Catch A Wave Dies, Fintastic Friends, Ocean View, Mermaid Kisses)

To make this fun card, I started with the base panel. I cut a piece of 110lb white cardstock 4 1/4" x 5 1/2" and inked the top half of the cardstock using a cloud stencil with Spun Sugar Distress ink. (I have several layers of ocean scene adhered to the window portion, so a heavier weight cardstock added extra stability). I then cut a post-it note in a wavy pattern, masked the bottom 1” of the panel and inked the ocean with Tumbled Glass, Salvaged Patina and Mermaid Lagoon Distress inks. I splattered a little water with a fan brush and once dry, masked the ocean and inked the bottom 1” with Antique Linen Distress ink. I then heat embossed a sentiment from the Mermaid Kisses Stamps with black embossing powder on the cloud portion approximately 1” from the top and right sides. With the inking complete, I die-cut the center of the panel with the Sliding Window Dies and the center of the top edge with the small semi-circle die included with these dies.

Next, I cut a piece of white cardstock 3 1/4" x 4 7/8” for the pull-out panel that opens the sliding window. I inked this piece with a cloud stencil using Spun Sugar Distress ink, die-cut a hole protector from pink cardstock and adhered it to the center of the top edge. I punched a hole through the center of the hole protector and tied off a piece of teal cording.

It was now time to construct the sliding window mechanism. I adhered the small flap of the sliding window to the bottom of the pink cloud panel. (Video instructions for this can be found in the product details on the Sunny website).

Sunny Studio Stamps: Sliding Window Die Focused Ocean Themed Card by Cathy Chapdelaine (featuring Catch A Wave Dies, Fintastic Friends, Ocean View, Mermaid Kisses)

For the panel revealed under the window, I cut a piece of white cardstock 4 1/4” x 5 1/2", masked the bottom 1” of the cardstock and inked the ocean using the same Distress inks as before. I then inked the sand with Antique Linen Distress ink. I heat embossed a sentiment from the Mermaid Kisses Stamps with black embossing powder approximately 2” from the bottom of the cardstock. I adhered the sliding window panel to this bottom panel and then adhered the combined piece to an A2 card front.

For my ocean scene, I cut 3 pieces of white cardstock for the waves on the sliding panel (2 1/4" x 4 1/4" and 2 pieces 1 1/2" x 4 1/4"). I die-cut the top edge of each piece using the Catch A Wave Dies and inked the smaller pieces with Tumbled Glass Distress ink. I also splattered a little water on these pieces. On the larger piece, I masked the very bottom, inked the ocean and then inked the bottom sand portion. I overlapped/adhered the small wave pieces behind the large wave piece. I then adhered the waves to the sliding window on the card front making sure to only apply adhesive on the window portion itself so the whole scene slides upward.

To finish, I stamped all images on Neenah Classic Crest 80lb solar white cardstock and colored them with Copics. I fussy cut all images as I used portions of some images to create this scene.

I used the following stamps:
Mermaid Kisses Stamps

Fintastic Friends Stamps

Ocean View Stamps


I hope you enjoyed my interactive mermaid scene and thanks for stopping by today! For more inspiration, please visit my blog www.inkredibleadventures.com and you can also find me on Instagram as @cathy.chapdelaine.


Sunny Studio Supplies Used:

Sliding Window Dies
Sliding Window Dies
Shop at:
Sunny Studio
Catch A Wave Dies
Catch A Wave Dies
Shop at:
Sunny Studio
Fintastic Friends Stamps
Shop at:
Sunny Studio
Fintastic Friends Dies
Shop at:
Sunny Studio
Ocean View Stamps
Ocean View Stamps
Shop at:
Sunny Studio
Ocean View Dies
Ocean View Dies
Shop at:
Sunny Studio
Mermaid Kisses Stamps
Shop at:
Sunny Studio
Mermaid Kisses Dies
Mermaid Kisses Dies
Shop at:
Sunny Studio