Showing posts with label Stitched Hearts. Show all posts

Saturday, January 27, 2024

Treat Bag Topper Gift with Cathy

Hey friends! Cathy here today sharing a fun Valentine's gift using the Treat Bag Topper Dies. These dies are perfect for any occasion and add such a great touch to a little gift!

Sunny Studio Stamps: Treat Bag Topper Die Focused Valentine's Day Treat Bag by Cathy Chapdelaine (featuring Sprawling Surfaces, Truckloads Of Love, Scalloped Heart Dies, Stitched Heart Dies, Loopy Letter Dies, Dotted Diamond Dies)

I started by die-cutting the topper from white cardstock and then die-cutting it with the Dotted Diamond Landscape Die for a little texture. Since I chose a panda in my little scene, I die-cut the topper again from black cardstock and overlapped/adhered the white and black toppers together.

Next, I die-cut the stitched rectangle in the dies from cream cardstock and inked it lightly with Saltwater Taffy Distress ink. I also splattered a little watered down white and black paints with a fan brush. I then stamped the cobblestone stamp from the Sprawling Surfaces Stamps on Neenah Classic Crest 80lb solar white cardstock and colored it with Copics. I used the same stitched rectangle die and die-cut the top portion of the stamp. I used scissors and cut along the top edge of the cobblestone and adhered it to the bottom of the cream stitched rectangle.

Sunny Studio Stamps: Treat Bag Topper Die Focused Valentine's Day Treat Bag by Cathy Chapdelaine (featuring Sprawling Surfaces, Truckloads Of Love, Scalloped Heart Dies, Stitched Heart Dies, Loopy Letter Dies, Dotted Diamond Dies)

Next, I stamped the panda, truck, hearts and heart balloons on Neenah Classic Crest 80lb solar white cardstock, colored them with Copics and die-cut them using the coordinating dies.

I used the following stamps/dies:
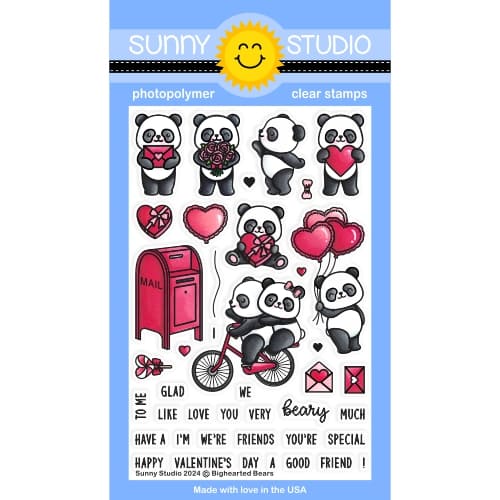
Bighearted Bears Stamps/Dies (heart balloons)

Balloon Rides Stamps/Dies (panda)

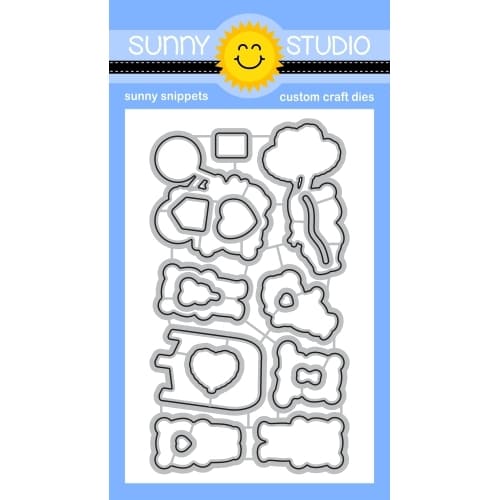
Truckloads of Love Stamps/Dies


I adhered the heart balloons to the treat bag topper first and then adhered the stitched rectangle with the truck. I heat embossed small sentiments from the Truckloads of Love Stamps and Panda Party Stamps on pink cardstock with white embossing powder and hand cut around them. I die-cut the "love" sentiment using the Loopy Letters Dies from black and white cardstock and layered them together.


The Treat Bag Topper Dies are sized perfectly to fit the top of a cellophane treat bag, but I decided to make an outer sleeve to go over a cellophane bag. This allowed the treat bag to stand upright with candy inside. To make this, I cut a piece of kraft cardstock 4" x 11" and scored it on the 11" side at 4 3/4" and 6 1/4". I then die-cut one end of the cardstock using the Dotted Diamond Landscape Die to match the topper.


Sunny Studio Stamps: Treat Bag Topper Die Focused Valentine's Day Treat Bag by Cathy Chapdelaine (featuring Sprawling Surfaces, Truckloads Of Love, Scalloped Heart Dies, Stitched Heart Dies, Loopy Letter Dies, Dotted Diamond Dies)


I created a window to see the treats inside by die-cutting the cardstock 3/4" up from the score line using the second largest Stitched Heart 2 Dies. To get a scalloped heart border around the opening, I die-cut a piece of pink cardstock using the second largest Scalloped Heart Dies and then die-cut it using the second largest Stitched Heart 2 Dies. I then adhered the scalloped frame around the opening.


To finish, I filled a cellophane treat bag with some candy, set it inside the folded kraft cardstock piece and stapled it at the top.  I then adhered my treat bag topper to the top of the kraft cardstock.


I had a lot of fun making this and hope you enjoyed! Thanks for stopping by today! For more inspiration, please visit my blog www.inkredibleadventures.com and you can also find me on Instagram as @cathy.chapdelaine.


Sunny Studio Supplies Used:


Loopy Letters Dies
Loopy Letters Dies
Shop at:
Sunny Studio
Balloon Rides Stamps
Shop at:
Sunny Studio
Balloon Rides Dies
Balloon Rides Dies
Shop at:
Sunny Studio
Scalloped Heart Dies
Shop at:
Sunny Studio
Stitched Heart 2 Dies
Shop at:
Sunny Studio
Panda Party Stamps
Panda Party Stamps
Shop at:
Sunny Studio
Panda Party Dies
Panda Party Dies
Shop at:
Sunny Studio
Dotted Diamond Landscape
Shop at:
Sunny Studio
Truckloads of Love Stamps
Shop at:
Sunny Studio
Truckloads of Love Dies
Shop at:
Sunny Studio
Bighearted Bears Stamps
Shop at:
Sunny Studio
Bighearted Bears Dies
Shop at:
Sunny Studio
Sprawling Surfaces Stamps
Shop at:
Sunny Studio
Treat Bag Topper Die
Shop at:
Sunny Studio

Monday, January 22, 2024

Treat Bag Topper Die Treat Bags with Leanne

Hello friends, Leanne here! If you are looking for a fun way to give someone a little treat, I have just the thing... a cocoa bomb treat bag with coordinating topper.  The new Treat Bag Topper die makes it so easy to kick your treat bags up a notch. I found some 4"x6" clear food safe party bags at my local craft store that are the perfect size to hold a cocoa bomb and attach the bag topper to.  

Sunny Studio Stamps: Treat Bag Topper Treat Bags with Leanne West (featuring Passionate Penguins, Stitched Heart Dies, Hayley Alphabet Dies, Warm & Cozy)

I started by die cutting the bag topper from 110lb white card stock.  To decorate the topper, I added die cut hearts and a little mug of cocoa.  The heart dies are found in two different die sets - Stitched Heart 2 and Gift Card Envelope.  The little mug dies come from Warm & Cozy.  

To finish the bag topper, I added a fun sentiment. I stamped "you're the" which comes from the Passionate Penguins set. With the Hayley Uppercase Alphabet dies I was able to spell out the word "bomb".  

Sunny Studio Stamps: Treat Bag Topper Treat Bags with Leanne West (featuring Passionate Penguins, Stitched Heart Dies, Hayley Alphabet Dies, Warm & Cozy)

I added some mini marshmallows, tiny heart sprinkles, a small stirring spoon, and one cocoa bomb into each bag. I then used some strong adhesive tape to attach the decorated topper to the bags.  These will be perfect Valentine gifts to give to friends and family.  

Sunny Studio Supplies Used:

Warm & Cozy Dies
Warm & Cozy Dies
Shop at:
Sunny Studio
Passionate Penguins Stamps
Shop at:
Sunny Studio
Stitched Heart 2 Dies
Shop at:
Sunny Studio
Hayley Uppercase Alphabet Dies
Shop at:
Sunny Studio
Gift Card Envelope Die
Shop at:
Sunny Studio
Treat Bag Topper Die
Shop at:
Sunny Studio

Monday, January 15, 2024

My Heart Card with Leanne

Hello everyone! Leanne here and I have another Valentine's Day card to share. Today's card showcases the My Heart stamp set.  I love the big and bold Valentine greetings in this little set. I've used them for both the outside and inside of my card.  

Sunny Studio Stamps: My Heart Valentines Day Card by Leanne West (featuring Stitched Heart Dies, Gift Card Envelope Dies)

I started this card by embossing a white panel with the Quilted Hearts embossing folder.  I trimmed the panel a bit smaller than A2 size and adhered to a white A2 card base.  I used the Gift Card Envelope die to make a pink envelope. I stamped Happy Valentine's Day onto a 2"x3" mini note card to tuck into the envelope.  The edges of the note card have been lightly inked so there would be some contrast from the white background. I adhered the envelope to the background with foam squares. I then added some die cut hearts and postage stamp as embellishments.  

Sunny Studio Stamps: My Heart Valentines Day Card by Leanne West (featuring Stitched Heart Dies, Gift Card Envelope Dies)

For the inside of the card I die cut a pink heart with the largest die included in the Stitched Heart 2 set.  I stamped the sentiment in red onto white card stock and then used the coordinating die to die cut. You could stamp the sentiment directly onto the pink heart, but I feel the die cut version stands out so much better.  

Thanks for stopping by today! I have a really fun project to share next Monday that you won't want to miss.  See you then! 

Sunny Studio Supplies Used:

Quilted Hearts Embossing
Shop at:
Sunny Studio
Stitched Heart 2 Dies
Shop at:
Sunny Studio
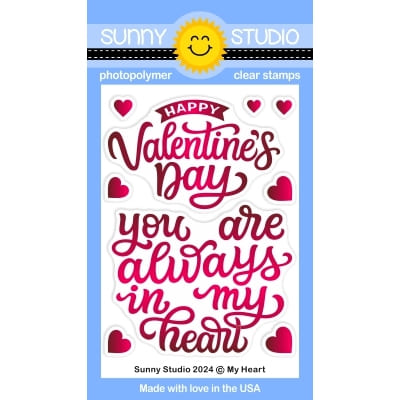
My Heart Stamps
My Heart Stamps
Shop at:
Sunny Studio
My Heart Dies
My Heart Dies
Shop at:
Sunny Studio
Gift Card Envelope Die
Shop at:
Sunny Studio

Thursday, January 11, 2024

Treat Bag Topper Card & Treat Bag with Marine

Hello crafty friends, Marine here, I'm so thrilled to be back on the blog with my first project of the year, and I'm so excited about the new items from the Spring 2024 release! As you may or may not know, I am for mixing and matching new stuff with older stuff. Here my new stuff is the Treat Bag Topper, and my older stuff is Love Monkey, which I used for the very first time, and that was so fun!

Sunny Studio Stamps: Treat Bag Topper Die Focused Valentine's Day Projects by Marine Simon (featuring Love Monkey, Stitched Heart Dies)

As very often, I started off with the coloring and stamped all my images on 80lb Neenah solar white cardstock using an alcohol marker friendly black ink. I cut them all using the coordinating dies, and used my Spectrum Noir Illustrator markers and Graph'it brush markers to color everything. And as you can see, I went for traditional Valentine colors.

Sunny Studio Stamps: Treat Bag Topper Die Focused Valentine's Day Projects by Marine Simon (featuring Love Monkey, Stitched Heart Dies)

Next I cut two identical Strathmore bristol smooth square panels and colored them both using a cloudy stencil along with spun sugar and worn lipstick oxide inks. I kept one of those two panels and cut a heart window out of it using the largest Stitched Heart 2, attached a piece of acetate at the back, on the front I stamped my "Swinging by to say I love you" greeting from Love Monkey on the acetate using black Stazon ink, and at the back of my panel I added foam strips all along the heart window, following its shape, and on the four sides as well. I poured some iridescent heart confetti and Red & Pink Confetti on the acetate, and then stuck my second cloudy panel to the foam strips to totally close my shaker.

I attached my shaker panel on a larger red panel from Holiday Cheer, and stuck my images using 1mm foam squares. Added highlights and details to the images using a white gel pen, and then moved on to the Treat Bag Topper.

Sunny Studio Stamps: Treat Bag Topper Die Focused Valentine's Day Projects by Marine Simon (featuring Love Monkey, Stitched Heart Dies)

I started off by cutting the small stitched panel out of Strathmore bristol smooth cardstock and colored it the same way as my card using spun sugar and worn lipstick oxide inks. I stamped my "For my little love monkey" greeting from Love Monkey on the right side, cut the main Treat Bag Topper piece out of the same red Holiday Cheer paper as before, and attached my small stitched panel on the main piece using liquid glue. I stuck the images using 1mm foam squares, added highlights and details using a white gel pen, and finally added a cute little bow on the handle.

And that's it! Coloring those cute monkeys was super fun, and I adore the Treat Bag Topper, it's so cool I want to use it all the time. By the way, it is not impossible that my next project features it, so stay tuned for more inspiration! Thanks so much for stopping by, and see you soon!

Sunny Studio Supplies Used:

Holiday Cheer 6x6 Paper
Shop at:
Sunny Studio
Love Monkey Stamps
Love Monkey Stamps
Shop at:
Sunny Studio
Love Monkey Dies
Love Monkey Dies
Shop at:
Sunny Studio
Stitched Heart 2 Dies
Shop at:
Sunny Studio
Treat Bag Topper Die
Shop at:
Sunny Studio

Monday, January 8, 2024

Bighearted Bears Card with Leanne

Hello crafty friends, Leanne here! Happy New Year! I'm absolutely thrilled to be back on the blog. Every Monday I'll be here sharing paper crafting inspiration featuring all the latest and greatest products from Sunny Studio.  

Sunny Studio Stamps: Bighearted Bears Valentine's Day Card by Leanne West (featuring Stitched Heart Dies)

For today's post, I have made what I call a triple heart slimline card. This special shaped card design is easy to make with heart dies. I have used the Stitched Heart 2 dies. With the largest one in the set I die cut six hearts to create a card front and back. I have decorated my card with adorable images from the new Bighearted Bears stamp set

Sunny Studio Stamps: Bighearted Bears Valentine's Day Card by Leanne West (featuring Stitched Heart Dies)

I've assembled the back of the card with three of the hearts cut from white heavy weight card stock. I adhered them together with the center heart on top and overlapping the other two. I used a slimline envelope as a guide so the total length of my card base is just a bit shorter. I wanted to be sure the assembled card fits in the envelope. 

After the back three hearts have been adhered, I scored a line along the top edge. Above the scored line is where I adhered the hearts for the card front. I used two red and one pale pink for the front. When all the hearts are secured, the card will have a hinge and open as any traditional card would.  

Sunny Studio Stamps: Bighearted Bears Valentine's Day Card by Leanne West (featuring Stitched Heart Dies)

To finish the front of the card, I layered on some smaller hearts which have been ink blended, splattered, and stamped with Valentine sentiments from the Bighearted Bears stamp set. I then picked out a few of the bear images to Copic color and add... three for the front and one for the inside. Even though this is a unique shaped card, there's still plenty of space on the inside to write a personal message to the recipient. It also will stand up for displaying just like a regular card. 

Here are the Copic colors I used to color the bears: grey shading & black - N0, N2, N4, N4; red & pink cheeks - R00, R20, R32, R35, R39. 

Thanks for stopping by today and I'll see you all next Monday! 

Sunny Studio Supplies Used:

Stitched Heart 2 Dies
Shop at:
Sunny Studio
Bighearted Bears Stamps
Shop at:
Sunny Studio
Bighearted Bears Dies
Shop at:
Sunny Studio

Friday, December 29, 2023

Love Birds Ornaments with Marine

Hello crafty friends, Marine here, I'm back for the last time of the year with this duo of Valentine ornaments showcasing the ever so sweet Love Birds. And I had so much fun coloring on kraft cardstock for my Merry Mocha see-through tags that I decided to do it again with those lovely birdies.

Sunny Studio Stamps: Love Birds Valentine Ornaments by Marine Simon (featuring Scalloped Heart Dies, Stitched Heart Dies)

So I started off by stamping the four birds, the branches, multiple leaves, flowers and hearts on a light kraft cardstock using an alcohol marker friendly black ink, I used my Spectrum Noir Illustrator and Graph'it brush markers to color them all, and then used the coordinating dies to cut everything. And I don't know why, but when I color on kraft cardstock I don't feel the need of adding white highlights to my images, but in that case I did add a dot on each bird's eye using a white gel pen, just to make them pop a little bit more.

Sunny Studio Stamps: Love Birds Valentine Ornaments by Marine Simon (featuring Scalloped Heart Dies, Stitched Heart Dies)

Next I created my two heart shaped ornaments following the same design for both, so here are the different steps for one:

1. Cut a large Scalloped Heart out of a light brown woodgrain cardstock, another one out of a dark kraft cardstock, and attach them back to back using liquid glue

2. Cut a large Scalloped Heart out of a colored cardstock, and cut a heart shaped window out of it using the largest Stitched Heart 2 to create a heart frame

Sunny Studio Stamps: Love Birds Valentine Ornaments by Marine Simon (featuring Scalloped Heart Dies, Stitched Heart Dies)

3. Glue this heart frame on the woodgrain heart panel using liquid glue

4. Cut a small Stitched Heart 2 out of a darker brown cardstock than the one at step 1, stamp and emboss a greeting from Love Birds on that heart, and attach that heart at the back of the ornament using 1mm foam squares

Sunny Studio Stamps: Love Birds Valentine Ornaments by Marine Simon (featuring Scalloped Heart Dies, Stitched Heart Dies)

Next I attached my images using 1mm and 2mm foam squares, added hemp twine to create the handles, and tied bows that I added at the top of each ornament using liquid glue. And that's it! Very simple, but yet super cute. 

I hope that you like those ornaments! Thanks so much for stopping by, and see you very soon!

Sunny Studio Supplies Used:

Scalloped Heart Dies
Shop at:
Sunny Studio
Stitched Heart 2 Dies
Shop at:
Sunny Studio
Love Birds Stamps
Love Birds Stamps
Shop at:
Sunny Studio
Love Birds Dies
Love Birds Dies
Shop at:
Sunny Studio

Wednesday, December 27, 2023

Love Bird Card with Isha

Hello everyone! Isha here with you with a valentine theme card featuring the Love Birds stamps and dies. Hope you all had a wonderful Christmas with your family. Moving from all the holiday cards to valentine theme card felt like a big change...lol.

Sunny Studio Stamps: Love Bird Card by Isha Gupta (featuring Bursting Heart Dies, Stitched Heart Dies, Scalloped Heart Dies)

I started by die-cutting a white panel using the Bursting Heart Dies. Next, take a vellum and sponge inks mimosa, mango sorbet, bubble gum and raspberry bliss by Pinkfresh studio. Adhere behind the die-cut panel. Adhere to a white card.

Die-cut the hearts using the Stitched Heart 2 dies from vellum and white card. Die-cut another heart using the Scalloped Heart die. Sponge the same inks to this piece. Stack the hearts using 3d foam and liquid glue.

Sunny Studio Stamps: Love Bird Card by Isha Gupta (featuring Bursting Heart Dies, Stitched Heart Dies, Scalloped Heart Dies)

Stamp the images from the Love Birds stamps, color using copic markers and die-cut using the coordinating dies. Adhere to the card. Stamp the sentiment using versamark ink, sprinkle WOW! opaque white embossing powder and adhere to the card.

Thank you for dropping by and Happy New Year to you all.

Sunny Studio Supplies Used:

Bursting Heart Die
Bursting Heart Die
Shop at:
Sunny Studio
Scalloped Heart Dies
Shop at:
Sunny Studio
Stitched Heart 2 Dies
Shop at:
Sunny Studio
Love Birds Stamps
Love Birds Stamps
Shop at:
Sunny Studio
Love Birds Dies
Love Birds Dies
Shop at:
Sunny Studio

Monday, December 25, 2023

Introducing Love Birds Stamps & Tree Branch Die For Valentine's Day!

Merry Christmas!  I hope you all are enjoying a fun and relaxing holiday with your loved ones today. This week our team will be transitioning from Christmas to Spring, featuring a new mini stamp set called Love Birds that is perfect for Valentine's Day, however as I think my cards will illustrate this set doesn't have to be limited to a single holiday. Let's jump right in!

Card No.1: For my first card featuring the Love Birds Stamps, I started by creating my pastel rainbow cloud background by inking on alternating distress inks together with masks I had cut from our Fluffy Cloud Border Dies. I then trimmed down my panel to 3.5" wide and added the stitching and scalloped trim to the edges with our Slimline Basic Border Dies

The love bird set comes with a bare tree branch and individual leaves making it easy to customize for both winter and spring scenes and to best position the leaves to suit your card. In this case, I was able to use the same tree branch three times, but by rotating it and placing the leaves in different spots for each of them, I was able to give my card a bit more personality. Finally, I heat-embossed a punny greeting from the set onto our Brilliant Banner 1 Dies which I had inked with a coordinating shade of Picked Raspberry distress ink to tie in with the pink cloud below.

Sunny Studio Blog: Tweetheart Birds on Tree Branches With Rainbow Clouds Valentine's Day Card using Love Birds Clear Stamps

Card No.2: Next up I paired two of those same adorable birds from the new Love Birds Stamps with our new Tree Branch Dies and the birdhouses from our A Bird's Life Stamps and Little Birdie Stamps. To create my cloud background, I used the coordinating cloud dies from our Plane Awesome Die set which I cut from masking material and then inked over using my favorite Jumbo Dauber. I then added the stitched edge along the bottom of my panel using that same Slimline Basic Border die.

To give my birdhouses the appearance they were hanging from the tree, I poked holes in my background panel and used a fat needle with some embroidery floss to string them on, taping the ends of the floss to the back of my panel before adhering the panel to my card base. I then was able to adhere my birdhouses onto my card and hide any holes. Before doing this though, I first adhered a 1" thick strip of red gingham patterned paper to the bottom of my card from our Classic Gingham Paper pack and layered a lacy scalloped edge from our Eyelet Lace Border Dies

Sunny Studio Blog: Love Is In The Air Birds on Tree Branch Red Gingham Scalloped Valentine's Day Card by Mendi Yoshikawa

Card No.3: For my next card featuring the adorable Love Birds, I paired them with a greeting from our new My Heart Stamps (which won't be fully unveiled or available to purchase until next week). This greeting was designed to perfectly fit within our Stitched Heart 2 Dies and Scalloped Heart Dies.

In this case, I stamped the greeting first with dye ink, and then while it was still in my MISTI tool, I stamped it again with VersaMark Ink so I could sprinkle the greeting with a little bit of clear embossing powder. In this case, my dye ink wasn't matching my cardstock as well as I would have liked, and heat embossing it warmed up the tones just enough to make them match better. It also has the added bonus of lending a bit of shine and sparkle to my card in person. 

To complete my card, I pierced my background using our Dotted Diamond Landscape Die, added the new Tree Branch Die for my birdie to perch on, and our Pink Spinel Jewels to the center of each stamped flower blossom. It was a fairly quick and simple card to create, but I love how adding the little flowers with the jewels gave it just the touch of oomph it was missing.

Sunny Studio Blog: You Are Always In My Heart Birds with Tree Branch Valentine's Day Card using Love Birds 3x4 Clear Stamps

Card No.4: For my last Love Birds card of the day, I paired them with our larger Out On A Limb tree branch die which I thought was a better scale to match the new free Cherry Blossom die that will automatically come with all retail orders placed in our store starting today! I repeatedly cut the blossoms from white cardstock, inked them with Spun Sugar Distress Ink, and then accentuated the veining detail using my Copic Marker before adding the little center portion which I had also colored with my Copics over a piece of scratch paper. For my background, I inked it up using the same masks I had cut from our Fluffy Clouds Border Dies for my first card.

Sunny Studio Stamps Love Is In The Air Birds on Cherry Blossoms Tree Branch Spring Valentine's Day Card by Mendi Yoshikawa

Here's a closer look at the new Love Birds Stamps, Love Bird Dies, and Tree Branch Dies. While these are available in our store now, the rest of our Spring Release will be shared with our Sneak Peek Week starting on January 1st and available to purchase on January 5th. 


I hope you enjoy the rest of your day and will continue to check back each day this week to see more fun ideas using this cute set by the rest of the team. :)

Other Sunny Studio Supplies Used:

A Bird's Life Stamps
Shop at:
Sunny Studio
A Bird's Life Dies
A Bird's Life Dies
Shop at:
Sunny Studio
Tsukineko Jumbo Dauber
Shop at:
Sunny Studio
Versafine Onyx Black Ink
Shop at:
Sunny Studio

Plane Awesome Stamps
Shop at:
Sunny Studio
Plane Awesome Dies
Plane Awesome Dies
Shop at:
Sunny Studio
Fluffy Clouds Border Dies
Shop at:
Sunny Studio
Eyelet Lace Borders
Eyelet Lace Borders
Shop at:
Sunny Studio
Slimline Basic Borders
Shop at:
Sunny Studio
Little Birdie Stamps
Shop at:
Sunny Studio
Little Birdie Dies
Little Birdie Dies
Shop at:
Sunny Studio
Out on A Limb Dies
Out on A Limb Dies
Shop at:
Sunny Studio
Scalloped Heart Dies
Shop at:
Sunny Studio
Stitched Heart 2 Dies
Shop at:
Sunny Studio
Brilliant Banner 1 Dies
Shop at:
Sunny Studio
Dotted Diamond Landscape
Shop at:
Sunny Studio
My Heart Stamps
My Heart Stamps
Shop at:
Sunny Studio
My Heart Dies
My Heart Dies
Shop at:
Sunny Studio
Pink Spinel Jewels
Pink Spinel Jewels
Shop at:
Sunny Studio
Cornflower Blue Jewels
Shop at:
Sunny Studio
Classic Gingham 6x6 Paper
Shop at:
Sunny Studio
Hero Arts Ultra Fine Clear
Shop at:
Sunny Studio
Hero Arts White Detail
Shop at:
Sunny Studio
VersaMark Watermark Ink
Shop at:
Sunny Studio