Showing posts with label Cascading Stars. Show all posts

Sunday, June 17, 2018

Guest Designer Spotlight: Cards with Michelle Short

Hello there, Michelle Short here and I am delighted to be back guest designing with Sunny Studio today. I have three cards to share and I had a lot of fun making them!

Sunny Studio Stamps: Critter Campout Cascading Stars Card by Michelle Short

For my first card, I started off by creating the background for my scene. I stamped the Cascading Stars stamp on to a piece of watercolour paper, using Versamark Ink. I applied clear embossing powder and heat set. I then stamped and embossed the stars again, so that it covered the width of the panel. I took Distress Inks in various shades of blue and blended these on to the top of the panel for the night sky. I then blended browns on to the bottom, for the ground. I took the sentiment from the Critter Campout stamp set and stamped this with black ink on to the bottom of the panel. This piece was then added to an A2 white card base with tape runner.

Sunny Studio Stamps: Critter Campout Cascading Stars Card by Michelle Short

I took the critters and fire from the Critter Campout stamp set and stamped these with black ink on to white cardstock. I coloured them with Copic Markers, adding a little yellow glow to the critters from the fire. These were then die cut out using the coordinating dies. These were added to the card with foam tape.

Sunny Studio Stamps: Background Basics Hello Word Die Card by Michelle Short

My next card uses the wonderful Background Basics stamp set to create a background. This is such a versatile set! I took the polka dot stamp from the set and stamped this repeatedly over a panel of watercolour paper with Versamark Ink. I applied white embossing powder and heat set. I then took Distress Inks in rainbow colours and blended these on to the panel. The panel was cut down and added to an A2 card base, at an angle, with tape runner.

Sunny Studio Stamps: Background Basics Hello Word Die Card by Michelle Short

I took the turtle from the Oceans of Joy stamp set and stamped him on to white cardstock with black ink. I coloured him with Copic Markers and die cut out with the coordinating dies. I also die cut the Hello Word die from black cardstock three times and stacked these up with liquid glue. The hello die was added to the card with more liquid glue and the turtle added with foam tape. I took the ‘sea you soon’ sentiment from the Oceans of Joy stamp set and heat embossed this in white onto black cardstock. This was cut in to a strip and added to the card with more foam tape.

Sunny Studio Stamps: Background Basics Magical Mermaids Card by Michelle Short

For my last card, I wanted to use the Background Basics stamp set for a border, instead of a whole background. I really love the accent of black and white stripes on this card! I took an A2 white card base and stamped the diagonal stripes stamp from the set on to it using black ink. I then took a panel of watercolour paper and blended blue Distress ink onto it for a sea background. This was splattered with water before stamping the sentiment from the Magical Mermaids stamp set on to it with black ink. I added the panel to the card base with foam tape.

Sunny Studio Stamps: Background Basics Magical Mermaids Card by Michelle Short

I took one of the mermaids from the Magical Mermaids stamp set, along with the rock and seaweed, and stamped these on to white cardstock with black ink. I then die cut them with the coordinating dies. I coloured them with Copic Markers and added them to the card with a combination of tape runner and foam tape.

I hope you have enjoyed seeing my cards today, a big thank you to Mendi for having me guest with Sunny Studio Stamps today! Have a great day!

Sunny Studio Supplies Used:

Magical Mermaid Dies
Shop at:
Sunny Studio
Magical Mermaid Stamps
Shop at:
Sunny Studio
Oceans of Joy Dies
Oceans of Joy Dies
Shop at:
Sunny Studio
Oceans of Joy Stamps
Shop at:
Sunny Studio
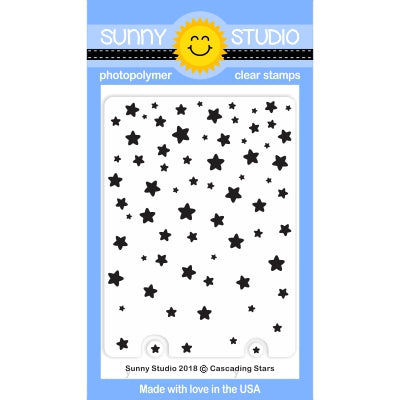
Cascading Stars Stamps
Shop at:
Sunny Studio
Critter Campout Stamps
Shop at:
Sunny Studio
Critter Campout Dies
Shop at:
Sunny Studio
Background Basics Stamps
Shop at:
Sunny Studio

Monday, June 11, 2018

Cascading Stars Camping Themed Critter Card with Eloise

Hi everyone, Eloise here and today I'll be using the Cascading Stars stamp set along with Critter Campout to create a camping themed card.

Sunny Studio Stamps: Cascading Stars Critter Campout Camping Themed Critter Card by Eloise Blue

To begin my card today, I stamped out the raccoon and campfire images from Critter Campout and coloured them in with Copic Markers. I then used the coordinating dies to cut them out and set them off to the side. For my background I white heat embossed the Cascading Stars stamp onto a piece of watercolour cardstock, then I used some Distress Inks to ink blend over the stars. I used Black Soot, Chipped Sapphire and Wilted Violet. Once the piece was coloured, I wiped over the embossing with a paper towel to get rid of the excess ink. Then, I needed to ink blend some grassy hills. I used Twisted Citron and Mowed Lawn Distress Ink for those. Once all my pieces were ink blended, I dripped some water over all three pieces, picked up the excess with a paper towel and then dried my pieces with a heat tool.

(Copics Used: E53, E55, E57 / Y35, YR15, YR09 / Y11, Y15, Y19 / R13, R24, R29 / W00, W2, W4, W5, W7 / R00, RV42)

Sunny Studio Stamps: Cascading Stars Critter Campout Camping Themed Critter Card by Eloise Blue

To finish off my card. I cut down my Distress Ink pieces to a little to fit on one side of my card base and then adhered them together. I then popped up my images onto foam tape and adhered them at the bottom. Next, I white heat embossed the sentiment 'Happy Trails' onto a thin strip of black cardstock and popped it onto the right hand side of my inked panel. I then popped the entire panel up onto some fun foam and adhered it to a piece of purple patterned paper from Classic Gingham and that finished off my card for today.

Thanks so much for stopping by today and I'll catch you all next time.

Sunny Studio Supplies Used:

Cascading Stars Stamps
Shop at:
Sunny Studio
Critter Campout Stamps
Shop at:
Sunny Studio
Critter Campout Dies
Shop at:
Sunny Studio
Classic Gingham 6x6 Paper
Shop at:
Sunny Studio

Wednesday, June 6, 2018

Cascading Stars Punny Thinking Of You Card with Franci

Hi there, Franci here with you today! I was definitely inspired by the 4th of July holiday to create my card with the new Cascading Stars stamp set.

Sunny Studio Stamps: Cascading Stars Fast Food Fun Punny Thinking Of You Card by Franci Vignoli

First, I die cut a scalloped rectangle frame out of some kraft cardstock using the largest die from the Fancy Frame Rectangle set. Then I created a coordinating card base in white. I stamped the starry background in the center in Versamark ink and embossed it in white.

Sunny Studio Stamps: Cascading Stars Fast Food Fun Punny Thinking Of You Card by Franci Vignoli

I sponged some Distress inks from the top and bottom of my card to create a fun colored background (I used Abandoned Coral and Peacock Feathers ink pads), and also used a cloth to remove the excess of color stacked on top of my embossed stars to make them pop!

Sunny Studio Stamps: Cascading Stars Fast Food Fun Punny Thinking Of You Card by Franci Vignoli

I stamped those cute foods from the Fast Food Fun set with Memento black ink, colored them with Copics, and die cut them with their coordinating diesI also cut a strip of white cardstock and stamped the sentiments with the same black ink used before. Finally, I glued the sentiment strip onto the card. I added the kraft frame and adhered down all of the images with foam tape.

Hope you like my card and thank you so much for stopping by. Have a lovely day!

Sunny Studio Supplies Used:

Cascading Stars Stamps
Shop at:
Sunny Studio
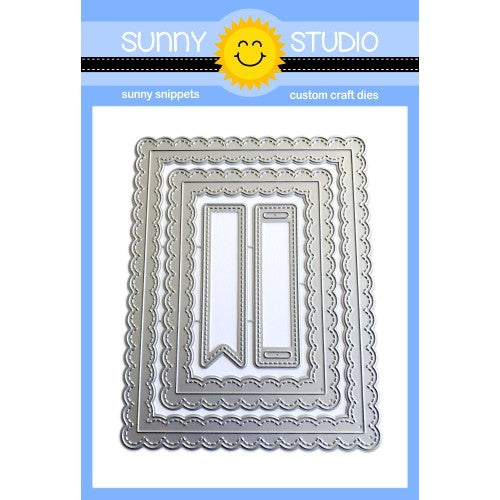
Fancy Frames- Rectangles
Shop at:
Sunny Studio
Fast Food Fun Stamps
Shop at:
Sunny Studio
Fast Food Fun Dies
Fast Food Fun Dies
Shop at:
Sunny Studio

Tuesday, May 29, 2018

Cascading Stars Night Sky Framed Background Card with Juliana

Hello friends it's Juliana Michaels and today, I'm sharing a happy little card using some of the new stamps and dies from Sunny Studio Stamps including the Cascading Stars stamp set. I choose to use this stamp set in a rather traditional way and create a night time sky by combining it with an image from the Critter Campout stamp set.

Sunny Studio Stamps: Cascading Stars Critter Campout Night Sky Framed Background Card by Juliana Michaels

To begin, cut a piece of the teal patterned paper from the Classic Gingham 6x6 paper pad to 4.25 x 5.5 inches. Adhere it to an A2 sized card base. Next, use the middle sized die from the Fancy Frames Rectangle dies to cut a frame from white cardstock. Use one of the banner dies from that same die set, and cut out a banner from white cardstock. Stamp your sentiment using the Happy Camper stamp set.

Now to create the scene inside the frame. Stamp the Cascading Stars stamp onto white cardstock using an embossing ink such as Versamark. Sprinkle it with white embossing powder and heat set it using a heat gun. Use a foam blending tool to apply Distress Oxide Inks in Black Soot, Wilted Violet and Salty Ocean to the cardstock. These colors are great for creating a night time sky!

Sunny Studio Stamps: Cascading Stars Critter Campout Night Sky Framed Background Card by Juliana Michaels

For the grass along the bottom, die cut a piece of white cardstock using the grass die from the Sunny Sentiments die set. Apply Distress Oxide Inks in Peeled Paint and Twisted Citron to give it a nice green grass color. Cut the sky piece to fit behind the die cut frame. Adhere the grass piece to the bottom of the sky and trim off any excess.


Take the banner with the sentiment and adhere it to the sky piece. Again, trim off any excess. Now you are ready to adhere the frame using your favorite adhesive.

For the final touch, stamp and color the adorable little skunk from the Critter Campout stamp set. Then die cut him using the coordinating die set. Use a piece of double sided foam adhesive to adhere it to the card front and to give it a bit of dimension. Your night time sky scene is now complete!

I hope you enjoyed this bit of inspiration using the Cascading Star stamp set along with some other great products from Sunny Studio Stamps. Thanks so much for stopping by today!

Sunny Studio Supplies Used:

Sunny Sentiments Dies
Shop at:
Sunny Studio
Cascading Stars Stamps
Shop at:
Sunny Studio
Critter Campout Stamps
Shop at:
Sunny Studio
Critter Campout Dies
Shop at:
Sunny Studio
Fancy Frames- Rectangles
Shop at:
Sunny Studio
Happy Camper Stamps
Happy Camper Stamps
Shop at:
Sunny Studio
Classic Gingham 6x6 Paper
Shop at:
Sunny Studio

Friday, May 11, 2018

Cascading Stars Gold Embossed Starry Night Sky Card with Lexa

Hello everyone! Lexa here today with a card that's highlighting Cascading Stars Stamp and pair it with my most favorite Critter Campout Stamps. If you're wondering why I always play favorites to critter stamps, it's simply just because I looove animals so much and I feel that I'll never have enough critter stamps in my life .. NEVER! 

Sunny Studio Stamps: Cascading Stars Gold Embossed Starry Night Sky Card by Lexa Levana

First of all, I stamp the Cascading Stars twice and gold embossed it on the background. After the gold shines all over my card, I blend some Distress Inks in Chipped Sapphire, Black Soot, Dusty Concord and Seedless Preserves to create night sky. As for the ground I blend Crushed Olive and Mowed Lawn in the bottom part of my card. To set the horizons I also stamp some pine trees in dark grey dye ink.

Sunny Studio Stamps: Cascading Stars Gold Embossed Starry Night Sky Card by Lexa Levana

All images are stamped with Versafine black ink and watercolored with Distress Markers. After I finished with the coloring, I die cut these three friends and their campfire with the coordinating dies. How adorable is that sleeping bear while his friends sing some lullabies. I love to create a story behind every scenic cards I made. I white embossed the sentiment on black cardstock and use staplers to set it on the fix position.

That's my card for today. I hope you enjoy this post. Thank you so much for stopping by and wish you all a wonderful day!

Sunny Studio Supplies Used:

Cascading Stars Stamps
Shop at:
Sunny Studio
Critter Campout Stamps
Shop at:
Sunny Studio
Critter Campout Dies
Shop at:
Sunny Studio

Tuesday, May 8, 2018

NICU Card Drive Blog Hop & Fundraiser with card by Juliana


Hello there! Thank you for joining us today.  We're so honored to be helping raise money for families with babies in the NCIU today.  You can read about Leah's story here and how with your help we can raise money to give these families gift cards to Starbucks for some much needed fresh air and time to regroup from everything they are going through.

Juliana Michaels has created a card to give to one of those families. Take it away Juliana...


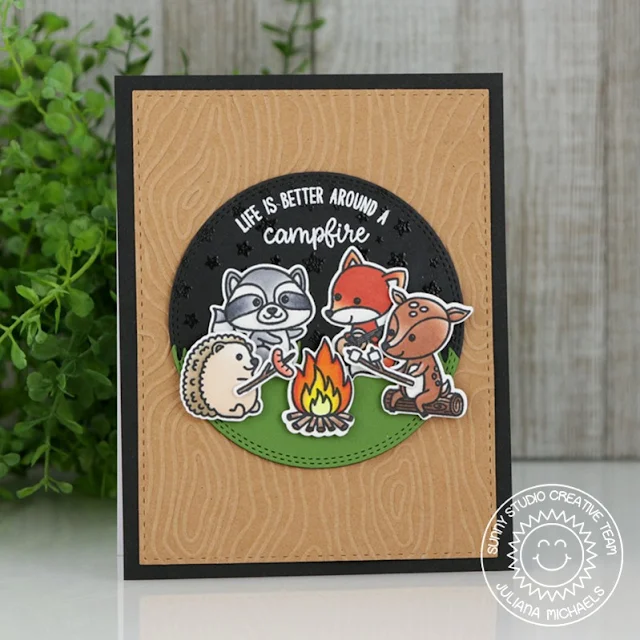
Hello there!  The card I created was inspired by the Encouragement theme and Woodland mood board. Sunny Studio recently released the Critter Campout stamps and I knew this set would be perfect for the theme.


Sunny Studio Stamps: Critter Campout Camping Card by Juliana Michaels (using Sunny Sentiments grass border die & Cascading Stars stamps)

I began by stamping and coloring a bunch of the cute woodland critters from Critter Campout Stamp Set. I then colored them with Chameleon Pens and die cut them using the coordinating Critter Campout Die Set.

To create the background, I cut a circle from black cardstock. I took the Cascading Stars Stamp Set and stamped it onto the black circle with Versamark Ink. I then heat embossed it with clear embossing powder to make the stars shine!

Sunny Studio Stamps: Critter Campout Camping Card by Juliana Michaels (using Sunny Sentiments grass border die & Cascading Stars stamps)

The grass was created using the Sunny Sentiments Die Set. I simply used the grass die to cut a strip from green cardstock. I then die cut this piece using the same circle die I used to cut out the background.

Using my MISTI Stamping Tool, I curved the sentiment to match the curve on the circle and stamped it with Versamark Embossing Ink. I then heat embossed it with white embossing powder to make it pop against the dark background.

Once the background was complete, I created the scene with the woodland critters gathered around the fire. For the final touch, I embossed a piece of kraft cardstock using a woodgrain embossing folder. I love how this continues the woodland theme.

It was my pleasure to be a part of this blog hop here on the Sunny Studio Blog! I hope this card will bring a bit of comfort to its recipient during their time of need!


PRIZES:


WAYS YOU CAN HELP:

1. Donate! - directly to Layton's Legacy YouCaring Fundraiser. For every $5 donated, you will be entered into the drawing for one of the prizes above!! All winners will be drawn from donations made thru the YouCaring Site. **Prizes will be drawn and announced here on my blog on Saturday, May 19th.**

2. Shop!
-Pinkfresh Studio will be donating 10% of their sales for the week.
-CAS-ual Fridays Stamps will be donating 15% of their sales thru May 19th.
-My affiliate linking dollars will be donated thru May 19th.

3. Create! -  this is also a card drive, and if you'd like to create a card using the theme/moodboard below, I would love that! I will be including these handmade treasures with the giftcards when I hand them over to the NICU social worker, and my dream is that the NICU will be covered in beautiful creations inspired by Layton!! Link them up HERE, and then please email me (lea@lealawsoncreates.com) to get the address for sending - and note that I will need them to arrive by May 31st.


HOW TO STAY UPDATED:

There are two ways to stay updated on the fundraising progress, and to see photos as I drop items off at the NICU. 

1. Subscribe to the Lea Lawson Creates blog via email using the prompt in the upper right corner - then you will get email notifications when I add a new post.

2. Follow Lea Lawson Creates on Instagram. I will add photos & videos to my IG Stories, and likely go LIVE a few times throughout the fundraising effort and as we drop everything off at the NICU!

Here's a full list of everyone hopping today...  You're next stop is Tae Eun Yoo's blog.  :)

Thursday, April 26, 2018

Cascading Stars Night Sky Hello Card with Vanessa

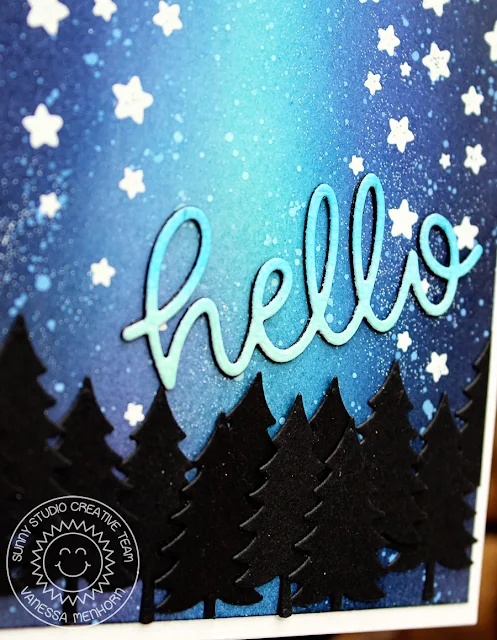
Hello everybody! Vanessa here with a night sky card using the Cascading Stars stamp set. I love creating backgrounds with my ink blending tool and here I made a beautiful sky for my stars to shine on.

Sunny Studio Stamps: Cascading Stars Night Sky Hello Card by Vanessa Menhorn

I first inked my cardstock panel with various blue Distress Inks and applied white ink droplets. After it was dried, I stamped and heat-embossed the stars and adhered the panel to the card. Now I die-cut the tree from the Happy Camper Dies multiple times from black cardstock and adhered them. 

Sunny Studio Stamps: Cascading Stars Night Sky Hello Card by Vanessa Menhorn

Next, I inked a scrap of cardstock with light blue inks, die-cut the Hello Word Die from it, layered the word with two layers of hellos die-cut from black cardstock and adhered it.

Thank you for visiting today! See you next week!

Sunny Studio Supplies Used:

Cascading Stars Stamps
Shop at:
Sunny Studio
Happy Camper Dies
Happy Camper Dies
Shop at:
Sunny Studio
Hello Word Die
Hello Word Die
Shop at:
Sunny Studio