Showing posts with label Big Bold Greetings. Show all posts

Thursday, May 29, 2025

Everything's Rosy Card with Marine

Hello crafty friends, Marine here, I'm very happy to be back with something different than I usually do. I mean, you know that I'm a "the busier the merrier" type of girl with lots and lots of critters. Well, today I'm sharing this floral shaker card showcasing the gorgeous Everything's Rosy stamp set, and I had a blast creating all those beautiful roses and foliage with this layering stamp set!

Sunny Studio Stamps: Everything's Rosy Miss You card by Marine Simon (featuring Big Bold Greetings, Frilly Frame Dies, Stitched Rectangle Dies, Spring Greenery Dies)

And speaking of which, I started off by stamping the roses and leaves, using all the layers, along with Lawn Fawn premium dye inks and Altenew crisp dye inks. For the roses, light to dark I used frosty pink (Alt.) + peachy keen (LF) + guava (LF) + lobster (LF) + raspberry (LF). And for the leaves, light to dark I used frayed leaf (Alt.) + forest glades (Alt.) + moss (Alt.)

I cut all the images using the matching dies, mixed some copic opaque white ink with water and used a slim brush to add splatters to each rose and piece of greenery, and set them aside to dry. I also cut additional pieces of greenery out of vellum using Spring Greenery dies, added white ink splatters to each piece and set them aside as well for later.

Next I cut a 5,5 x 4,25 inches Strathmore bristol smooth panel, and started by covering it with tattered rose oxide ink. I added a brick pattern to my panel using a brick stencil from stash along with saltwater taffy oxide ink, splattered water all over the panel and dried it with a paper towel, mixed some worn lipstick oxide ink with water and added more splatters to the panel, and then did the same with copic opaque white ink.

Sunny Studio Stamps: Everything's Rosy Miss You card by Marine Simon (featuring Big Bold Greetings, Frilly Frame Dies, Stitched Rectangle Dies, Spring Greenery Dies)

Once my panel was dry, I cut an opening out of it right in the center using the second largest Stitched Rectangle die, kept the frame piece only, and added a piece of acetate at the back of my brick frame using liquid glue. And I wanted my roses to be climbing up on a lattice, so I cut three white panels using the same die I used to create the opening, and cut a lattice design out of each white panel using the Frilly Frame Lattice die set. I layered the three lattice panels on top of each other using liquid glue to create a little bit of dimension, and then attached my lattice panel in the middle of my brick panel, right on the acetate using liquid glue again.

I flipped my brick panel over, added foam strips along the opening, close to the edges, and on the edges of the panel as well. I poured a lot of Pink Blossoms confetti inside the acetate opening, peeled all the foam strips backing papers off, and then closed my shaker panel with a Flirty Flowers pink panel.

Next, back to the front of the brick panel. Along with my climbing roses, I wanted to add some extra foliage, so I cut a Botanical Backdrop panel out of green cardstock, added some rustic wilderness oxide ink to darken some spots, mixed that same ink with water and added splatters to the leaves, did the same with copic opaque white ink, and attached this leafy panel to my brick panel using 1mm foam squares.

Sunny Studio Stamps: Everything's Rosy Miss You card by Marine Simon (featuring Big Bold Greetings, Frilly Frame Dies, Stitched Rectangle Dies, Spring Greenery Dies)

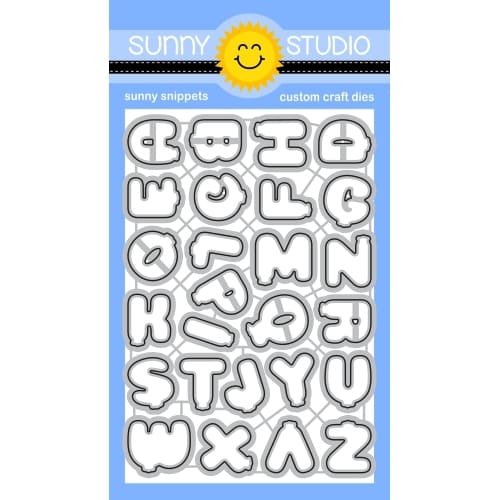
Before attaching the roses and leaves, I wanted to frame my panel with wood, so I used the Tropical Trees die set to cut my frame out of light brown woodgrain cardstock, attached it to my panel using liquid glue, and then finally stuck the roses and leaves using 1mm and 2mm foam squares, and the vellum greenery using liquid glue. For my greeting, I white heat embossed "Miss you" from Big Bold Greetings on dark brown cardstock, cut it using the matching die, and attached it to my panel using foam squares again. I attached my panel to a white card base, and to finish my card I added a scattering of clear droplets from my stash for shine and brightness.

And that's it! I hope that you like this card as much as I enjoyed creating it. It was pretty amazing to see those beautiful roses come to life layer after layer, and it was super easy to line everything up! Thanks so much for stopping by, and see you next week!

Sunny Studio Supplies Used:

Stitched Rectangle Dies
Shop at:
Sunny Studio
Flirty Flowers 6x6 Paper
Shop at:
Sunny Studio
Everything's Rosy Stamps
Shop at:
Sunny Studio
Everything's Rosy Dies
Shop at:
Sunny Studio
Frilly Frames Lattice Dies
Shop at:
Sunny Studio
Spring Greenery Dies
Shop at:
Sunny Studio
Tropical Trees Backdrop
Shop at:
Sunny Studio
Big Bold Greetings Stamps
Shop at:
Sunny Studio
Big Bold Greetings Dies
Shop at:
Sunny Studio
Botanical Backdrop Die
Shop at:
Sunny Studio

Friday, May 2, 2025

Cheerful Daisies Layered Daisy Cards with Mendi

Hello and welcome! This is Mendi here today, popping in to share some floral cards for Spring using our Cheerful Daisies Stamps and Dies. These have always been a favorite set of mine, so I had so much fun revisiting them for these two clean and simple cards.

Sunny Studio Daisy Birthday & Mother's Day Card using Cheerful Daisies & Layered Basket Clear Stamps & Botanical Backdrop Die

For my first card today featuring the Cheerful Daisies Stamps, I started by stamping a classic white daisy using only the top petal layer of the daisy image, which I stamped with a very pale ink called Barely Beige by Simon Says Stamp. I kept my color scheme yellow and green to match my daisies, filling the background with a yellow polka-dot patterned paper from our Polka-dot Parade Paper pack. I then layered our Botanical Backdrop Die over the top, which I cut from olive green cardstock. 

I cut three extra groupings of leaves by positioning some of my leftover cardstock to run through my machine again with the same die so I could fill in more of my edges with the leafy vines since my two daisies grouped on the bottom were pretty large and obstructed the view of many of the leaves. To add interest, I added some vein details to each leaf with my G07 Copic sketch marker. For my sentiment, I stamped the oversized "Happy Birthday" phrase from our Big Bold Greetings Stamps in Versafine Onyx Black ink. Lastly, I adhered some yellow Citrine Jewels to add a little sparkle and help fill in some visually empty spots.

Sunny Studio Daisy Birthday Card using Cheerful Daisies & Big Bold Greetings Clear Craft Stamps & Botanical Backdrop Die

Ink Color used for White Daisy: 

Ink colors used for Green Leaves:

For my second card today, I inked up all my gerber daisies from our Cheerful Daisies Stamps in various pink hues, pairing them with the woven basket from our Layered Basket Stamps. To embrace my country feel, I paired the flowers with a scalloped mat cut using our Frilly Frames Hexagon Dies from a lilac gingham print. However, the lilac gingham from our Gingham Pastels Paper pack is a bit more vibrant and it felt like it was competing for attention with the flowers in the foreground. I considered covering it with a piece of vellum, but decided I didn't want to mess with finding a way to hide the adhesive. Instead I applied a layer of white Hero Arts Unicorn Pigment Ink over the top of my patterned paper with a Jumbo Dauber to tone it down and make it appear more muted. This was my first time attempting something like this and while the background is still a bit busier than I wanted, it helped give me the look I was after. I finished my Mother's Day card with a small sentiment from our Puppy Parents Stamps.

Sunny Studio Daisy Mother's Day Card using Cheerful Daisies & Layered Basket Clear Layering Craft Stamps & Metal Cutting Dies

Ink colors for pale pink daisy:

Ink colors for medium pink daisy:

Ink colors for hot pink daisy:

Ink colors for lilac daisy:

Ink colors for centers of each daisy:

Ink colors for leaves:

Ink colors for layered basket: 
  • Skipped Lightest Layer
  • Hero Arts Soft Sand
  • Memories Soft Sand or Gina K. Sandy Beach
  • Memories Sand

That wraps up my projects for this morning. I hope I've inspired you in your own cardmaking and that you spread a little happiness by sending out a card to a loved one today.💗

Don't forget to check out our Cheerful Daisies Stamps, Layered Basket Stamps, Botanical Backdrop Die, and 6x6 Patterned Paper Pads in our online shop, which are all currently on sale!

I also encourage you to check out all the card ideas with these sets on each of their product pages. I always make sure to upload tons of ideas for each set following the product image so there are lots of ideas to scroll through there organized by set.

Supplies Used:

Versafine Onyx Black Ink
Shop at:
Sunny Studio
Polka-dot Parade 6x6 Paper
Shop at:
Sunny Studio
Gingham Pastels 6x6 Paper
Shop at:
Sunny Studio
Puppy Parents Stamps
Shop at:
Sunny Studio
Botanical Backdrop Die
Shop at:
Sunny Studio
Frilly Frames Hexagon Dies
Shop at:
Sunny Studio
Cheerful Daisies Stamps
Shop at:
Sunny Studio
Cheerful Daisies Dies
Shop at:
Sunny Studio
Layered Basket Stamps
Shop at:
Sunny Studio
Layered Basket Dies
Layered Basket Dies
Shop at:
Sunny Studio
Big Bold Greetings Stamps
Shop at:
Sunny Studio
Citrine Jewels
Citrine Jewels
Shop at:
Sunny Studio
Tsukineko Jumbo Dauber
Shop at:
Sunny Studio
PinkFresh Studio Blending Brushes
Shop at:
Sunny Studio
Hero Arts Unicorn Pigment Ink
Shop at:
Sunny Studio

Monday, April 21, 2025

Cherry Blossoms & Dotted Diamond Cards with Mendi

Hello and welcome! This is Mendi here today, popping in to share some floral cards for Spring using our Cherry Blossoms Stamps and the two variations of our Dotted Diamond Dies.

Sunny Studio Spring Floral Birthday & Sympathy Cards using Cherry Blossoms Clear Layering Stamps & Dotted Diamond Metal Dies


For my first card of the day I have a soft and pretty sympathy card using the Cherry Blossoms Stamps with the tree branch from our Out on a Limb Dies. For my background, I inked up my cardstock panel with Peacock Feathers, Salty Ocean, and a light hand of Prize Ribbon Distress inks. I then die-cut / embossed the background with our Dotted Diamond Portrait Die. I inked up another small piece of cardstock with a similar blend of inks, which I die-cut using our Rounded Rectangle Window Dies. I shorted the rectangle by running it through my die-cutting machine again to better fit my sentiment from our Inside Greetings Sympathy Stamps. Lastly, I added a sprinkling of Majestic Clear Confetti adhered with Ranger's Multi Medium Matte.

Sunny Studio Spring Floral Tree Branch Sympathy Card using Cherry Blossoms Clear Layering Stamps & Dotted Diamond Metal Die

Next up is a more vibrant take on the Cherry Blossoms Stamps. I paired them with a dramatic navy blue cardstock, which I had die-cut using our Dotted Diamond Landscape Die. For my focal point birthday greeting, I heat embossed the words "Happy Birthday" using our Big Bold Greetings Stamps and die-cut a navy frame around it using our Limitless Labels 1 Die, which I popped up with black foam tape to help it stand out. As a finishing touch, I added a few scattered Midnight Blue Crystals for some subtle sparkle. I love the tone-on-tone look with the different textures!

Sunny Studio Spring Navy & Pink Floral Birthday Card using Cherry Blossoms Clear Layering Stamps & Dotted Diamond Metal Die

I am frequently asked which ink colors I used for my layered images. While I think there are so many great options out there, these are the colors I used today for my stamped images from light to dark:

Flower Blossoms
PinkFresh Ballet Slipper
Hero Arts Soft Pink
Hero Arts Bubblegum

Gina K.Passionate Pink

Flower Centers / Stamen
Gina K. Key Lime (card no. 1)
Gina K. Sweet Corn (card no. 2)

Flower Anthers 
VersaFine Clair Pinecone


That wraps up my projects for this morning. I hope I've inspired you in your own cardmaking and that you spread a little happiness by sending out a card to a loved one today.💗

Supplies Used:

Cherry Blossoms Stamps
Shop at:
Sunny Studio
Cherry Blossoms Dies
Shop at:
Sunny Studio
Big Bold Greetings Stamps
Shop at:
Sunny Studio
Big Bold Greetings Dies
Shop at:
Sunny Studio
Dotted Diamond Landscape
Shop at:
Sunny Studio
Dotted Diamond Portrait
Shop at:
Sunny Studio
Limitless Labels 1 Dies
Shop at:
Sunny Studio
Rounded Rectangle Window Dies
Shop at:
Sunny Studio
Versafine Clair Ink- Acorn
Shop at:
Sunny Studio
Versafine Clair Ink- Pinecone
Shop at:
Sunny Studio
Hero Arts White Detail
Shop at:
Sunny Studio
Majestic Clear Confetti
Shop at:
Sunny Studio
Inside Greetings Sympathy
Shop at:
Sunny Studio
Tsukineko Jumbo Dauber
Shop at:
Sunny Studio
VersaMark Watermark Ink
Shop at:
Sunny Studio
PinkFresh Fairy Dust Ink
Shop at:
Sunny Studio
Out on A Limb Dies
Out on A Limb Dies
Shop at:
Sunny Studio
Multi Medium Matte
Multi Medium Matte
Shop at:
Sunny Studio