Showing posts with label Inside Greetings. Show all posts

Wednesday, November 12, 2025

Snow One Like You Card with Tina

Hi there crafty friends, Tina here and today we are creating a sweet holiday card with the adorable Snow One Like You stamp and die set. I love that the cute girl and her snowman!

Sunny Studio Stamps: Snow One Like You Winter Themed Holiday Card by Tina Henkens (featuring Scenic Route, Frilly Frames Chevron Dies, Inside Greetings Holidays)

I colored this image with my Copics and added white highlights with a gel pen. Next, I pulled a red card base from my stash and cut a white panel with the outer die of the Frilly Frames Chevron set. We will use this piece to build the entire background of this scene card.

To start, I stamped the tree scene from Scenic Route directly on to this panel and used my Copics again for the coloring. To mimic the snow on the trees I added a bunch of fine lines with my white gel pen. I repeated this step on a separate piece of white card stock, but this time I only focused on the lower three pines. I used my scissors to fussy cut these trees, traced the outline with a black marker and glued them to the left of the panel filling in that part of the scene.

Sunny Studio Stamps: Snow One Like You Winter Themed Holiday Card by Tina Henkens (featuring Scenic Route, Frilly Frames Chevron Dies, Inside Greetings Holidays)

I wanted a dramatic sky, which I created with a cloud stencil from my stash and a combo of Saltwater Taffy and Kitsch Flamingo Distress Oxide inks. After mounting the girl and her snowman to the scene, I added lots of white snowflakes with a white paint marker.

My sentiment was pulled from the Inside Greetings Holiday set and stamped on a white banner with Versafine Onyx Black ink. To add more interest to the sky I added lots of little white stars (Snowflake Circle Frame die).

And that finishes my card, I hope you are having fun creating your holiday projects! Thank you for joining me and happy crafting!

Sunny Studio Supplies Used:

Frilly Frames Chevron Die
Shop at:
Sunny Studio
Scenic Route Stamps
Scenic Route Stamps
Shop at:
Sunny Studio
Scenic Route Dies
Scenic Route Dies
Shop at:
Sunny Studio
Snowflake Circle Frame
Shop at:
Sunny Studio
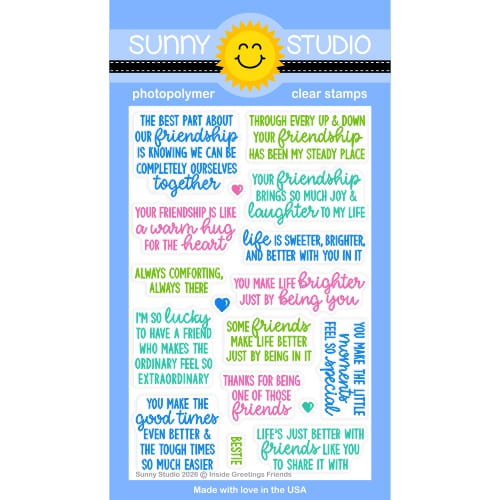
Inside Greetings-Holidays
Shop at:
Sunny Studio
Snow One Like You Stamps
Shop at:
Sunny Studio
Snow One Like You Dies
Shop at:
Sunny Studio

Wednesday, October 22, 2025

Alpaca Holiday Card with Tina

Hello crafters, it’s Tina and I have another cute holiday card for you! This time we are creating an oval design with the sweet images from the Alpaca Holiday stamp and die set.

Sunny Studio Stamps: Alpaca Holiday Winter Themed Card by Tina Henkens (featuring Stitched Oval Dies, Scalloped Oval Mat Dies, Brilliant Banner Dies, Inside Greetings)

To create an oval shaped card base from white card stock, I folded the paper in two and used the largest die from Stitched Ovals. You just have to make sure to place the die higher than the fold line from the card stock, that way it will not cut through.

I wanted to have a fun frame for my scene, so I opted for the largest of the Scalloped Oval Mat 1 dies combined with a smaller die from the Stitched Ovals. These sets work great together. My paper was a sheet of teal from the Polka-dot Parade pack. To give this frame a more distressed look I went in with a blending brush and Salvaged Patina Distress Oxide.

To build the scene I needed three more pieces of white card stock in an oval shape (Stitched Ovals), two for the snow banks and one for my sky (also inked with Salvaged Patina and sprinkled with splatters of white paint to mimic the snow).

Sunny Studio Stamps: Alpaca Holiday Winter Themed Card by Tina Henkens (featuring Stitched Oval Dies, Scalloped Oval Mat Dies, Brilliant Banner Dies, Inside Greetings)

From the Alpaca Holiday stamp, I selected three cuties and the mountain range (twice). I colored my images in pink, brown and teal Copics colors. Then it was time to build the scene layer by layer, starting with the sky and adding the two snow banks (cut with a die from my stash). Next, I added the two mountain ranges tucked in behind the snow. I used the second piece to strategically place the hills, doing some cutting with my scissors were needed. Then, I could add the frame and the sweet alpacas.

For oval designs, I love to work with a banner (Brilliant Banners 2), because it has that perfect rounded shape. My sentiment was taken from the Inside Greetings Holiday set and stamped in a pink ink from my stash. As embellishments, I glued three small snowflakes (Snowflake Circle Frame die) across the sky, adorning each of them with an Iridescent JewelFor this winter scene, I added lots of snowy dots with my white gel pen! 

I hope you got inspired by these cute alpacas for your holiday cards! Thank you for joining me and happy crafting!

Sunny Studio Supplies Used:

Polka-dot Parade 6x6 Paper
Shop at:
Sunny Studio
Alpaca Holiday Stamps
Shop at:
Sunny Studio
Alpaca Holiday Dies
Alpaca Holiday Dies
Shop at:
Sunny Studio
Stitched Oval Dies
Stitched Oval Dies
Shop at:
Sunny Studio
Snowflake Circle Frame
Shop at:
Sunny Studio
Inside Greetings-Holidays
Shop at:
Sunny Studio
Scalloped Oval Mat 1 Dies
Shop at:
Sunny Studio
Brilliant Banner 2 Dies
Shop at:
Sunny Studio

Sunday, October 19, 2025

Holiday Hugs & Woolen Mitten Card with Hanh

Hello Crafty Friends! This is Hanh on the Sunny Studio Stamps blog today with a fun mitten shaped card featuring these absolutely adorable bear from the Holiday Hugs set as well as a custom made sentiment using the new Build-a-Greeting Holidays Stamp set. 

Sunny Studio Polar Bear & Hot Cocoa Christmas Card using Woolen Mitten Die, Cable Knit Embossing Folder & Holiday Hugs Stamps

I stamped the bear and mug from the Holiday Hugs Stamp set onto a piece of Neenah Solar White 110 lb cardstock with Memento Tuxedo Black ink and used the coordinating Holiday Hugs Dies to die-cut them out. I made sure to use the special die that allows you to diecut the arms on the bear to allow her to hold the mug. I colored the images with Copic markers and highlighted them with a white gel pen.

COPIC COLORS:
Bear: E40/41/81 W3, R20, R000/20
Scarf: RV10/21/23, RV21/23/25/29, C1
Mug: RV23/25/29, E33, R24

Sunny Studio Polar Bear & Hot Cocoa Christmas Card using Woolen Mitten Die, Cable Knit Embossing Folder & Holiday Hugs Stamps

Merry Everything and Happy Always! I love this fun sentiment, but it is hard to find a premade clear stamp for it. I used the recently released 
Build-a-Greeting Holidays Stamp set for this task. This fun stamp set has oodles of holiday-themed words and is just perfect for creating custom sentiments. I aligned the words that I needed and stamped onto a piece of white cardstock with Memento Tuxedo Black ink. I used a paper trimmer to trim it out. 

Sunny Studio Polar Bear & Hot Cocoa Christmas Card using Woolen Mitten Die, Cable Knit Embossing Folder & Holiday Hugs Stamps

Next, I used the Woolen Mitten Dies to die-cut the mitten once out of pink and twice out of white cardstock. I also diecut the cuff out of pink cardstock. The pink mitten was placed into the Cable Knit 6 x 6 Embossing Folder and run through the die-cutting machine. This created a beautiful, deep-knit impression on the mitten. I adhered the pink to one of the white mittens. Foam tape was used to adhere the cuff to the pink mitten.

In order to create a hinge for the card, I used a score board to score a line along the top 0.5" of the second white mitten. I stamped one of the sentiments from the Inside Greetings Seasons Stamp set onto this white mitten with Worn Lipstick Distress Oxide ink and Memento Tuxedo Black ink. I used a strong double-sided tape to adhere the two white mittens to each other along the previously scored 0.5" space along the top of the mitten.

The colored images and the sentiment were adhered to the card front with foam tape for a bit of dimension and interest. I finished the card with a few white snowflakes die-cut using the Basic Mini Shape 2 and Basic Mini Shape 5 Dies. 

Sunny Studio Polar Bear & Hot Cocoa Christmas Card using Woolen Mitten Die, Cable Knit Embossing Folder & Holiday Hugs Stamps

I appreciate you taking the time to stop by and visit today. I hope you liked my card. Be sure to check out the Sunny Studio Stamps Shop for more info and ideas. Please also visit my INSTAGRAM feed for more inspiration.

Have a wonderful and crafty day! 

Sunny Studio Supplies Used:

Cable Knit Embossing
Shop at:
Sunny Studio
Basic Mini Shape Dies 2
Shop at:
Sunny Studio
Woolen Mitten Dies
Woolen Mitten Dies
Shop at:
Sunny Studio
Holiday Hugs Stamps
Holiday Hugs Stamps
Shop at:
Sunny Studio
Holiday Hugs Dies
Holiday Hugs Dies
Shop at:
Sunny Studio
Inside Greetings Seasons
Shop at:
Sunny Studio
Basic Mini Shape Dies 5
Shop at:
Sunny Studio
Build-a-Greeting Holidays
Shop at:
Sunny Studio

Wednesday, October 8, 2025

Merry Mice Card with Tina

Hi there crafty friends, Tina here and I am super excited to show you my first Christmas card of the year! How fun is it to add lots of snow to your projects or make them sparkle and shine! You know I love cute critters and today is no exception, we are featuring the cute images from Merry Mice and it’s coordinating dies.

Sunny Studio Stamps: Merry Mice Christmas Card by Tina Henkens (featuring Stitched Arch Dies, Frilly Frame Chevron Dies, Inside Greetings Holiday, Brilliant Banners)

As usual, I started with a white card base and cut an extra panel with the outer die from Frilly Frames Chevron. Next, I created my focal point for the snowy scene and die cut a window with the second largest of the Stitched Arched dies. I set this piece aside for another project.

For extra dimension, I ran the chevron panel again through the die cutting machine with the Dapper Diamonds embossing folder. Fun fact about this method is that you can reverse the panel and get a totally different look, and that is what I did today.

To create the sky and snow banks I used extra pieces of white card stock slightly bigger that the arched frame. I finally decided to use my Distress Mica Stain in the color Snow Flurries which has been in my stash for a while now. The result is a beautiful shiny sky, but you can also use any Distress Oxide inks that you have and a shimmer spray. I glued the snow banks and sky piece to the back of the diamond panel and added the whole to my card base.

Sunny Studio Stamps: Merry Mice Christmas Card by Tina Henkens (featuring Stitched Arch Dies, Frilly Frame Chevron Dies, Inside Greetings Holiday, Brilliant Banners)

After selecting the images from the adorable Merry Mice set, I started coloring with my Copics. I went with yellow, pink and blue shades which go well with the background.  

Next, I mounted the images into the scene with foam tape. The sentiment was taken from the Inside Greetings Holiday set (they also work great on the outside of a card!) and stamped onto a Brilliant Banner 4 piece with a blue ink from my stash. Lastly, I added a few Champagne Clear Jewels for that extra shimmer and shine.

I can’t wait to see all your wonderful Christmas cards! Thank you for joining me and happy crafting!

Sunny Studio Supplies Used:

Dapper Diamonds Embossing
Shop at:
Sunny Studio
Frilly Frames Chevron Die
Shop at:
Sunny Studio
Merry Mice Stamps
Merry Mice Stamps
Shop at:
Sunny Studio
Merry Mice Dies
Merry Mice Dies
Shop at:
Sunny Studio
Stitched Arch Dies
Stitched Arch Dies
Shop at:
Sunny Studio
Inside Greetings-Holidays
Shop at:
Sunny Studio
Brilliant Banner 4 Dies
Shop at:
Sunny Studio

Sunday, August 24, 2025

Birthday Mouse Card with Hanh

Hello Crafty Friends! This is Hanh on the Sunny Studio Stamps blog today with a fun birthday card featuring images from the Harvest Mice and Birthday Mouse sets. I just love these adorable mice.

Sunny Studio Card using Birthday Mouse & Harvest Mice Clear Stamps, Scalloped Square Craft Dies and Moroccan Circle Embossing

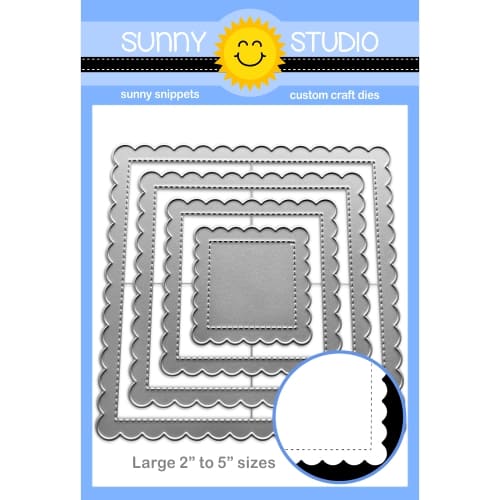
I started by creating the background and using the Moroccan Circles Embossing Folder to emboss a piece of pink cardstock. I trimmed a slim edge off the panel and adhered it to a white A2 card base (4.25" x 5.5"). Next, I used the second smallest die from the Scalloped Square 1 Small Dies to die-cut two squares out of Neenah Solar White cardstock. I lightly colored the upper part of the sky with Copic markers. I added a piece of craft foam to the backside of the squares before adhering them to the pink panel.

Sunny Studio Card using Birthday Mouse & Harvest Mice Clear Stamps, Scalloped Square Craft Dies and Moroccan Circle Embossing

I stamped the mice from the Harvest Mice Stamps and Birthday Mouse Stamps, the cheese from the Merry Mice Stamps, and the hats from the Party Pets Stamps sets onto a piece of Neenah Solar White 110 lb cardstock with Memento Tuxedo Black ink. I used the coordinating Harvest Mice DiesBirthday Mouse DiesMerry Mice Dies and Party Pets Dies to die-cut them out. I colored them with Copic markers and highlighted them with a white gel pen.

COPIC COLORS:
Mice: E50/51/53/33/35, R000/20
Hats: RV13
Cheese: Y13/15, RV10/13/14
Balloons: YG00/01/03/17, RV000/10//21/13/14, Y11/13/15
Bicycle: RV13, C1, W5
Sky: RV1000/10
Banner: YG01/03/17

Sunny Studio Card using Birthday Mouse & Harvest Mice Clear Stamps, Scalloped Square Craft Dies and Moroccan Circle Embossing

For the sentiment, I used the Brilliant Banner 3 Die to die-cut a banner from Neenah Solar white cardstock. I colored the banner with Copic markers. I stamped the "Happy Birthday" sentiment from the Inside Greetings: Birthday Stamps directly onto the banner with Memento Tuxedo Black ink. I highlighted it with a white gel pen. The colored images and sentiment were adhered to the panel with foam tape for a bit of dimension and interest.


Sunny Studio Card using Birthday Mouse & Harvest Mice Clear Stamps, Scalloped Square Craft Dies and Moroccan Circle Embossing


I appreciate you taking the time to stop by and visit today. I hope you liked my card. For more info and ideas, be sure to visit the 
Sunny Studio Stamps Shop. Please also visit my
INSTAGRAM feed for more inspiration.


Before you go, just a little reminder that there are still two days left for our 10th Birthday Sale! Use the discount code TENYEARS to save 20% on all Sunny Studio branded products (excluding retired items already on sale) through tomorrow, August 25th at Midnight PDT. Plus, all retail orders that exceed $100 will automatically receive free US shipping. Limit one discount code per order.

Birthday Sale: Save 20% off on Sunny Studio branded products (excluding retired items) using code TENYEARS through 8/25/25


Have a wonderful and crafty day!


Sunny Studio Supplies Used:


Moroccan Circles Embossing
Shop at:
Sunny Studio
Merry Mice Stamps
Merry Mice Stamps
Shop at:
Sunny Studio
Merry Mice Dies
Merry Mice Dies
Shop at:
Sunny Studio
Harvest Mice Stamps
Harvest Mice Stamps
Shop at:
Sunny Studio
Harvest Mice Dies
Harvest Mice Dies
Shop at:
Sunny Studio
Inside Greetings Birthday
Shop at:
Sunny Studio
Birthday Mouse Stamps
Shop at:
Sunny Studio
Birthday Mouse Dies
Birthday Mouse Dies
Shop at:
Sunny Studio
Scalloped Square 1 Small Die
Shop at:
Sunny Studio
Brilliant Banner 3 Dies
Shop at:
Sunny Studio
Party Pets Stamps
Party Pets Stamps
Shop at:
Sunny Studio
Party Pets Dies
Party Pets Dies
Shop at:
Sunny Studio