Showing posts with label Dotted Diamond Die. Show all posts

Wednesday, March 27, 2024

Wicker Basket Die Focused Card with Tina

Hi crafty friends, Tina here and since Spring is in the air I made another Easter card with the cute Wicker Basket Die. Not the traditional wooden look this time but a colorful flower one filled with pastel eggs!

Sunny Studio Stamps: Wicker Basket Die Focused Easter Card by Tina Henkens (featuring Frilly Frame Dies, Chickie Baby, Mini Grass Border Dies, Dotted Diamond Dies)

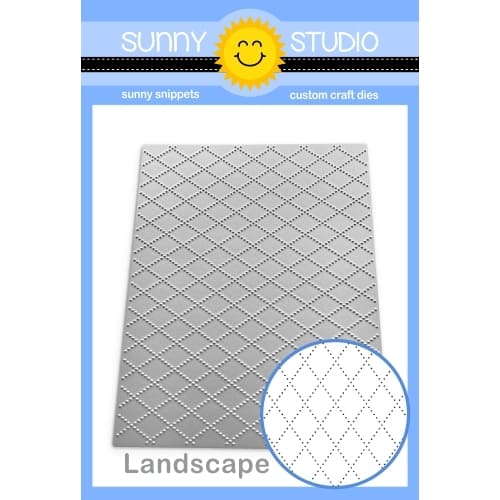
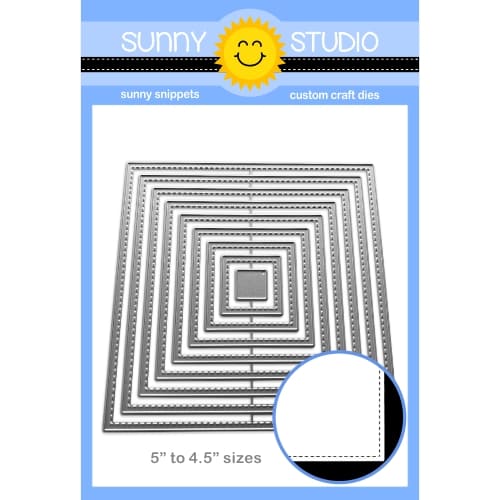
For my background I cut a panel from white cardstock with the outer die from the Frilly Frames Stripes Die. I used some blue ink from my stash for some fun splatter. Next I added even more texture to this piece with the beautiful Dotted Diamond Portrait Die. The grass portion of the scene is build with two layers and I used both of the Mini Grass Borders Dies. In search of a green that would match the leaves in my pattern paper for the basket I went with a mix of Bundled Sage and Mowed Lawn Distress OxideOf course, these pieces needed some splatters too!

Starting with a white card base I glued the dotted panel and the biggest grass border with liquid glue, the second grass border was popped up with foam tape. The Wicker Basket Die set comes with all the pieces you need for the perfect Easter hamper. For the basket I choose a beautiful floral pattern from Spring Fever. This was my inspiration for the color scheme of this card. The handle and part of the bow were cut from a blue gingham sheet (Gingham Pastel). Soft blue, pink and yellow pastel eggs were splattered and coated with some Stickles Glitter Glue for a ‘sugar coated effect’!

Sunny Studio Stamps: Wicker Basket Die Focused Easter Card by Tina Henkens (featuring Frilly Frame Dies, Chickie Baby, Mini Grass Border Dies, Dotted Diamond Dies)

Most of my cards include critters and today three cuties from Chickie Baby are searching for the Easter Eggs! And they have found a lot already! All the coloring was done with my Copics in happy colors that would match my color theme.

I mounted the basket and bow to the background panel and added the Easter eggs, then it was time to scatter the chickies in and around the hamper. The sentiment was selected from the Big Bunny set and added to the grass border. A few soft blue Pastel Jewels were the perfect embellishment for this project. 

I had a lot of fun creating this sweet card and I hope to see your creations soon! Thank you for visiting the blog and happy crafting!

Sunny Studio Supplies Used:

Gingham Pastels 6x6 Paper
Shop at:
Sunny Studio
Frilly Frames Stripes Die
Shop at:
Sunny Studio
Chickie Baby Stamps
Chickie Baby Stamps
Shop at:
Sunny Studio
Chickie Baby Dies
Chickie Baby Dies
Shop at:
Sunny Studio
Spring Fever Paper
Spring Fever Paper
Shop at:
Sunny Studio
Dotted Diamond Portrait
Shop at:
Sunny Studio
Big Bunny Stamps
Big Bunny Stamps
Shop at:
Sunny Studio
Wicker Basket Dies
Wicker Basket Dies
Shop at:
Sunny Studio
Mini Grass Border Dies
Shop at:
Sunny Studio

Saturday, March 23, 2024

Spring Garden Card with Cathy

Hey friends! Cathy here today and I’m excited to share a card featuring the Spring Garden Dies paired with elements of the Wonderful Windows Dies to create a gardening bench!

Sunny Studio Stamps: Spring Garden Die Focused Card by Cathy Chapdelaine (featuring Frilly Frame Dies, Wonderful Windows, Dotted Diamond Dies, Stitched Rectangle Dies, Notebook Dies, Brilliant Banner Dies)

This is an A2 card and I started with the background panel on the card front. I cut a piece of white cardstock 4 1/4" x 5 1/2", inked it with Lilac and Orchid Simon Says Stamp inks and die-cut it with the Dotted Diamond Portrait Die. I then die-cut the piece again with the largest Stitched Rectangle Die and adhered it to a white card front.

For the lattice, I die-cut a piece of white cardstock using the notebook paper die from the Notebook Photo Corners Dies and then die-cut the center of it using the smallest Stitched Rectangle Die. This created a frame for the lattice. (You could also just cut a piece of white cardstock 3” x 4 1/8” in place of the notebook paper die, but I liked the slightly rounded corners that this die produces.) Next, I cut a piece of white cardstock 3” x 4 1/8” and die-cut it using the Frilly Frames Lattice Die. I then adhered the frame over the lattice and adhered the combined piece to the card front 1/4" from the top of the lilac background panel. I was able to line the lattice up with the lines of the Dotted Diamond Portrait Die background, but you could also back the lattice with an inked piece of cardstock before adhering it to the card front.

Sunny Studio Stamps: Spring Garden Die Focused Card by Cathy Chapdelaine (featuring Frilly Frame Dies, Wonderful Windows, Dotted Diamond Dies, Stitched Rectangle Dies, Notebook Dies, Brilliant Banner Dies)

For the drawer portion of the bench, I die-cut a shutter twice from white cardstock using a Wonderful Windows Dies, layered them together and adhered them slightly overlapping the bottom of the lattice using foam dimensional tape. I die-cut drawer pulls from silver cardstock using dies also found in the Wonderful Windows Dies. I used a combination of inking and Copic coloring on the Spring Garden Dies. I just love the details of these dies and the cute little gardening tools!

To finish, I die-cut a piece of white cardstock using the Brilliant Banner 1 Die, embossed a sentiment from the Watering Can Stamps with white embossing powder and inked it with Memento Lulu Lavender ink.

I hope you enjoyed and thanks for stopping by today! For more inspiration, please visit my blog www.inkredibleadventures.com and you can also find me on Instagram as @cathy.chapdelaine.

Sunny Studio Supplies Used:

Stitched Rectangle Dies
Shop at:
Sunny Studio
Frilly Frames Lattice Dies
Shop at:
Sunny Studio
Watering Can Stamps
Watering Can Stamps
Shop at:
Sunny Studio
Wonderful Windows Dies
Shop at:
Sunny Studio
Notebook Photo Corners Dies
Shop at:
Sunny Studio
Brilliant Banner 1 Dies
Shop at:
Sunny Studio
Dotted Diamond Portrait
Shop at:
Sunny Studio
Spring Garden Dies
Spring Garden Dies
Shop at:
Sunny Studio

Friday, March 8, 2024

Big Bunny Card with Nicky

Happy Friday everyone, this is Nicky with you today on the Sunny Studio blog and I'm sharing a playful Easter card with you featuring the super duper cute Big Bunny stamp set.

Sunny Studio Stamps: Big Bunny Easter Card by Nicky Meeks (featuring Dotted Diamond Dies, Fancy Frame Dies)

I kicked things off by using the Dotted Diamond Landscape Die to die cut the background panel which I then softly ink blended in some dreamy pastel colours.  I glued this to my card base.

The next task was to stamp the bunny image three times with Memento Ink in Tuxedo Black and I coloured using the following Copic marker combinations:

Bunnies - C3, C1, C00
Blushes - R85, R83, R81, R000
Yellow - Y15, YR31, Y0000
Pink - RV02, RV00
Mint - G00, G000

Sunny Studio Stamps: Big Bunny Easter Card by Nicky Meeks (featuring Dotted Diamond Dies, Fancy Frame Dies)

The images were die cut with the Big Bunny Dies and arranged on the background which meant they were hanging over the edges and so once adhered with glue I flipped the panel over and cut back neatly to the edges of the card base.

I popped a small piece of dimensional foam tape under the bunny's ear in the centre of the card where they are layered one on top of one another and under the bouquet and Easter egg.

Sunny Studio Stamps: Big Bunny Easter Card by Nicky Meeks (featuring Dotted Diamond Dies, Fancy Frame Dies)

To complete the card I highlighted a couple of points with a white gel pen and gave the bunnies eyelashes. I die cut a frame using the Fancy Frames Rectangle Dies and backed it with foam tape and applied to the background and finally I stamped and die cut the sentiments and applied with foam tape also.

I hope you have enjoyed my card today and are inspired to go and create something soon!

Sunny Studio Supplies Used:

Fancy Frames- Rectangles
Shop at:
Sunny Studio
Dotted Diamond Landscape
Shop at:
Sunny Studio
Big Bunny Stamps
Big Bunny Stamps
Shop at:
Sunny Studio
Big Bunny Dies
Big Bunny Dies
Shop at:
Sunny Studio

Monday, March 4, 2024

Beautiful Bluebells Card with Leanne

Hello everyone! Leanne here and today I'm showcasing the Beautiful Bluebells layering stamps and coordinating dies. No floral arranging experience needed with these. The way the images are designed, makes it very easy to create a nice bouquet.  

Sunny Studio Stamps: Beautiful Bluebells Birthday Card by Leanne West (featuring Stitched Oval Dies, Inside Greetings, Watering Can Dies, Dotted Diamond Dies)

I started this card with an A2 size white card stock panel then gave it subtle pattern with the Dotted Diamond Portrait die. Next I adhered a die cut Stitched Oval to the center of my background panel. This oval helps to ground and spotlight my Bluebell arrangement.  

I used the Watering Can stamps to create a container for my Bluebell arrangement. I stamped it in two shades of gray and then splattered with some rust colored ink. I used the coordinating Watering Can die to cut out. I then stamped the "happy birthday" sentiment onto the center.  This stamp comes from Inside Greetings Birthday

Sunny Studio Stamps: Beautiful Bluebells Birthday Card by Leanne West (featuring Stitched Oval Dies, Inside Greetings, Watering Can Dies, Dotted Diamond Dies)

To create the Bluebells I used these colors of Altenew ink: Iceberg, Eastern Sky, Ultramarine, Azurite for the blues; Parrot & Olive for the greens. Once I had enough flowers to make a full arrangement, I added them into the Watering Can which has a slot cut out for the stems. I adhered this entire piece to the oval with foam tape. I left an open spot in the arrangement to place a butterfly. This image is included in the Watering Can stamp set. To finish, I added a gingham bow and a few sequins.  

Sunny Studio Supplies Used:

Stitched Oval Dies
Stitched Oval Dies
Shop at:
Sunny Studio
Inside Greetings Birthday
Shop at:
Sunny Studio
Watering Can Stamps
Watering Can Stamps
Shop at:
Sunny Studio
Watering Can Dies
Watering Can Dies
Shop at:
Sunny Studio
Dotted Diamond Portrait
Shop at:
Sunny Studio
Beautiful Bluebells Stamps
Shop at:
Sunny Studio
Beautiful Bluebells Dies
Shop at:
Sunny Studio

Wednesday, February 28, 2024

Big Bunny Card with Tina

Hi crafty friends, Tina here and I am super excited to share this sweet Easter card with you. Isn’t this the cutest Big Bunny you have ever seen? The stamp set comes with several accessories and the matching dies also cut the little paws so bunny can easily hold the flowers, letter or Easter items. I really love this larger size of stamp, similar to the adorable bear from Holiday Hugs.

Sunny Studio Stamps: Big Bunny Easter Card by Tina Henkens (featuring Gift Card Envelope Dies, Dotted Diamond Dies, Frilly Frame Dies)

I don’t often make yellow cards but for this one I went all out using a bright background created with the outer die from Frilly Frames Polka Dots, the Dotted Diamond Landscape cover plate and a paper from my stash. After gluing this piece directly to a white card base, I started working on my envelop using the Gift Card Envelope die. Of course, I selected a fun flower pattern from Spring Fever.

Next, I stamped and die cut the adorable bunny and the flower bouquet from Big Bunny and used the pattern paper as my inspiration for the Copic coloring. Some soft pastel tones this time which is perfect for Spring and warmer days to come.

Sunny Studio Stamps: Big Bunny Easter Card by Tina Henkens (featuring Gift Card Envelope Dies, Dotted Diamond Dies, Frilly Frame Dies)

The ‘Easter’ sentiment was selected from the same set (Big Bunny) and stamped onto a small white strip with Versafine Onyx Black ink. The Big Bunny Dies include the word ‘Greetings’ so after stamping I could use the matching die. The combined sentiment fitted nicely on the back flap of the envelope. Finally, I tucked the sweet bunny inside the envelope, put the bouquet in his little paws and added this piece to the yellow backdrop. I love that it completely fills an A2 card size! A few Gold Jewels were the only embellishment this project needed.

I had a lot of fun creating this cute card and I hope to see your creations soon! Thank you for visiting the blog and happy crafting!

Sunny Studio Supplies Used:

Frilly Frames Polka-Dot
Shop at:
Sunny Studio
Spring Fever Paper
Spring Fever Paper
Shop at:
Sunny Studio
Dotted Diamond Landscape
Shop at:
Sunny Studio
Big Bunny Stamps
Big Bunny Stamps
Shop at:
Sunny Studio
Big Bunny Dies
Big Bunny Dies
Shop at:
Sunny Studio
Gift Card Envelope Die
Shop at:
Sunny Studio

Tuesday, February 20, 2024

Big Bunny Card with Isha

Hello everyone! Isha here with a fun spring theme card featuring the adorable Big Bunny stamps and coordinating diesI know I am so very ready for spring, which shows in my color choices these days :)

Sunny Studio Stamps: Big Bunny Spring Themed Card by Isha Gupta (featuring Mini Grass Border Dies, Dotted Diamond Dies)

I started by sponging kitsch flamingo, worn lipstick, dried marigold and wild honey distress oxide inks to create the background. Flick some water. Use the Dotted Diamond Portrait die to add texture to this panel.

Die-cut the grass using Mini Grass Border die, sponge using mowed lawn and peeled paint distress ink. Adhere to the panel. Stamp the images using the Big Bunny stamps, color using the copic markers and die-cut using the coordinating dies.

Sunny Studio Stamps: Big Bunny Spring Themed Card by Isha Gupta (featuring Mini Grass Border Dies, Dotted Diamond Dies)

T
his adorable bunny can hold things as there is a separate die to die-cut the hand part, it's such a sweet and cute idea.

Adhere the card to a white cardbase. Thank you for dropping by and have a nice day!

Sunny Studio Supplies Used:

Dotted Diamond Portrait
Shop at:
Sunny Studio
Big Bunny Stamps
Big Bunny Stamps
Shop at:
Sunny Studio
Big Bunny Dies
Big Bunny Dies
Shop at:
Sunny Studio
Mini Grass Border Dies
Shop at:
Sunny Studio

Friday, February 16, 2024

Beautiful Bluebells Card with Nicky

Hello everyone this is Nicky with you today on the Sunny Studio blog and I'm sharing a new card featuring the gorgeous Beautiful Bluebells stamp set which I've combined with several other Sunny products so please read on for all the details.

Sunny Studio Stamps: Beautiful Bluebells & Big Bunny Card by Nicky Meeks (featuring Fancy Frame Dies, Dotted Diamond Dies)

As I nearly always do, I started by creating my background. For this card I took an A2 panel of white cardstock and softly ink blended the appearance of sky and grass. I then die cut with the Dotted Diamond Portrait Die to add some interest. I applied this panel to my card base and then  I die cut white cardstock using the two largest frames from the Fancy Frames Rectangle Die and backed them with dimensional foam tape and applied it to the background.

I stamped the Big Bunny and simply coloured it using Copic markers in E31, E41, E40, W00, R22, R20, R00, R000. I die cut using the coordinating die, backed it with foam tape and applied it to the card base tucking it just inside the frame at the bottom. The hair bow was stamped and coloured with Copics B12 and B26. I backed with foam tape and applied it at the base of her ear. Points were highlighted with a white gel pen. I emphasised her eyes using a Memento pen in Rich Cocoa and gave her some flirtatious eyelashes.

Sunny Studio Stamps: Beautiful Bluebells & Big Bunny Card by Nicky Meeks (featuring Fancy Frame Dies, Dotted Diamond Dies)

Next I tackled the layered stamping of the Beautiful Bluebells. First, I die cut white cardstock and I used the coordinating die for the stamped image I wanted for my bouquet. I then used the following ink colours by The Stamp Market to stamp each layer - Ocean, Cobalt and Navy and the greenery was inked with Leafy. I gathered the blooms in a bunch and glued them together and tucked them under the bunny's paw and used a little foam tape under the flower heads to make the bouquet stand away from the body of the bunny.

To finish the project I stamped the sentiments with the Cobalt ink so that everything would tone nicely and I die cut the word 'greetings' using the coordinating die and then made 2 or 3 more die cuts so that I could glue them in a stack to keep up with the dimension of the rest of the card.

I hope you like my bluebell card and I will be back next Friday with something new to inspire.

Sunny Studio Supplies Used: 

Fancy Frames- Rectangles
Shop at:
Sunny Studio
Dotted Diamond Portrait
Shop at:
Sunny Studio
Big Bunny Stamps
Big Bunny Stamps
Shop at:
Sunny Studio
Big Bunny Dies
Big Bunny Dies
Shop at:
Sunny Studio
Beautiful Bluebells Stamps
Shop at:
Sunny Studio
Beautiful Bluebells Dies
Shop at:
Sunny Studio

Saturday, February 3, 2024

Guest Designer Spotlight: Bighearted Bears Cards with Ashlee Bellinger

Hey, Sunny Studio friends it's Ashlee and I'm super excited to be back again with another guest post here at Sunny Studio Stamps. I'm also excited because I got to create with some of the brand new release that's available celebrating Spring and Valentine's.

Sunny Studio Stamps: Bighearted Bears & My Heart Cards by Ashlee Bellinger (featuring Dotted Diamond Dies, Gift Card Envelope Dies)

Here are the products I used for my first card :

Bighearted Bears Stamps / Bighearted Bears Dies

Dotted Diamond Portrait die

My Heart Stamps / My Heart Dies

To create this card I started with a dark pink card stock base. I then got a light pink card and added a touch of ink blending to it with Catherine Pooler ink before splattering it with water giving it a mottled effect. Once that was dry I die-cut it using the Dotted Diamond Portrait die before adhering it to the card base. 

Now it was time to add all the super cute elements to create a Valentine-themed card. 

Sunny Studio Stamps: Bighearted Bears & My Heart Cards by Ashlee Bellinger (featuring Dotted Diamond Dies, Gift Card Envelope Dies)

Using the My Heart Stamps I selected one of the sentiments and heat embossed it on black card stock using WOW! Opaque bright white embossing powder before die cutting it with the coordinating My Heart Dies and adhering in place with liquid glue.

I stamped, coloured and die-cut a bunch of the Bighearted Bears images. These were all coloured using Spectrum noir tri-blend markers with added white pen highlights. Using foam tape I added varying depths of the tape to the back of all the images so I could adhere them in place and create dimension on the card with the sweet little scene! To complete the card I added a touch of pretty sequins.

Sunny Studio Stamps: Bighearted Bears & My Heart Cards by Ashlee Bellinger (featuring Dotted Diamond Dies, Gift Card Envelope Dies)

Onto my second card. For this one, I used these products :

Bighearted Bears stamp / Bighearted Bears Dies

Dotted Diamond Portrait Die

My Heart Stamps / My Heart Dies

Gift Card Envelope Die

To create this one I started with a light grey card stock base, added some Catherine Pooler grey ink and then splattered with water creating the same effect for the card base as I did for my first card. Die cut also using the dotted diamond die. 

The new Gift Card Envelope Die is too cute, I couldn't resist using that to add a sweet little envelope to the centre of my card. I die-cut it from light pink card stock before folding and adhering it into place. I also wanted it to look like it had a little letter inside so I cut a piece of white card to add inside it.

Sunny Studio Stamps: Bighearted Bears & My Heart Cards by Ashlee Bellinger (featuring Dotted Diamond Dies, Gift Card Envelope Dies)

I stamped, coloured and die-cut three of the Bighearted Bears before adhering them in place with foam tape on the little card. All coloured using Spectrum noir tri-blend markers with added white pen highlights!

This sentiment was also heat embossed using WOW! Opaque bright white powder on black cardstock before die-cutting with the coordinating die and adhering to the envelope with foam tape for more dimension. I love using foam tape on my cards just to make the scene pop up off the card.

And of course, to finish it all off a touch of sequins, I just can't go without adding some!

That's all for my cards today, I really hope you enjoyed them and thank you for having me as a guest here with you all at Sunny Studio Stamps. Big crafty hugs!

Sunny Studio Supplies Used:

Dotted Diamond Portrait
Shop at:
Sunny Studio
Bighearted Bears Stamps
Shop at:
Sunny Studio
Bighearted Bears Dies
Shop at:
Sunny Studio
My Heart Stamps
My Heart Stamps
Shop at:
Sunny Studio
My Heart Dies
My Heart Dies
Shop at:
Sunny Studio
Gift Card Envelope Die
Shop at:
Sunny Studio