Showing posts with label Happy Howl-o-ween. Show all posts

Sunday, September 15, 2024

Happy Howl-o-ween Card with Hanh

Hello Crafty Friends! This is Hanh. I am excited to be back on the Sunny Studio Stamps blog today to share a slimline card and a pair of shaker tags featuring the Happy Howl-o-ween set from the latest release. These adorable pups are all dressed up and ready to head out to celebrate Halloween.

Sunny Studio Stamps: Happy Howl-o-ween Card by Hanh Nguyen (featuring Picket Fence Border Dies)

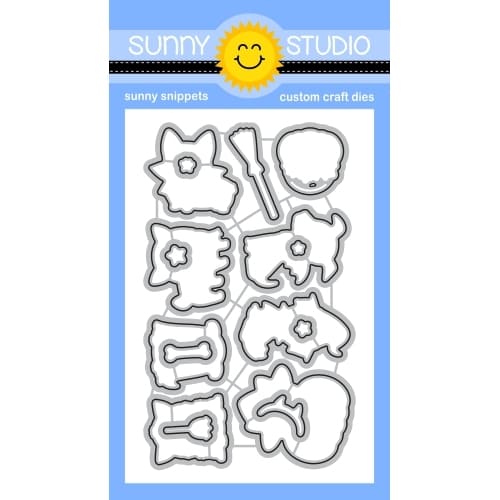
I stamped the images from the Happy Howl-o-ween Stamp set onto a piece of Neenah Solar White 110 lb cardstock with Memento Tuxedo Black ink and used the coordinating Happy Howl-o-ween Dies to diecut them out. I colored with Copic markers and accented with a white gel pen.

COPIC COLORS:
Dogs: E51/53/33/99, C00/1, R00/20, R22, C5
Pumpkins: Y35/38 YR04/07, C5
Hat: C3/5/7/9, Y38 YR04/07
Bones: E81/41 W3

Sunny Studio Stamps: Happy Howl-o-ween Card by Hanh Nguyen (featuring Picket Fence Border Dies)

For the background, I took a piece of Bristol Smooth cardstock (8.5" x 3.5"). I created a homemade 3" mask by diecutting a piece of masking paper with a 3" circle die. INSIDE TIP: for smaller masks such as this one, I use a full-adhesive Post-It sticky note to make my masks. I applied the mask to the center of the slimline panel to create a moon. I ink blended the background with Salvaged Patina, Peacock Feathers, Prize Ribbon, Chipped Sapphire and Black Soot Distress inks. Once the panel was dry, I splattered it with some Opaque White Copic ink that I slightly diluted with water. 

Sunny Studio Stamps: Happy Howl-o-ween Card by Hanh Nguyen (featuring Picket Fence Border Dies)

Next, I stamped one of the sentiments from the set with Versamark Watermark ink and heat embossed with some Fine Detail White Embossing Powder onto a piece of black cardstock (8.5" x 1.25"). I used the grassy edge die from the Picket Fence Die set to trim the upper edge of the strip. I adhered the strip to the bottom edge of the panel. I adhered the colored images before adhering the panel to a white cardbase (8.5' x 3.5").

Sunny Studio Stamps: Happy Howl-o-ween Shaker Tags by Hanh Nguyen (featuring Mini Mat & Tag Dies)

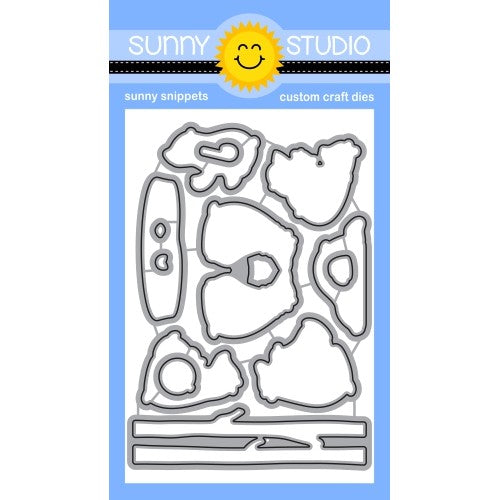
I had a few colored images left so I decided to make some matching shaker tags for my card. i used the tag die with the window die attached from the Mini Mat & Tag 3 Die set to diecut 5 tags with the windows out of black cardstock, one solid tag (no window) out of clear acetate and one solid tag out of a patterned paper from the Polka Dot Parade Paper Pack for each tag. I stacked and adhered 4 black tags together with liquid adhesive. I added the clear acetate to the top before adhering the final layer of black tag. I added some of the colored bone images and sparkling clear sequins from my stash. I closed off the back with the layer of patterned paper tag. I repeated the same process for the second tag.

Sunny Studio Stamps: Happy Howl-o-ween Card & Shaker Tags by Hanh Nguyen (featuring Mini Mat & Tag Dies, Picket Fence Border Dies)

I stamped the sentiments from the same stamp set onto a 3/8" strip of white cardstock, trimmed it to the desired length and used a hole puncher to create the sentiment strip. I used some festive ribbon and twine to attach the strips to the tags. 

I appreciate you taking the time to stop by and visit today. I hope you liked my card and tags. Be sure to check out the Sunny Studio Stamps Shop for more info and ideas. Please also visit my INSTAGRAM feed for more inspirations.

Have a wonderful and crafty day!

Sunny Studio Supplies Used:

Picket Fence Border Dies
Shop at:
Sunny Studio
Polka-dot Parade 6x6 Paper
Shop at:
Sunny Studio
Mini Mat & Tag 3 Dies
Shop at:
Sunny Studio
Happy Howl-o-ween Stamps
Shop at:
Sunny Studio
Happy Howl-o-ween Dies
Shop at:
Sunny Studio

Saturday, September 14, 2024

Guest Designer Spotlight: Fall Themed Cards with Sara Zoppi

Hi crafty friends, Sara here! Today I am so happy and grateful to be here again, guesting for Sunny Studio Stamps! And today I have two cards featuring some of the recent released fall products. So, let's dive into the first one!

Sunny Studio Stamps: Autumn Garland Cards by Sara Zoppi (featuring Holiday Hugs, Buffalo Plaid Dies)

Fall is around the corner and as soon as I saw the newest Autumn Garland Stamp set I fell in love and I knew I would have created a card with some unconventional fall colors. If you know me, you might know I am a big fan of the huge Sunny Studio critters and this bear included in the Holiday Hugs Stamp was the perfect match to this garland. So I firstly stamped the garland, the big bear and the small pinecone he is keeping using a dark brown copic friendly ink (Memento Espresso Truffle) and I started coloring everything with the copics listed below. I went for a desaturated palette, and I absolutely E08 loved the result.

- Bear: E44 – E43 – E42 – E40 – RV34 – R20
- Pinecone: E59 – E57 – E35 – E31
- Orange combo:– E97 – YR21
- Purple combo: RV69 – RV66 – V01
- Olive green combo: BG96 – YG95 – YG93
- Teal combo: BG78 – BG18 – BG72
- Berries: R89 – R56 – R35 – R43

Sunny Studio Stamps: Autumn Garland Cards by Sara Zoppi (featuring Holiday Hugs, Buffalo Plaid Dies)

I then die cut the images using Autumn Garland Dies and Holiday Hugs Dies and I moved into the background. I wanted a soft look and I decided to use the Buffalo Plaid Diagonal Die as a hot foil plate. This background die was perfect to get a light impression of foiling, I used a shining gold on white cardstock (every die can be used with the hot foil system, the look is really soft because the "lines" are really thin). I also white heat embossed the autumn word that comes from the 
Autumn Garland Stamp set on some teal cardstock and I completed the sentiment with a purple "greetings". I arranged the colored images and the sentiment on the background. 

Sunny Studio Stamps: Autumn Garland Cards by Sara Zoppi (featuring Holiday Hugs, Buffalo Plaid Dies)

To complete the card, I matted the foiled panel (which is slightly smaller than 4,25"x5,5") with a purple coordinated cardstock and then with a 6"x4,75" white panel too. And here's the finished result!

Sunny Studio Stamps: Happy Howl-o-ween Cards by Sara Zoppi (featuring Chloe Alphabet Dies)

My second and last inspiration for today is more "spooky" and features the Happy Howl-o-ween Stamp set.

This is an almost one layer card and I know it looks more "intimidating" because there is an hand drawn background. But I can assure you it is not soo hard to do. I firstly stamped the four Halloween dogs using some Judikins Masking Paper: I started with the two in the foreground and then moved into the back. 

Sunny Studio Stamps: Happy Howl-o-ween Cards by Sara Zoppi (featuring Chloe Alphabet Dies)

Then I colored everything with the copics listed below.

- Pumpkin: E08 – YR68 – E97 – YR15 – YR12 – YR21 | T7 – T4 – YR68 – Y13
- Dogs: T10 – T9 – T7 – T6 – T5 – E43 – E41
- Background: T10 – T8 – T7 – T5 – T4 – T3 – T2 – T1 – T0

For the background I firstly colored the sky, leaving a white hole as the moon. I then added layers of branches to create the wood.

Sunny Studio Stamps: Happy Howl-o-ween Cards by Sara Zoppi (featuring Chloe Alphabet Dies)

I then trimmed the panel to 4"x5,25" and I decided to matt it with a 4, 5"x5,75" white panel in order to create a white frame around. For the sentiment, I die cut the word BOO with the Chloe Alphabet Dies (I die cut it twice from orange glitter cardstock and a black die cut with a small offset). I then added the white stripe with the orange "Happy Howl-o-ween" stamped sentiment. And here's the finished result!
 
Thanks for stopping by! I really hope you will like my projects and you will be inspired to create something!

Sunny Studio Supplies Used:

Chloe Alphabet Dies
Chloe Alphabet Dies
Shop at:
Sunny Studio
Holiday Hugs Stamps
Holiday Hugs Stamps
Shop at:
Sunny Studio
Holiday Hugs Dies
Holiday Hugs Dies
Shop at:
Sunny Studio
Autumn Garland Stamps
Shop at:
Sunny Studio
Autumn Garland Dies
Autumn Garland Dies
Shop at:
Sunny Studio
Happy Howl-o-ween Stamps
Shop at:
Sunny Studio
Happy Howl-o-ween Dies
Shop at:
Sunny Studio
Buffalo Plaid Diagonal Die
Shop at:
Sunny Studio

Friday, September 13, 2024

Happy Howl-o-ween Card with Nicky

Hello, this is Nicky with you today on the Sunny Studio Stamps blog and I'm sharing an equal parts fun, and cute, Halloween card, featuring our Happy Howl-o-ween set.  Read on for all the details on this slimline card.

Sunny Studio Stamps: Happy Howl-o-ween Card by Nicky Meeks

I created a slimline card base and then glued on a white slimline panel. I created another panel that was 1/4 inch smaller and I ink blended it using Melon Orange and Black inks from The Stamp Market. I distressed the background, backed it with white craft foam and glued it to the card base.

I stamped the images from Happy Howl-o-ween using Memento Ink in Tuxedo Black. I coloured the images with the following Copic marker combinations:

Pumpkins - YR09, YR04, Y38, T3
Corgi - E44, E31, E41, C3, C1, C00, T7, R59
Bowtie Dog - T6, T4, T2, C3, C1, C00, V09, V17, V04
Ghost Dog - C3, C1, C00, E77, E74, E71
Dog in Pumpkin - T6, T5, T4, V09, V17, V04
Bat Dog - E44, E43, E42, C3, C1, C00, T7, T5, T3, V09, V17, V04
Blushes - R22, R21, R20, R00

Sunny Studio Stamps: Happy Howl-o-ween Card by Nicky Meeks

The images were die cut using the coordinating Happy Howl-o-ween Die and applied to the scene with foam tape along with the sentiment. I embellished the background further by dotting in interest in white and black and also metallic and I added some 4 point stars for some twinkle. Points were highlighted with a white gel pen and I used Copic markers to add some shadows underneath the characters.

Thank you for stopping by the blog today and I'll be back next Friday with something new. Enjoy your weekend.

Sunny Studio Supplies Used:
 

Happy Howl-o-ween Stamps
Shop at:
Sunny Studio
Happy Howl-o-ween Dies
Shop at:
Sunny Studio

Thursday, September 5, 2024

Happy Howl-o-ween Card with Marine

Hello crafty friends, Marine here, I'm so happy to share this spooky cute and colorful card with you today showcasing the super adorable pups from Happy Howl-o-ween. They're so fun, I adore them, and I hope to be able to feature them on more cards in the coming weeks.

Sunny Studio Stamps: Happy Howl-o-ween Card by Marine Simon (featuring Scenic Route, Too Cute To Spook, Fall Scenes)

I went for quite a simple background for this card, and started off by cutting a 5,5 x 4,25 inches Strathmore bristol smooth panel that I divided in two parts: the sky in the upper part, and grass in the lower part. For the sky, I applied, from top to bottom, salty ocean and prize ribbon oxide inks. I splattered water droplets that I dried using a paper towel. I mixed a drop of liquid stardust with a couple of water droplets, added more splatters to the sky, and next I mixed some black soot oxide ink with water to make even more splatters. For the grass, I started off by applying mowed lawn oxide ink on the whole section, and next blended some rustic wilderness oxide ink at the bottom and on the sides. I mixed some rustic wilderness oxide ink with water and added splatters on my green section. And then I mixed some copic opaque white ink with water, and added splatters all over the panel.

Sunny Studio Stamps: Happy Howl-o-ween Card by Marine Simon (featuring Scenic Route, Too Cute To Spook, Fall Scenes)

I stamped my images on 80lb Neenah solar white cardstock using an alcohol marker friendly black ink, I cut them all using the matching dies, and colored everything using my Spectrum Noir Illustrator markers, my Graph'it brush markers, and my Ohuhu markers. And for some extra fun, I picked a purple, aqua, green, yellow and orange color palette for the houses and lights.

Here is a detailed list of the stamp sets I used: • Happy Howl-o-ween - dogs • Scenic Route - houses, lights • Fall Scenes - bats, small pumpkins, trees • Too Cute To Spook - spiders, tiny Jack 'O Lantern face.

Sunny Studio Stamps: Happy Howl-o-ween Card by Marine Simon (featuring Scenic Route, Too Cute To Spook, Fall Scenes)

Once the coloring was done, I white heat embossed my "Wishing you a grrreat Halloween" greeting from Happy Howl-o-ween at the bottom of my panel, and then attached all my images using 1mm and 2mm foam squares. I added a drop of white blizzard nuvo drops on each light to make them all shine, and finished my card by adding highlights and details to the images using a white gel pen. 

And that's it! Here's to a fun and colorful Halloween! Thanks so much for stopping by, and see you next time!

Sunny Studio Supplies Used:

Scenic Route Stamps
Scenic Route Stamps
Shop at:
Sunny Studio
Scenic Route Dies
Scenic Route Dies
Shop at:
Sunny Studio
Fall Scenes Stamps
Fall Scenes Stamps
Shop at:
Sunny Studio
Fall Scenes Dies
Fall Scenes Dies
Shop at:
Sunny Studio
Too Cute To Spook Stamps
Shop at:
Sunny Studio
Too Cute To Spook Dies
Shop at:
Sunny Studio
Happy Howl-o-ween Stamps
Shop at:
Sunny Studio
Happy Howl-o-ween Dies
Shop at:
Sunny Studio

Wednesday, August 28, 2024

Happy Howl-o-ween Card with Tina

Hi crafty friends, Tina here and we are getting ready for the spooky season with this fun ‘Howl-o-ween’ card using almost all the sweet dressed up dogs from the Happy Howl-o-ween stamp and die set. I loved these cuties so much that I went with a card design that could feature six of them!

Sunny Studio Stamps: Happy Howl-o-ween card by Tina Henkens (featuring Window Trio Dies, Frilly Frame Dies)

To start, I die cut a panel from white card stock with the outer border of the Frilly Frames Stripes Die. In my stash I found a giant spiderweb stencil and used it to ink up the panel with Wilted Violet Distress Oxide. For extra interest, I added a few black ink splatters with a small paint brush.

Once the ink was dry, I ran the panel twice through the die cutting machine with the Window Trio Square Dies, thus obtaining 6 windows for my critters.

Next, I prepared a white card base and added 6 matching squares from two patterns of the Subtle Grey Tones pack. I have used these papers so many times before, they give that extra little texture to your card without being too busy! Then I could layer the purple panel with small foam tape strips for dimension.

Sunny Studio Stamps: Happy Howl-o-ween card by Tina Henkens (featuring Window Trio Dies, Frilly Frame Dies)

After selecting 6 cute dogs and some accessories from the Happy Howl-o-ween stamp set, I browsed through my stash and also selected the witch hat, the cauldron (Bewitching stamps) and some small pumpkins (Truckloads of Love).

All the coloring was done with my trusty Copic markers and white gel pen details made the images pop even more. I played around with the placement of the dogs and the pumpkins trying to evenly spread the colors over the panel. Once happy with the positioning, I mounted all the critters and accessories with foam tape to the window frames.

My sentiment was taken from the Happy Howl-o-ween stamp and stamped in Versafine Onyx Black ink. I think it’s a perfect match for this card. Adding a few Crystal clear Jewels finishes this sweet project. 

I can’t wait to see all these adorable dogs featured in your projects! Thank you for visiting the blog and happy crafting!

Sunny Studio Supplies Used:

Bewitching Stamps
Bewitching Stamps
Shop at:
Sunny Studio
Bewitching Dies
Bewitching Dies
Shop at:
Sunny Studio
Window Trio- Square Die
Shop at:
Sunny Studio
Frilly Frames Stripes Die
Shop at:
Sunny Studio
Truckloads of Love Stamps
Shop at:
Sunny Studio
Truckloads of Love Dies
Shop at:
Sunny Studio
Happy Howl-o-ween Stamps
Shop at:
Sunny Studio
Happy Howl-o-ween Dies
Shop at:
Sunny Studio

Monday, August 19, 2024

Sneak Peek: Happy Howl-o-ween and Brilliant Banner 3 & 4 Dies

Hello and welcome to Day 2 of our Holiday Sneak Peek Week!  All this week I am sharing cards showcasing our newest collection which will be available for purchase this Friday!

Card No. 1: My cards today showcase our new Happy Howl-o-ween Stamps which include 7 adorable pups that mix and match so perfectly with our other Halloween sets. For my first card, I used five of the dogs together with our Comic Strip Speech Bubble Dies, the spider web & spider from our Too Cute To Spook Stamps, and the grass from our Mini Grass Border Dies. I also scattered a number of the little stars from the new stamp set, but I was feeling like the white die-cut borders were distracting and made my card feel too busy so I fixed that by coloring around them with a coordinating Copic Marker to match my Prize Ribbon Distress inked background.

Sunny Studio Dog Halloween Card (using Happy Howl-o-ween & Too Cute To Spook Stamps, Comic Strip Speech Bubbles & Mini Grass Border Dies)

Card No. 2: For my next card featuring the Happy Howl-o-ween Stamps, I paired the dogs with the haunted house from our Fall Scenes Stamps for a trick-or-treating scene. For my background, I inked up an oversized moon to frame the "Happy Halloween" greeting from the Too Cute To Spook Stamps. I then inked the night's sky around the moon blending both Wilted Violet and Seedless Preserves Distress inks and masked off below my fence and trees so I could ink them up to match to blend into my background. A trio of bats from the Fall Scenes Stamps completed my scene.

Sunny Studio Dogs with Haunted House Halloween Card (using Happy Howl-o-ween, Fall Scenes, & Too Cute To Spook Clear Stamps)

Card No. 3: This Halloween card uses the dog wearing a witch costume with the broom, greeting, and stars from our new Happy Howl-o-ween Stamps with the Haunted House and bats from the Too Cute to Spook Stamps, and the bare tree from the Fall Scenes Stamps. I framed my flying dog with a full moon using our Stitched Circle Large Dies and added a stitched hillside with our Slimline Nature Border dies. 

To create the look of craters in my moon, I dripped some Squeezed Lemonade re-inker on my glass mat, spritzed it with water, smooshed it with a piece of plastic packaging I had sitting on my desk, and transferred the splatters that clung to the clear packaging to my piece of white cardstock. I dried it with my heat gun and then was able to blend the same ink with a lighter touch to fill in the background before die-cutting it. My night's sky was inked by blending Salty Ocean, Mermaid Lagoon, Prize Ribbon, Chipped Sapphire, and Black Soot Distress ink along the outside edges. I wanted to vary the height of my spooky trees so I lengthened the trunk of one tree by inking in the remainder by hand using a Copic Multiliner pen. My stars were heat embossed to match using some old Wow Sunny Yellow Embossing Powder (WK09R) from my stash.

Sunny Studio Dog Witch with Moon & Haunted House Halloween Card (using Happy Howl-o-ween, Fall Scenes, & Too Cute To Spook Clear Stamps)

Card No. 4: For a quick & easy card using the Happy Howl-o-ween Stamps, I turned to our Staggered Circle Dies which can cute 5 stitched circle windows. However, I positioned the die to just cut four windows and backed the openings with different bright colored prints from our Polka-dot Parade Paper pack. I added a coordinating purple striped strip along the bottom of my card from our Striped Silly Paper pack, and heat embossed my sentiment onto our new Brilliant Banner 3 Dies which had been cut out using our Classic Gingham Paper pack. Lastly, to add balance to my design by including a little spider hanging down from our Too Cute To Spook Stamps using a stitched trail from our Snail Mail Stamps.

Sunny Studio Dog Halloween Card using Happy Howl-o-ween Stamps, Staggered Circles Dies, Polka-dot Parade, Striped Silly & Classic Gingham Paper

Card No. 5: This card design was inspired from the bottom up. I started by creating my black and orange gingham panel using our new Buffalo Plaid Straight die together with our Diagonal & Straight Stripes Stencils. I cut off one row along the bottom to add a black scalloped border using our Slimline Basic Border Dies. That in turn inspired me to frame my critters using our coordinating Scalloped Square 2 Small Dies, layered with our Stitched Square Dies. From there I was looking for the perfect grouping of dogs to become my focal point using our new Happy Howl-o-ween Stamps. The finishing touch was adding an orange ombre colored speech bubble die-cut from our Comic Strip Speech Bubble Dies and heat embossed using a punny greeting from the new set.

Sunny Studio Dogs in Halloween Costumes Orange Gingham Card (using Happy Howl-o-ween Stamps, Buffalo Plaid Straight Die & Stencils)

Card No. 6: Up next is card pairing the costumed doggies from our Happy Howl-o-ween Stamps with our new Distinctive Door Dies (being shared more on Wednesday) for a cute Trick-or-Treating scene. The Distinctive Door Dies come with most of the home elements seen here, but I fashioned my own fall wreath using the leaves from our Autumn Tree Dies and added the spider webs and pumpkins from our Too Cute To Spook Stamps. I finished off my card with a heat-embossed greeting stamped onto our new Brilliant Banner 4 Dies. I have been eagerly awaiting this particular banner die which pairs well with so many of our curved basic dies such as our Stitched Arch, Stitched Semi-Circle, Stitched Circle Dies, and Stitched Oval Dies.

Sunny Studio Dogs in Halloween Costumes Trick or Treat Card (using Happy Howl-o-ween & Too Cute To Spook Stamps, Distinctive Door Dies)

Card No. 7: For my last card of the day, I thought I would show that these stamps aren't limited to only Halloween cards. I used the greeting, paw print, bone, and bow tie-wearing dog images from the Happy Howl-o-ween Stamps to create a fun everyday card. I was able to customize the punny greeting by pairing it with our Chloe Alphabet Dies. I repeatedly stamped the paw print in my background to create a custom tone-on-tone background and arranged the dog bones to form a frame around my dogs and sentiment. Lastly, I finished my card with a coordinating stitched "ribbon" cut using our Ribbon & Lace Border Dies and a white scalloped trim from our Eyelet Lace Border Dies.

Sunny Studio Dog Thinking of You Card (using Happy Howl-o-ween Stamps, Ribbon & Lace Border, Eyelet Lace Border & Chloe Alphabet Dies)

That wraps up today's sneak peek. I'm so happy you joined me today! I'd love to give a $25 gift code to one lucky winner using the Rafflecopter below. Our daily contests will run through Monday, August 26th at Midnight PST with winners announced here on Friday, August 30th.

a Rafflecopter giveaway
Here's a closer look at our new Happy Howl-o-ween Stamps & Dies, Brilliant Banner 3 Dies, and 
Brilliant Banner 4 Dies used today and available for purchase on Friday, August 23rd.

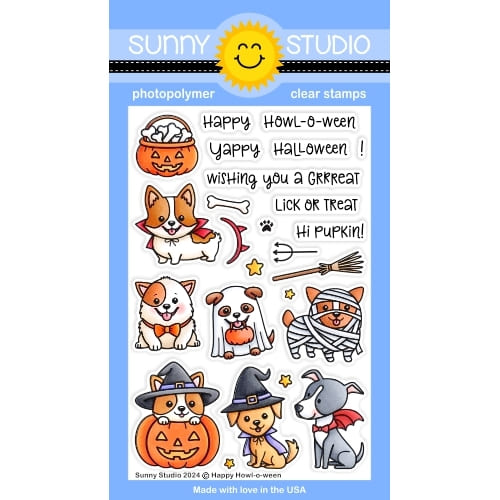
Sunny Studio Happy Howl-o-ween Dogs in Halloween Costumes 4x6 Clear Photopolymer Craft Stamps

Sunny Studio Stamps Brilliant Banner 3 curved layered Metal Cutting Craft Dies Sunny Studio Stamps Brilliant Banner 4 curved layered Metal Cutting Craft Dies

Other Supplies Used:

Chloe Alphabet Dies
Chloe Alphabet Dies
Shop at:
Sunny Studio
Tsukineko Jumbo Dauber
Shop at:
Sunny Studio
Versafine Onyx Black Ink
Shop at:
Sunny Studio
Comic Strip Speech Bubble Dies
Shop at:
Sunny Studio

Slimline Basic Borders
Shop at:
Sunny Studio
Slimline Nature Borders
Shop at:
Sunny Studio
Stitched Circle Large Dies
Shop at:
Sunny Studio
Fall Scenes Stamps
Fall Scenes Stamps
Shop at:
Sunny Studio
Fall Scenes Dies
Fall Scenes Dies
Shop at:
Sunny Studio
Too Cute To Spook Stamps
Shop at:
Sunny Studio
Too Cute To Spook Dies
Shop at:
Sunny Studio
Autumn Tree Die
Autumn Tree Die
Shop at:
Sunny Studio
Ribbon & Lace Dies
Ribbon & Lace Dies
Shop at:
Sunny Studio
Mini Grass Border Dies
Shop at:
Sunny Studio
Stitched Square Dies
Shop at:
Sunny Studio
Scalloped Square 2 Small Die
Shop at:
Sunny Studio
Buffalo Plaid Straight Die
Shop at:
Sunny Studio
Distinctive Door Dies
Shop at:
Sunny Studio
Diagonal & Straight Stripes Stencils
Shop at:
Sunny Studio
Hero Arts White Detail
Shop at:
Sunny Studio
Classic Gingham 6x6 Paper
Shop at:
Sunny Studio
Striped Silly 6x6 Paper
Shop at:
Sunny Studio
Polka-dot Parade 6x6 Paper
Shop at:
Sunny Studio
Staggered Circles Die
Shop at:
Sunny Studio
Eyelet Lace Borders
Eyelet Lace Borders
Shop at:
Sunny Studio
VersaMark Watermark Ink
Shop at:
Sunny Studio