Showing posts with label Notebook Dies. Show all posts

Tuesday, September 23, 2025

Fall Scenes & Too Cute To Spook Card with Amanda

Hey, hey, crafty friends, Amanda here! Halloween is just around the corner, and I'm celebrating with this fun card I created! I'm here to explain how I made it so you can get inspired to make something crafty today!

Sunny Studio Costume Critter & Haunted House Halloween Card using Fall Scenes and Too Cute To Spook Clear Stamps & Craft Dies


First, I created an A2 card base out of white cardstock. I trimmed the cardstock to 5.5" x 8.5" and then scored it at 4.25". I, then, folded it on the score line. Next, I pulled out my Critter Country Paper. This pack is full of beautiful fall colors and patterns! I trimeed the orange polka-dot date paper down to 4" x 5.25" and then glued it directly to my card base.

I also pulled out the dark orange polka dot paper, the pumpkin pattern paper, and the green plaid paper. I ran the pumpkin paper through my die cutting machine with the large notebook paper die from the Notebook Photo Corners Die. I also cut a plain piece of white cardstock with this die as well. I cut the photo corners out of the dark orange paper. I created the tab from the green plaid paper with the Notebook Tabs Dies.

Next, I trimmed a piece of white cardstock to 3 - 3/8" x 2 - 5/8". On this panel, I stamped the Fall Scenes background stamp. I also stamped the "trick or treat" from the Too Cute To Spook Stamps on a separate small piece of white cardstock with my MISTI.

Sunny Studio Costume Critter & Haunted House Halloween Card using Fall Scenes and Too Cute To Spook Clear Stamps & Craft Dies

Then, it was time to color! I used Copic markers to color my scene and here are the markers I used:
  • Grass: YG00, YG21, YG23, YG25, YG17
  • All Orange spots:  YR04, YR09
  • Lights: Y13
  • House: N4, N5, N7
  • Concrete: C1, C2, C4
  • Sky: B41
  • Critter: E35, E25, E27, E29, YG23, YG 25, W3, W5, W7, N9, RV21, V05

I also added some white highlights to the little bear with a white Gelly Roll pen. 
I used the Too Cute to Spook Dies to cut out my little costumed friend. Next, I arranged everything as I wanted it on the card and started adhering the pieces together! I used foam squares, tape, and liquid glue to assemble everything.

I love all the layers to this card and that sweet little bear in his costume! Hopefully, you're feeling inspired to make a card yourself! Have fun! 

Supplies Used:
Fall Scenes Stamps
Fall Scenes Stamps
Shop at:
Sunny Studio
Fall Scenes Dies
Fall Scenes Dies
Shop at:
Sunny Studio
Too Cute To Spook Stamps
Shop at:
Sunny Studio
Too Cute To Spook Dies
Shop at:
Sunny Studio
Notebook Photo Corners Dies
Shop at:
Sunny Studio
Notebook Tabs Dies
Notebook Tabs Dies
Shop at:
Sunny Studio
Memento Tuxedo Black Ink Pad
Shop at:
Sunny Studio
Hero Arts Intense Black Ink
Shop at:
Sunny Studio
Critter Country Paper
Shop at:
Sunny Studio

Tuesday, July 29, 2025

Notebook Photo Corner Die Focused Card with Amanda

Hey, hey crafty friends, Amanda here! I just got my hands on the Notebook Photo Corners Dies and I am OBSESSED! If you have these dies, you know what I’m talking about! I love the little notebook paper! Keep scrolling and craft along with me!

Sunny Studio Stamps: Notebook Photo Corner Die Focused Card by Amanda Fitterer (featuring Harvest Mice)

I started by grabbing the Sweater Weather Paper, but you could use any patterned paper for this card! I trimmed the flower piece to 4” x 5.25” and glued it to an A2 card base. Then, I grabbed a coordinating piece of paper and trimmed it to 2” x 5.25”. I glued that to the center of the card.

Next, I die cut 2 of the notebook paper dies from the Notebook Photo Corners Dies with white cardstock. I used a ruler and light blue and pink pens to make the lines across the paper to make them look like they really came from a notebook! I glued the 2 notebook papers together and then put 3D foam tape behind them. I attached them to the center of the card and added a little yellow paperclip to them.

Sunny Studio Stamps: Notebook Photo Corner Die Focused Card by Amanda Fitterer (featuring Harvest Mice)

For the stamped images, I gathered my MISTI, black ink, and the Harvest Mice Stamps. I stamped the 2 mice, the wagon components, and a bunch of cheese! I colored all the images with Copic markers and used a white Gelly Roll pen to create some dots and highlights. Then, I die cut the images out with the coordnating die setI put 3D foam squares behind all the images and arranged them on the card. 

For the sentiment, I die cut one of the banner dies from the Notebook Photo Corners Dies with black cardstock. Then, I stamped the sentiment with a WOW!  Embossing pad. I applied white embossing powder to the glue and then melted the powder with my heat tool. I added a 3D foam strip to the back of the sentiment and added it to the card. The final step is to add those cute little flowers from the Clay Flower Confetti! I attached them to the card with a tiny bit of glue.

I just love this color combo with that beautiful floral paper, don’t you!? I hope you enjoyed this post and you find some time to get crafty today!

Sunny Studio Supplies Used:

Harvest Mice Stamps
Harvest Mice Stamps
Shop at:
Sunny Studio
Harvest Mice Dies
Harvest Mice Dies
Shop at:
Sunny Studio
Sweater Weather Paper
Shop at:
Sunny Studio
Notebook Photo Corners Dies
Shop at:
Sunny Studio

Wednesday, July 23, 2025

Big Panda Card with Tina

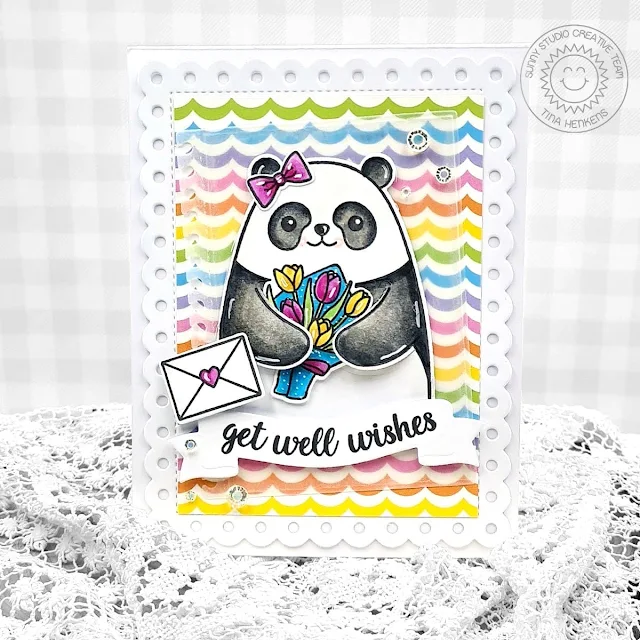
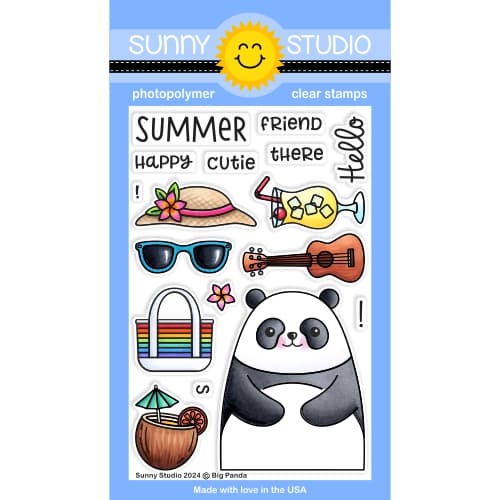
Hi crafty friends, Tina here and today I am creating a ‘get well’ project for my sister who is recovering from surgery. What better way to cheer her up then to send her a card featuring the cute Big Panda stamp and die set.

Sunny Studio Stamps: Big Panda Get Well Card by Tina Henkens (featuring Frilly Frame Dies, Notebook Tab Dies, Brilliant Banner Dies, Heartfelt Wishes)

The whole idea for this design was combining the panda with a bold background. I browsed through my paper pads and came across this gorgeous rainbow wavy sheet (Spring Fever) which I cut to size so it would fit inside a white scalloped panel (Frilly Frames Polka-Dots). After gluing these two pieces together, I adhered both to a white card base.

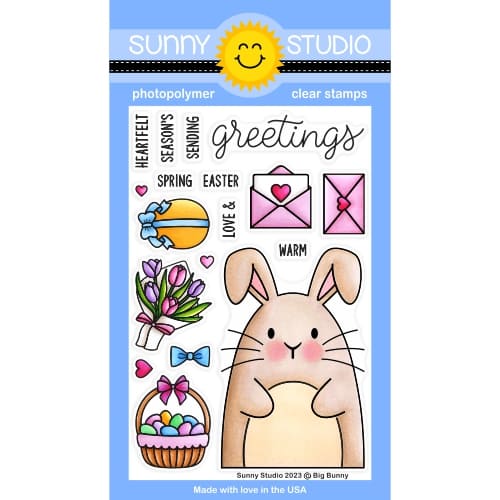
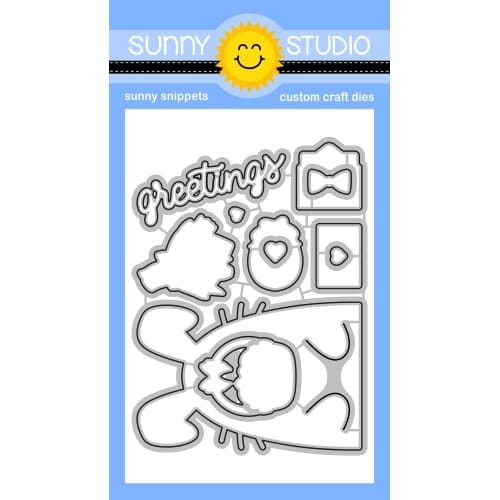
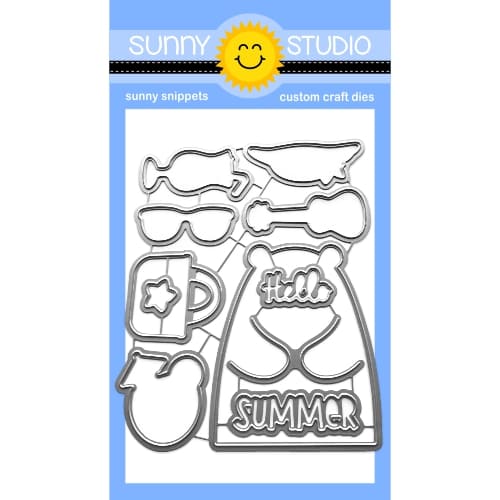
Next, I stamped the cute panda (Big Panda stamp), a little bow, the flower bouquet and a letter (Big Bunny). I cut all the images with the matching dies, making sure to use the special die which cuts the arms of the panda. Now the bear can hold the flowers, so cute!! After coloring the images with my copics, I added some white highlights with a gel pen.

Sunny Studio Stamps: Big Panda Get Well Card by Tina Henkens (featuring Frilly Frame Dies, Notebook Tab Dies, Brilliant Banner Dies, Heartfelt Wishes)

Although the panda looked cute against the bold background, I still decided to add an extra layer of vellum to tone the brightness down a bit. I wanted this layer to stick well to the pattern paper, so I adhered the vellum to a large piece of double sided sticky paper before cutting it with the spiral notebook die (Notebook Tabs dies). I glued this piece to the wavy paper at a little angle. My sentiment was taken from the Heartfelt Wishes set and stamped with Versafine Onyx Black ink onto a white banner (Brilliant Banner 1).

To assemble the card, I placed the banner near the bottom of the vellum notebook page so I could tug in the bear behind this piece. I added the bow, flowers and letter and mounted everything with foam tape. After sprinkling a few Iridescent Clear Jewels this sweet project was ready!

Thank you for visiting the blog and happy crafting!

Sunny Studio Supplies Used:

Heartfelt Wishes Stamps
Shop at:
Sunny Studio
Frilly Frames Polka-Dot
Shop at:
Sunny Studio
Spring Fever Paper
Spring Fever Paper
Shop at:
Sunny Studio
Notebook Tabs Dies
Notebook Tabs Dies
Shop at:
Sunny Studio
Brilliant Banner 1 Dies
Shop at:
Sunny Studio
Big Bunny Stamps
Big Bunny Stamps
Shop at:
Sunny Studio
Big Bunny Dies
Big Bunny Dies
Shop at:
Sunny Studio
Big Panda Stamps
Big Panda Stamps
Shop at:
Sunny Studio
Big Panda Dies
Big Panda Dies
Shop at:
Sunny Studio

Thursday, June 19, 2025

Two Scoops Card with Marine

Hello crafty friends, Marine here, back with a super duper extra colorful birthday card showcasing Two Scoops. I've had this stamp set in my stash for a very long time, and I knew that when I'd use it, it would be on a rainbow themed card. So here we are!

Sunny Studio Stamps: Two Scoops Birthday Card by Marine Simon (featuring Slimline Scalloped Frame Dies, Ribbon & Lace Border Dies, Notebook Photo Corner Dies)

I started off with all the stamping, and the Two Scoops layering stamps are super easy to line up, so even if it looks like the stamping took a million years, it actually did not, it actually was pretty quick. Here is a detailed list of the Lawn Fawn premium dye inks I used to stamp everything, from light to dark:

• pink - ballet slippers + peachy keen + guava

• orange - peach fuzz + carrot + fake tan

• yellow - butter + lemonade + sunflower

• green - celery stick + freshly cut grass + jalapeno

• aqua - kiddie pool + merman + peacock

• purple - fresh lavender + grape jelly + sugarplum

• cones - pizza crust + doe

Sunny Studio Stamps: Two Scoops Birthday Card by Marine Simon (featuring Slimline Scalloped Frame Dies, Ribbon & Lace Border Dies, Notebook Photo Corner Dies)

Once the stamping was done, I cut the images using the matching dies, mixed some copic opaque white ink with water, and used a slim brush to add white splatters to each image. I also picked matching distress inks, mixed each of them with water, added more splatters to the ice-creams, and then I did the same with matching distress spritz for sparkling details.

Next I cut a slimline panel out of Strathmore bristol smooth cardstock using a die from the Slimline Scalloped Frame die set, and used distress inks to create watercolored splashes, giving the illusion of melting ice-cream. I mixed each ink with water, and from left to right, I applied the colors with a fluffy brush: worn lipstick, spiced marmalade, mustard seed, mowed lawn, peacock feathers and wilted violet. I let the paper dry, and then added more ink to get different shades on each splash of colors.

I added water splatters all over the panel and dried it with a paper towel, I mixed the same distress inks with water and used a slim brush to add matching splatters, next I did the same with copic opaque white ink, and then with matching distress spritz for shine and sparkles.

Sunny Studio Stamps: Two Scoops Birthday Card by Marine Simon (featuring Slimline Scalloped Frame Dies, Ribbon & Lace Border Dies, Notebook Photo Corner Dies)

Once my watercolored panel was dry, I attached it to a slightly larger slimline aqua panel using liquid glue, and then worked on the rainbow scalloped panel. I started by cutting multiple strips out of colored cardstock using a strip die from the Ribbon & Lace Borders die set. I attached each strip of paper to a large piece of cardstock in this order: pink, orange, yellow, green, aqua and purple, and then used the scalloped die from the Slimline Scalloped Frame die set to cut my rainbow strips panel. I attached this panel to an 8,5 x 3,5 inches white card base using 1mm foam tape, and then stuck my watercolored panel on top using foam tape again.

For my greeting, I cut two fishtail banners using a die from the Notebook Photo Corners die set: a pink one and a gold glitter one, and I white heat embossed "Hope you have a sweet birthday" from Summer Sweet on the pink one. I stuck the pink banner on top of the gold glitter one, shifted them for a little bit of more fun, using 1mm foam squares, and finally attached my banner at the bottom right hand corner of my card using foam squares again.

And that's it! I very much love how it all turned out, with all those beautiful layering stamps matching with the splashes of colors in the background. I hope that you like it too. Thanks so much for stopping by, and see you next time.

Sunny Studio Supplies Used:

Two Scoop Dies
Two Scoop Dies
Shop at:
Sunny Studio
Two Scoop Stamps
Two Scoop Stamps
Shop at:
Sunny Studio
Summer Sweets Stamps
Shop at:
Sunny Studio
Slimline Scalloped Frame
Shop at:
Sunny Studio
Ribbon & Lace Dies
Ribbon & Lace Dies
Shop at:
Sunny Studio
Notebook Photo Corners Dies
Shop at:
Sunny Studio

Monday, May 12, 2025

Color My World & A Cut Above Teacher Cards with Mendi

Hello and welcome! This is Mendi here today, popping in to share some more School-Themed cards showcasing our Color My World Stamps, A Cut Above Stamps, and Teacher Appreciation Stamps.

Sunny Studio Rainbow Scissors & Pencils School Cards using Teacher Appreciation, Color My World, & A Cut Above Clear Stamps

For my first card of the day, I started by die-cutting white cardstock using our Notebook Tabs Dies and then added the rows of lines to my paper using the stamp from our A Cut Above Stamps. This gave me an easy surface to align the sentiments from our Teacher Appreciation Stamps, which I stamped using VersaFine Onyx Black Ink. I made a point to stamp it on the left-hand side so I would have room to add a focal point pair of scissors from our A Cut Above Stamps to layer over the top on the right. I then began the work of randomly layering other pairs of scissors on my black background in a rainbow of colors. I was careful to not let a single piece go to waste, so when a pair bled off the edge of my card front, I saved that trimmed portion to squeeze in another black space. When all was said and done, I believe I created this card with a total of 6 stamped pairs of scissors.


Sunny Studio Rainbow Scissors School Card using Teacher Appreciation & A Cut Above Clear Craft Stamps, & Notebook Tabs Dies

It was challenging to capture the fabulous texture in my background when taking a photo of my card straight on, so here's a closer look at it from an angle. I adore how the Background Basics 2 Stamps add subtle texture and interest without being busy or overwhelming to my design. I stamped the background using clear VersaMark Ink and Clear Embossing Powder to provide a bit of tone-on-tone glossy shine.

Sunny Studio Rainbow Scissors School Card using Teacher Appreciation & A Cut Above Clear Craft Stamps, & Notebook Tabs Dies

Next up is another fun rainbow teacher card featuring the colored pencils from our Color My World Stamps. For this card, I started by die-cutting my stitched panel from white cardstock using our Rounded Rectangle Mat Dies. I then stamped my sentiment from our Teacher Appreciation Stamps using VersaFine Onyx Black Ink. This gave me a focal point to arrange my pencils around. Once again, I tried to not let a single piece of my stamped images go to waste by using the portion cut off on the opposite side. By arranging them outside of rainbow order, it felt more random, and it was easier to hide the fact that I was using fewer pencils than it appeared.

Sunny Studio Rainbow Pencils School Card using Teacher Appreciation, Color My World Clear Stamps, & Rounded Rectangle Dies

I am frequently asked which ink colors I used for my layered images.  While I think there are so many great options out there, these are the colors I used today for my stamped images from light to dark:

As always we have layering guides as the second image on each of these stamp product pages that are also available to download with links in the product descriptions.

That wraps up my projects for today. Thanks so much for hanging out with me. I hope I've inspired you to spread a little happiness by sending out a card to someone you love. 💛

Don't forget to check out our A Cut Above Stamps and Dies in our online shop, which are currently on sale!

Supplies Used:

Color My World Stamps
Shop at:
Sunny Studio
Color My World Dies
Color My World Dies
Shop at:
Sunny Studio
Teacher Appreciation Stamps
Shop at:
Sunny Studio
Versafine Onyx Black Ink
Shop at:
Sunny Studio
A Cut Above Stamps
A Cut Above Stamps
Shop at:
Sunny Studio
A Cut Above Dies
A Cut Above Dies
Shop at:
Sunny Studio
Notebook Tabs Dies
Notebook Tabs Dies
Shop at:
Sunny Studio
Rounded Rectangle Mat Dies
Shop at:
Sunny Studio
Background Basics 2 Stamps
Shop at:
Sunny Studio
Hero Arts Shades of Grey Ink
Shop at:
Sunny Studio
Hero Arts Ultra Fine Clear
Shop at:
Sunny Studio
VersaMark Watermark Ink
Shop at:
Sunny Studio
PinkFresh Rise & Shine Ink
Shop at:
Sunny Studio
PinkFresh Heartbeat Ink
Shop at:
Sunny Studio
PinkFresh Over The Hills Ink
Shop at:
Sunny Studio
PinkFresh Starry Night Ink
Shop at:
Sunny Studio
PinkFresh Soul of Provence
Shop at:
Sunny Studio
PinkFresh Indian Summer Ink
Shop at:
Sunny Studio