Showing posts with label Fishtail Banners II. Show all posts

Sunday, April 21, 2024

Strawberry Patch Card with Cathy

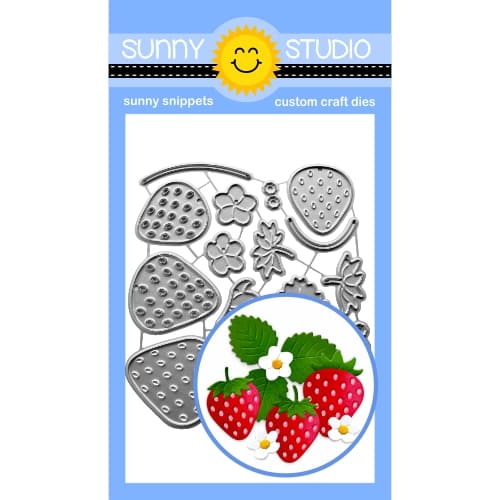
Hey friends! Cathy here today and I'm excited to be back on the blog with a fresh and fun card featuring the new Strawberry Patch Dies.

Sunny Studio Stamps: Strawberry Patch Die Focused Card by Cathy Chapdelaine (featuring Ribbon & Lace Border Dies, Punny Fruit Greetings, Fishtail Banner II Dies, Frilly Frame Dies, Wicker Basket)

I started this A2 card by cutting a black cardstock panel 4 1/4" x 5 1/2". I then cut a piece of white cardstock 3 1/4" x 4 1/4", die-cut it using the Frilly Frames Eyelet Lace Die and adhered it to the top of the black cardstock panel.

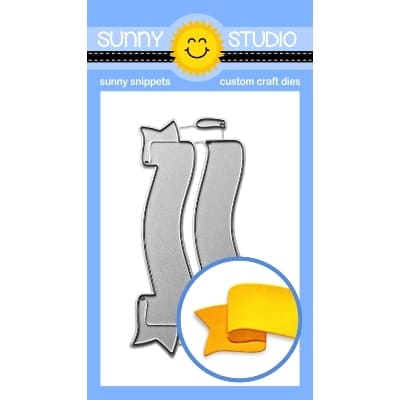
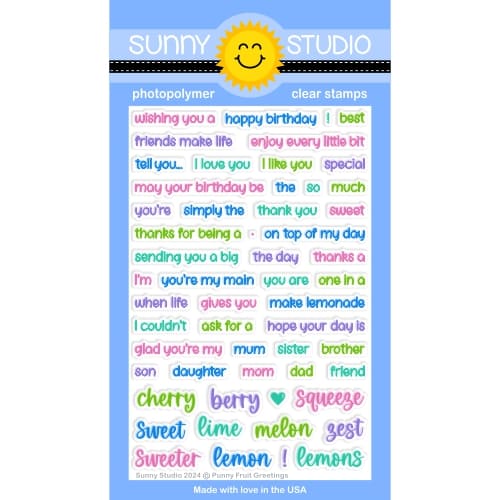
Next, I die-cut a 4 1/4" long piece of black cardstock using the ribbon die from the Ribbon & Lace Borders Dies and adhered it across the bottom of the white cardstock. The red paper from the Gingham Pastels Paper reminds me of a picnic tablecloth so I cut a piece 2" x 4 1/4" and then die-cut the bottom of it using a Fishtail Banner II die. I heat embossed sentiments from the Punny Fruit Greetings Stamps with black embossing powder and adhered the paper to the card front just below the stitched line of the black ribbon piece.

Sunny Studio Stamps: Strawberry Patch Die Focused Card by Cathy Chapdelaine (featuring Ribbon & Lace Border Dies, Punny Fruit Greetings, Fishtail Banner II Dies, Frilly Frame Dies, Wicker Basket)

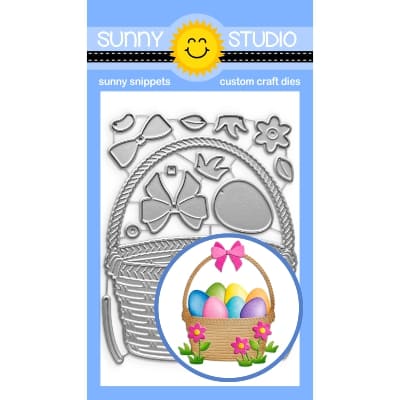
To finish, I die-cut the strawberries, flowers and leaves from white cardstock using the Strawberry Patch Dies and a basket using the Wicker Basket Dies. I colored the strawberries, flowers and basket with Copics and inked the leaves with Rustic Wilderness Distress ink applying light pressure to the ends of the leaves and heavier pressure towards the stems.

I hope you enjoyed and thanks for stopping by today! For more inspiration, please visit my blog www.inkredibleadventures.com and you can also find me on Instagram as @cathy.chapdelaine. 

Sunny Studio Supplies Used:

Fishtail Banner II Dies
Shop at:
Sunny Studio
Gingham Pastels 6x6 Paper
Shop at:
Sunny Studio
Frilly Frames-Eyelet Lace
Shop at:
Sunny Studio
Ribbon & Lace Dies
Ribbon & Lace Dies
Shop at:
Sunny Studio
Wicker Basket Dies
Wicker Basket Dies
Shop at:
Sunny Studio
Punny Fruit Greetings
Shop at:
Sunny Studio
Strawberry Patch Dies
Shop at:
Sunny Studio

Monday, September 5, 2022

Fall Scenes Cards with Cathy and Bobbi

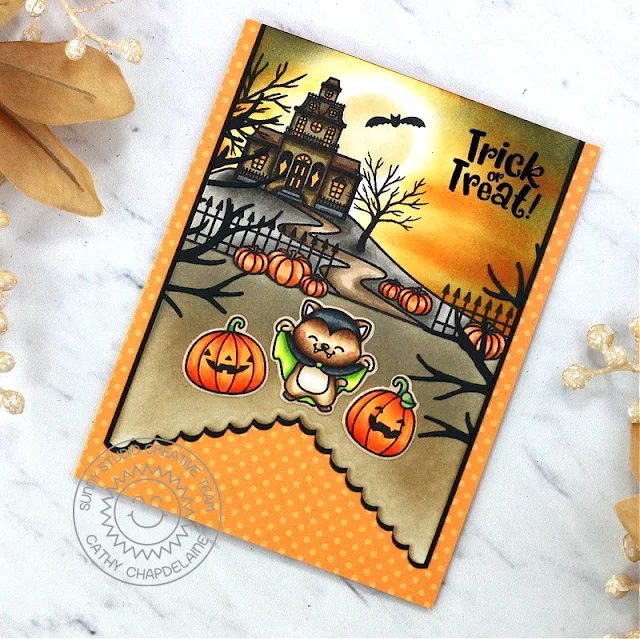
Hey friends! Cathy here sharing a card today featuring the spooktacular haunted mansion from the Fall Scenes stamp set paired with a little cutie from the Too Cute to Spook stamps.

Sunny Studio Stamps; Fall Scenes Card by Cathy Chapdelaine (featuring Too Cute To Spook, Fishtail Banner Dies, Stitched Circle Dies, Autumn Tree Dies)

I started with a piece of Neenah Classic Crest 80lb solar white cardstock cut to 3 3x4” x 5 1/2". I die-cut the bottom edge using a Fishtail Banners II die. I also cut a mat for this panel slightly larger from a piece of black cardstock and die-cut the bottom edge. I stamped the haunted mansion scene towards the top of the cardstock piece and masked the image using eclipse tape. I then inked the ground with Pumice Stone and Frayed Burlap Distress ink.

Sunny Studio Stamps; Fall Scenes Card by Cathy Chapdelaine (featuring Too Cute To Spook, Fishtail Banner Dies, Stitched Circle Dies, Autumn Tree Dies)

To create a spooky night sky, I die-cut a circle from eclipse tape using a 
Stitched Circles Small die and used the negative cut out from the tape to ink a moon with Antique Linen Distress ink. I then masked the moon and inked the sky with Scattered Straw, Wild Honey, Spiced Marmalade and Black Soot Distress inks. I stamped a bat from the Fall Scenes stamps across the moon.

Sunny Studio Stamps; Fall Scenes Card by Cathy Chapdelaine (featuring Too Cute To Spook, Fishtail Banner Dies, Stitched Circle Dies, Autumn Tree Dies)

To finish, I colored the stamped images with Copics and die-cut the Too Cute to Spook images using the coordinating dies. I heat embossed a sentiment from the Too Cute to Spook stamps and adhered a portion of the Autumn Tree die-cut from black cardstock to the left and right sides of the cardstock panel. I cut a piece of paper from the Critter Country paper pack 4 1/4" x 5 1/2" and adhered it to an A2 card base. I then matted the cardstock panel on the black cardstock and adhered it to the card front.

I hope you enjoyed and thanks for stopping by today! For more inspiration, please visit my blog www.inkredibleadventures.com and you can also find me on Instagram as @cathy.chapdelaine. 

----------------------------------------------------

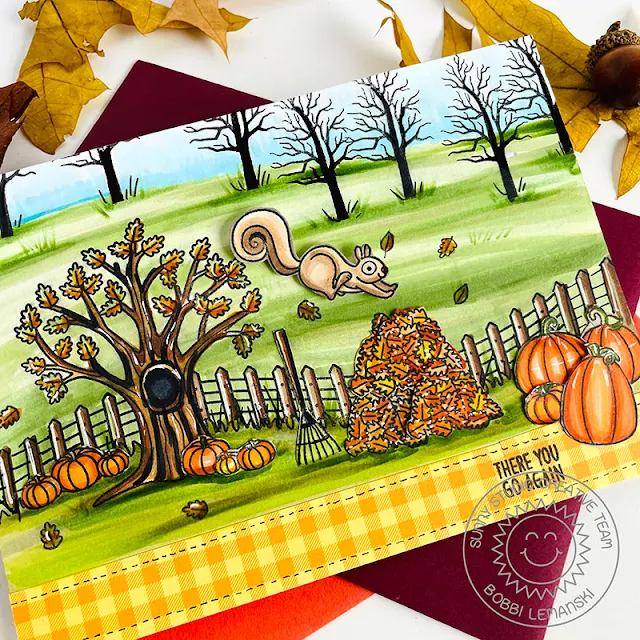
Hello Sunny friends. It’s Bobbi here with a fall scene card featuring some of the new fall sets just released by Sunny Studio Stamps. 


Sunny Studio Stamps; Fall Scenes Card by Bobbi Lemanski (featuring Squirrel Friends, Too Cute to Spook, Words of Gratitude)

Today, I’m using the following products:

Fall Scenes stamps and coordinating dies

Squirrel Friends stamps and coordinating dies

Too Cute to Spook stamps and coordinating dies

Words of Gratitude Stamps

Critter Country Pattern Paper


Sunny Studio Stamps; Fall Scenes Card by Bobbi Lemanski (featuring Squirrel Friends, Too Cute to Spook, Words of Gratitude)

To make this 5″ X 7″ size card, I started by stamping the fence and tree setting from the Fall Scenes stampsNote: Because my card is 7″ wide, I did add in more fencing on both sides to extend the fence line on the card front panel. Next, I created a background landscape using Copic markers in various greens and blues. I used a lot of different greens. Simply explore what you like. I tend to gravitate to yellow-greens for meadows, but since this is a fall scene, I brought in some grayish greens, too. Using the bare silhouette tree from the Too Cute to Spook stamps, I added trees in the background by the sky. This creates some depth in the scene.

Sunny Studio Stamps; Fall Scenes Card by Bobbi Lemanski (featuring Squirrel Friends, Too Cute to Spook, Words of Gratitude)

I stamped the foreground items including: 5 leaf piles, various small pumpkins, and a rake. I also added some larger pumpkins from the Too Cute to Spook stamp set and the flying squirrel is from the Squirrel Friends stamps. Adding the larger pumpkins in the very front provides more scene dimension. All of the images were adhered in place. I popped up the flying squirrel using foam tabs to make him look like he is in the air.

Lastly, I added some designer paper to the bottom of this scene and added faux stitching by hand and a stamped phrase from the Words of Gratitude Stamp set.

Sunny Studio Stamps; Fall Scenes Card by Bobbi Lemanski (featuring Squirrel Friends, Too Cute to Spook, Words of Gratitude)

Inside, I finished the sentiment thought with another one. This card is ready to send!

Thanks for stopping by today. If you want to see more ideas and inspiration from me, subscribe to my blog, BobbiHartDesign.com. I’ll send you updates on new posts! You can also find me on Instagram as @BobbiHartDesign and on Facebook as BobbiHartDesign. Bobbi Hartmann Lemanski, Bobbi Hart♥ Design, Adding h♥art into every design.


Sunny Studio Supplies Used:

Fishtail Banner II Dies
Shop at:
Sunny Studio
Words of Gratitude Stamps
Shop at:
Sunny Studio
Stitched Circle Small Dies
Shop at:
Sunny Studio
Fall Scenes Stamps
Fall Scenes Stamps
Shop at:
Sunny Studio
Fall Scenes Dies
Fall Scenes Dies
Shop at:
Sunny Studio
Squirrel Friends Stamps
Shop at:
Sunny Studio
Squirrel Friends Dies
Shop at:
Sunny Studio
Too Cute To Spook Stamps
Shop at:
Sunny Studio
Too Cute To Spook Dies
Shop at:
Sunny Studio
Autumn Tree Die
Autumn Tree Die
Shop at:
Sunny Studio
Critter Country Paper
Shop at:
Sunny Studio

Friday, March 19, 2021

Feeling Froggy Cards with Tammy and Candice

Hello friends! Tammy here sharing a fun birthday card, featuring the adorable set, Feeling Froggy

Sunny Studio Stamps: Feeling Froggy Froggy Friends Slimline Dies Frog Themed Birthday Card by Tammy Stark

To begin, I cut a white A2 rectangle and another using the green dot paper from Polka Dot Parade 6X6 Paper. I then cut the polka dot paper using the Fishtail Banner II Dies and attached to the white card base. 

Next, I stamped, colored with Copic markers, and die cut images from the following sets:
Feeling FroggyCoordinating Dies
Froggy FriendsCoordinating Dies

Copic Colors Used: Greens: YG67, YG17, YG13, YG03, YG01, YG00; Browns: E44, E43, E42, E41; Hat: R22, R20, R000, Y18, Y13, Y11

Sunny Studio Stamps: Feeling Froggy Froggy Friends Slimline Dies Frog Themed Birthday Card by Tammy Stark

Next, I cut a white scalloped circle using the Scalloped Circle Mat 2 Dies and layered a Stitched Circle, ink blended with Abandoned Coral, Dried Marigold, and Squeezed Lemonade Distress Oxide inks. I cut another circle then used the Slimline Nature Borders Dies to cut a curved edge for the water, and ink blended it with Tumbled Glass and Salty Ocean. Next, I arranged the images onto my card, using foam tape on some for dimension. 

Lastly, I cut a black cardstock banner using the Slimline Pennant Dies, and white heat embossed the sentiment from Froggy Friends to complete my card. 

Thanks so much for stopping by today!

-------------------------------------------

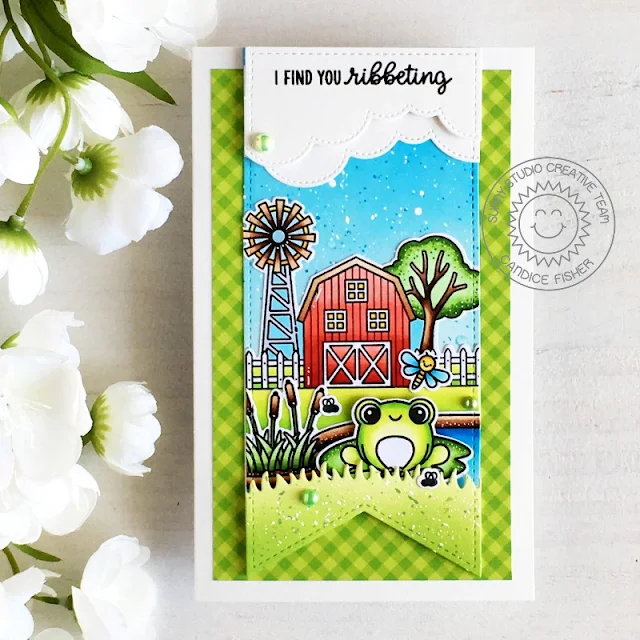
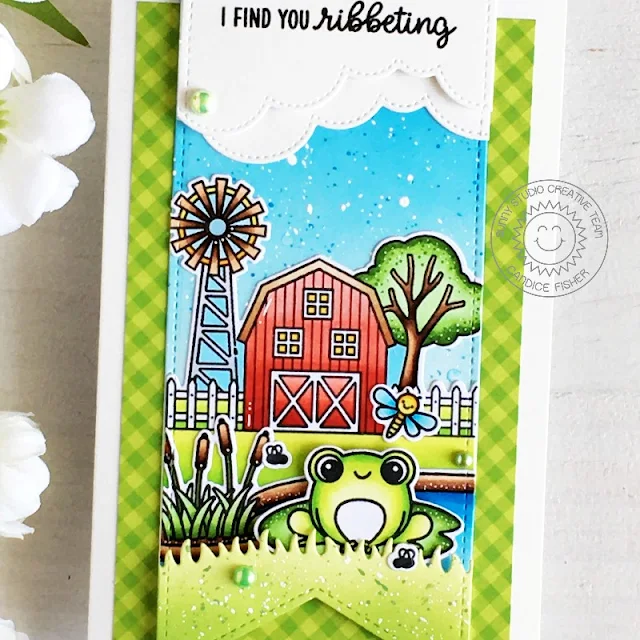
Hello my crafty friends! Candice with you today sharing a fun mini slimline design highlighting the adorable Feeling Froggy stamp set!

Sunny Studio Stamps: Feeling Froggy Slimline Dies Country Scenes Farm Fresh Frog Themed Card by Candice Fisher

I used these Sunny Studio products to create my mini slimline card:

I began my mini slimline with a 6 1/2 x 4. For the background I die cut the stitched pennant from Bristol Smooth cardstock and inked the thirds with Salty Ocean and Tumbled Glass and splattered with the Salty Ocean and white paint using damp paintbrush. While that dried, I die cut the clouds and the grass and then cut a second time from the pennant to give the stitched line all around. On the grass, I inked it with Mowed Lawn and Shabby Shutters and splattered it with the Mowed Lawn and white paint too.

Sunny Studio Stamps: Feeling Froggy Slimline Dies Country Scenes Farm Fresh Frog Themed Card by Candice Fisher

Next, I stamped the barn scenepondfrog and flies, colored them with Copic markers and used the coordinating dies to cut them out. I stamped the sentiment along the top cloud and put the pennant together. I finished by gluing the pennant scene onto a piece of green gingham pattern paper and a few of the green domes!

Thank you so much for visiting with me today!

Sunny Studio Supplies Used:

Fishtail Banner II Dies
Shop at:
Sunny Studio
Froggy Friends Dies
Froggy Friends Dies
Shop at:
Sunny Studio
Froggy Friends Stamps
Shop at:
Sunny Studio
Polka-dot Parade 6x6 Paper
Shop at:
Sunny Studio
Gingham Pastels 6x6 Paper
Shop at:
Sunny Studio
Slimline Nature Borders
Shop at:
Sunny Studio
Farm Fresh Stamps
Farm Fresh Stamps
Shop at:
Sunny Studio
Farm Fresh Dies
Farm Fresh Dies
Shop at:
Sunny Studio
Country Scenes Stamps
Shop at:
Sunny Studio
Country Scenes Dies
Country Scenes Dies
Shop at:
Sunny Studio
Feeling Froggy Stamps
Shop at:
Sunny Studio
Feeling Froggy Dies
Feeling Froggy Dies
Shop at:
Sunny Studio
Scalloped Circle Mat 2 Dies
Shop at:
Sunny Studio
Slimline Pennant Dies
Shop at:
Sunny Studio
Stitched Circle Large Dies
Shop at:
Sunny Studio

Wednesday, February 17, 2021

Slimline Pennant Die Focused Cards and Video Tutorial with Julia and Franci

Hello crafty friends! I hope your week is going well! It’s Julia here - this time with a cute fairytale themed bookmark! I created this magical little scene using the Slimline Pennant dies and I paired it with the adorable Enchanted and Garden Fairy stamp sets! I really just can't get enough of those sweet fairies!!

Sunny Studio Stamps: Slimline Dies Enchanted Garden Fairy Card by Julia Englich


I die cut the fluffy clouds using the
Slimline Nature Borders and for the backing of the stitched panel I cut down a piece of pink cardstock and die cut the bottom edge with the Fishtail Banner II dies to add the beautiful scalloped detail. I really wanted to add a sentiment that would fit well with a bookmark, so I masked off the first two letters of the word "spreading" from the North Pole stamp set to spell "reading" and for the rest I used the Garden Fairy set!

Sunny Studio Stamps: Slimline Dies Enchanted Garden Fairy Card by Julia Englich


If you would like to see how this bookmark came together, you can watch the video below - or on my YouTube channel,
Craft Room Adventures.


Inks: background: Spun Sugar and Worn Lipstick Distress Ink. Grass: Cracked Pistachio and Lucky Clover Distress Oxide. Copic Markers: E000, E00, E11, E13; RV10, RV21, RV23, RV25, RV29; Y000, Y00, Y11, Y13; BG0000; C00, C0, C1, C3, C5; E30, E31 E33, E35, E37.

Sunny Studio Stamps: Slimline Dies Enchanted Garden Fairy Card by Julia Englich

Thank you so much for joining me today! Have an amazing week!

----------------------------------------------

Hi there! It's Franci here with you today, with a fun and colorful interactive card to share! I'm in love! This llama is one of my favorite new critter and I love all the banner/ pennant details here, plus this is an interactive card, YAY!!

Sunny Studio Stamps: Slimline Dies Sliding Window Dies Lovable Llama Balloon Rides Card by Franci Vignoli

So first of all I created a standard size card base out of white cardstock, then I cut a matching panel out of some patterned paper from the Surprise Party 6x6 paper set and I die cut it with the Sliding Window dies set. I also cut out a thin stripe out of the same patterned paper that measures 1/2 x 3 inches.

Sunny Studio Stamps: Slimline Dies Sliding Window Dies Lovable Llama Balloon Rides Card by Franci Vignoli

Then I cut out a 3 x 4 inches panel out of some light blue cardstock and the smallest pennant from the Slimline Pennant Dies set out of white cardstock. I stamped, colored and die cut all my images from these sets: 
Lovable Llama + coordinated dies and Balloon Rides set + coordinated dies. I assembled my interactive mechanism and mounted everything onto my card base and then I decorated the little light blue panel by adhering down the stitched pennant in the middle and all my images on top with foam adhesive.

Sunny Studio Stamps: Slimline Dies Sliding Window Dies Lovable Llama Balloon Rides Card by Franci Vignoli

Finally I added some clear sequins and I just put a gift card in there to share that it fits perfectly! You can also add a sentiment, some more images. I left it blank for now because I kind of like the idea I can customize it last minute. And also it's a design that can work for lot of occasions. A birthday card, a Congratulations card, even a baby card! 

I hope you like it and thank you so much for stopping by today!

Sunny Studio Supplies Used:


Fishtail Banner II Dies
Shop at:
Sunny Studio
Sliding Window Dies
Sliding Window Dies
Shop at:
Sunny Studio
Surprise Party 6x6 Paper
Shop at:
Sunny Studio
Enchanted Stamps
Enchanted Stamps
Shop at:
Sunny Studio
Enchanted Dies
Enchanted Dies
Shop at:
Sunny Studio
North Pole Stamps
North Pole Stamps
Shop at:
Sunny Studio
Balloon Rides Stamps
Shop at:
Sunny Studio
Balloon Rides Dies
Balloon Rides Dies
Shop at:
Sunny Studio
Garden Fairy Stamps
Garden Fairy Stamps
Shop at:
Sunny Studio
Garden Fairy Dies
Garden Fairy Dies
Shop at:
Sunny Studio
Lovable Llama Stamps
Shop at:
Sunny Studio
Lovable Llama Dies
Lovable Llama Dies
Shop at:
Sunny Studio
Slimline Pennant Dies
Shop at:
Sunny Studio