Showing posts with label Stitched Ovals. Show all posts

Saturday, November 8, 2025

Happy Owlidays Owl Christmas Cards with Mendi

Hello and welcome! This is Mendi here today, popping in to share some Christmas cards featuring our Happy Owlidays Stamps.

Sunny Studio Owl Holiday Christmas Cards Set using Happy Owlidays Clear Stamps, Stitched Metal Cutting Craft Dies & 6x6 Paper

For all of my cards today, I started by coloring a pile of images, and when I was done, I realized that the aquas and the pinkish shades of red I chose didn't actually match any of Sunny Studio's Christmas paper packs. Switching directions, I pulled tone-on-tone prints of small scraps from my Ziploc bag from various basic patterned paper sets. I also inked up the edges of all the pinks from the pastel paper packs using Worn Lipstick Distress inks to help them lean closer to the colors in my images. It was so fun designing these cards simultaneously as a cohesive set. It made my creative process so much quicker, and I was able to complete these cards in a fraction of the time I usually spend.

For my first card showcasing the Happy Owlidays Stamps, I lined up three of the same owl images dressed in a tree costume, reindeer antlers, and a gift box with a lid. To frame them, I matted them using the Rounded Rectangle Mat Dies with the stitched edge and trimmed off the bottom portion to add a border of colorful pennant strips using the smallest pennant from the Slimline Pennant Dies. I added a thinner stitched strip from the Ribbon & Lace Border Dies, cut from an aqua gingham print from the Gingham Pastels Paper pack, to bridge the transition between the two. As I was finishing up, I realized I needed a little snow to go with my punny greeting, so I added some with the Marvy Uchida Snow Marker that you dab on and then heat emboss to help it puff up.

Sunny Studio May Owl Your Christmases Be White Punny Holiday Christmas Card using Happy Owlidays Clear Stamps & Craft Dies

For my second card using the 
Happy Owlidays Stamps, I built a mini scene using the snowy tree branch with three hanging stockings. Perched on top, I added the owl wearing the scarf and Santa hat, and the red cardinal with its own Santa hat. To frame this scene, I mounted them onto a white stitched banner cut out using the Slimline Pennant Dies and inked behind them with some Salvaged Patina Distress ink. I mounted them on a larger banner cut from a print polka-dot found in the Dots & Stripes Pastels Paper pack and an aqua gingham background from the Gingham Pastels Paper pack. Lastly, I die-cut a stitched strip from a pink print found in that same paper set using the smallest pennant die from the slimline pennant set to heat-emboss my punny greeting from the Happy Owlidays stamps.

Sunny Studio Owl I Want For Christmas Is You Punny Holiday Card using Happy Owlidays Clear Stamps & Metal Cutting Craft Dies

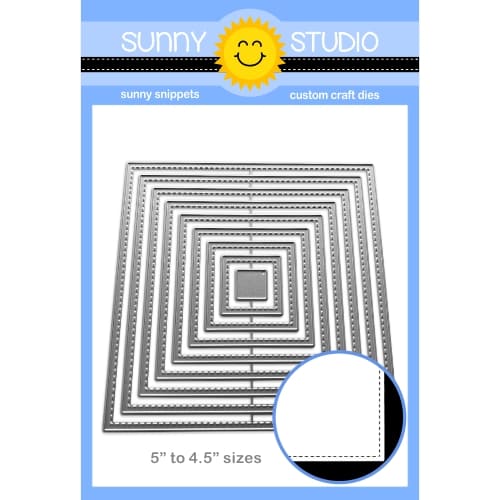
For my last card using the Happy Owlidays Stamps, I started by creating a patchwork background using the 1" Stitched Square Dies and patterned paper scraps that I then mounted onto coordinating cardstock squares cut on my paper trimmer that were just a hair smaller than 1.25" wide. This gave me the extra dimension and width to fill the space for my A2-sized card background. I then die-cut a Stitched Oval Die from white cardstock, which really pops against the colorful background. For my focal point, I added the third owl from the set perched inside a holly wreath from which I hung five ornaments and jingle bells. Lastly, I inked up our Brilliant Banner 4 Dies using Twisted Citron and Mowed Lawn Distress Inks. I stamped a greeting from the Happy Owlidays set on the curve using a piece of acetate to help me position it over the banner just right before closing my Misti lid over the top to pick up the stamp.

Sunny Studio Owl Be Home For Christmas Holiday Card using Happy Owlidays Clear Stamps & Stitched Metal Cutting Craft Dies

That wraps up my projects for today. Thanks so much for hanging out with me. I hope I've inspired you to spread a little happiness by sending out a card to someone you love. ðŸ’›

Don't forget to check out the Happy Owlidays Stamps, Slimline Pennant Dies, and Stitched Oval Dies in our online shop, which are currently on sale!

Also, please check out all the card ideas using these sets on each of their product pages. I always make sure to upload tons of card ideas following the product image, so there are lots of ideas to scroll through, organized by set.

Supplies Used: 

Happy Owlidays Stamps
Shop at:
Sunny Studio
Happy Owlidays Dies
Happy Owlidays Dies
Shop at:
Sunny Studio
Slimline Pennant Dies
Shop at:
Sunny Studio
Ribbon & Lace Dies
Ribbon & Lace Dies
Shop at:
Sunny Studio
Stitched Oval Dies
Stitched Oval Dies
Shop at:
Sunny Studio
Stitched Square Dies
Shop at:
Sunny Studio
Rounded Rectangle Mat Dies
Shop at:
Sunny Studio
Brilliant Banner 4 Dies
Shop at:
Sunny Studio
Gingham Pastels 6x6 Paper
Shop at:
Sunny Studio
Flirty Flowers 6x6 Paper
Shop at:
Sunny Studio
Dots & Stripes Pastels 6x6 Paper
Shop at:
Sunny Studio
Classic Sunburst Paper
Shop at:
Sunny Studio
Classic Gingham 6x6 Paper
Shop at:
Sunny Studio
Polka-dot Parade 6x6 Paper
Shop at:
Sunny Studio
PinkFresh Studio Blending Brushes
Shop at:
Sunny Studio
Hero Arts White Detail
Shop at:
Sunny Studio
VersaMark Watermark Ink
Shop at:
Sunny Studio
Versafine Onyx Black Ink
Shop at:
Sunny Studio

Wednesday, October 22, 2025

Alpaca Holiday Card with Tina

Hello crafters, it’s Tina and I have another cute holiday card for you! This time we are creating an oval design with the sweet images from the Alpaca Holiday stamp and die set.

Sunny Studio Stamps: Alpaca Holiday Winter Themed Card by Tina Henkens (featuring Stitched Oval Dies, Scalloped Oval Mat Dies, Brilliant Banner Dies, Inside Greetings)

To create an oval shaped card base from white card stock, I folded the paper in two and used the largest die from Stitched Ovals. You just have to make sure to place the die higher than the fold line from the card stock, that way it will not cut through.

I wanted to have a fun frame for my scene, so I opted for the largest of the Scalloped Oval Mat 1 dies combined with a smaller die from the Stitched Ovals. These sets work great together. My paper was a sheet of teal from the Polka-dot Parade pack. To give this frame a more distressed look I went in with a blending brush and Salvaged Patina Distress Oxide.

To build the scene I needed three more pieces of white card stock in an oval shape (Stitched Ovals), two for the snow banks and one for my sky (also inked with Salvaged Patina and sprinkled with splatters of white paint to mimic the snow).

Sunny Studio Stamps: Alpaca Holiday Winter Themed Card by Tina Henkens (featuring Stitched Oval Dies, Scalloped Oval Mat Dies, Brilliant Banner Dies, Inside Greetings)

From the Alpaca Holiday stamp, I selected three cuties and the mountain range (twice). I colored my images in pink, brown and teal Copics colors. Then it was time to build the scene layer by layer, starting with the sky and adding the two snow banks (cut with a die from my stash). Next, I added the two mountain ranges tucked in behind the snow. I used the second piece to strategically place the hills, doing some cutting with my scissors were needed. Then, I could add the frame and the sweet alpacas.

For oval designs, I love to work with a banner (Brilliant Banners 2), because it has that perfect rounded shape. My sentiment was taken from the Inside Greetings Holiday set and stamped in a pink ink from my stash. As embellishments, I glued three small snowflakes (Snowflake Circle Frame die) across the sky, adorning each of them with an Iridescent JewelFor this winter scene, I added lots of snowy dots with my white gel pen! 

I hope you got inspired by these cute alpacas for your holiday cards! Thank you for joining me and happy crafting!

Sunny Studio Supplies Used:

Polka-dot Parade 6x6 Paper
Shop at:
Sunny Studio
Alpaca Holiday Stamps
Shop at:
Sunny Studio
Alpaca Holiday Dies
Alpaca Holiday Dies
Shop at:
Sunny Studio
Stitched Oval Dies
Stitched Oval Dies
Shop at:
Sunny Studio
Snowflake Circle Frame
Shop at:
Sunny Studio
Inside Greetings-Holidays
Shop at:
Sunny Studio
Scalloped Oval Mat 1 Dies
Shop at:
Sunny Studio
Brilliant Banner 2 Dies
Shop at:
Sunny Studio

Thursday, September 18, 2025

Pink Peonies Card with Marine

Hello crafty friends, Marine here, I'm thrilled to be back on the blog with this monochromatic Halloween card featuring black peonies and spiders. I mostly like to create Halloween cards with cute critters, but when I colored the Pink Peonies back in April (you can check the card right here) I knew I would color them again in black to make a monochromatic card.

Sunny Studio Stamps: Pink Peonies Monochromatic Black Halloween Card by Marine Simon (featuring Scalloped Oval Mat Dies, Stitched Oval Dies, Too Cute To Spook, Buffalo Plaid Dies)

I started off by stamping my images on 110lb Neenah solar white cardstock using an alcohol marker friendly black ink, I cut them using the coordinating dies and then colored them using my Graph'it brush markers in shades of grey: dark shades for the peonies and spiders, and lighter shades for the leaves. The peonies and leaves are from Pink Peonies, the spiders and spider webs are from Too Cute To Spook, and I usually add details to my images with a white gel pen, but this time I mixed copic opaque white ink with water and used a slim brush to add white splatters to the flowers and leaves, and only added white gel pen details to the spiders.

Sunny Studio Stamps: Pink Peonies Monochromatic Halloween Card by Marine Simon (featuring Scalloped Oval Mat Dies, Stitched Oval Dies, Too Cute To Spook, Buffalo Plaid Dies)

I cut a 5,25 x 4 inches Strathmore bristol smooth panel, ran it through my die cutting machine along with my Buffalo Plaid Diagonal die, covered the entire panel with hickory smoke oxide ink, and used the Diagonal Stripes stencil along with black soot oxide ink to add a nice pattern to my panel. Next I mixed black soot oxide ink with water and added black splatters to my panel, I did the same with copic opaque white ink and then with iron gate mica spray for sparkling details. And once my panel was dry, I attached it to a 5,5 x 4,25 inches black panel.

Sunny Studio Stamps: Pink Peonies Monochromatic Halloween Card by Marine Simon (featuring Scalloped Oval Mat Dies, Stitched Oval Dies, Too Cute To Spook, Buffalo Plaid Dies)

Next I cut a large Scalloped Oval Mat 1 panel out of black cardstock, used the largest Stitched Oval 2 die to cut an opening out of it and this way created a scalloped frame. I used the largest Stitched Oval 2 die again to cut a Subtle Grey Tones woodgrain panel, added black splatters to it, attached both the black frame and grey panel together using tape at the back, and stamped "Happy Halloween" from Too Cute To Spook right in the middle of that panel. I added 1mm foam tape at the back, attached it to my Buffalo Plaid Diagonal panel, and then stuck all my images using 1mm and 2mm foam squares. 

And that's it! I really love the elegant and monochromatic style of this card, and I hope that you like the unusual look. Thanks so much for stopping by, and see you next time!

Sunny Studio Supplies Used:

Subtle Grey Tones Paper
Shop at:
Sunny Studio
Pink Peonies Stamps
Pink Peonies Stamps
Shop at:
Sunny Studio
Pink Peonies Dies
Pink Peonies Dies
Shop at:
Sunny Studio
Scalloped Oval Mat 1 Dies
Shop at:
Sunny Studio
Stitched Oval 2 Dies
Shop at:
Sunny Studio
Too Cute To Spook Stamps
Shop at:
Sunny Studio
Too Cute To Spook Dies
Shop at:
Sunny Studio
Buffalo Plaid Diagonal Die
Shop at:
Sunny Studio
Diagonal & Straight Stripes Stencils
Shop at:
Sunny Studio

Wednesday, July 2, 2025

Enchanted Card with Tina

Hello crafters, it’s Tina and my project today is so sweet and romantic! I am using the adorable Enchanted stamp and die set with lots of fairytale images. You can mix and match the sentiments to create the cutest messages!

Sunny Studio Stamps: Enchanted Love Themed Card by Tina Henkens (featuring Frilly Frame Dies, Scalloped Oval Mat Dies, Stitched Ovals Dies, Dotted Diamond Dies, Brilliant Banner Dies)

Lots of romance going on and that is reflected in my color palette of soft pink, green and a bit of yellow. Such a perfect combo for this theme card. The scene wouldn’t be complete without lots of layers, I think it adds so much to the definition of a card.

Today I star with a standard pink card base, which I ‘created’ by coloring the edges of a plain white base with the darkest pink Copic marker I used for my coloring. Simple, and a perfect match!

Next, I cut a white panel using the outer die from the Frilly Frames Chevron set, which was further embellished by the Dotted Diamond Portrait die. This latter die is great to have in your stash, I love how it always elevates my cards and it is so easy to use!

Sunny Studio Stamps: Enchanted Love Themed Card by Tina Henkens (featuring Frilly Frame Dies, Scalloped Oval Mat Dies, Stitched Ovals Dies, Dotted Diamond Dies, Brilliant Banner Dies)

Creating the oval focus point was achieved by combining the largest die from Scalloped Oval Mat 1 and the largest of the Stitched Ovals 2 dies. I used both to create a pink border, next, I cut three panel with the stitched die from white cardstock. One of these was splattered with Kitsch Flamingo Distress Oxide ink and a small paintbrush. The other two were turned into grass borders (mini grass border dies, colored with Cracked Pistachio).

After selecting a cute princess, a knight and of course a castle (Enchanted stamp), I started my coloring with Copic markers. I added highlights with a gel pen.

I opted to stamp the combined sentiment (Enchanted stamp) onto a curved banner (Brilliant Banner 4) with Versafine Onyx Black ink. For extra interest, I cut the same shape from the pink card stock I used for the oval frame. I added all the layers and images to my card base and finished this project with some Pink Spinel Jewels.

I hope you like this sweet card and happy crafting!

Sunny Studio Supplies Used:

Frilly Frames Chevron Die
Shop at:
Sunny Studio
Enchanted Stamps
Enchanted Stamps
Shop at:
Sunny Studio
Enchanted Dies
Enchanted Dies
Shop at:
Sunny Studio
Scalloped Oval Mat 2 Dies
Shop at:
Sunny Studio
Stitched Oval 2 Dies
Shop at:
Sunny Studio
Dotted Diamond Portrait
Shop at:
Sunny Studio
Brilliant Banner 4 Dies
Shop at:
Sunny Studio