Showing posts with label Strawberry Patch Dies. Show all posts

Friday, July 26, 2024

Strawberry Patch Die Focused Card with Nicky

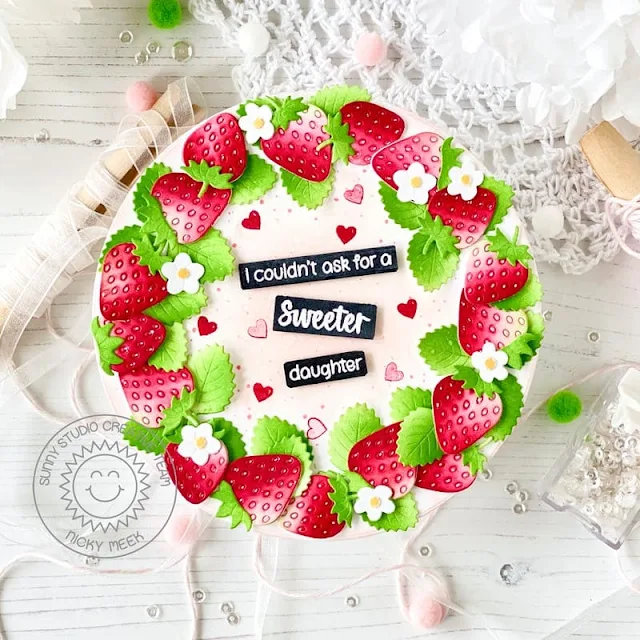
Hello there, this is Nicky with you today on the blog and I'm sharing a circular card, featuring our Strawberry Patch Diesthat was inspired by a photo I saw online of a cake decorated with fresh strawberries including the leaves and flowers.

Sunny Studio Stamps: Strawberry Patch Die Focused Card by Nicky Meeks (featuring Punny Fruit Greetings)

To create this card I die cut two large circles of white cardstock which would form the front and back of my card base. With the back panel, I cut a sliver off at what would be the bottom so that it would stand up without rolling around when it was being displayed and at the top I scored a line that would form a 'hinge' and above the line I added ScorPal tape and then adhered the front and back panels together.

I did some soft ink blending on the front panel using Blush Pink ink by The Stamp Market. I splattered on some water and blotted it up then dotted in a little interest with Copic markers just to distress it a little.

Sunny Studio Stamps: Strawberry Patch Die Focused Card by Nicky Meeks (featuring Punny Fruit Greetings)

I used the Strawberry Patch Dies to die cut sturdy white cardstock and made a juicy pile of strawberries by ink blending the parts. I used Lipstick Red and Gumdrop by The Stamp Market to blend. I then began building a 'wreath' of strawberries and their leaves around the edge of the 'cake' that I had been inspired by.  Building and gluing until I had gone all the way around and then for balance I tucked in the odd extra leaf or two and then added the little flowers.

Sunny Studio Stamps: Strawberry Patch Die Focused Card by Nicky Meeks (featuring Punny Fruit Greetings)

To finish it up I grabbed the Punny Fruit Greetings stamp set and some black sentiment strips. I stamped the sentiment with Versamark Ink and heat embossed in white and added these strips to the centre of the cake using dimensional foam tape.

Last but not least, I stamped around the sentiments using 1st, 2nd and 3rd generation impressions of the little heart included in the sentiment stamp set and the same Lipstick Red ink I had blended the strawberries with. Card done! Slice of cake anyone?

Thanks for reading the blog today and I'll see you next Friday with something new.

Sunny Studio Supplies Used:

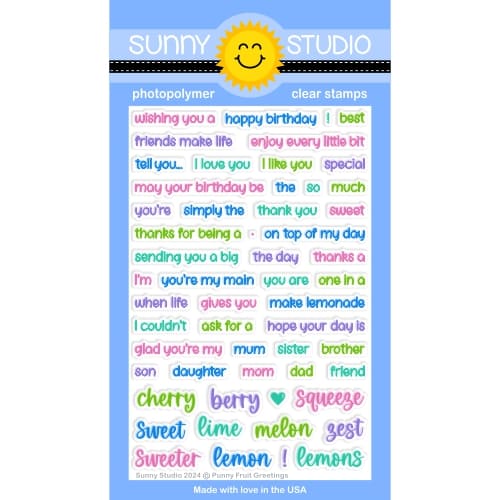
Punny Fruit Greetings
Shop at:
Sunny Studio
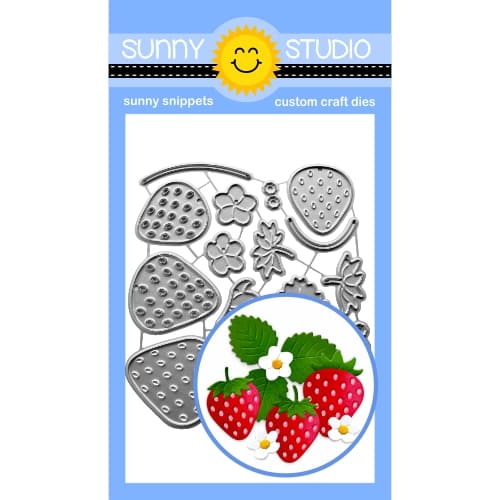
Strawberry Patch Dies
Shop at:
Sunny Studio

Monday, July 22, 2024

Summer Jar Mug Die Focused Card with Leanne

Hello everyone! Leanne here to share a friendship card featuring the Summer Jar Mug. I have made the jar mug into a shaker for this card and I've colored plus filled it to look like a refreshing cup full of pink lemonade. 

Sunny Studio Stamps: Summer Jar Mug Die Focused Card by Leanne West  (featuring Punny Fruit Greetings, Sweet Word Die, Strawberry Patch Dies, Scalloped Oval Mat Dies)

Here's a list of the Sunny Studio products you'll need to create this A2 card design: 

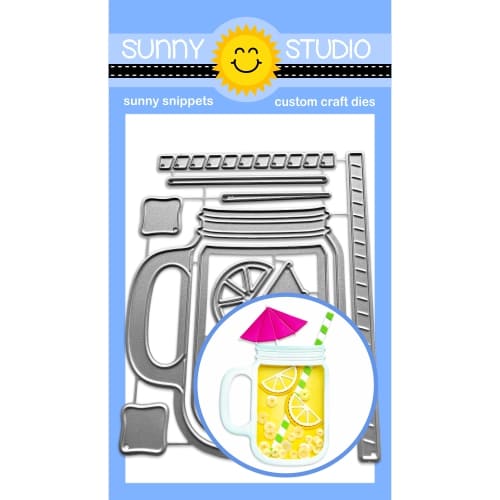
Summer Jar Mug dies - for the mug, straw, and tiny lemon slice die cuts 
Scalloped Oval Mat 3 dies - for the scalloped oval mat
Punny Fruit Greetings -  for the stamped words "friends make life" 
Sweet Word die -  for the die cut word "sweet"
Strawberry Patch dies - for the tiny flower die cut
Classic Gingham Paper - for the gingham background mat

The Sweet Word die is retired but if you don't have it you can use alphabet dies to spell out the word. The Hayley Upper Case or Chloe Alphabet dies would work great! 

Sunny Studio Stamps: Summer Jar Mug Die Focused Card by Leanne West  (featuring Punny Fruit Greetings, Sweet Word Die, Strawberry Patch Dies, Scalloped Oval Mat Dies)

To make this jar mug into a fun shaker, I have adhered several layers of the jar mug frame together. I die cut one solid mug shape for the back and 5 layers of the open mug frame to make it thick enough to allow for the shaker bits to move around freely. I filled the shaker well with tiny pink balls and iridescent confetti bits. I then adhered clear acetate and one final mug frame piece over top. The back solid piece and top frame piece were lightly colored with pink ink prior to assembly to enhance the pink lemonade look. 

When adhering the jar mug frame layers together to build up the shaker well, be sure to include the straw in between two layers toward the back. I forgot to do this and after I had my shaker completely assembled, I had to cut a small slit in the back to slide the straw inside the mug. 

Sunny Studio Supplies Used:

Sweet Word Die
Sweet Word Die
Shop at:
Sunny Studio
Classic Gingham 6x6 Paper
Shop at:
Sunny Studio
Scalloped Oval Mat 3 Dies
Shop at:
Sunny Studio
Punny Fruit Greetings
Shop at:
Sunny Studio
Strawberry Patch Dies
Shop at:
Sunny Studio
Summer Jar Mug Dies
Summer Jar Mug Dies
Shop at:
Sunny Studio

Sunday, July 7, 2024

Build-A-Bowl Die Focused Card with Cathy

Hey friends! Cathy here today sharing a zesty appreciation card with a fresh summer color scheme featuring the Build-A-Bowl Dies!

Sunny Studio Stamps: Build-A-Bowl Die Focused Card by Cathy Chapdelaine (featuring Stitched Square Dies, Ribbon & Lace Border Dies, Frilly Frame Dies, Strawberry Patch Dies, Fresh Lemon Dies, Punny Fruit Greetings)

This is a 4 3/4" square card and I started by die-cutting a piece of white cardstock using the largest Stitched Square Dies. I inked the outside edges with Mermaid Lagoon Distress ink and adhered it to the center of a white card front.

Next, I die-cut a green paper from the Gingham Pastels Paper 4 times using the ribbon die from the Ribbon & Lace Border Dies. I cut each piece to 4 1/4" long and adhered them along the stitched edges of the stitched square overlapping them at the corners. For the quatrefoil background, I cut a piece of white cardstock 5” x 5” and die-cut it using the Frilly Frames Quatrefoil Die (I die-cut it once on one side of the cardstock and then lined up the die with the end of the cut pattern and die-cut again to achieve a larger continuous pattern). I then cut a second piece of white cardstock 4 1/2" x 4 1/2" and inked it with Squeezed Lemonade Distress ink. I didn’t blend the ink smoothly since I wanted a slightly mottled look. I adhered the white quatrefoil die-cut piece to the inked cardstock and then die-cut the combined piece using the second largest Stitched Square Dies. I adhered this piece centered on the green strips.

Sunny Studio Stamps: Build-A-Bowl Die Focused Card by Cathy Chapdelaine (featuring Stitched Square Dies, Ribbon & Lace Border Dies, Frilly Frame Dies, Strawberry Patch Dies, Fresh Lemon Dies, Punny Fruit Greetings)

To finish, I die-cut the bowl using the Build-A-Bowl Dies from white cardstock and inked it with Tumbled Glass Distress ink. I added a floral pattern by die-cutting a piece of vellum using a flower from the Strawberry Patch Dies and then using it as a stencil with Mermaid Lagoon Distress ink. I then die-cut and inked the lemons, flowers and a branch using the following dies:

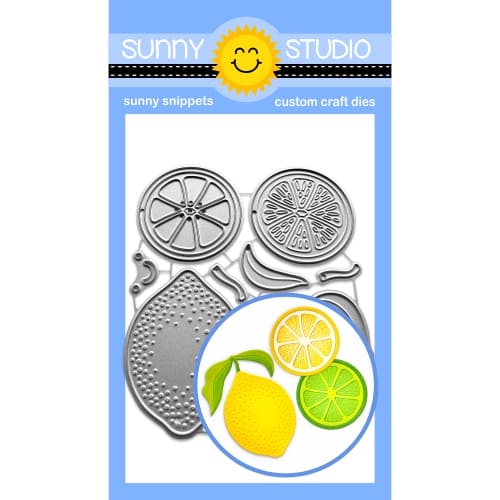
Fresh Lemon Dies
Strawberry Patch Dies
Tree Branch Die

I heat embossed the sentiment from the Punny Fruit Greetings Stamps with white embossing powder on white cardstock, inked over the sentiments and fussy cut them out.

I hope you enjoyed and thanks for stopping by today! For more inspiration, please visit my blog www.inkredibleadventures.com and you can also find me on Instagram as @cathy.chapdelaine.

Sunny Studio Supplies Used: 

Gingham Pastels 6x6 Paper
Shop at:
Sunny Studio
Frilly Frames Quatrefoil
Shop at:
Sunny Studio
Ribbon & Lace Dies
Ribbon & Lace Dies
Shop at:
Sunny Studio
Tree Branch Die
Tree Branch Die
Shop at:
Sunny Studio
Punny Fruit Greetings
Shop at:
Sunny Studio
Strawberry Patch Dies
Shop at:
Sunny Studio
Fresh Lemon Dies
Fresh Lemon Dies
Shop at:
Sunny Studio
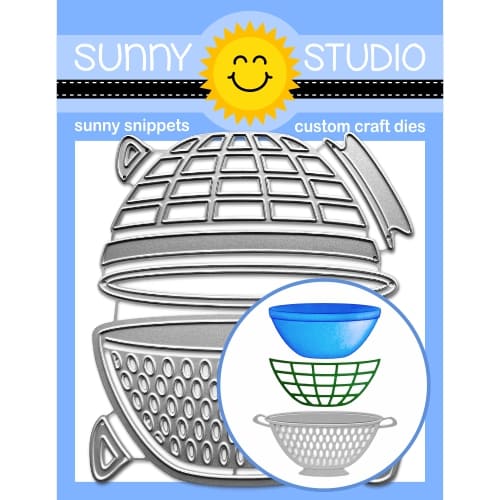
Build-A-Bowl Dies
Build-A-Bowl Dies
Shop at:
Sunny Studio
Stitched Square Dies
Shop at:
Sunny Studio

Thursday, July 4, 2024

Strawberry Patch Card with Marine

Hello crafty friends, Marine here with you today! Happy 4th of July to those who celebrate! How about a refreshing strawberry lemonade to start celebrating this special day? Tempting, right? Let's see how I made this card, shall we? And then I will serve you a drink!

Sunny Studio Stamps: Strawberry Patch Die Focused Card by Marine Simon (featuring Stitched Rectangles Dies, Summer Jar Mug Dies, Crepe Paper Streamers Dies, Brilliant Banner Dies)

I started off by creating my strawberry lemonade using the Summer Jar Mug. And I built it the same way I did on my Rainbow Mermaid Kisses card and my Ladybug Fairies card. Here are the different steps:

1. Cut a jar frame out of holographic cardstock, cut a whole jar out of acetate, and stick the holographic frame on the acetate jar using liquid glue

2. Cut more jar frames out of white cardstock, and attach them on the acetate. The number of extra frames depends on the thickness of the shaker accessories. For my fake ice cubes, strawberry clay slices and confetti, I cut and attached eight extra jar frames

3. Cut a whole jar out of a pinkish pattern paper

4. Pour the shaker accessories on the acetate

5. Attach the pinkish jar to the jar frame to totally close the shaker

Sunny Studio Stamps: Strawberry Patch Die Focused Card by Marine Simon (featuring Stitched Rectangles Dies, Summer Jar Mug Dies, Crepe Paper Streamers Dies, Brilliant Banner Dies)

I cut a Strathmore bristol smooth panel using the largest Stitched Rectangle die, and colored it using oxide inks. I started off by creating a base using, from top to bottom, prize ribbon + salty ocean + tumbled glass oxide inks. Next I used a sunray stencil from my stash along with, from top to bottom, chipped sapphire + prize ribbon + salty ocean oxide inks to create a beautiful pattern on my panel. As always, I added texture to my background, starting with water droplets that I dried using a paper towel. I mixed some black soot oxide ink with water, and used a small brush to make more splatters on my panel, and then did the same with copic opaque white ink. And to bring an extra 4th of July touch, I used a starry stencil from my stash along with white paste to add white stars all over my panel.

Next I cut all the bits and pieces out of colored cardstock: the strawberries, paper streamers, stems, etc. So here is a detailed list of the products I used: • Strawberry Patch - strawberries, leaves, stems, flowers • Summer Jar Mug - parasol, ice cubes, lemon slice, straws • Crepe Paper Streamers. And I cut the parasol out of a Surprise Party red starry pattern paper.

Sunny Studio Stamps: Strawberry Patch Die Focused Card by Marine Simon (featuring Stitched Rectangles Dies, Summer Jar Mug Dies, Crepe Paper Streamers Dies, Brilliant Banner Dies)

I attached my strawberry lemonade on the panel first, using liquid glue, and then all the pieces using 1mm and 2mm foam squares, liquid glue and 3mm glue dots. I white heat embossed my "Wishing you a happy day" greeting from Panda Party on a light blue Brilliant Banner 1 that I attached below the mug using foam squares again, attached my panel to a larger white panel, and to a larger Very Merry red stripe panel using double sided tape.

I added highlights and details to the die-cut pieces using a white gel pen, glued a few iridescent mini star confetti on the background, and added a white blizzard nuvo drop in the center of each flower to make them shine. And that's it! 

This was a very fun card to make, I hope that you like it. Now, who wants a drink? Thanks so much for stopping by, and see you next time.

Sunny Studio Supplies Used:

Stitched Rectangle Dies
Shop at:
Sunny Studio
Surprise Party 6x6 Paper
Shop at:
Sunny Studio
Very Merry 6x6 Paper
Shop at:
Sunny Studio
Panda Party Stamps
Panda Party Stamps
Shop at:
Sunny Studio
Panda Party Dies
Panda Party Dies
Shop at:
Sunny Studio
Crepe Paper Streamers Dies
Shop at:
Sunny Studio
Brilliant Banner 1 Dies
Shop at:
Sunny Studio
Strawberry Patch Dies
Shop at:
Sunny Studio
Summer Jar Mug Dies
Summer Jar Mug Dies
Shop at:
Sunny Studio

Monday, June 17, 2024

Designer's Choice: Limitless Labels Cards with Leanne

Hello everyone! Leanne here and today I'm sharing a trio of thank you cards. These A2-sized cards all started with the same simple layout... a strip of patterned paper with an overlapping Limitless Labels 1 mat. This versatile layout design can be used on both landscape and portrait cards.

Sunny Studio Stamps: Limitless Labels Fruit Themed Thank You Cards by Leanne West (featuring Strawberry Patch Dies, Wild Cherry Dies, Juicy Watermelon Dies, Punny Fruit Greetings)

For these cards, I used a pretty floral pattern and a light green check pattern from Carta Bella's My Valentine Collection. The floral strip is 1.5" wide and placed about .25" from the long edge of the cards.  I used the largest die from Limitless Labels 1 to create the green check mat.

Sunny Studio Stamps: Limitless Labels Fruit Themed Thank You Cards by Leanne West (featuring Strawberry Patch Dies, Wild Cherry Dies, Juicy Watermelon Dies, Punny Fruit Greetings)

Once you have the base layout of pattern paper strip and large mat in place, the cards can be embellished with whatever suits your fancy.  I decided to go with a summer fruit theme for all of mine. The fruit die cuts were created with the Strawberry PatchWild Cherry, and Juicy Watermelon dies. 

Sunny Studio Stamps: Limitless Labels Fruit Themed Thank You Cards by Leanne West (featuring Strawberry Patch Dies, Wild Cherry Dies, Juicy Watermelon Dies, Punny Fruit Greetings)

I die-cut all the fruit pieces from white card stock and then used small blending brushes and the following Catherine Pooler inks to color: Grass Skirt, Spruce, Rouge, Cotton Candy, & Over Coffee. 

Sunny Studio Stamps: Limitless Labels Fruit Themed Thank You Cards by Leanne West (featuring Strawberry Patch Dies, Wild Cherry Dies, Juicy Watermelon Dies, Punny Fruit Greetings)

I used some of the smaller dies in the Limitless Labels 1 set to make little mats to stamp the thank you sentiments. These sentiments come from the Punny Fruit Greetings stamp set. This set includes words and short phrases to create custom greetings that cleverly coordinate with the all different fruit themes. 

Sunny Studio Supplies Used:

Punny Fruit Greetings
Shop at:
Sunny Studio
Strawberry Patch Dies
Shop at:
Sunny Studio
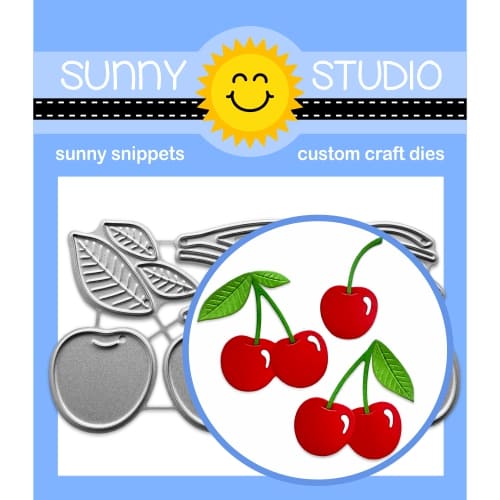
Wild Cherry Dies
Wild Cherry Dies
Shop at:
Sunny Studio
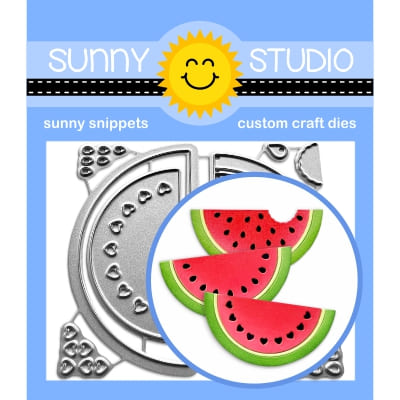
Juicy Watermelon Dies
Shop at:
Sunny Studio
Limitless Labels 1 Dies
Shop at:
Sunny Studio

Wednesday, June 12, 2024

Strawberry Patch Card with Tina

Hello crafters, it’s Tina and today I am making a fun shaped card using the yummy Strawberry Patch Dies. I love making sweet mini cards and the largest of the Scalloped Circle Mats 3 dies is perfect for this.

Sunny Studio Stamps: Strawberry Patch Birthday Card by Tina Henkens (featuring Scalloped Circle Mat Dies, Stitched Circle Dies, Punny Fruit Greetings, Harvest Mice)

For some extra interest, I inked up this white circle with Distress Oxide Picked Raspberry. To create my card base, I used a smaller size circle die (like the Stitched Circle Small Dies). By folding the white paper in two and not cutting the top part, you’ll end up with the perfect circle base.

Of course, I needed a few cute critters for picking the strawberries and after browsing my stash, I decided to stamp two adorable mice and their wheelbarrow from the Harvest Mice set. Next, I die cut a bunch of strawberries, flowers, and leaves (Strawberry Patch Dies).

Sunny Studio Stamps: Strawberry Patch Birthday Card by Tina Henkens (featuring Scalloped Circle Mat Dies, Stitched Circle Dies, Punny Fruit Greetings, Harvest Mice)

Instead of using inks for my die cuts, I used my Copic Markers for all the coloring, and I added some details with a white gel pen. The sentiment was selected from the Punny Fruit Greetings and stamped on a white banner with Versafine Onyx Black ink.

Time to assemble this mini card! I glued the pink circle panel to the shaped card base. Next, I assembled the wheelbarrow and the pile of strawberries. I mounted this piece with foam tape, added the sentiment banner and the cute mice. I love how their tails cover the banner. Finally, I glued some Gold Jewels to the centers of the flowers.

Thank you for joining me and I am looking forward to seeing your yummy creations with these fun dies! Happy crafting!

Sunny Studio Supplies Used:

Harvest Mice Stamps
Harvest Mice Stamps
Shop at:
Sunny Studio
Harvest Mice Dies
Harvest Mice Dies
Shop at:
Sunny Studio
Scalloped Circle Mat 3 Dies
Shop at:
Sunny Studio
Stitched Circle Small Dies
Shop at:
Sunny Studio
Punny Fruit Greetings
Shop at:
Sunny Studio
Strawberry Patch Dies
Shop at:
Sunny Studio