Showing posts with label Sunny Borders. Show all posts

Friday, June 28, 2019

Hawaiian Hibiscus Cards with Rachel and Lexa

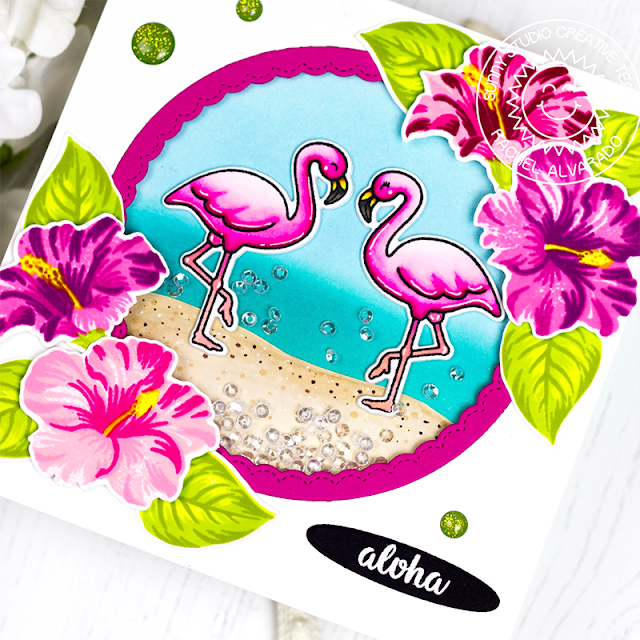
Hello, everyone! It's Rachel here and I have a fun tropical shaker square card to share with you today featuring the new Hawaiian Hibiscus layering stamps. I just love all of the gorgeous detail that you get from this set! I combined this set with some flamingos from the Tropical Paradise Stamp Set.

Sunny Studio Stamps: Hawaiian Hibiscus Fancy Frames Tropical Paradise Summer Themed Card by Rachel Alvarado

To create my flowers, I simply used 4 different colors to stamp each one.
  • Light Pink: MFT Tickled Pink, Cotton Candy, Ripe Raspberry, and Razzle Berry
  • Dark Pink: MFT Cotton Candy, Ripe Raspberry, Razzle Berry, and Hero Arts Raspberry Jam
  • Purple: Altenew Rose Quartz, Puffy Heart, Purple Wine, and Cosmic Berry
  • Greens: Altenew Parrot, Bamboo, and Olive
Sunny Studio Stamps: Hawaiian Hibiscus Fancy Frames Tropical Paradise Summer Themed Card by Rachel Alvarado

For my flamingos, I stamped them with Memento Tuexedo Black Ink onto a sheet of Neenah Solar White 110lb Card Stock and colored with Copic Markers. I like to use a lot of different shades to blend my coloring but only a few of the ones listed would be sufficient. (Pinks: RV0000, RV00, RV02, RV04, RV06, and RV09. Legs: R12, RV55. Yellow beak: Y13, Y17, and E35. Black part of beak: W5, W7.) I then used the coordinating Tropical Paradise Dies to cut them out.

Sunny Studio Stamps: Hawaiian Hibiscus Fancy Frames Tropical Paradise Summer Themed Card by Rachel Alvarado

Next, I assembled the base of my card with these components. I quickly blended some Tumbled Glass and Peacock Feathers on a piece of scrap paper for the background of my card. I then colored some sand using some Copic Markers (E41, E42). I used the Fancy Frames Circle Dies to die cut a beautiful scalloped circle frame from pink card stock. I trimmed my card base to 5"x5" prior to die cutting a circular hole/window in the center.

Sunny Studio Stamps: Hawaiian Hibiscus Fancy Frames Tropical Paradise Summer Themed Card by Rachel Alvarado

I added all of my Hibiscus flowers with some 3D Foam Adhesive Squares for some added dimension and the leaves with liquid adhesive. Lastly, I heat embossed my sentiment with Fine Detail White Embossing Powder onto a strip of black card stock and then diecut it with the small oval die from the Sunny Border Dies and filled my card with some Studio Katia Majestic Mini Sequins.

I hope you enjoyed my card! Thanks so much for dropping by today and have a wonderful weekend!

-------------------------------------------------------

Hi everyone! Lexa here today to share a see through card using Hawaiian Hibiscus Stamp and the coordinating dies. It's inspired from Jennifer McGuire's cards. The hibiscus flowers from Sunny Studio is sure the prettiest layered stamp, they have couple of other flowers too. Make sure to check them out.

Sunny Studio Stamps: Hawaiian Hibiscus Everyday Greetings Floral Best Wishes Card by Lexa Levana

First, I cut a 4.25"x5.5" paper in half. Blend Wild Honey and Worn Lipstick Distress Inks on one part. Then use the other one for a guide rectangle to arrange the hibiscus. Stamp the flowers in two colors, pink and orange with some dye inks. Then use the coordinating dies to cut every pieces. Arrange them on the piece of paper I mentioned above, use a washi tapes to keep them in their places and trim the excess on three sides. Make sure to leave them hanging on one side. After the trimmings, use strong adhesive glue on overlapping pieces. You'll have a see through panel ready. 

Sunny Studio Stamps: Hawaiian Hibiscus Everyday Greetings Floral Best Wishes Card by Lexa Levana

Adhere the hanging part on the blended panel. It's simple and easy, but turns out so beautiful. I use Everyday Greetings Stamps and copper embossed it on pink paper piece. Adhere it with foam tapes so it will pop out. Last touch is add pretty yellow jewels here and there. I love the bright colors and how pretty the hibiscus are.

Thank you so much for stopping by today, don't forget to leave me some love on the comments below. I hope you like today's card as much as I do. Have a wonderful day!

Sunny Studio Supplies Used:

Sunny Borders Dies
Sunny Borders Dies
Shop at:
Sunny Studio
Tropical Paradise Dies
Shop at:
Sunny Studio
Tropical Paradise Stamps
Shop at:
Sunny Studio
Fancy Frames-Circle Dies
Shop at:
Sunny Studio
Everyday Greetings Stamps
Shop at:
Sunny Studio
Hawaiian Hibiscus Stamps
Shop at:
Sunny Studio
Hawaiian Hibiscus  Dies
Hawaiian Hibiscus Dies
Shop at:
Sunny Studio

Friday, December 14, 2018

Here Comes Santa Window Style Christmas Card with Mendi

Hello there!  It's Mendi here today with a fun Christmas card idea using our Here Comes Santa stamps.  I thought it would be cool to showcase them in a window style card using our Fancy Frames Circle dies and a couple of 3/16" wide strips of white cardstock.

To fill my window I started by inking my sky from bottom to top in Peacock Feathers, Salty Ocean, Mermaid Lagoon, Blueprint Sketch and Chipped Sapphire Distress inks blending them with my favorite Jumbo Dauber.  When I was done stamped my tree border (twice) and my Santa and reindeer along the top.  I then used a white extra fine Sharpie paint pen to draw in some stars (or snow--I can't decide which).
Sunny Studio Stamps: Here Comes Santa Window Style Holiday Christmas Card by Mendi Yoshikawa

I completed my card with a banner stamped on pale yellow cardstock to match my moon using our Sunny Borders stamps which was inked up along the edges using Squeezed Lemonade distress inks.  I finished it off with a sentiment from our Gleeful Reindeer Stamps and a simple tone-on-tone striped paper from our Striped Silly Paper pack to give the look of wallpaper.


Sunny Studio Stamps: Here Comes Santa Window Style Holiday Christmas Card by Mendi Yoshikawa

I hope I've inspired you to try a window style card of your own.  They're seriously so much fun!


Sunny Studio Supplies Used:
Gleeful Reindeer Stamps
Shop at:
Sunny Studio
Sunny Borders Dies
Sunny Borders Dies
Shop at:
Sunny Studio
Sunny Borders Stamps
Shop at:
Sunny Studio
Tsukineko Jumbo Dauber
Shop at:
Sunny Studio
Fancy Frames-Circle Dies
Shop at:
Sunny Studio
Striped Silly 6x6 Paper
Shop at:
Sunny Studio
Here Comes Santa Stamps
Shop at:
Sunny Studio
VersaMark Watermark Ink
Shop at:
Sunny Studio

Thursday, July 6, 2017

Sunny Borders Watercolor Star Background Card with Vanessa

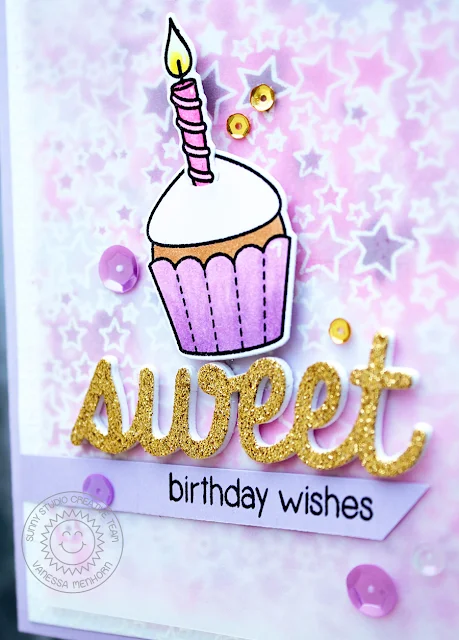
Hi everybody, here is Vanessa with a sweet birthday card using various stamps and dies! I wanted to play with watercolors for a fun background and used the star border from Sunny Borders for this.

Sunny Studio Stamps: Sunny Borders Watercolor Star Background Card by Vanessa Menhorn

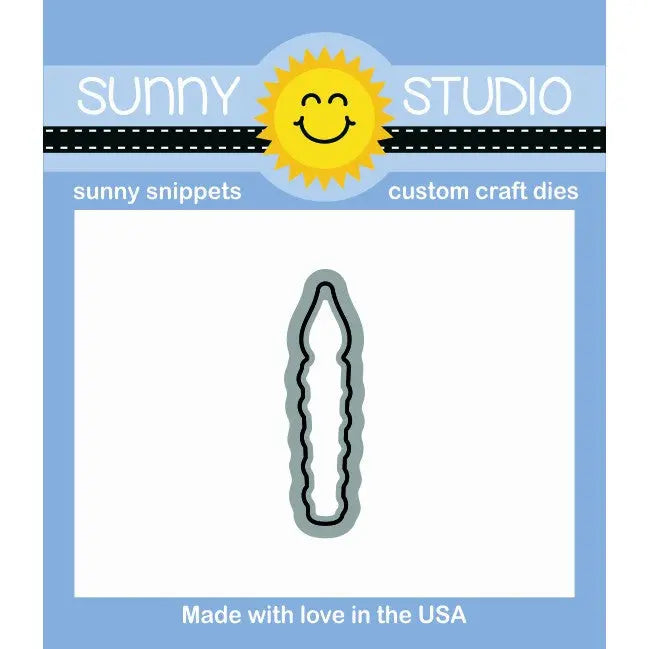
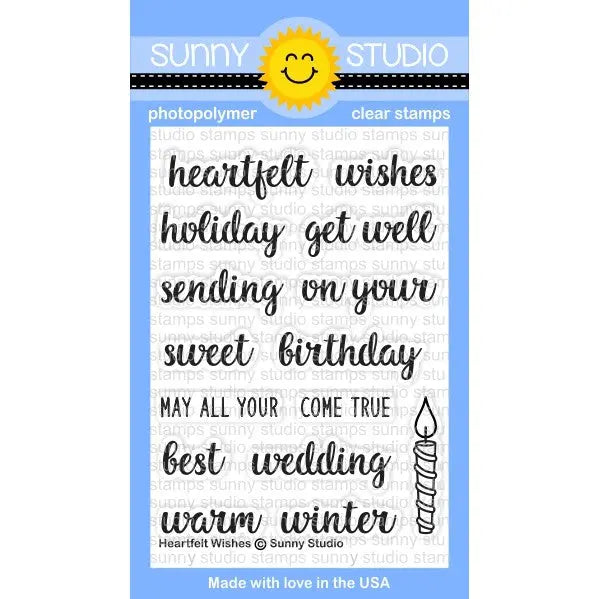
I repeatedly stamped the star border with Versamark Ink onto a panel of watercolor paper and heat-embossed it with white embossing powder. Then I applied pink and purple watercolors. After everything was dried, I adhered the panel to the card base and covered it with a piece of vellum to tone it down a bit. I stamped the cupcake and the candle (using the Heartfelt Wishes set) onto white cardstock, colored them with Copics, die-cut them with the matching dies and adhered them to the card.

Sunny Studio Stamps: Sunny Borders Watercolor Star Background Card by Vanessa Menhorn

Now I die-cut the Sweet Word die from fun foam and glitter cardstock, assembled them and adhered them to the card. I stamped the rest of the sentiment from Sweet Shoppe onto a strip of purple cardstock, trimmed it and adhered it to the card. Finally, I added matching sequins.

I hope you like this girly card! Thank you for visiting!

Sunny Studio Supplies Used:

Heartfelt Wishes Candle Die
Shop at:
Sunny Studio
Heartfelt Wishes Stamps
Shop at:
Sunny Studio
Sunny Borders Stamps
Shop at:
Sunny Studio
Sweet Shoppe Dies
Sweet Shoppe Dies
Shop at:
Sunny Studio
Sweet Shoppe Stamps
Sweet Shoppe Stamps
Shop at:
Sunny Studio
Sweet Word Die
Sweet Word Die
Shop at:
Sunny Studio

Friday, June 23, 2017

Fresh & Fruity Googly Eyed Fruit Bowl Thank You Card with Lexa

Hello everyone! Lexa here today to share some inspiration with you. I just came back from Bali for my holiday, and I must say that I'm still in a holiday mood. Bali is one of the most popular holiday destination in Indonesia, both for local tourists and foreigners, and everyone loves to be there. I took inspiration from Bali's popular fruit stacks for my card. I used the Fresh & Fruity Stamp Set and it's coordinating dies to create this card.

Sunny Studio Stamps: Fresh & Fruity Googly Eyed Fruit Bowl Thank You Card by Lexa Levana

I started my card with a piece of 4.25" x 5.5" white cardstock and blended Tumbled Glass Distress Ink on the bottom part to create a gradation. It helps to ground my bowl, so that it doesn't look like it's floating on air. I stamped all the fruit images from Fresh & Fruity Stamp with Versafine black ink and then watercolored them with Distress Markers. After I finished with the coloring I cut all of them with Fresh & Fruity coordinating dies. I love the thin white lines around the images ... perfectly cute! 

Sunny Studio Stamps: Fresh & Fruity Googly Eyed Fruit Bowl Thank You Card by Lexa Levana

After I arranged all the fruits in the bowl, I felt somehow this card looked unfinished. I got the idea to create a "roof" so it looks like a fruit stall. I used the bigger scallop from Sunny Borders and drew lines in between each scallop, before coloring them in with red and white. To tie in all the red in my card, I die cut a "thanks" script from Vintage Jar Dies from red cardstock and finished the sentiment with "from the whole gang" using one of the stamp in Comfy Creatures.

Last but not least I adhered some googly eyes on every fruits to add extra cuteness. Thank you so much for stopping by today. I hope you like my card and have a wonderful day!

Sunny Studio Supplies Used:
        

Friday, May 26, 2017

Two Scoops Ice Cream Card Set with Lexa

Hello everyone! Lexa here with two cards featuring Two Scoops Stamp and the coordinating dies. I pair it with some other stamp sets and see how they work well together for my cards. Warning! This super sweet stamp set is so addictive and may make you crave some ice cream instantly - so beware ladies. ;)

Sunny Studio Stamps: Two Scoops Ice Cream Cone Card Set by Lexa Levana

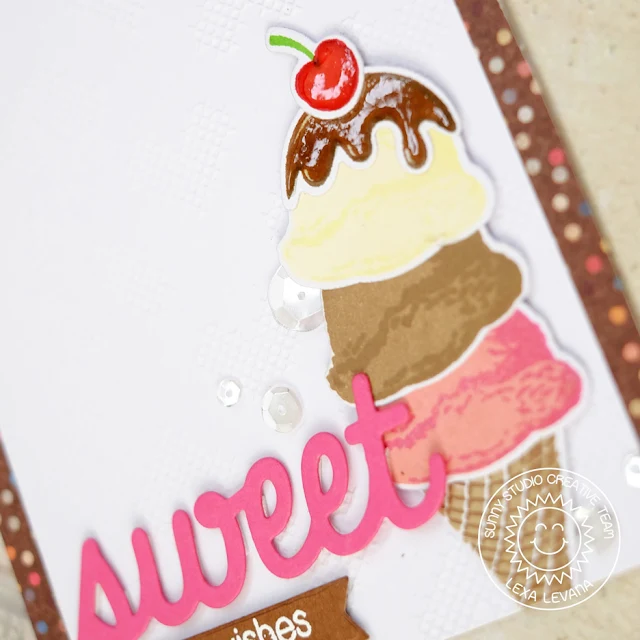
The reason why I made two cards instead of one just like I usually do is simply because I can't stop stamping them in different colors. I find it easier to use a stamping tool for layering stamps just like this one. For the first card, I choose a classic combo of ice cream scoops with vanilla, chocolate, strawberry, and a cherry on top. I dry embossed the white background to give it some textures while keep the background simple so the three scoops of ice cream will be the star.

Sunny Studio Stamps: Two Scoops Ice Cream Cone Card Set by Lexa Levana

I die cut the Sweet Word Die from hot pink cardstock and heat embossed the "birthday wishes" from Sweet Shopee Stamp on brown cardstock. I added two strips of polka dotted patterned paper (looks like rainbow sprinkles on chocolate sauce to me), one on each side.

Sunny Studio Stamps: Two Scoops Ice Cream Cone Card Set by Lexa Levana

And for my second card, I also dry embossed the white background but this time the pattern is polka dots. This card is a little bit more colorful than the first one. I blended Squeezed Lemon and Wild Honey Distress Inks on the bottom part to create an ombre look. Three portions of soft ice creams are never too much! I'm really enjoying this because I feel less guilty just by staring at them! ;)

Sunny Studio Stamps: Two Scoops Ice Cream Cone Card Set by Lexa Levana

To match the curve I use a banner from Sunny Borders Stamp and fill it with the sentiment from Color Me Happy Stamp. This card will make anyone's day brighter! Last but not least, I add some sparkling clear sequins in various sizes around the ice creams. Can you guess what's the flavor is for each color? They are my favorite, while stamping this I have particular flavors in mind... they are strawberry, matcha (japanese green tea), sea salt (yep, it's trending now in my country) Yum!

​Thank you so much for stopping by today. I hope you guys like them as much as I do. Have a great day everyone!

Sunny Studio Supplies Used: