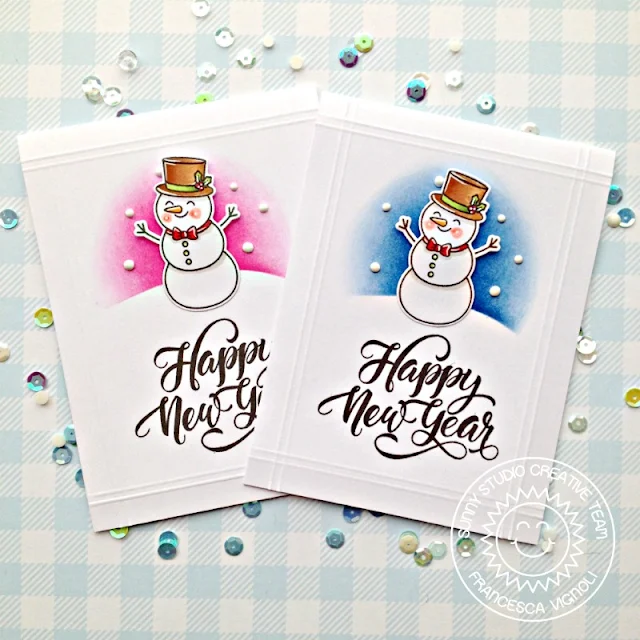
Then I stamped my sentiment from the Season's Greetings set at the
bottoms and created a little snowy hill out of masking paper to ink the tops with
Distress Inks.
I chose Picked Raspberry and Salty Ocean as background colors here but you could also go crazy with colors and use some yellows and greens! I stamped my fave snowman from the Feeling Frosty set twice, colored them and die cut them with it's coordinated die.
I chose Picked Raspberry and Salty Ocean as background colors here but you could also go crazy with colors and use some yellows and greens! I stamped my fave snowman from the Feeling Frosty set twice, colored them and die cut them with it's coordinated die.
I glued them down with
liquid glue and foam adhesive and then added some Tonic Nuvo Drops on the
background to mimic snow. Finally I added some sparkle with my Wink of Stella
clear brush and some details with a white gel pen.
Hope you like these clean and simple, easy to mail (and also easy to make a ton of if you need a lots for Christmas!) cards and thanks a lot for stopping by!
-----------------------------------------------------
Hello friends! It’s Ana here today with a super cute card featuring Feeling Frosty stamps and coordinating dies!
As always, I
started with stamping the images with alcohol marker friendly ink, coloring
them with Copic markers and cutting them out with coordinating dies. For the
background I choose patterned paper from Very Merry 6x6 paper pack, and cut it slightly smaller than A2 size card base.
Next, I die cut a piece of vellum with a stitched rectangle outline die from Frilly Frames Retro Petals die set, then using VersaMark ink, stamped the sentiment and the snowflakes (from Feeling Frosty stamp set) and white heat embossed them.
Next, I die cut a piece of vellum with a stitched rectangle outline die from Frilly Frames Retro Petals die set, then using VersaMark ink, stamped the sentiment and the snowflakes (from Feeling Frosty stamp set) and white heat embossed them.
To create the snowy hills, I used Woodland Borders Die set. I arranged the images and
hills to the vellum, adhered them with liquid glue, added highlights with white
gel pen and my card was finished!
Thank you so much for stopping by today, I’ll see you next week and until then I wish you Happy Crafting!
Thank you so much for stopping by today, I’ll see you next week and until then I wish you Happy Crafting!
Sunny Studio Supplies Used:
 Woodland Borders Dies Shop at: Sunny Studio |
 Frilly Frames Retro Petals Dies Shop at: Sunny Studio |
 Very Merry 6x6 Paper Shop at: Sunny Studio |
 Season's Greetings Stamps Shop at: Sunny Studio |
 Feeling Frosty Stamps Shop at: Sunny Studio |
 Feeling Frosty Dies Shop at: Sunny Studio |


No comments:
Post a Comment