Hello everyone, Isha here with a fun interactive baby card
featuring the Hayley Alphabets dies. I used action wobbler to create the
interactive element.
To
start, I created the clouds in the center of the white panel by sponging pink
distress ink through a cloud stencil. I then flicked some pink and white ink
splatters.
Stamp
the images from the Baby
Elephants stamps, color, and die-cut using the coordinating
dies. Stamp the banner from the Little
Birdie stamp set, stamp the sentiment, color, and die-cut using
the coordinating
dies. Adhere the center focal image to the card using a mini action
wobbler. Adhere to the rest of the images.
Die-cut
the word "WELCOME" using the Hayley Uppercase and Hayley Lowercase alphabet.
I die-cut it once with white and then with black card. Color the white using
pink markers. Adhere the pink alphabet to the black, slightly offset. Adhere to
the card.
Adhere the panel to a pink card base. Add some white gel pen details. Add shine to
the clouds, crown, and word using a Nuvo shimmer pen. To finish, add some diamond
sparkle stars by Studio Katia.
Thanks for dropping by and have a nice day!---------------------------------------------
Hi crafty friends! It's Lien here, with some tips to align your custom sentiments and a fun way to add stitching to a border die!
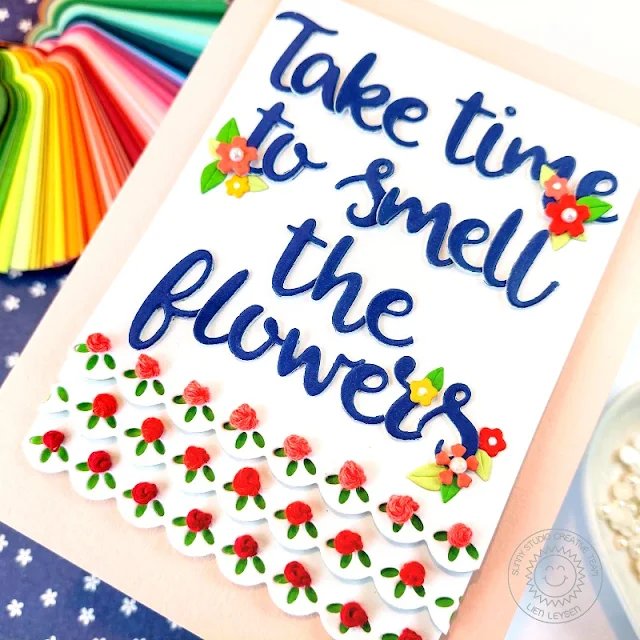
Today I finally got to try an idea I had as soon as I saw these beautiful Ribbon and Lace Border dies. I added stitching to them! First, I die-cut one of the borders from a panel of white cardstock and twice more from scraps. I tried to align the die-cut scraps behind the panel and temporarily adhered them together with washi tape once I liked the spacing. I then trimmed the entire piece down to 4 3/4" x 3 1/2".
I used three shades of red embroidery thread and stitched french knots in all the circular holes on the border. You can find some great french knot tutorials on youtube, but for stitching on paper, I recommend using all 6 strands of thread and wrapping the thread around your needle at least 5 times for a thicker rose. This takes a little bit of practice, but I promise it's worth it!
I traced the borders on some green cardstock with a pencil and quickly trimmed it out with scissors. I can adhere these green scraps behind each white border so it looks like the oval holes in the border die are leaves for each stitched rose. I adhered all these borders together and set the finished piece to the side.
I wanted a longer sentiment on this card and used both the Hayley Uppercase Alphabet Dies and the Hayley Lowercase Alphabet Dies to cut this out. As I did for my last card, before die-cutting these letters, I covered the back of my cardstock (dark blue) in foam tape to create quick puffy alphabet stickers.
Now for my perfect tip to line up a longer sentiment like this created with alphabet dies: I cut a piece of parchment paper (baking paper works too!) to the size of my empty white space above the stitched borders. I adhered this down to my cutting mat so I could see the grid of it through the parchment paper. This way I could use the grid to space my die cuts. Once I was happy with the spacing, I used a piece of Press 'n Seal to pick all the letters up at once and transfer them to my card.
I foam mounted the white panel onto a pink card base and added some small flower and leaf dies from the Wonderful Windows dies and the Autumn Tree dies to embellish the sentiment a little bit. That finishes up this stitched card!
Sunny Studio Supplies Used:


Both cards are wonderful. I love the baby card, Isha!
ReplyDelete