Hello and welcome to day 4 of our Sneak Peek Week! Each morning this week I have been showcasing projects using our newest Summer collection which will be available to purchase on April 21st.
Card No. 1 & 2: Today I am showcasing our new A Cut Above Stamps & Dies, along with two new Notebook dies which this first set of two cards fully utilizes. The layering stamps come with all the pieces you need to create a pair of scissors, colored pencils, and thumbtacks, as well as both the option to add a repeated grid or lined background for both new notebooks dies.
Card No. 1: The new A Cut Above Stamps have been designed to complement our previously released Color My World Stamps so I was able to include both types of pencils for my card here today. The pencil image that comes with the Color My World set has quite a few components, however, for the colored pencil image that comes with A Cut Above set there is no eraser involved which allowed me to streamline the layers which really speeds up the stamping process and makes it a breeze to line up for assembly line style stamping.
For this card, I turned to our new Notebook Photo Corners Dies which features a 3x4 Notebook Paper with a spiral tear along the top. The set also includes pennant strips in two different widths, perfect for stamping greetings, and four fun photo corners. For both the cards in this set, I used the 4" x 1" grid print stamp with my Misti, moving the die incrementally up one inch at a time until the entire background was covered. I then mounted it onto a piece of black cardstock so that it would stand out against my colorful polka-dot background from our Rainbow Bright Paper pack.

Card No. 2: For my second card featuring the A Cut Above Stamps, I used our new Notebook Tabs Dies which feature another 3x4 Notebook die, this time with the spiral down the long edge. This die set also comes with four unique tab dies perfect for adding a sentiment to your cards or for use with scrapbooks and planners. For this card, I utilized a colorful striped patterned paper for my background from that same Rainbow Bright Paper pack, along with the yellow dot from our Polka-Dot Parade Paper for the pennant-shaped sentiment strip that comes with the Notebook Photo Corners Dies.

Card No. 3: Up next is a card focusing just on the cute pair of scissors from A Cut Above which I stamped in a rainbow of colors, alternating their direction and positioning them on the diagonal across my horizontal card. To make them stand out, I adhered them to a piece of black cardstock which I trimmed down using the stitched edge die from our Ribbon & Lace Border Dies. For my background, I added a simple yellow striped print from our Striped Silly Paper pack and stamped the punny sentiment from the stamp set with Versafine Onyx Black Ink to match the diagonal angle of my scissors.
Card No. 4: For this rainbow-inspired card I stamped a variety of colored pencils using the new A Cut Above Stamps and then fanned them out in a circle for a fun radial design. I made sure to leave a little space in the center for my "hi" greeting from our Hawaiian Hibiscus Stamps. I then kept the rest of my card very simple, trimming down my panel to be square and mounting it onto a black scalloped square from our Fancy Frames Square Dies. To make lining up things easier, I created a free printable template for some similar cards I created using our Color My World Stamps which you can download HERE (You can also see those card examples and read about them HERE).
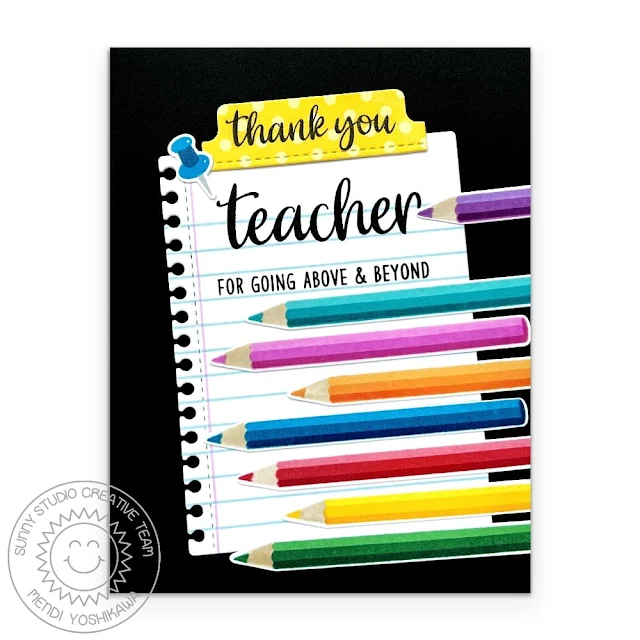
Card No. 5: Next up in a teacher card combining the colored pencils, thumbtack, and lined background from the A Cut Above Stamps with the Notebook Tabs Dies. After stamping the lines onto my spiral-bound paper, I added the sentiment from our Teacher Appreciation Stamps with Versafine Onyx Black Ink. I chose to stamp the "thank you" portion of my phrase onto a tab die from the set to help break up the longer sentiment and add a little extra visual interest, cutting the tab from a yellow polka-dot print from our Polka-dot Parade Paper pack.
Card No. 6: For this card, I thought it would be fun to use the pushpin image from the A Cut Above Stamps to recreate the look of a framed corkboard. I had some thin sheets of cork made for crafting in my stash (I think this one came from one of those specialty pads by DCWAV) which I adhered to a piece of kraft cardstock for extra stability. Since the pins would be pushed into the cork, I omitted the tack portion and used the alternate die from the set. I cut some Memory Box woodgrain cardstock into thin 1/4" strips and added them to the edges of my corkboard to give the look of a frame by mitering the corners.
To arrange my tacks in a perfect circle, I die-cut a circle using our Stitched Circle Large Dies in the cork material and then left the circle in place and covered the cut with the pins. You could also achieve a similar result by tracing a circle with a pen onto the cork material, but I thought the cut would be more invisible. For my note, I stamped the grid print from the A Cut Above Stamps and used our Notebook Photo Corners Dies to give the spiral notebook edge, trimming it down to fit within the confines of my circle. I used printer paper to give it a more realistic look and tore it along the bottom edge for some extra interest. For my sentiment, I added the phrase "Just a note" from our Balloon Rides Stamps and the phrase "to say" from our Floating By Stamps using Versafine Onyx Black Ink. Lastly, I layered two shades of blue cardstock cut using our Hello Word Die.
Card No. 7: For my last card of the day, I created a vibrant, colorful background by repeatedly cutting out one of the stitched photo corners dies from the new Notebook Photo Corners Die set using different rainbow shades of patterned paper from our Gingham Jewel Tones Paper pack. I then drew some light pencil line grids on the front of my card base to help me keep things somewhat straight, added rows of adhesive with my tape gun and then set to work adhering the stacked photo corners down the center of my card front, alternating them the opposite direction on either side to create a fun chevron print! It took me a bit of time to cut the tabs out from various paper scraps, but I really enjoy paper-piecing backgrounds like this--It's the perfect mindless activity to do while watching TV and I found it really relaxing to create.
To complete my card, I cut an oval mat using our Stitched Oval 2 Dies to frame my greeting. The Cut Above Stamps includes the punny "I'm sorry I was snippy" sentiment to compliment the layered scissors images, but the words were feeling a bit too small for the space I had to fill so I substituted the word "snippy" with my own version cut using our Hayley Lowercase Alphabet Dies. I then tucked the handle of my scissors in under the loop of my letter "s" to give the appearance they are hanging there.
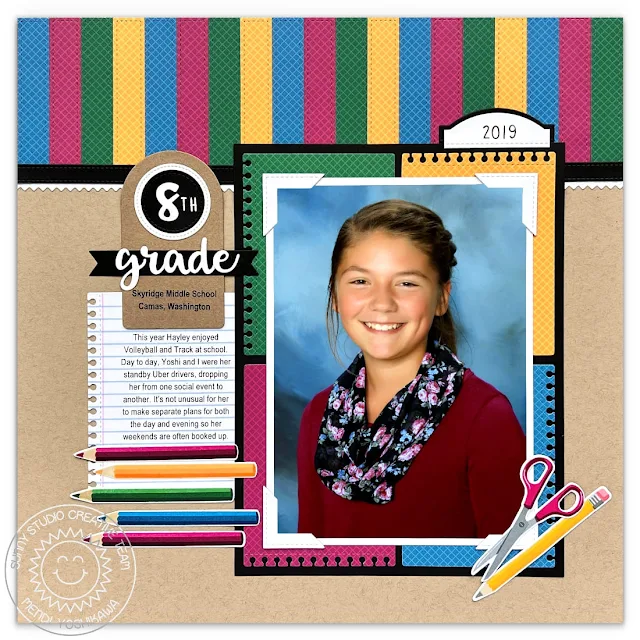
Scrapbook Layout: I have been working on completing my daughter's school portrait album before she graduates from high school next year and I knew that our new A Cut Above Stamps, Notebook Photo Corners Dies, and Notebook Tabs Dies would be perfect for a page in her scrapbook!
I started by die-cutting the stitched strips to add along the top of my page using the pennant strip from our Stitched Rectangle Dies, cutting them for our Gingham Jewel Tones Paper. I then layered the bottom edge with the ricrac trim cut from white cardstock using our Slimline Basic Border Dies and the stitched strip from our Ribbon & Lace Border Dies cut from black cardstock. To add interest to my 5x7 photo, I mounted it onto a decorative mat with 4 of the two different notebook dies which had been mounted onto black cardstock to help them stand out against the kraft background and make them feel like a cohesive block. I added the year to a photo tab using our Kinsley Alphabet Stamps and added it to the top right corner of my photo.
For my title block, I started by die-cutting the curved tag from our Build-a-Tag 1 Dies using a darker shade of kraft cardstock. I die-cut a black circle using our Stitched Circle Large Dies and layered it over a circle cut from white cardstock using the die from the same Build-a-Tag 1 Dies. I then used the number 8 from our Chloe Number Dies, the 'th" from our Kinsley Alphabet Stamps, and paired it with the word "grade" cut using our Hayley Lowercase Alphabet Dies.
For my journaling I used the spiral paper from our Notebook Tabs Dies, adding the notebook lines that come with our A Cut Above Stamps. I then calculated the size of my journaling block by measuring the space I had to work with, adjusting my margins in Microsoft Word, and then printing it out onto printer paper. I believe in my case based on my font size, I needed to adjust my line spacing to 1.2 rather than the standard 1 or 1.5 spacing, but I was able to play with it before adhering my cardstock to my printer paper with photo splits and running it through my printer using the manual feed tray. I then just pull it off and adhered it to my page. Lastly, I embellished my page with the colored pencils and scissors from our new A Cut Above Stamps and Color My World Stamps.
*Please note: my daughter's photo has been substituted with a stock photo as she requested I not share photos of her publicly.
I frequently am asked which ink colors I used for my layered images. While I think there are so many great options out there, these are the colors I used today for my stamped images from light to dark:
PinkFresh Studio Raspberry Bliss
Hero Arts Raspberry Jam
Stampin' Up Rich Razzleberry
Red Pencil & Scissors
PinkFresh Studio Coral Reef
Gina K. Red Hot
Concord & 9th Cranberry
Orange Pencil & Scissors
Hero Arts Butter Bar
Pinkfresh Studio Apricot
Pinkfresh Studio Clementine
Yellow Pencil & Scissors
Pinkfresh Studio Sunshine
Pinkfresh Studio Sweet Mustard
Pinkfresh Studio Marigold
Green Pencil
PinkFresh Studio Meadow
Concord & 9th Clover
Gina K. Christmas Pine
Green Scissors
PinkFresh Studio Meadow
Concord & 9th Clover
Dark Green Scissors
Concord & 9th Clover
Gina K. Christmas Pine
Blue Pencil & Scissors
Gina K. Blue Raspberry
Hero Arts Deep Ocean
Stampin' Up Pacific Point
Turquoise Pencil
Gina K. Turquoise Sea
Gina K. Blue Lagoon
Gina K. Tranquil Teal
Purple Pencil
PinkFresh Studio Lavender
VersaFine Clair Purple Delight
Hero Arts Grape Juice
Hot Pink Pencil
PinkFresh Studio Sparkling Rose
PinkFresh Studio Bubble Gum
Hero Arts Ultra Pink
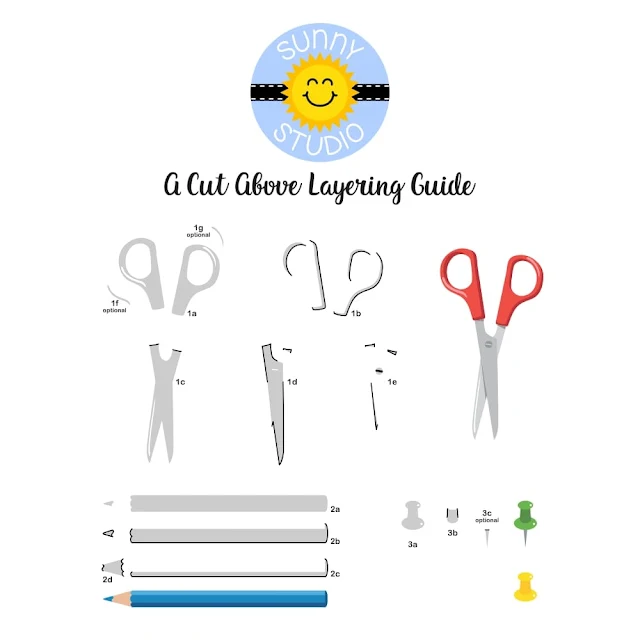
To help you line up our layered stamps I've created a special layering guide (you can click on the photo below to view it larger). The guide shows the stamps starting with the lightest ink color, working towards the darkest, but sometimes I find it easier to start backward when setting up my layers. They both work depending on what your preference is. The black outline indicates where that layer touches the previously stamped layer.
That wraps up today's sneak peeks. I'm so happy you spent part of your day with me today. I read all your comments and they mean so much! I'd love to give a $50 gift code to one lucky winner using the Rafflecopter below.
a Rafflecopter giveaway
Our daily contests this week run through Saturday, April 22nd at Midnight PST with winners announced here on Sunday, April 23rd. :)
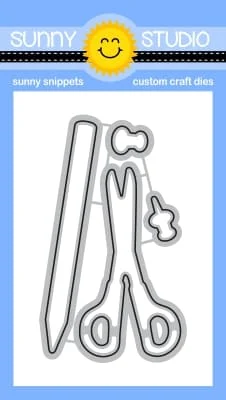
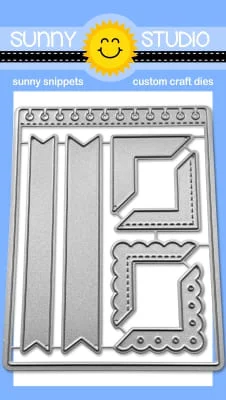
Here's a closer look at our new A Cut Above Stamps & Dies, Notebook Photo Corners Dies, and Notebook Tabs Dies used today (which will be available to purchase starting on April 21st):
Other Supplies Used:
 Teacher Appreciation Stamps Shop at: Sunny Studio |
 Stitched Rectangle Dies Shop at: Sunny Studio |
 Chloe Number Dies Shop at: Sunny Studio |
 Versafine Onyx Black Ink Shop at: Sunny Studio |
|
 Classic Gingham 6x6 Paper Shop at: Sunny Studio |
 Striped Silly 6x6 Paper Shop at: Sunny Studio |
 Polka-dot Parade 6x6 Paper Shop at: Sunny Studio |
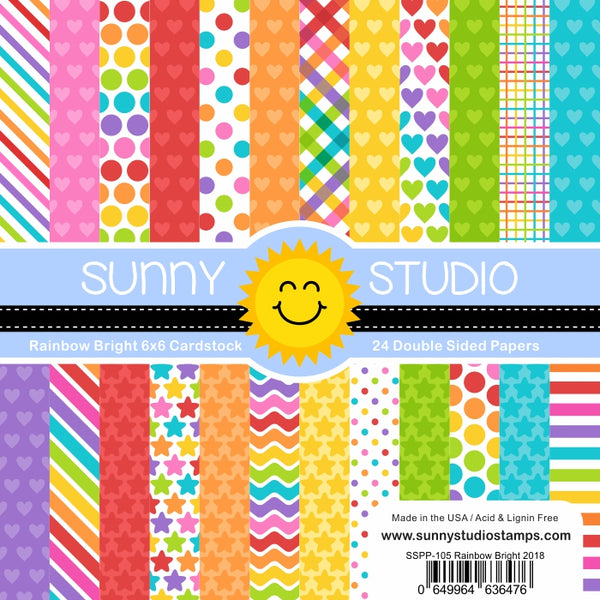 Rainbow Bright 6x6 Paper Shop at: Sunny Studio | |
 Gingham Jewel Tones 6x6 Paper Shop at: Sunny Studio |
 Build-A-Tag #1 Dies Shop at: Sunny Studio |
 Hawaiian Hibiscus Stamps Shop at: Sunny Studio |
 Kinsley Alphabet Stamps Shop at: Sunny Studio | |
 Slimline Basic Borders Shop at: Sunny Studio |
 Stitched Circle Large Dies Shop at: Sunny Studio |
 Stitched Oval 2 Dies Shop at: Sunny Studio |
 Hayley Lowercase Alphabet Dies Shop at: Sunny Studio | |
 Color My World Stamps Shop at: Sunny Studio |
 Color My World Dies Shop at: Sunny Studio |
 Fancy Frames-Square Dies Shop at: Sunny Studio |
 Ribbon & Lace Dies Shop at: Sunny Studio |
|
 Hello Word Die Shop at: Sunny Studio |
 Floating By Stamps Shop at: Sunny Studio |
 Balloon Rides Stamps Shop at: Sunny Studio |
 VersaMark Watermark Ink Shop at: Sunny Studio |
|
 Hero Arts White Detail Shop at: Sunny Studio |







I like to watercolor or use copic markers. I also like to add details with colored pencils.
ReplyDeleteI love Copic markers or my colored pencils. The Cut Above set is awesome!!
ReplyDeleteWhat fun sets. Love the pencil and scissors. The thumb tack circle on the cork is awesome.
ReplyDeleteI LOVE your scrappy layouts every single time Mendi 💝 I literally have saved so so many of them over the years to copy them with love!! But You know that!! 🙏🏼😇 Thank You so much for your beautiful creativity and sharing so much love and kindness with us!! That layout is what I pinned to Pinterest today!! Wishing you worlds of Blessings and endless Success Always crafty Friend 🌈💐🌞
ReplyDeletehttps://pin.it/6VAhTE0
Fun sets! The scissors are so fun. Yes, use a stock photo and let your daughter keep her privacy - totally agree. My favorite coloring medium is alcohol markers. I have all sorts of other mediums but they usually are my first pick.
ReplyDeleteI am not a big fan of coloring, but alcohol markers are my first choice. I'd rather stencil than stamp.
ReplyDeleteMy favorite form of coloring is Copic coloring (although I only do basic coloring). Cute, fun cards today with a perfect layout for a school photo.
ReplyDeleteMy sister is a second grade teacher so I LOVE todays sneak peeks!!!! I love to color with copics for cute images and stencils and ink for flowers :)
ReplyDeleteI use Copic markers most often
ReplyDeleteAs a former teacher and, of course, a crafter, I love x love today's collection! I need to make teacher cards for my niece and nephew's teachers, and what you've designed here are perfect! My favourite colouring medium is ink and, on occasion, copics. Watercolour is a no for me! LOL!
ReplyDelete~carol
My favorite medium is definitely Copic markers.
ReplyDeleteMy favorite coloring medium at the moment is watercolor markers. But I do other coloring mediums too. Love the chevron card. Wouldn't think that it is a corner die that created that. Looks like a lot of work lining the patterns but all the hard work is truly worth it.
ReplyDeleteMy favorite form of coloring is Ohulu markers. I am a beginner in coloring so I am comfortable with them.
ReplyDeleteMy favorite medium for coloring images is Copic markers. I love all the inspiration! So many great products!
ReplyDeleteSo many good things in this release. I especially love the little notebook papers dies so fun.
ReplyDeleteI guess I didn’t sign in was too excited to comment LOL. I’m Deneen and my email is Deneen03@aol.com
DeleteLove the designs!
ReplyDeleteI use my Zig markers the most!
Great products and inspiration today! My go-to coloring mediums right now are colored pencils, watercolor pencils, and my Zig markers.
ReplyDeleteAlcohol markers are my usual way
ReplyDeleteLove these stamps! I'm starting to get into alcohol markers, but I also love colored pencils when coloring.
ReplyDeleteI love using copics and colour pencils but am starting to love using watercolour (inks or paints)
ReplyDeletelove these layering images - fav medium is copic markers - love them!!
ReplyDeleteI've become more comfortable using alcohol markers for my stamped images. I do really enjoy colored pencils too.
ReplyDeleteSo bright and colorful!
ReplyDeleteI love the sorry I’ve been snippy!!!
ReplyDeleteSo colorful! All the cards and page are amazing! My favorite is card 7, I love the zig zag background. Really nice!
ReplyDeleteI love the realistic look of these stamps! A great set for teachers and crafters.
ReplyDeleteLovely cards as always, I always enjoy the palettes used on your designs. I really enjoy using alcohol markers and I try valiantly with watercolours!
ReplyDeleteFun cards...husband hiding credit card...but that won't stop me !!
ReplyDeletealcohol markers are my first pick, next watercolor pencils
ReplyDeleteAlcohol markers are my go to colouring medium but I've been using coloured pencils more lately and loving them too!
ReplyDeleteI love markers and though I don't have a lot, I use Copies fro blending.
ReplyDeleteI love coloring my images with Copic markers!
ReplyDeleteI like coloring with Copic markers.
ReplyDeleteWhat fun cards. I like using ink pads to color.
ReplyDeleteThese would be so great for teachers. I love copics and am learning how to use olos.
ReplyDeleteI prefer to color with colored pencils. Fun projects today!
ReplyDeleteLove the scissors and the pins on the cork are too adorable. Love sending Just a Note cards!
ReplyDeleteAs a retired elementary teacher, I still love all the kiddo supplies stamps/dies. This new batch will go hand & hand with all my other 'Teacher Appreciation' style of craft items. These new stamps would be excellent for 'welcome-back-to-school', notes to students when you catch them being extra good/kind, thanks to parents/volunteers or your kid's classroom teachers, end-of-year to all, gift certificate holders, teacher to teacher birthdays, etc.
ReplyDeleteI've colored my cards using ink pads, colored pencils, watercolor paints, copic markers, and even the basic Crayola crayons for certain kid/fellow teacher subject cards. The medium depends on the mood of the card/scrapbook page/gift.
I love your stuff. But, as with many craft companies, the prices to get the stamps + dies + embellishments+++ can add up very quickly. (Heck, even just the stamps!) I'm sure it takes more $$$ to make sure it's made in the USA (that's a very good thing) but I had to stop buying anything for awhile to balance out my retired teacher income vs my cancer bills cash flow. (Plus, lots of other jobs, no job...) I've really missed it. Looking forward to getting at least a few goodies as always. THANKS for your creativity and joy you bring to so many folks.
I probably like using alcohol markers the best for coloring my stamped images. I have several different brands of markers and use them all, depending on what I am coloring. :D
ReplyDeleteAs a former teacher, I love these school supply layering stamps and dies!
ReplyDeleteCute cute…
ReplyDeleteI love to use Copic markers to color images
ReplyDeleteGreat notepad set and dies. I like to add details over various mediums with colored pencils.
ReplyDeleteUsing alcohol markers and blending them is my favorite
ReplyDeleteI use my pencils a lot and love using dyes and distress inks!
ReplyDeleteI use copic markers and color pencils the most.
ReplyDeleteThis is an adorable release! I use alcohol markers and colored pencils mostly.
ReplyDeleteGreat release, I have so many ideas from watching the video recap. I like to use zig markers and pencils and your designs are so easy to color and always look great!
ReplyDeleteThese colors in the cards really pop - love them!
ReplyDeleteSherry Storjohann
Simple coloring with watercolor pens.
ReplyDeleteI just love the Cut Above Stamps and Dies! So cute, and you have so many awesome card examples!
ReplyDeleteWhat a great and useful set. I like to color with colored pencils.
ReplyDelete