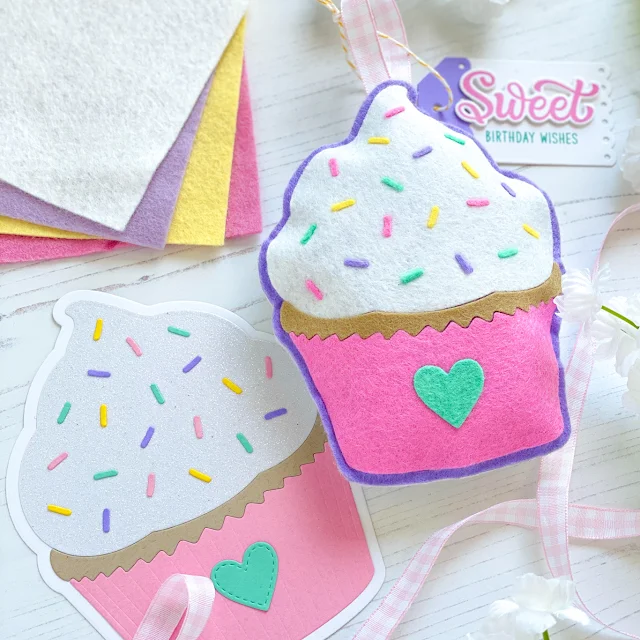
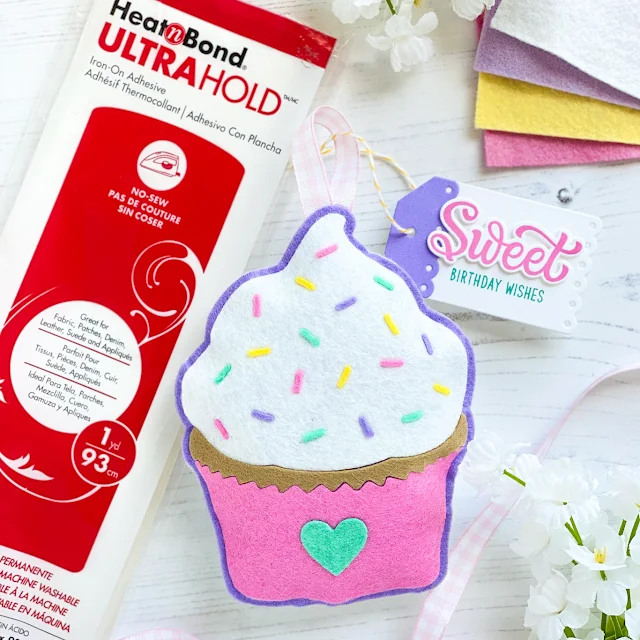
Hello crafty friends, Leanne here! I have a super fun project to share with you all today. It's a no sew cupcake plushie that doubles as a gift card holder. I have used the Cupcake Shapes dies to create this cute cupcake plushie. I have always found that any metal die that can cut card stock, can cut felt. Any kind of felt will work for this project. This project is also an excellent opportunity to use up any felt scraps you might have.
Besides felt, you'll also need some type of adhesive. I used an iron on adhesive called Heat'n'Bond. It's as simple to use as it sounds. Heat'n'Bond is a double sided adhesive. To start, simply iron on the adhesive to the back side of the felt. After applying the Heat'n'Bond to the back of all my felt scraps, I then started die cutting the cupcake pieces. The metal dies easily cut through the felt even with the adhesive on the the back. It's important to note, you won't need to apply the Heat'n'Bond to the back side of the large solid cupcake shapes (you'll need a front and a back). These pieces will just require adhesive around the outer edge when it's time to stuff the cupcake.
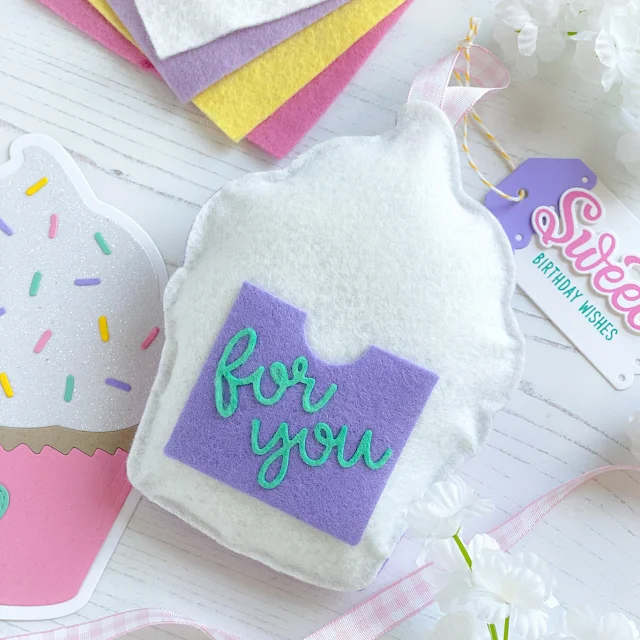
To assemble, I placed all the parts of the cupcake (frosting, sprinkles, cake, wrapper, and heart) onto one of the solid cupcake shapes. Since all the separate cupcake pieces had Heat'n'Bond on the back, I simply ironed them in place. There's one last step before stuffing the cupcake if you want to make this into a gift card holder. You can add a pocket to the back piece. I used the Gift Card Pocket Die to create a felt pocket. Again I used the Heat'n'Bond. I used the iron on adhesive to apply the words "for you" onto the pocket. Then I just used little strips of Heat'n'Bond to adhere the pocket flaps down onto the back cupcake piece. As long as you keep the center free of adhesive, you'll have a functional little pocket to slide a gift card into.
Once I had the front and back pieces complete, I adhered the edges together and stuffed with poly fiber fill. I used my hot glue gun to apply a thin line of adhesive all along the outer edges. At the top of the cupcake, I added a ribbon hanger while gluing. I left a small opening at the bottom to add the stuffing. After stuffing, I glued the opening shut. To customize the cupcake for any occasion, you can add a paper tag. I made a birthday tag to add to mine. I used Build-a-Tag 2 dies to make a cute little scalloped edge tag. The sentimenFelt stamps come from the Candy Shoppe stamp set.
I hope this project gives you lots of inspiration for making your own felt plushies using the Cupcake Shapes dies. As you can see from the photos, the felt plushie is much more dimensional than the card stock version. It will definitely add some extra sweetness to the recipient's special day.
Sunny Studio Supplies Used:
 Candy Shoppe Stamps Shop at: Sunny Studio |
 Cupcake Shape Dies Shop at: Sunny Studio |
 Gift Card Pocket Shop at: Sunny Studio |
 Build-A-Tag #2 Dies Shop at: Sunny Studio |


No comments:
Post a Comment