Tuesday, August 3, 2021

Scalloped Fence Focused Cards with Kavya and Isha

Hi folks, Kavya here. I am back with another fun project to share with you all! I love it when dies/stamps are realistic and the new Scalloped Fence die has so many details that make it just perfect to create fun scenes with. I love playing with critters but I never really created a shadow box before until now. The new fence die was the just the perfect size to create a fun farm scene! When putting this together, I felt like I was transported back to middle school where I had to create mini dioramas almost every summer! 

Sunny Studio Stamps: Scalloped Fence Dies Picket Fence Dies Farm Fresh Interactive Card by Kavya

I know that there are dies available to create shadow boxes but they are super easy to create with supplies that you already have. I used my paper trimmer to cut cardstock into the following dimensions:

- Background: 4.25” x 3.5”
- Base - 2 strips: 
8.5” x 1” strip scored at 0.5”, 2.5”, 6” and 8; 3.5” x 1” strip 

Fold the base strips at the score lines and attach the smaller strip using the 0.5” tabs to create a 3.5” x 2” base. I then attached the background cardstock to the back of the base to finish off my base! 

Sunny Studio Stamps: Scalloped Fence Dies Picket Fence Dies Farm Fresh Interactive Card by Kavya

For the grass, I started off by cutting 3 1.25” x 4.5” strips of different green colored cardstock scored at 0.5” and 4”. I used the grass die from Picket Fence to die cut the top of each panel and snipped the edges of the tabs as shown below:

I ink blended the edges of the panel with matching dye ink before adding them to my shadow box. My box is now complete for decoration! I started off by ink blending a white panel slightly smaller than 3.5” x 4.25” using shades of mint to create a ducky sky. I then stamped and colored images from the Farm Fresh stamp set. As only the bottom part of these images were going to be stuck to the grass base, I stacked 2 die cuts for each image to make it sturdier. I then adhered all these images to the shadow box. 

Sunny Studio Stamps: Scalloped Fence Dies Picket Fence Dies Farm Fresh Interactive Card by Kavya

The Scalloped Fence die is just the perfect size to create an outer border for your shadow box card and make the farm scene more realistic! I stacked two die cuts just like my images to make it sturdier… This would add extra weight when mailing your cards though! 
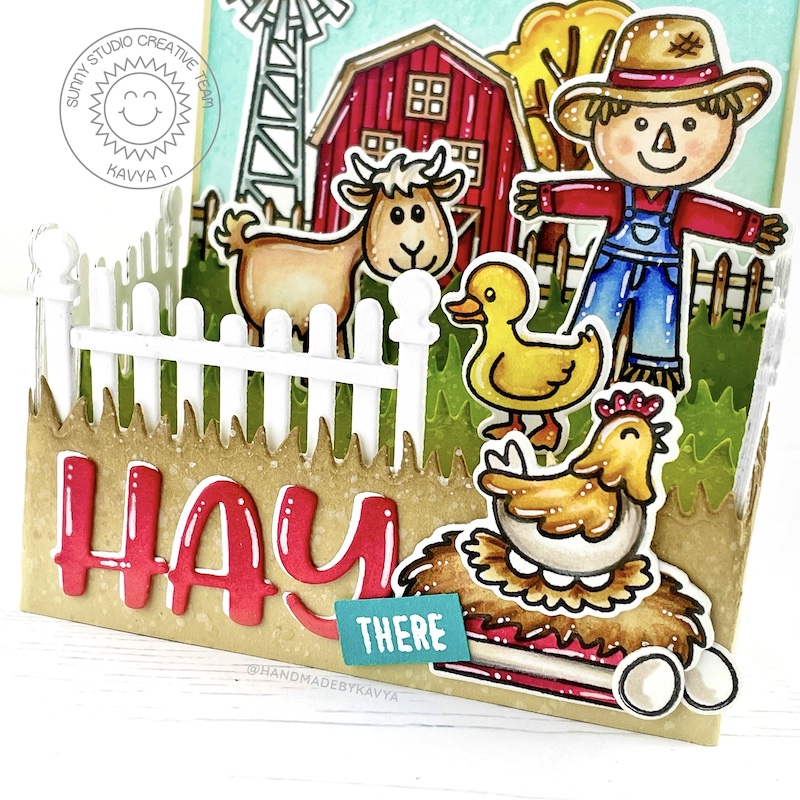
Sunny Studio Stamps: Scalloped Fence Dies Picket Fence Dies Farm Fresh Interactive Card by Kavya

I then finished off by adding a sentiment by using the Chloe Alphabet die set and the word ’there’ from Farm Fresh stamps set.

That’s it! I hope this fun card inspires you to create a fun shadowbox card if you haven’t already. Happy Crafting!

------------------------------------------------

Hello everyone! Isha, here featuring the Scalloped Fence dies. These are such pretty dies with some lovely details. I get the feel of the big cottages and enchanted lands when I see it, so my card had to have a fairy...lol.

Sunny Studio Stamps: Scalloped Fence Dies Garden Fairy Floating By Seasonal Trees Card by Isha Gupta

I started by sponging tumbled glass distress ink to create the sky. Flick some ink splatters and water to it. Die-cut the grass from the Slimline Nature Borders dies two times. Sponge distress inks in shabby shutters and mowed lawn. Flick water and ink. Adhere to the mat layer. Adhere this to a white card base.

Now I die-cut the Scalloped Fence three times, applied glue and over lapped them to create one single fence. I then adhered the other elements of the dies to create some dimension.

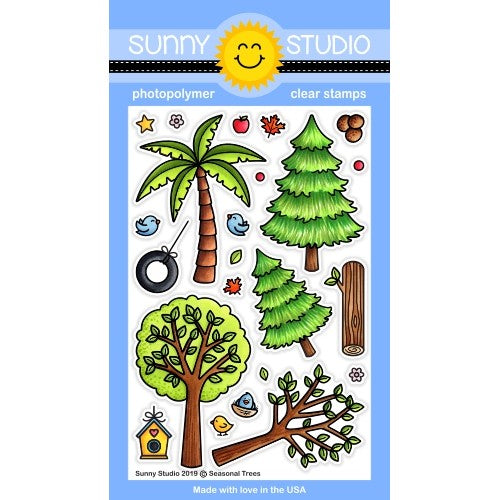
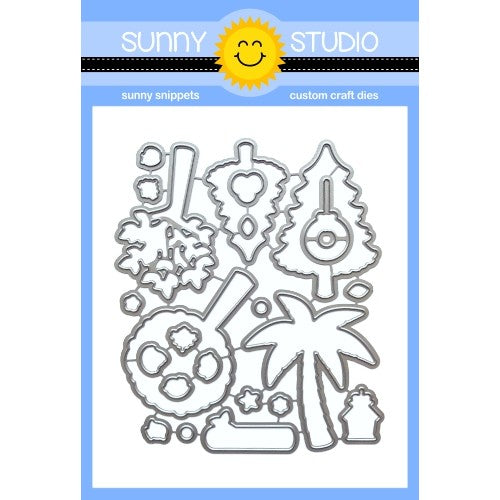
Tree and flower - Seasonal Trees stamp and Dies
Sun - Balloon Rides Stamp and Dies
Balloon, sentiment - Floating By stamp and Dies
Fairy, flower, snail - Garden Fairy stamp and Dies
Bird - Outback Critters stamp and Dies

Sunny Studio Stamps: Scalloped Fence Dies Garden Fairy Floating By Seasonal Trees Card by Isha Gupta

Stamp the images, color using Copic markers and die-cut. Adhere to the card to create a scene. To finish, I applied Nuvo glitter drops to the fairy wings and a bit to the sky.  Finally spectrum noir clear sparkle pen to the balloon, fairy and flowers.

Thanks for dropping by! Have a nice day.

Sunny Studio Supplies Used:
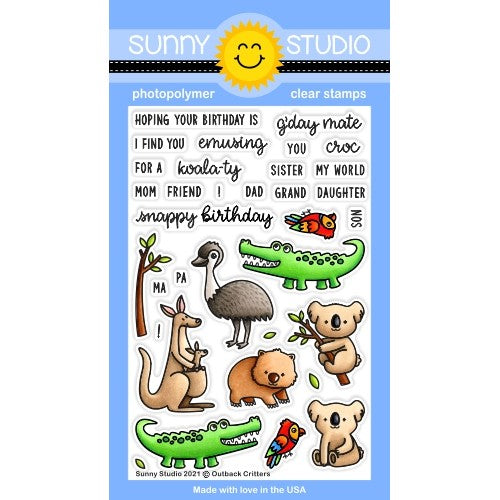
Outback Critters Stamps
Shop at:
Sunny Studio
Outback Critters Dies
Shop at:
Sunny Studio
Chloe Alphabet Dies
Chloe Alphabet Dies
Shop at:
Sunny Studio
Picket Fence Border Dies
Shop at:
Sunny Studio
Scalloped Fence Die
Scalloped Fence Die
Shop at:
Sunny Studio
Seasonal Trees Stamps
Shop at:
Sunny Studio
Seaonal Trees Dies
Seaonal Trees Dies
Shop at:
Sunny Studio
Floating By Stamps
Floating By Stamps
Shop at:
Sunny Studio
Floating By Dies
Floating By Dies
Shop at:
Sunny Studio
Slimline Nature Borders
Shop at:
Sunny Studio
Farm Fresh Stamps
Farm Fresh Stamps
Shop at:
Sunny Studio
Farm Fresh Dies
Farm Fresh Dies
Shop at:
Sunny Studio
Balloon Rides Stamps
Shop at:
Sunny Studio
Balloon Rides Dies
Balloon Rides Dies
Shop at:
Sunny Studio
Garden Fairy Stamps
Garden Fairy Stamps
Shop at:
Sunny Studio
Garden Fairy Dies
Garden Fairy Dies
Shop at:
Sunny Studio

Monday, August 2, 2021

Teacher Appreciation Cards with Mayra and Ashley

Hello everyone. Happy Monday. Mayra here with you today sharing this teacher thank you-themed card. I used the Sweet Treat House Add-on die to create the schoolhouse, along with the wonderful Teacher Appreciation stamp set. 

Sunny Studio Stamps: Teacher Appreciation Sweet Treat House Add-on Dies Slimline Dies Teacher Card by Mayra Duran-Hernandez

I began by die cutting the layers I needed to create the scene for the schoolhouse, I used Sweet Treat House Add-on die to create the schoolhouse, the Stitched Rectangle dies to create the schoolhouse building, and the base panel. I also used the Picket Fence Borders die, to create the trees, and bushes, I used the cloudy border from the Slimline Nature Border dies, and the tree base from the Rustic Winter dies set. After die-cutting the layers, I added a bit of color to the green layers using Distress Oxide inks. I used Twisted Citron, Mowed Lawn, and Rustic Wilderness. For the base panel and schoolhouse, I used the patterned paper from the Classic Sunburst paper pad and the Sleek Stripes paper pad. 

Sunny Studio Stamps: Teacher Appreciation Sweet Treat House Add-on Dies Slimline Dies Teacher Card by Mayra Duran-Hernandez

Next, I stamped the sentiment from the Teacher Appreciation stamp set onto the banner from the Stitched Rectangles dies set. I hope you enjoy the card I created to share with you today. Thank you very much for taking the time to stop by. I hope you each have a wonderful and blessed day. 

------------------------------------------

Hello friends! It's Ashley with a fun back to school card for you today! It's hard to believe the school year is already coming up soon! It will be my daughter's first year - she is going to prekindergarten! Time has flown way too fast! I know I'm going to need some cards ready for the teachers she will be spending time with, so why not get started now? I used the Teacher Appreciation stamp set and some other Sunny Studio supplies to create this old school chalkboard look. Yes, I know it's all about white boards and smart boards now, but the chalk is so cute!

Sunny Studio Stamps: Teacher Appreciation Grad Cat Teacher Card by Ashley Ebben

I started by randomly blending white pigment ink in soft patches onto dark green cardstock. l stamped the sentiment from Teacher Appreciation right in the center with VersaMark ink and embossed with white. I then used a white gel pen to make random marks around the outside and rubbed them with a cloth before they dried. This gave me that dirty, erased look like a chalkboard that pairs perfectly with the sentiment.

Sunny Studio Stamps: Teacher Appreciation Grad Cat Teacher Card by Ashley Ebben

I created a frame for the chalkboard with some kraft cardstock and the Stitched Rectangle dies. I scored the corner lines and blended a bit of Gathered Twigs Distress Ink to add depth to the lines. I attached the frame to the chalkboard, then added the whole thing to an A2 sized piece of grid paper from Subtle Grey Tones. I stamped the cat and book from Grad Cat and colored with Copics. I cut them out with the matching dies and finished the card by adding the images with foam tape for dimension.

Thank you so much for stopping by! Have a wonderful day!

Sunny Studio Supplies Used:

Teacher Appreciation Stamps
Shop at:
Sunny Studio
Picket Fence Border Dies
Shop at:
Sunny Studio
Stitched Rectangle Dies
Shop at:
Sunny Studio
Rustic Winter Dies
Rustic Winter Dies
Shop at:
Sunny Studio
Subtle Grey Tones Paper
Shop at:
Sunny Studio
Sweet Treats House Add-on
Shop at:
Sunny Studio
Grad Cat Stamps
Grad Cat Stamps
Shop at:
Sunny Studio
Grad Cat Dies
Grad Cat Dies
Shop at:
Sunny Studio
Slimline Nature Borders
Shop at:
Sunny Studio
Classic Sunburst Paper
Shop at:
Sunny Studio
Sleek Stripes Paper
Sleek Stripes Paper
Shop at:
Sunny Studio

Saturday, July 31, 2021

Guest Designer Spotlight: Birthday Cards with Michelle Short

Hello there, Michelle Short here and I am delighted to be back guesting here on the Sunny Studio Blog. When I saw the latest release, I fell in love with everything! What an amazing release! I had to narrow down what I wanted to use, so for today’s cards, I am using the fabulous Cupcake Shaped Die, Chloe Alphabet Dies and Looking Sharp. Perfect for Birthday cards, which is what I am sharing with you today.

Sunny Studio Stamps: Cupcake Shaped Die Chloe Alphabet Dies Birthday Card by Michelle Short

My first card uses the fabulous Cupcake Shaped Die. I love creating shaped cards, but it is not always easy to get the shape correct. With this set of dies all the work is done for you! You simply need to cut the dies from cardstock or patterned paper and you are good to go! I started off my card by die cutting the cupcake base card twice from white cardstock, as well as the frosting, candle and sprinkles. I then cut the cake and the cupcake wrapper from a kraft cardstock. Using Copic Markers, I coloured the elements to add texture, depth and shading. I also added highlights with a white gel pen.

Although you can adhere the elements directly to the cupcake card base (or leave it off, if you want to add the cupcake to a traditional card base), I decided to piece the elements together first and add tape to the back to hold them in place. I then added foam tape and adhered the pieces, as one, to the cupcake card base. I took the back portion of the card base and made a score line a quarter of the way down. I adhered this piece to the back of the front base, so that the card can stand up and open easily.

Sunny Studio Stamps: Cupcake Shaped Die Chloe Alphabet Dies Birthday Card by Michelle Short

I took the sentiment from the Looking Sharp set, masked it off so that only ‘birthday’ would stamp and stamped it on to white cardstock with black ink. I coloured the piece with a matching Copic Marker that I used on the cupcake and cut it in to a strip. It was added to the card with foam tape. I took the Chloe Alphabet Dies and cut them from white cardstock, as well as white glitter cardstock. The letters for ‘wishes’ were layered up so that the glitter letter was adhered to the white cardstock one (for extra dimension) and then added them to the card. This was such a fun card to make and that cupcake is good enough to eat! ;)


Sunny Studio Stamps: Looking Sharp Birthday Card by Michelle Short
 
My next card uses the Looking Sharp set. This is another really fun set! I love that the set has faces that you can stamp on to the cacti. You can stamp them on the cactus themselves, on to the pots like I have or not at all! So versatile! I started off my card by stamping three of the cacti on to white cardstock with black ink. I also stamped the party hat and bow. They were coloured with Copic Markers and die cut out using the Looking Sharp Dies. I set them aside while I worked on my background.


Sunny Studio Stamps: Looking Sharp Birthday Card by Michelle Short
 
I took an A2 white card base and masked off the edges. Using ink blending brushes, I blended on Black Soot Distress Ink at the bottom and Peacock Feathers at the top. I removed the masks and then stamped the sentiment from the set at the top, using more black ink. The cacti were adhered with foam tape at the bottom. I felt like the scene was missing something, so I took the balloon image from the Oceans of Joy set and stamped, coloured and die cut it. I drew a line from the cactus with a black fine liner and then adhered the balloon on top with foam tape. To finish off, I added white gel pen highlights.


That’s it from me today but I will be back in a couple of weeks with another guest spot as I have more cards to share! Thanks so much for stopping by, have a great day!


Sunny Studio Supplies Used:


Oceans of Joy Dies
Oceans of Joy Dies
Shop at:
Sunny Studio
Oceans of Joy Stamps
Shop at:
Sunny Studio
Looking Sharp Stamps
Shop at:
Sunny Studio
Looking Sharp Dies
Looking Sharp Dies
Shop at:
Sunny Studio
Chloe Alphabet Dies
Chloe Alphabet Dies
Shop at:
Sunny Studio
Cupcake Shape Dies
Cupcake Shape Dies
Shop at:
Sunny Studio

Friday, July 30, 2021

Teacher Appreciation Cards with Tammy and Candice

Hello! Tammy here with a fun project, featuring Teacher Appreciation, a versatile sentiment set that can be used not only for teachers, but for so many occasions and people in your life! For my project, I created an A2 card and a fun pencil shaped card.

Sunny Studio Stamps: Teacher Appreciation Fishtail Banner Dies Cards by Tammy Stark

For the A2 card I started with a white cardstock card base, then layered a green dotted rectangle cut from the Dots & Stripes Jewel Tones 6X6 Paper. Next, I added some fun notebook looking paper I found in my stash and stamped it with a sentiment from Teacher Appreciation in black ink, then added a little apple from Harvest Mice. To create the pencil, I cut yellow striped paper from the Dots & Stripes Jewel Tones 6X6 Paper using the Slimline Pennant Die. I cut 3 more pennants using kraft, guava, and silver cardstock. I created a scalloped edge using the smaller border die from the Slimline Pennant Die, then layered it over the kraft pennant. I used the Fishtail Banner Dies to create the pointed edge of the pencil. I then trimmed down the silver and guava pennants and attached to create the eraser and silver band you would find on a pencil. I added a little piece of charcoal cardstock to the end of the pencil to look like the lead. 

Sunny Studio Stamps: Teacher Appreciation Fishtail Banner Dies Cards by Tammy Stark

I attached the pencil to the card with foam tape for dimension, then white heat embossed the sentiment onto a charcoal cardstock sentiment strip to complete my card.

Sunny Studio Stamps: Teacher Appreciation Fishtail Banner Dies Cards by Tammy Stark

The shaped card was created exactly as the pencil on the A2 card, but I used the larger pennant from the Slimline Pennant Die to create it. Once the pencil was created, I attached it to a white card base, measuring 2 3/4 X 6 1/2" when folded. I then trimmed the sides along the pencil to create the pointed shape. Next, I stamped the sentiment in black ink from Teacher Appreciation onto some patterned paper and die cut it with the Stitched Circle Dies. I then layered it onto a charcoal Scalloped Circle Mat, added a small apple from Harvest Mice, and adhered to my card with foam tape to complete it!

Thanks so much for stopping by! I hope you enjoyed my projects today! See you next time!

--------------------------------------------

Hello! Candice with you sharing a fun thank you card today using the multi-purpose Teacher Appreciation stamp set!

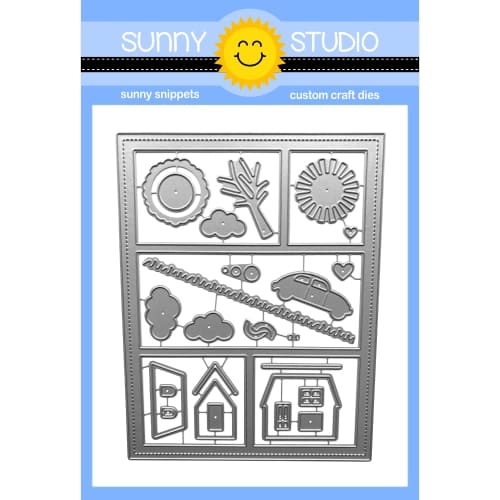
Sunny Studio Stamps: Teacher Appreciation Looking Sharp Comic Strip Everyday Dies Card by Candice Fisher

I used these Sunny Studio products for my design:

I began with a 6 1/2 x 5 card base. For the background, I die cut multiples of the Comic Strip Frame from grey cardstock and backed with the woodgrain pattern paper. I then die cut multiples of the 'thank you' and layered them adhering the 'thank' with foam tape and gluing the 'you' in the center frame.

Sunny Studio Stamps: Teacher Appreciation Looking Sharp Comic Strip Everyday Dies Card by Candice Fisher

Next, I stamped the cacti, colored them with copic markers, and cut out with the coordinating dies. I finished the sentiment with the smaller sentiments heat embossed in white on black banners and the 'brightened' in gold on white cardstock adhered with foam tape. A sprinkle of gold jewels add a bit of sparkle!

Thank you for stopping by with me today!

Sunny Studio Supplies Used:

Fishtail Banner Dies
Shop at:
Sunny Studio
Looking Sharp Stamps
Shop at:
Sunny Studio
Looking Sharp Dies
Looking Sharp Dies
Shop at:
Sunny Studio
Teacher Appreciation Stamps
Shop at:
Sunny Studio
Dots & Stripes Jewel Tones 6x6 Paper
Shop at:
Sunny Studio
Comic Strip Everyday Dies
Shop at:
Sunny Studio
Subtle Grey Tones Paper
Shop at:
Sunny Studio
Slimline Scalloped Frame
Shop at:
Sunny Studio
Harvest Mice Stamps
Harvest Mice Stamps
Shop at:
Sunny Studio
Harvest Mice Dies
Harvest Mice Dies
Shop at:
Sunny Studio
Scalloped Circle Mat 1 Dies
Shop at:
Sunny Studio
Slimline Pennant Dies
Shop at:
Sunny Studio
Stitched Circle Small Dies
Shop at:
Sunny Studio