Hello Sunny Studio friends, Marieke here. Today I hope to inspire you with a card using die cuts only.
First off I trimmed a white rectangle, splattered some black paint and let it dry. Die cut the Summer Greenery Dies out of a teal, blue and green cardstock. Ink Blended them using inks and splattered some water, paint or ink onto them.
Glued the leaves onto the rectangle and trimmed off what was hanging off the rectangle. Cut a white top fold basecard. Added the pattern panel onto the base card using foam tape.
Die cut the Sunshine Word die four times out of black cardstock and glued them together onto the card. Stamped the sentiment out of the Sending Sunshine stamp on white paper. Trimmed it to a small banner and added it to the card using foam tape. Finished off the card adding some clear sequins.
------------------------------------------
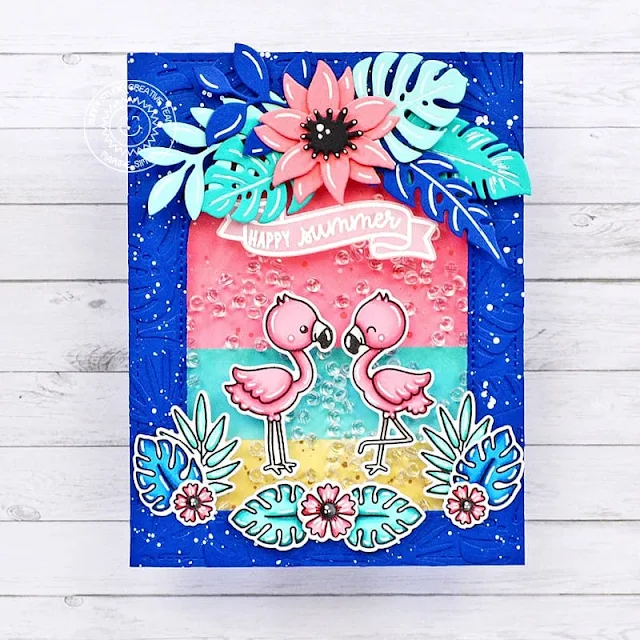
Hello crafty friends, Marine here with you today, I'm back with a new shaker card, I'm quite obsessed with them at the moment, they're so fun to make!
This new card features some beautiful leaves from the Summer Greenery die set, but before cutting them, I started off by stamping two cute flamingos, as well as some flowers and tropical leaves from Fabulous Flamingos that I colored using my alcohol markers.
Next I created a simple distress oxide ink background. I divided a 5,5 x 4,25 inches bristol panel in three sections using washi tape: sand at the bottom, ocean right above it, and then sky at the top. For the sand section, I used antique linen + vintage photo + copic opaque white ink, for the ocean I used salvaged patina + peacock feathers, and for the sky I used worn lipstick + festive berries + copic opaque white ink.
I set my oxide ink panel aside to dry, and created the panel that goes on the front. I cut a 5,5 x 4,25 inches navy blue panel, as well as a bunch of leaves out of the same paper using the Summer Greenery die set. I attached the leaves on the panel using liquid glue, added copic opaque white ink splatters all over the leaves and then cut a window out of the panel using a Stitched Arch die.
I attached my window panel on a piece of acetate, added foam strips at the back all along the arch and on the sides as well, poured a bunch of clear jewels inside the window and then stuck the oxide ink panel to the foam strips to complete my shaker panel.
Next I cut more Summer Greenery leaves, as well as two Spring Greenery leaves out of different colored cardstock. I also created a flower using dies from the Botanical Backdrop die set, I arranged all those pieces at the top of the arch window to create a cluster, and attached them all using foam squares and glue dots, as well as the flamingos, flowers and leaves at the bottom of the arch.
For my sentiment, I white heat embossed the banner from Little Birdie on vellum, as well as the "Happy summer" phrase from Fabulous Flamingos inside of it, and attached it below the flower & leaf cluster using clear foam squares.
And that's it! I hope you like this new colorful summer shaker card! Of course you can check the process video if you need more details and information (click the image above). Thanks so much for stopping by, and see you next time!
Sunny Studio Supplies Used:
 Sunshine Word Die Shop at: Sunny Studio |
 Botanical Backdrop Die Shop at: Sunny Studio |
 Fabulous Flamingos Stamps Shop at: Sunny Studio |
 Fabulous Flamingos Dies Shop at: Sunny Studio |
 Sending Sunshine Stamps Shop at: Sunny Studio |
 Stitched Arch Dies Shop at: Sunny Studio |
 Little Birdie Stamps Shop at: Sunny Studio |
 Little Birdie Dies Shop at: Sunny Studio |
 Spring Greenery Dies Shop at: Sunny Studio | |
 Summer Greenery Die Shop at: Sunny Studio |

.jpg)
.jpg)


Hi, Marieke and Marine - Love both of these. Marine's shaker is awesome!
ReplyDeleteLori S in PA